July 4th drink station
Before: a card table with a few two-liter bottles of soda and a bag of ice.
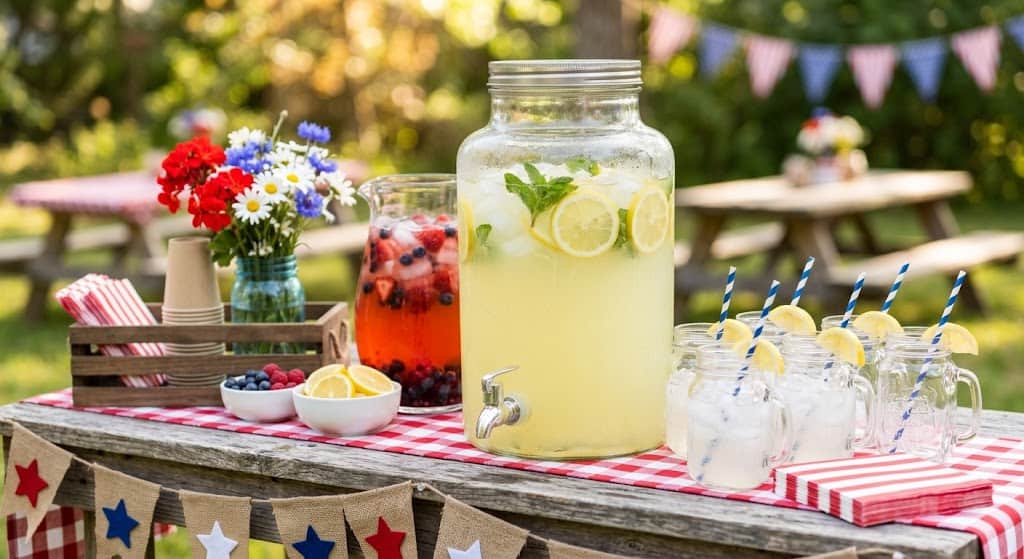
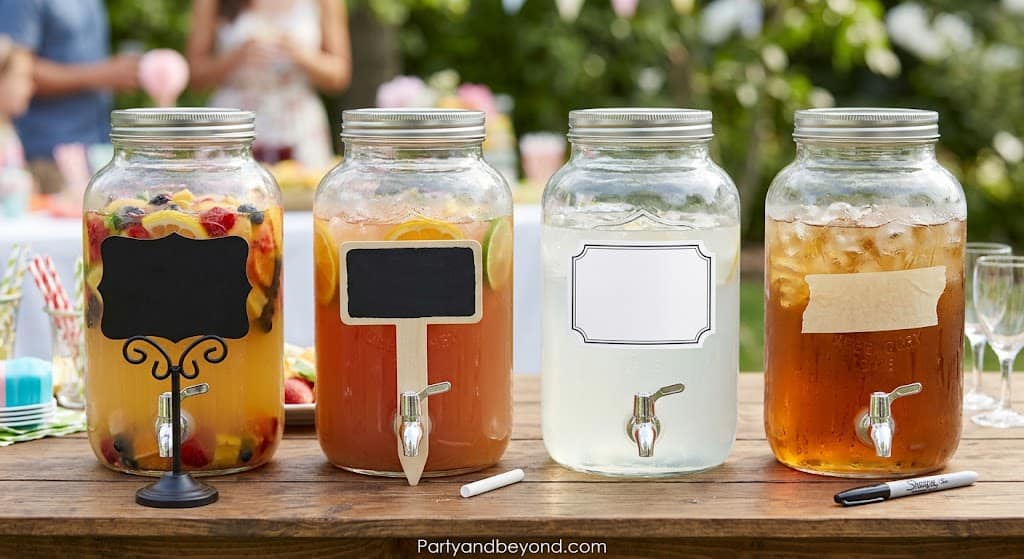
After: a styled lemonade and drink bar with two glass dispensers — one classic lemonade, one strawberry — a small garnish station of fresh berries and mint sprigs, chalkboard signs with the drink names, patriotic paper straws, and mason jar glasses lined up waiting.
The dividing line? About $45 and 45 minutes of setup.
I spent two hours one summer at the dollar store — not looking for anything specific, just wandering and looking for hidden party gold. What I found for a drink station: a chalkboard-painted wooden board for $1.25, glass-look acrylic pitchers for $3.50 each, mason jar-style glasses for $1.25 for 4, and a small wooden tray for $2.50. My entire drink station display “hardware” cost under $15. The lemonade inside the dispensers costs less than the dispensers.
That’s the version of hosting I love. Looks like it cost $200. Costs $45. Here’s how to build it: full July 4th party drink recipes here.
What You Need for a July 4th Lemonade Drink Station
Small wooden tray or serving board for the garnish station
3–4 small bowls or ramekins for garnishes
Chalkboard labels or signs— or masking tape + black marker works perfectly
Patriotic paper straws
Ice bucket with scoop
A small pitcher or ladle for serving
Lemonade ingredients (for 20 guests):
12–15 fresh lemons ($5–$7) — avoid bottled lemon juice if possible
1.5 cups granulated sugar ($0.75)
10 cups cold water
Fresh strawberries, blueberries, mint for garnish ($6–$8)
Total station cost: $40–$70 for a full setup that serves 20 guests and looks like it cost three times more.
How to Set Up a Lemonade and Drink Station for July 4th
Step 1: Choose Your Station Surface and Location
Time: 10 minutes | What you need: table, tablecloth, location
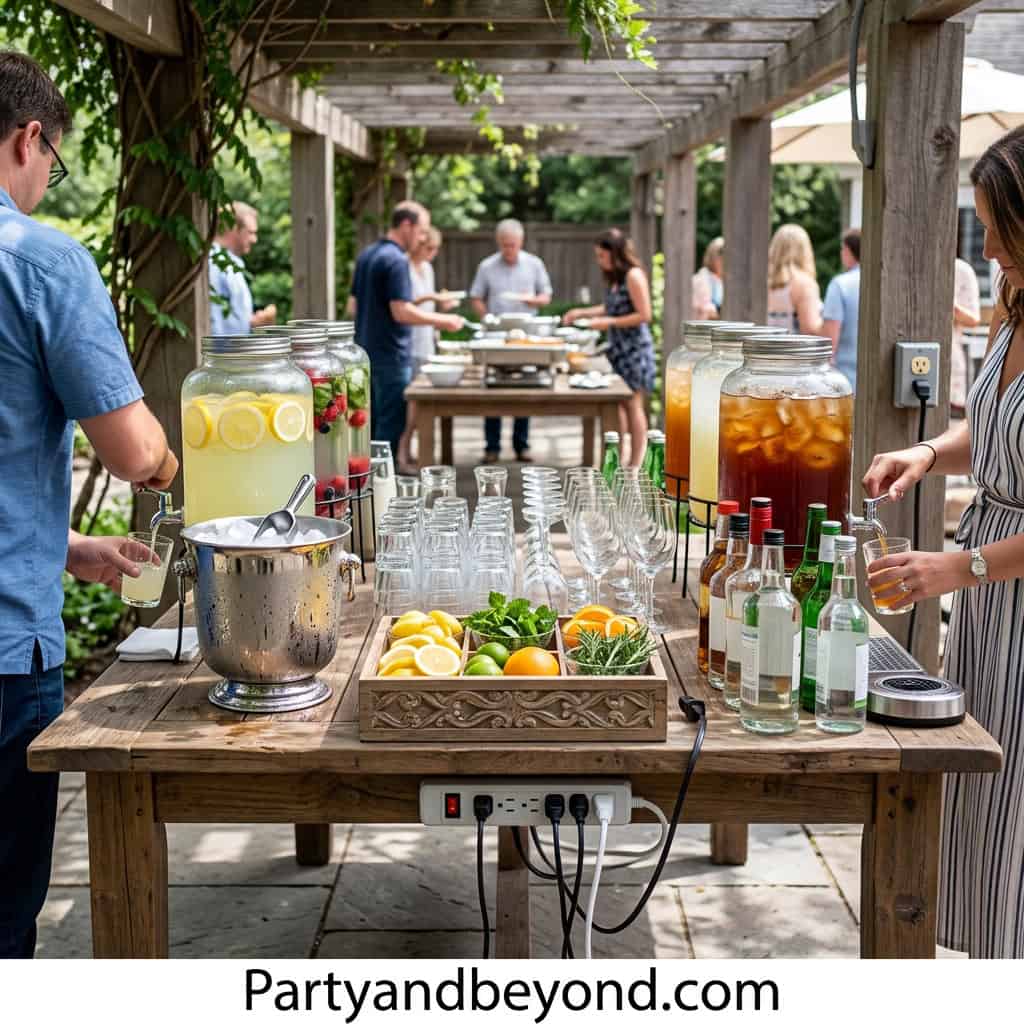
Your drink station needs to be: separate from the food table (at least 15 feet — same traffic flow principle as any large party), in partial shade if possible (to slow ice melt), accessible from both sides if you have 20+ guests (so two people can fill their glasses simultaneously), and near an electrical outlet if you’re using any plug-in accessories.
Table options:
One 6-foot folding table ($20–$35 at Target, Walmart)— ideal
Two small TV trays or end tables — works for under 15 guests
A wooden pallet on sawhorses — rustic, impressive, completely free if you have pallets
Cover the table surface: A white, red, or patriotic tablecloth (even a basic plastic one at $2 from the dollar store) creates a clean, intentional look that elevates everything placed on it.
Pro Tip: Place the station against a fence or wall rather than freestanding — it photographs better, keeps guests from clustering on all sides, and creates a clear “front” and “back” to the station.
Step 2: Select Your Dispensers and Vessels
Time: 5 minutes | What you need: dispensers, glasses
The dispenser is the star of the drink station. A glass dispenser filled with bright red strawberry lemonade or deep blueberry lemonade looks beautiful and communicates “this was planned” to every guest.
Drink dispenser with stand ($35–$55): elevated height creates visual interest and easier filling
Dollar store acrylic pitchers ($3–$4 each): budget-friendly, work perfectly, look great with a good chalkboard label
Mason jar dispenser ($25–$35): rustic-chic aesthetic
For two drink options (recommended — one classic, one flavored): Use two dispensers of slightly different heights or styles for visual variety. Heights don’t need to match.
Glasses: Mason jar glasses are the most universally loved drink station glass — they look intentional, feel summery, and photograph beautifully. Standard clear plastic party cups work perfectly if budget is a concern.
Step 3: Make Your Lemonade Recipes
Time: 20–30 minutes | Make the night before for best flavor
The Critical Technique — Always Make Simple Syrup:
Never add granulated sugar directly to cold lemonade. It sinks to the bottom and doesn’t dissolve properly, leaving a gritty sweetness. Simple syrup takes 5 extra minutes and transforms lemonade.
Basic Simple Syrup: Combine 1.5 cups sugar + 1.5 cups water in a saucepan. Heat over medium, stirring until sugar fully dissolves (about 3–4 minutes). Do not boil. Cool completely before adding to lemon juice. Add the lemon zest of 2 lemons to the hot syrup while it’s still warm — the flavor infusion is remarkable.
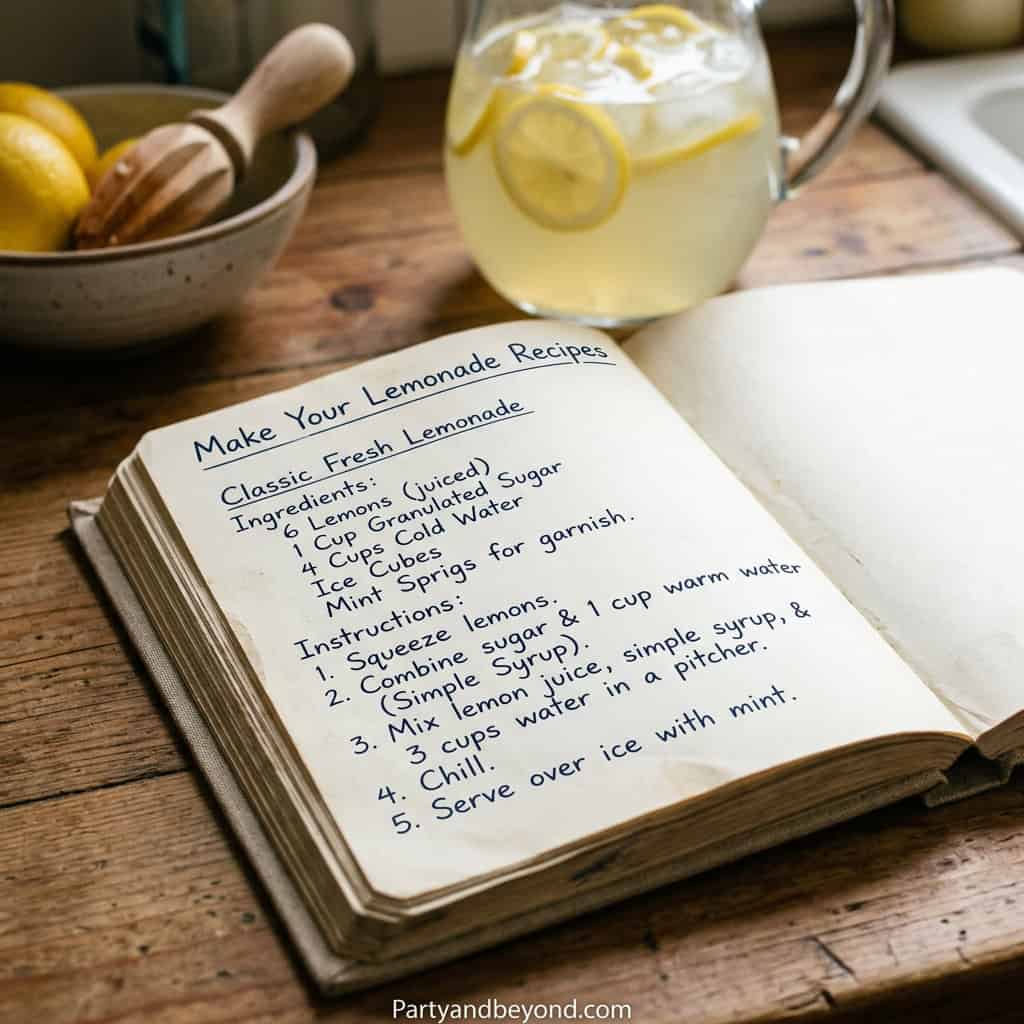
Classic Lemonade (serves 20):
2 cups fresh lemon juice (from 12–14 lemons)
1.5 cups simple syrup (recipe above)
10 cups cold water
Pinch of salt (balances the sweetness)
Combine all ingredients. Taste and adjust — more syrup for sweeter, more lemon juice for tart. Refrigerate overnight for best flavor. Add ice at serving time.
Cost: ~$8–$10 for 20 servings ($0.40–$0.50 per serving)
Strawberry Lemonade (serves 20): Start with Classic Lemonade base, then add:
1 cup fresh strawberry purée (blend 1 pint strawberries until smooth, strain through mesh sieve)
Reduce simple syrup to 1 cup (strawberries add sweetness)
The result: a deep blush-pink lemonade that’s the visual star of your drink station. Make this one. It photographs as beautifully as anything I’ve put on a party table.
Cost: ~$12–$14 for 20 servings
Blueberry Lemonade (serves 20): Make a blueberry syrup first: simmer 1 pint blueberries + 3/4 cup sugar + 3/4 cup water for 8 minutes until blueberries burst. Cool and strain. Combine 3/4 cup blueberry syrup with Classic Lemonade base.
The result: a deep purple-blue lemonade that creates a genuine blue element on your patriotic drink station. Pair this with strawberry lemonade in separate dispensers for a visual red-and-blue drink station.
Cost: ~$11–$13 for 20 servings
Watermelon Lemonade (serves 20): Add 2 cups fresh watermelon juice (blend 4 cups watermelon chunks, strain) to Classic Lemonade base. Reduce added water to 8 cups.
The result: a gorgeous pale red-pink lemonade with a subtle watermelon sweetness. Pairs beautifully with fresh mint garnish.
Cost: ~$10–$12 for 20 servings
Mint Lemonade (serves 20): Add 1/4 cup muddled fresh mint to Classic Lemonade base. Let steep in the refrigerator overnight. Strain before serving. Add additional fresh mint sprigs at serving.
Cost: ~$9–$11 for 20 servings
Step 4: Build the Flavor Add-In Bar
Time: 10 minutes | Cost: $6–$10
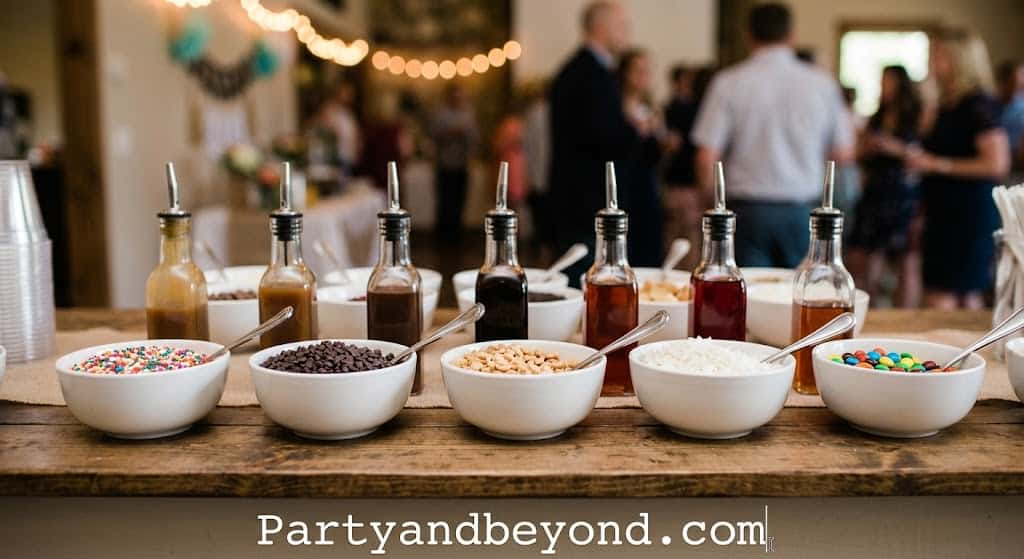
The flavor add-in bar is the element that turns a drink station into an experience.
Set out 4–6 small ramekins or bowls with:
Sliced fresh strawberries (guests add to their cup)
Fresh blueberries
Fresh mint sprigs
Sliced cucumber (unexpectedly popular)
Lemon and lime slices
Lavender or strawberry simple syrup in a small pouring pitcher
Adult add-in section (optional, clearly labeled):
Small bottle of vodka with a pouring spout
Small bottle of gin
Place slightly apart from the non-alcoholic garnishes with a clear sign: “Adult Add-Ins 🍋”
Guests create their own custom drink. The customization is genuinely fun and it means one classic lemonade recipe can produce 6 different cups.
Step 5: Set Up the Garnish Station
Time: 5 minutes
Group all the add-in bowls on a small wooden tray or cutting board — this creates a “station within a station” that looks organized and intentional. Label each bowl with a small card or chalkboard tag.
Garnish station layout: Left to right — herb garnishes (mint, basil) → fruit garnishes (strawberries, blueberries, lemon slices) → simple syrups → adult add-ins (if using). This flows naturally from “I want to add some flavor” to “I want to add some alcohol.”
Pro Tip: Place the garnish station slightly to the side of the dispensers, not in front of them. Guests can fill their glass first, then move to the garnish station — so the person choosing their add-ins isn’t blocking the dispenser for the next guest.
Step 6: Label Everything Clearly
Time: 5–10 minutes | Cost: $3–$8
Labeling options from most to least expensive:
Chalkboard label signs on stands ($8–$15 for 6)
Chalkboard paint on flat wooden stakes (dollar store) — paint it, write with chalk ($3 total)
Masking tape + black Sharpie on the dispenser — honest and completely effective ($0)
Printable labels on cardstock, taped to the dispenser — $0 to print, looks polished
What to include on each label:
Drink name (Classic Lemonade, Strawberry Lemonade, etc.)
Whether it contains alcohol (critical — always mark this)
One emoji or small graphic — the star emoji ⭐ works great for July 4th
For the garnish station bowls, use small folded cardstock tent cards (cut index cards in half, fold in the middle) with the garnish name written in black marker.
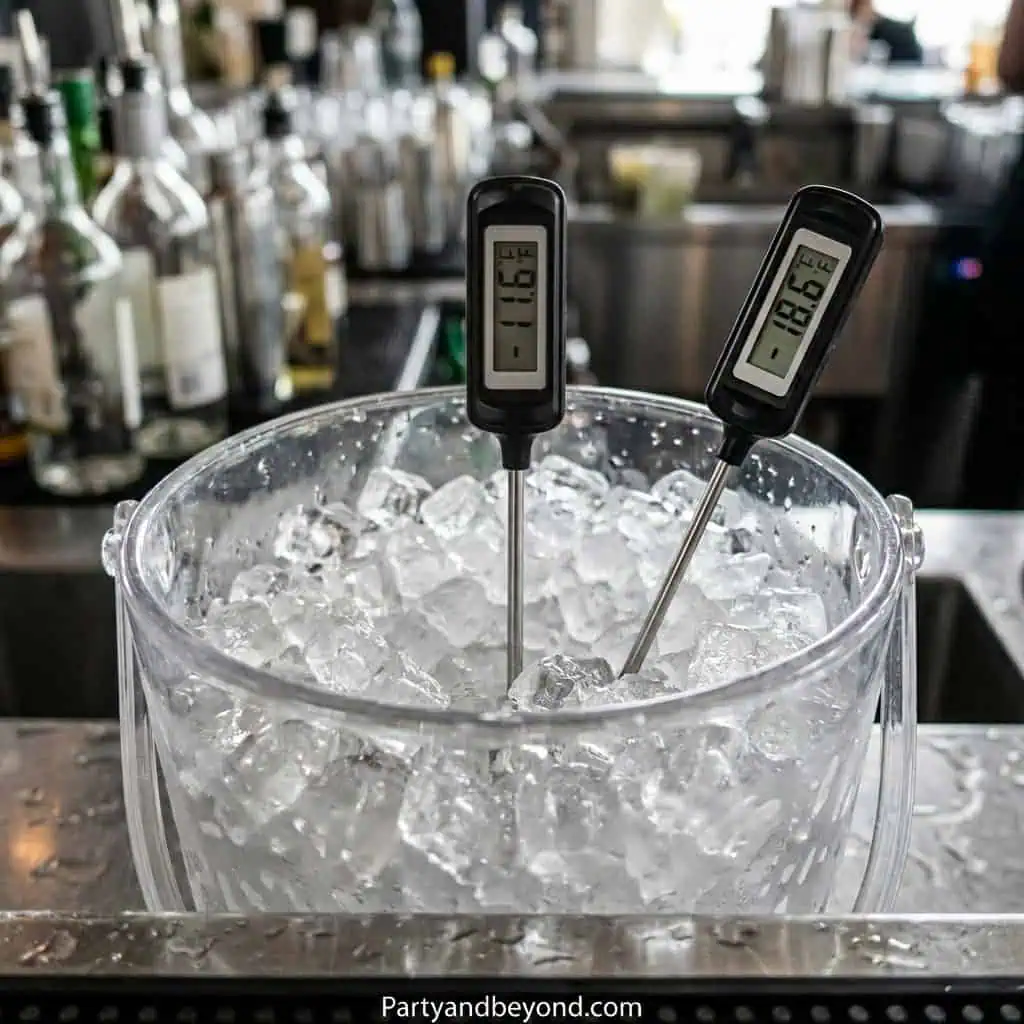
Step 7: Handle Ice and Temperature
Time: 5 minutes at setup | Ongoing: refill as needed
The ice challenge: Outdoor parties in July heat mean ice melts fast. A drink station without ice management produces warm lemonade within 90 minutes.
Two ice strategies:
Dispenser with internal ice column: Some dispensers have a center tube where you add ice — it chills the drink without diluting it. This is the ideal solution
Ice bucket + serve over ice: Place a separate ice bucket with scoop next to the dispensers. Guests add ice to their glass before pouring. This works perfectly and is the most budget-friendly approach.
Keep lemonade refrigerated until 30 minutes before serving. Don’t fill the dispensers 2 hours early and let the lemonade sit in heat — fill them when guests start arriving.
How much ice for the drink station: Plan 1 lb of ice per person for the drink station alone (separate from cooler ice). For 20 guests: 20 lbs of drink ice.
Step 8: Add Patriotic Styling Touches
Time: 10 minutes | Cost: $5–$12
This is the step that turns a functional drink setup into a drink station that guests photograph.
Styling elements:
Patriotic paper straws in red, white, and blue — stand them upright in a mason jar ($3 for 100 straws)
Mini American flags on picks — stick one in each dispenser to identify the drink ($1.25 at dollar store)
Red, white, and blue fresh berries placed in the garnish bowls and scattered across the tray surface
Fresh greenery: a few sprigs of fresh mint laid across the garnish tray add color and fragrance
Star-shaped ice cubes: Use star ice cube molds filled with lemonade for frozen, no-dilution drink cubes ($8–$12 for a silicone mold set)
A small vase of fresh flowers (red, white, or blue — whatever’s seasonal) near the station
The signature touch: Write a small chalkboard sign with Leah’s favorite hosting quote: “The best parties don’t require perfection. They require presence.” Prop it against the dispenser. Guests always read it. Some photograph it. It costs $0.
Full Drink Station Setup Timeline
Time Before Guests
Task
2 days before
Buy all lemon juice, sugar, garnish fruit
Night before
Make all lemonade recipes, refrigerate
2 hours before
Set up station surface, dispensers, glasses, labels, straws
30 min before
Fill dispensers with chilled lemonade, add ice bucket
15 min before
Set out garnish bowls (fresh berries out now — not before)
Party time
Station is self-serve — you never touch it again
Drink Station Style Variations
Style
Best For
Cost
Signature Look
Classic Lemonade Stand
Family parties, all ages
$25–$40
Yellow lemons on table, white dispenser
Patriotic Flavor Bar
July 4th celebrations
$40–$65
Red (strawberry) + blue (blueberry) dispensers
Rustic Farmhouse
Outdoor garden parties
$50–$80
Wooden crate base, mason jar glasses
Upscale Cocktail Bar
Adult parties
$70–$120
Crystal-look dispensers, adult add-ins
Budget Dollar Store
Any party
$15–$25
Same elements at fraction of cost
Summary: July 4th Lemonade Station Quick Guide
🏆 BEST OVERALL: Strawberry + Blueberry side-by-side dispensers — red and blue, visually stunning 💰 BEST BUDGET: Classic lemonade + dollar store dispensers and mason jars — $20 total 💎 MOST IMPRESSIVE: Full flavor add-in bar with adult section + styling — guests talk about this
🎯 MOST IMPORTANT TECHNIQUE: Always make simple syrup — never add granulated sugar to cold lemonade ⚡ BEST MAKE-AHEAD: All lemonade recipes improve overnight — make them the day before
Frequently Asked Questions
How do I set up a self-serve drink station for a party?
Use 1–2 glass beverage dispensers on a dedicated table, separate from the food station. Label each dispenser clearly with a chalkboard sign or masking tape. Place a garnish station to the side (small bowls of fruit, mint, lemon slices). Set an ice bucket with scoop next to the dispensers. Stack glasses nearby. Guests fill their glass with ice, pour from the dispenser, and add garnishes — completely self-serve, no host involvement required after initial setup.
How much lemonade do I need for 20 people at a party?
Plan for 8–12 oz per person per hour, multiplied by the length of your party. For 20 guests at a 4-hour party: 20 guests × 10 oz average × 4 hours = 8,000 oz, or about 2.5 gallons of lemonade total. A 2-gallon dispenser holds about 32 eight-oz servings. For 20 guests over 4 hours with one dispenser, you’ll need to refill once. For reliability, make 3 gallons and keep the extra in the refrigerator.
Should I use fresh or bottled lemon juice for lemonade?
Fresh lemon juice makes significantly better lemonade — the flavor is brighter, less bitter, and more complex. However, for large parties, fresh-squeezing enough lemons can be time-consuming (approximately 12–14 lemons per 2 cups of juice). A good middle ground: use fresh lemon juice for the classic base and add bottled juice to extend volume. Avoid 100% bottled lemon juice for the entire recipe — the flavor difference is notable.
How do I make simple syrup for lemonade?
Combine equal parts sugar and water in a saucepan (1.5 cups each for a party batch). Heat over medium heat, stirring until the sugar fully dissolves — about 3–4 minutes. Do not bring to a full boil. Remove from heat and cool completely before using. To infuse: add lemon zest, fresh mint, or lavender to the hot syrup and steep for 20 minutes before straining. Simple syrup stays fresh in the refrigerator for 2–3 weeks.
What do I put on a lemonade flavor bar?
The best lemonade flavor bar includes: fresh fruit (sliced strawberries, blueberries, cucumber, lemon slices), fresh herbs (mint sprigs, basil), flavored simple syrups (lavender, strawberry, vanilla), and for adult parties, a clearly labeled section with vodka, gin, or rum for guests who want to make their lemonade into a cocktail. Use small bowls or ramekins for each garnish, organize on a wooden tray, and label everything clearly.
How do I keep lemonade cold at an outdoor party?
Best methods: use a dispenser with an internal ice column (chills without diluting), keep filled dispensers in the refrigerator until 30 minutes before serving, place the drink station in partial shade, and set an ice bucket with scoop next to the dispensers for guests to add ice to individual glasses. Avoid filling dispensers hours before the party — lemonade should be cold when it goes in the dispenser, not warming up for 2 hours before guests arrive.
What are good July 4th drink station ideas?
The best July 4th drink station ideas: strawberry lemonade (red) and blueberry lemonade (blue) in side-by-side dispensers for patriotic color impact; a “make your own lemonade” flavor bar with add-in options; a self-serve sweet tea and lemonade station (“Arnold Palmer bar”); or a hybrid alcoholic/non-alcoholic station where the adult add-ins are clearly labeled separately.
The self-serve format is key — you set it up before guests arrive and it runs itself.
Can I make lemonade the night before a party?
Yes — and you should. Lemonade made with simple syrup the night before tastes better than day-of lemonade because the flavors have time to blend and mellow. Make the full batch, refrigerate in sealed pitchers or mason jars, and pour into dispensers on party day.
The strawberry and blueberry versions especially improve overnight as the fruit flavor infuses fully into the base. Add any carbonated elements (sparkling water, ginger ale) only at serving time.
The Drink Station That Runs Itself
Here’s what I love most about a properly set-up drink station: after the 45 minutes of setup, you never touch it again. Guests help themselves. The dispenser does its job. The garnish station delights whoever’s looking for something interesting.
You built it. Now go be at your party.
That’s the whole point — the work you do before guests arrive is what gives you the freedom to be present once they do. A self-serve drink station is one of the best investments of pre-party effort you can make.
Leah Meyer is a passionate event planner and creative writer behind Party & Beyond, where she helps hosts throw stunning celebrations on a real-world budget. From birthday parties and baby showers to backyard weddings and holiday gatherings, Leah personally tests every DIY idea she shares , proving that the wow factor lives in the details, not the price tag. When she's not planning the next party, you'll find her hunting for hidden treasures at dollar stores, inflating balloons (she owns three pumps!), or brainstorming with her dog, the official Chief Inspiration Officer of Party & Beyond.


")
")
")

")

")