Disclosure: This post contains affiliate links. If you buy through them, I may earn a small commission at no extra cost to you. All recommendations come from personal use and research.
Quick answer: You can build a luxury-style picnic party setup for about $80–$150 in DIY materials instead of the $250–$450 most picnic vendors charge per setup. The core formula is a low table (plywood + crates, around $35–$50), layered blankets and floor pillows for seating, a grass tablescape with a runner and candles in hurricane jars, and food built to survive 2 hours outdoors. For 6–10 guests, plan on $80–$150 total for a reusable setup you’ll use all summer.
Picnic Party Ideas
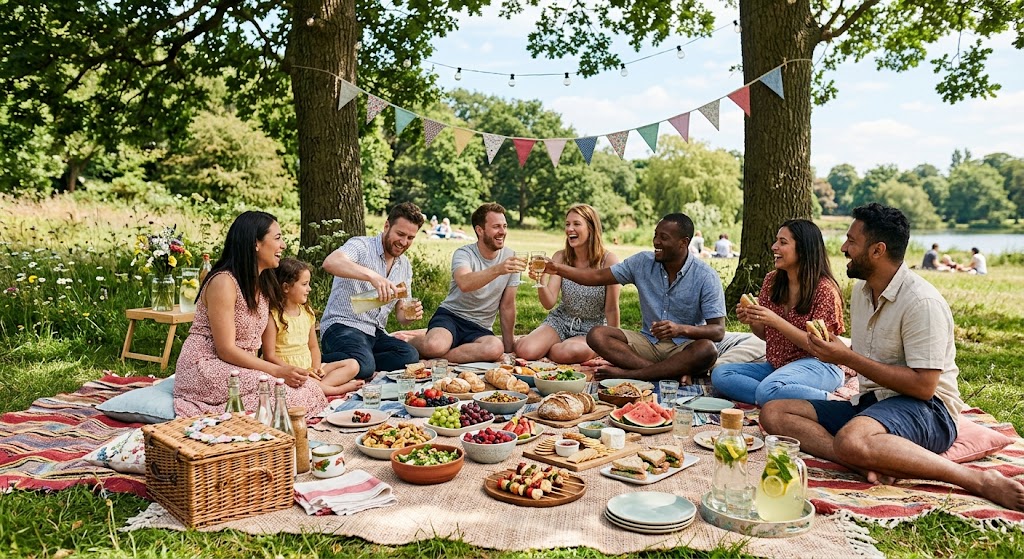
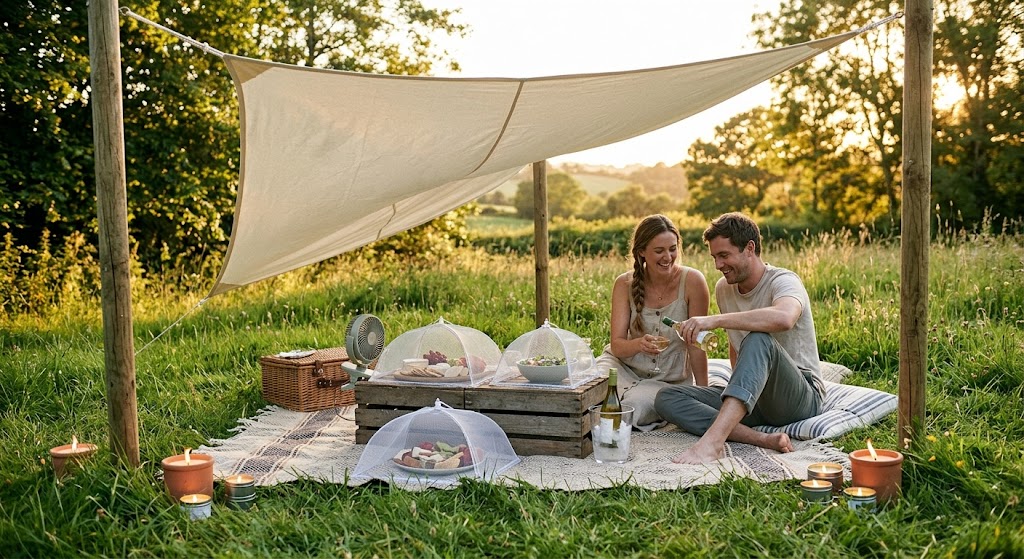
Picture this: a low wooden table set right on the grass, blankets layered underneath, fat floor pillows scattered around, candles flickering in glass hurricanes as the sun drops, and a board piled with cheese, fruit, and crackers running down the center. That’s the “luxury picnic” look all over Pinterest right now — and the vendors charging $300 to set it up in your own backyard are counting on you not realizing how cheap the pieces actually are.
I’ve put together enough of these picnic party setups to tell you exactly where the money needs to go and where it absolutely does not. These 23 picnic party ideas cover the build, the tablescape, the food that won’t wilt, and four themed versions you can copy this weekend. Every one comes with a real cost, a group size, and a “best for” so you can match it to your occasion.
What a “luxury picnic” actually is (and what you’re really paying for)
A luxury picnic is just a styled, low-to-the-ground picnic: a short table, soft layered seating, a decorated runner down the middle, and pretty food. That’s it. When a vendor charges you $250–$450, you’re paying for their table, their rental linens, their styling time, and the teardown — not for anything you couldn’t assemble yourself with materials you keep and reuse.
Here’s the honest split. The stuff worth buying once and keeping: a low table, a few quality blankets, floor pillows, glass hurricanes, and a drink dispenser. The stuff that’s overrated: pampas grass that sheds everywhere, single-use balloon garlands on a grass setup (they pop and blow around), and anything described as a “luxury picnic kit” for $200 that’s mostly a cheap rug and four pillows.
How do you build a DIY low picnic table cheaply?
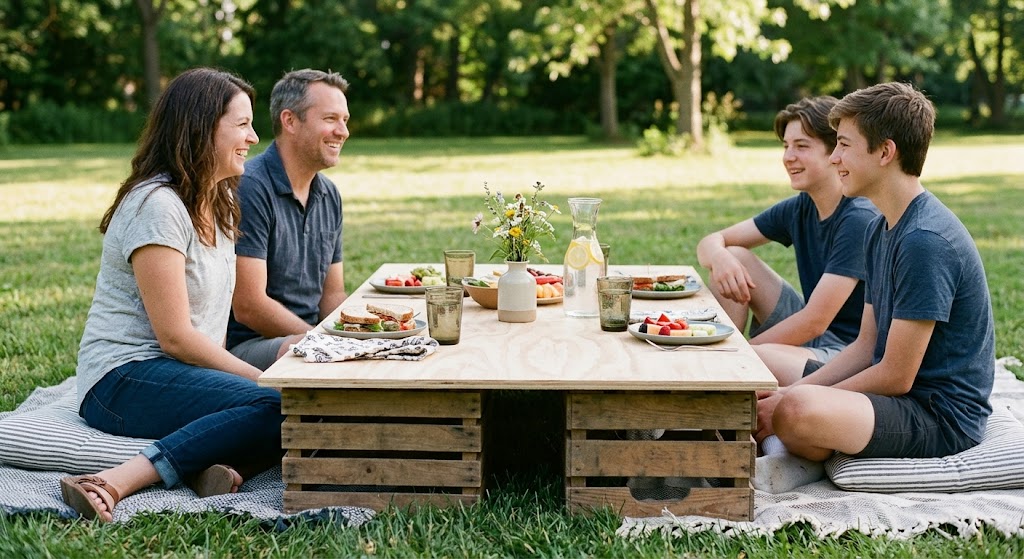
The fastest cheap low table is a sheet of plywood laid across two wooden crates. Buy a 2’x4′ pre-cut plywood panel ($15–$20 at a hardware store), sand the edges, and rest it on two milk-style wooden crates ($12–$15 each). Total: about $35–$50, and it seats 6–8 people sitting on the ground. Sand it smooth, and either leave the wood raw for a rustic look or do one coat of white paint.
1. Plywood-and-crate low table. Materials: 2’x4′ plywood, two wood crates, sandpaper. Cost: $35–$50. Difficulty: Easy. Time: 30 minutes. Best for: birthdays and bridal showers, 6–8 guests.
2. Pallet table. One clean, heat-treated pallet (look for the “HT” stamp, never “MB”) sanded down and laid flat is an instant low table for free or about $5. Stack two for height. Best for: rustic backyard birthdays, 8–10 guests.
3. Folding table with the legs off. If you own a folding table, a hacksaw on the legs (or just folding them and bracing with crates) gets you low without a build. Cost: $0 if you have one. Best for: last-minute setups, any group.
Pro tip: Whatever table you build, check it’s level on the grass before you style it. A 1-inch slope doesn’t look like much until your candles and drinks are sliding toward one guest. Two flat paver stones under the low side fix it in seconds.
The blanket-layering formula (this is what sells the look)
The single thing that makes a picnic read as “luxury” instead of “we sat on a sheet” is layering. Use three layers: a waterproof base, a large flat blanket, then texture on top.
4. Waterproof base layer. A cheap painter’s drop cloth or a tarp ($8–$12) under everything keeps ground moisture from soaking through. Nobody sees it. Don’t skip it.
5. The big flat blanket. A large neutral cotton blanket or a flat-weave rug ($20–$40) goes down next as your main surface. Neutral colors photograph better and hide grass stains.
6. Texture on top. Two or three smaller throws in different weaves — a chunky knit, a striped flatweave, a flannel — layered at the corners and edges. This is where the depth comes from. Thrift these; you want $5–$10 each, not boutique throws.
7. Floor pillows and cushions.Six to eight floor pillows ($8–$15 each) around the table edges. Mix two sizes. If buying new is too much, bring couch cushions out in pillowcases that match your palette — nobody can tell in photos.
Layer
What to use
Cost
Why it matters
Base
Tarp / drop cloth
$8–$12
Blocks ground moisture
Main
Neutral cotton blanket / flat rug
$20–$40
The surface guests sit on
Texture
2–3 thrifted throws
$15–$30
Creates the styled, layered look
Seating
6–8 floor pillows
$50–$90
Comfort + visual fullness
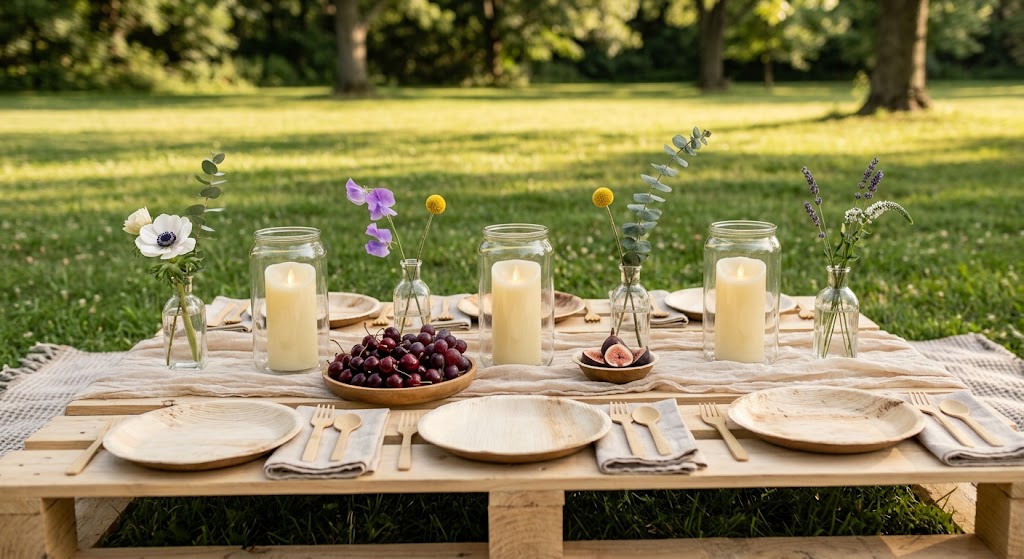
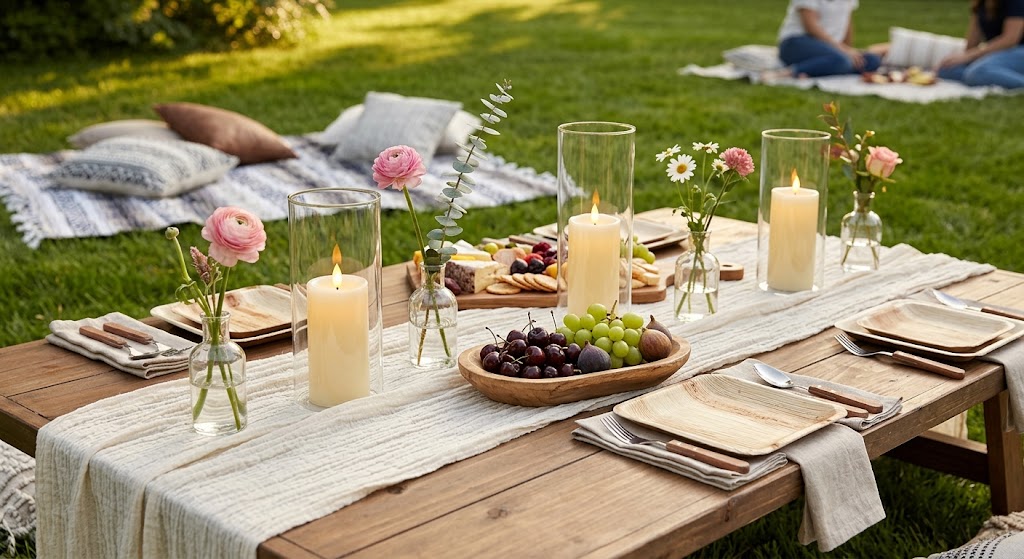
The grass tablescape: runner, candles, and bud vases
8. Table runner. A linen or gauze runner ($10–$15) down the center of your low table instantly anchors the styling. Cheesecloth runners are cheap and have that draped, romantic look.
9. Candles in hurricane jars. Real flames blow out on grass and near blankets are a fire risk, so use battery LED pillar candles inside glass hurricane vases ($4–$8 each). Three down the runner. The glass blocks wind and keeps the flame look without the hazard.
10. Bud vases with single stems. A row of small bud vases ($1–$3 each from a dollar store) with one grocery-store stem in each ($8–$12 for a bunch split between them) beats one big expensive centerpiece. Spread five or six down the table.
11. Low fruit bowls. A shallow bowl of cherries, grapes, or figs doubles as decor and food. Free if it’s food you’re serving anyway.
12. Plates and flatware. Skip clear plastic. Bamboo or palm-leaf disposable plates ($20–$40 for a pack) look like real dishware in photos and won’t tip over on uneven ground like melamine can.
Pro tip: Keep the centerline of the table clear enough that people can actually reach the food. I’ve styled tablescapes so packed with vases that nobody could pass the cheese board. Decor down the edges, food down the middle.
What picnic food survives sitting outside?
Food that survives a picnic is food with no mayo, no raw dairy sitting in the sun, and nothing that wilts. Build board-style spreads, mason jar salads layered with dressing on the bottom, and skewers — and follow the 2-hour rule: perishable food should not sit out longer than 2 hours, or 1 hour if it’s above 90°F (per USDA food-safety guidance).
13. Grazing board. Hard cheeses (they hold up far better than soft in heat), cured meats, crackers, grapes, nuts, dried fruit. Cost: $25–$40 feeds 8–10. Best for: bridal showers and date picnics.
14. Mason jar salads. Dressing on the bottom, then hardy veg, greens on top, sealed. They don’t go soggy and they travel upright. About $2–$3 per jar. Best for: kids’ picnics and grab-and-go groups.
15. No-mayo sandwiches. Pesto, hummus, mustard, or olive oil instead of mayo — these don’t spoil the way mayo-based fillings do in heat. Best for: any group, any budget.
16. Fruit and veggie skewers. Easy to eat sitting on the ground, no utensils, no spills. Best for: kids and toddlers.
17. Drink dispenser. A 1–2 gallon glass beverage dispenser ($25–$35) with infused water or lemonade is cheaper per serving than bottles and looks like part of the styling. Add a bag of ice on arrival, not before.
18. The cooler you hide. Keep a soft cooler with backup ice and the perishables stashed just out of frame, and only put food on the board in waves. That’s how you beat the 2-hour clock without a wilted spread.
Shade and bugs: the two things that ruin a picnic
19. Shade. A simple market umbrella ($30–$50) or a stretched piece of canvas/muslin between two poles ($15–$20) keeps the setup — and the cheese — out of direct sun. Schedule a summer picnic for late afternoon into golden hour instead of high noon and you may not need shade at all.
20. Bug strategy.Citronella candles around the perimeter (not on the table), a small clip fan (mosquitoes are weak fliers and a breeze keeps them off), and food kept covered with mesh food domes ($8–$12 for a set) until serving. Honestly, the mesh domes are the most underrated picnic purchase there is.
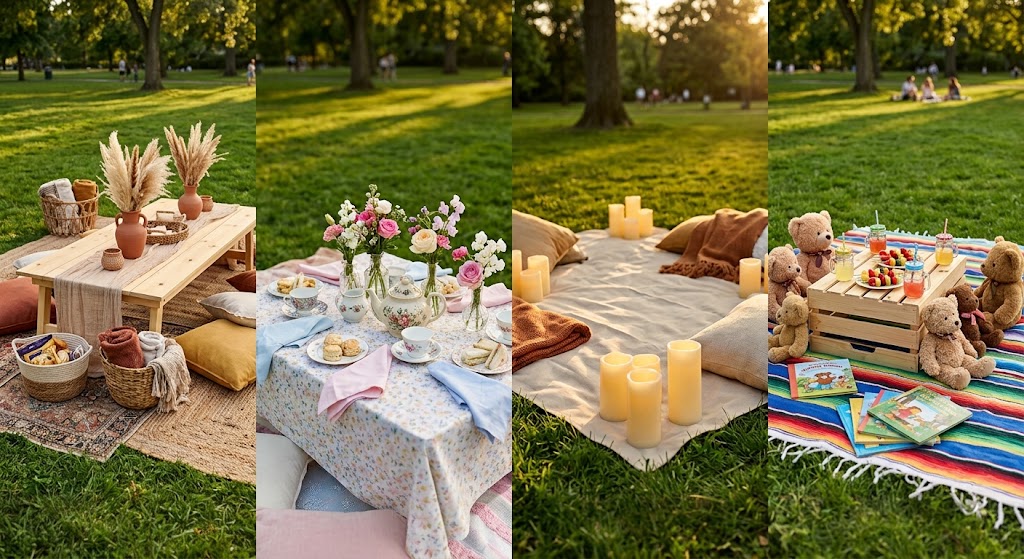
Four themed picnic versions to copy
21. Boho picnic. Earth tones, a gauze runner, woven baskets, terracotta tones, mixed thrifted throws. Cost on top of the base setup: $20–$40. Best for: bridal showers and adult birthdays.
22. Garden tea picnic. Florals, a real (or thrifted) teapot, pastel napkins, scones and tea sandwiches, bud vases everywhere. Add $25–$45. Best for: bridal and baby showers.
23. Sunset golden-hour picnic. Warm tones, lots of LED candles, set for 90 minutes before sundown so the light does the styling for you. Nearly free if you already have the base. Best for: date picnics and small adult birthdays.
And a bonus kids’ version: the teddy bear picnic — every kid brings a stuffed animal as a “guest,” low table, mason jar drinks, fruit skewers, a stack of picture books. Add $15–$25. Best for: toddler and preschool birthdays.
DIY luxury picnic vs. hired vendor: the real cost
Item
DIY cost
Vendor cost (built in)
Low table
$35–$50 (keep it)
Included in package
Blankets + pillows
$65–$120 (keep them)
Included, you keep nothing
Tablescape (runner, hurricanes, vases)
$25–$40
Included
Drink dispenser
$25–$35 (keep it)
Often extra
Styling + teardown labor
Your afternoon
The bulk of the fee
First-time total
$80–$150 (reusable)
$250–$450 per setup
Every picnic after
~$30 (food + flowers)
$250–$450 again
The math is the whole argument. The vendor fee resets every single time. Your DIY kit is a one-time spend, and from the second picnic on you’re only buying food and a few fresh stems.
Common mistakes that wreck a picnic party
Skipping the moisture barrier. Wet jeans 20 minutes in. Always tarp first.
Real candles on grass. Fire risk and they won’t stay lit. LED inside hurricanes.
Mayo-based food in the sun. The fastest way to make guests sick. No-mayo rules outdoors.
Setting up at noon. Harsh light, melted cheese, hot guests. Aim for late afternoon.
Over-styling the centerline. Pretty but nobody can reach the food. Edges, not middle.
One giant expensive centerpiece. Spread bud vases instead — cheaper and fuller.
🎉 Quick Summary
✅ Best for: backyard birthdays, bridal showers, date picnics, kids’ parties
💰 Budget: $80–$150 first time (reusable), ~$30 each picnic after
⏱ Time: 1–2 hours to build and style
🌟 Top pick: plywood-and-crate low table + layered blankets + LED hurricanes
📌 Don’t skip: the moisture barrier underneath and the 2-hour food rule
Picnic party FAQ
How much does a DIY luxury picnic setup cost?
A DIY luxury picnic setup costs about $80–$150 the first time for a reusable kit — a low table ($35–$50), layered blankets and floor pillows ($65–$120), and a tablescape ($25–$40). After that, each picnic only costs around $30 for food and fresh flowers. Hired picnic vendors typically charge $250–$450 per setup, every time, and you keep nothing.
What food is best for a picnic that sits outside?
The best picnic foods have no mayo and don’t wilt: grazing boards with hard cheese and cured meat, mason jar salads with dressing on the bottom, no-mayo sandwiches, and fruit skewers. Keep perishables in a hidden cooler and refill the spread in waves. Follow the USDA 2-hour rule — 1 hour if it’s over 90°F.
How do I make a low picnic table without power tools?
Lay a pre-cut 2’x4′ plywood panel ($15–$20) across two wooden crates ($12–$15 each), no building required. Sand the edges by hand. A clean heat-treated pallet works too. Total cost is about $35–$50 and it seats 6–8 people sitting on the ground.
How many guests can a luxury picnic seat?
A single 2’x4′ low table comfortably seats 6–8 people sitting on the ground. For 10–12, add a second table or a pallet end-to-end. Plan roughly 2 feet of table edge per guest so everyone can reach the food down the center.
Can you do a luxury picnic in a small backyard?
Yes. A low picnic only needs about an 8’x8′ patch of flat grass for 6 guests. In tight yards, use one long narrow table against a fence or hedge, seat guests on one side, and use the background as your backdrop instead of a freestanding setup.
What candles are safe for an outdoor picnic?
Use battery-powered LED pillar candles inside glass hurricane vases. Real flames blow out in any breeze and are a fire hazard near dry grass and blankets. The glass hurricane blocks wind and gives you the warm flame look safely. Keep any citronella candles on the ground perimeter, never on the table.
How do I keep bugs away from a picnic?
Combine three things: citronella candles around the perimeter, a small clip fan (mosquitoes can’t fly well against a breeze), and mesh food domes over every dish until serving. Set up away from standing water and trash cans. Late afternoon has fewer bugs than dusk for the worst mosquito hours.
What’s the best time of day for a picnic party?
Late afternoon into golden hour — roughly 90 minutes before sunset — is best. The light is flattering, the heat has dropped, your cheese won’t sweat, and you may not need shade at all. High noon means harsh light, melted food, and hot, squinting guests.
What do you put under picnic blankets?
A waterproof base layer — a tarp or painter’s drop cloth ($8–$12) — goes under everything to block ground moisture. Then a large flat blanket or flat-weave rug as the main surface, then smaller textured throws on top. Nobody sees the tarp, but it’s the difference between dry guests and damp jeans.
How do you make a picnic look expensive on a budget?
Layer textures (three blankets, not one), spread cheap bud vases instead of one big centerpiece, use LED candles in glass hurricanes, and swap clear plastic plates for bamboo or palm-leaf disposables. Neutral colors photograph as more expensive than brights. The styling does the work, not the price tag.
Is a hired picnic vendor worth it?
It’s worth it only if you value zero setup and teardown and you’re doing it once. For anyone hosting more than one picnic a year, a DIY kit pays for itself on the second use — the vendor’s $250–$450 fee resets every time, while your reusable kit drops to about $30 per picnic in food and flowers.
What size blanket do I need for a picnic table setup?
For a low table seating 6–8, you want a main blanket or rug at least 6’x9′ so guests have room to sit around all sides with their legs. Layer smaller 4’x6′ throws on top for texture. Going slightly bigger is always safer than too small — cramped seating is the most common picnic complaint.
People also ask
Do you need a permit for a picnic party in a public park?
For a small private picnic, usually no — but many parks require a permit for groups over a set size (often 25–50 people) or for reserving a specific area. Check your city’s parks department website before planning a larger picnic party in a public space.
How far in advance can you set up a luxury picnic?
Build and style it 30–60 minutes before guests arrive, but don’t put perishable food out until the last 15 minutes — the 2-hour food clock starts the moment it’s out. The table, blankets, and decor can go down earlier; the food goes last.
What’s the difference between a picnic and a luxury picnic?
A regular picnic is a blanket and a basket. A luxury picnic adds a styled low table, layered seating, a decorated runner with candles and flowers, and a board-style food spread. The setup is the upgrade — the food and location can be identical.
Can you do a luxury picnic indoors?
Yes — an indoor floor picnic works great for rainy days, kids’ parties, and winter. Skip the moisture barrier and bug strategy, keep the low table, blankets, pillows, and tablescape, and use real (supervised) or LED candles. It’s the same formula minus the weather variables.
Don’t stress about making it look exactly like the photo you saved. The best picnic parties are the ones where you’re sitting in the grass with your people, the light is gold, and nobody’s checking whether the throw pillows match. Build the kit once, and you’ll be the friend who can throw a gorgeous picnic on a Saturday’s notice all summer long.
Leah Meyer is a passionate event planner and creative writer behind Party & Beyond, where she helps hosts throw stunning celebrations on a real-world budget. From birthday parties and baby showers to backyard weddings and holiday gatherings, Leah personally tests every DIY idea she shares , proving that the wow factor lives in the details, not the price tag. When she's not planning the next party, you'll find her hunting for hidden treasures at dollar stores, inflating balloons (she owns three pumps!), or brainstorming with her dog, the official Chief Inspiration Officer of Party & Beyond.


2026")
")
")
")
