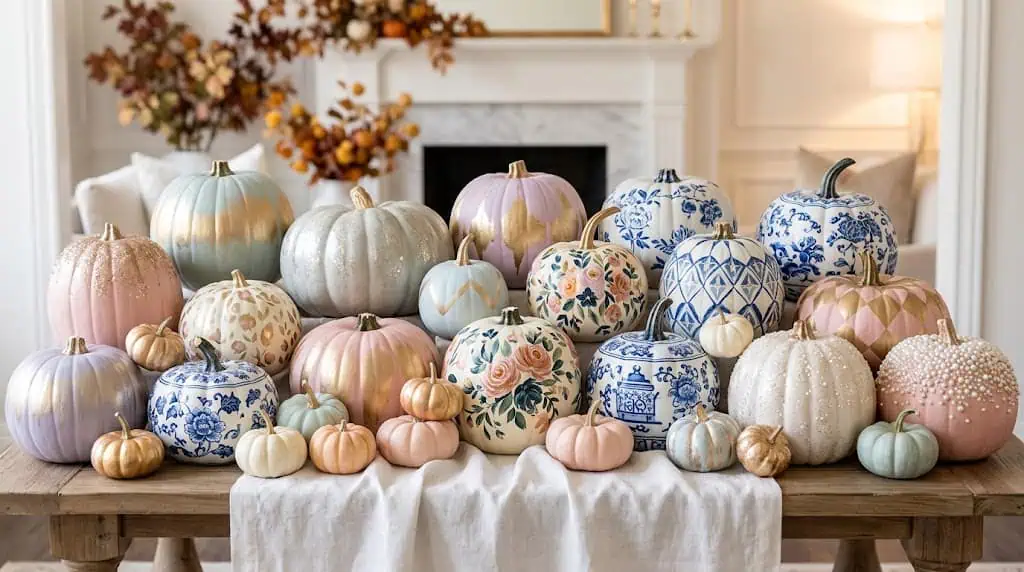
Picture this: Emma’s front porch last October. Three pumpkins, all painted white. No orange plastic skeletons. No glittery cobwebs draped across the railing. No six competing trends fighting for attention in a 4-foot space. Just three matte white pumpkins in graduated sizes, a cluster of dried pampas grass tucked to one side, and a single black lantern. Guests paused before they even knocked on the door. Someone said, “Did she hire someone?” She did not. She spent $18 at the craft store, forty minutes at her kitchen table, and made the entire neighborhood look like it was trying too hard by comparison.
That is what elegant pumpkin painting actually is. It is restraint. It is commitment to a palette. It is the decision to do one technique really well instead of layering five mediocre ones on top of each other.
After 10+ years of crafting through every fall season — and destroying at least a dozen pumpkins learning what not to do — I have pulled together the 39 most genuinely chic pumpkin painting ideas for 2026. Every idea in this list has specific costs, real technique notes, and honest difficulty ratings. According to NRF (2025), 78% of Halloween shoppers purchase decorations, with Americans spending $4.2 billion on decor alone — more than they spend on candy. That tells you people care deeply about how their spaces look. This guide makes sure your money and effort go toward ideas that actually land.
What Do Elegant Pumpkin Painting Ideas Actually Mean in 2026?
Let’s be honest: the word “elegant” gets thrown around on every fall crafting post from August through November. So here is the actual definition, at least by the standard I apply after hosting and crafting through more fall seasons than I can count.
What elegant pumpkin painting IS:
- Muted, considered color palettes — not orange and black by default
- Clean execution of one or two techniques, not a pile of trends
- Pumpkins that work with your existing home decor, not against it
- A display that looks intentional, like someone made a decision
What elegant pumpkin painting IS NOT:
- Covering every inch in chunky glitter
- Mixing five paint colors because you could not commit to three
- Adding googly eyes and calling it artistic
- Recreating twelve Pinterest trends simultaneously on one pumpkin
The trick is deciding your palette before you open a single paint bottle. Pick two or three colors maximum. Commit. The difference between a display that looks expensive and one that looks cluttered is almost always just that one decision made upfront.
What Kind of Paint Works Best on Pumpkins?
Chalk paint and acrylic craft paint are the two best options for painted pumpkins. Chalk paint — brands like FolkArt or Rust-Oleum Chalked, around $5–$8 at Walmart or Target — gives you a matte, velvety finish that looks genuinely expensive, especially on white or cream pumpkins. It adheres to both real and foam pumpkins without a primer coat, which saves you a step.
Acrylic craft paint works perfectly well for detail work and layered designs. You will find 3-packs at Dollar Tree for $1.25, and they cover surprisingly well with two coats. Spray paint is excellent for base coats and solid-color looks — a can of matte black or chalk white runs about $5 at Walmart and covers 4–6 medium pumpkins easily.
Whatever paint you choose, always seal your finished pumpkin with Mod Podge or clear matte spray to protect the design and extend the life of real pumpkins outdoors.
💡 Pro Tip: If you are displaying pumpkins outdoors, apply two coats of polyurethane spray after your design is fully dry. It extends the life by 2–3 weeks. Better yet, use foam pumpkins from Dollar Tree or Michael’s for outdoor displays — they last the entire season without rotting, and they take paint beautifully.
39 Elegant Pumpkin Painting Ideas for Fall 2026
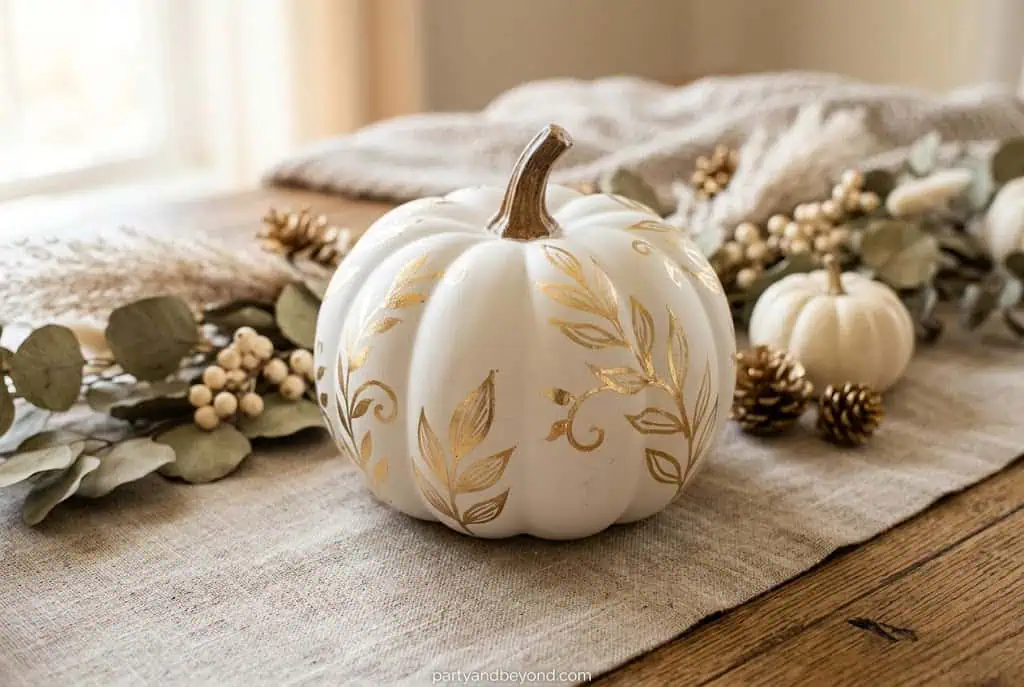
1. All-White Minimalist Pumpkin with Gold Leaf Accents
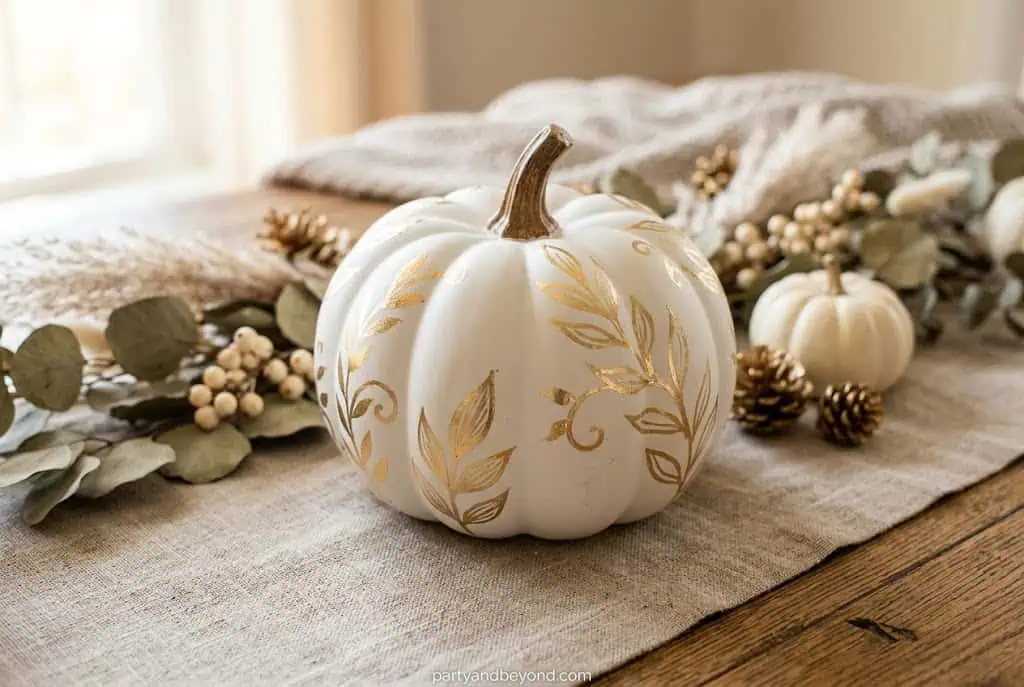
This is the design that changed how Emma and I both think about pumpkin decorating, and it remains the single most impactful thing you can do with $10 and twenty minutes. Start with two thin coats of white chalk paint over your pumpkin — thin coats dry faster and layer more evenly than one thick coat. Once completely dry, tear small irregular pieces of gold leaf sheets and press them gently onto the pumpkin’s ridges and near the stem.
You do not need a separate adhesive — the paint’s slight natural tackiness holds the leaf in place once you press it. The result is organic and editorial, the kind of thing that makes people assume you bought it somewhere expensive. Total cost: $10 ($4 chalk paint + $6 gold leaf). Time: 20 minutes plus drying. Difficulty: Easy. Best for: entryway displays, Thanksgiving tables, living room vignettes where you want quiet luxury without announcing it.
2. Velvet Black Matte Pumpkin
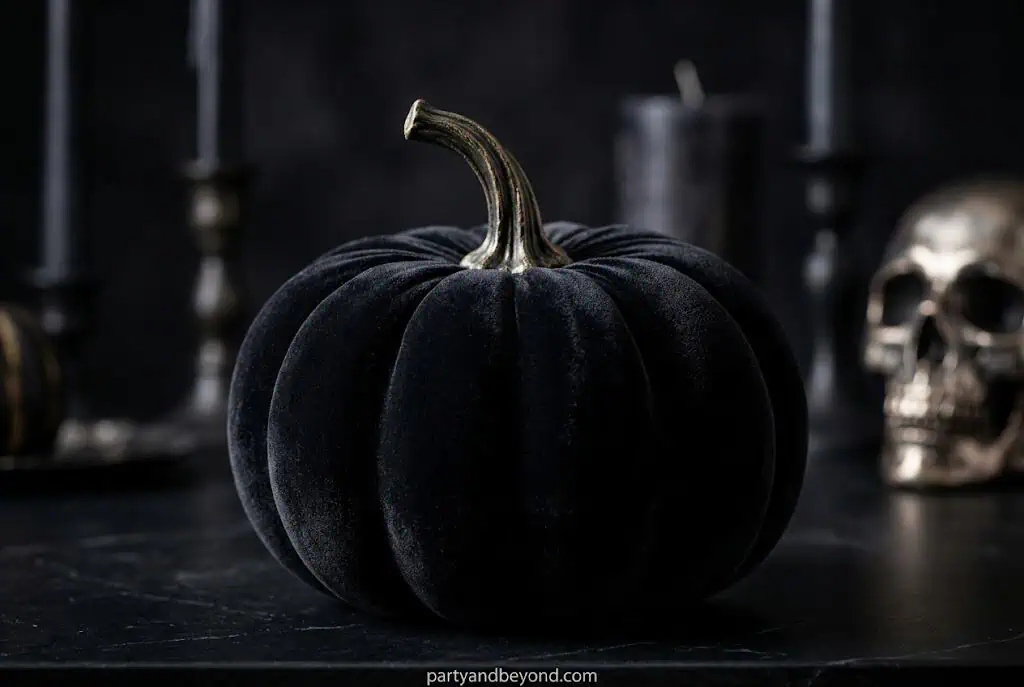
Matte black is having its fall moment, and done right it belongs on a mantle between two taper candles, not at a Spirit Halloween checkout lane. Spray your pumpkin with matte black spray paint in two light coats, letting each coat dry fully before adding the next — rushing this step leaves uneven patches that catch differently.
Then, while the final coat is still very slightly tacky, apply velvet flocking spray from about 8 inches away in short, even bursts. The velvet spray creates a soft, suede-like surface texture that makes this pumpkin genuinely tactile and luxurious. Total cost: $13 ($5 spray paint + $8 velvet spray). Time: 30 minutes active, 2 hours total including drying. Difficulty: Easy. Best for: dark and moody fall aesthetics, adults-only Halloween party tables, gothic-adjacent tablescapes.
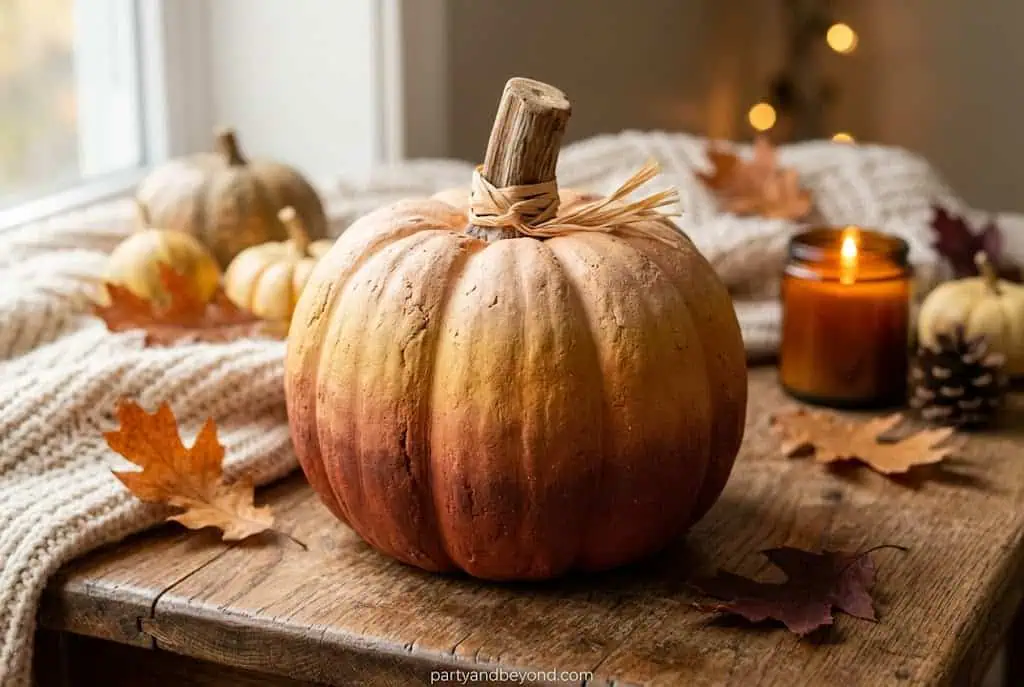
3. Terracotta Ombré Pumpkin
Terracotta is one of those shades that makes everything near it feel warm and considered. For this technique, mix acrylic paint in burnt sienna, warm terracotta, and pale cream. Working in horizontal sections from the darkest tone at the base to the lightest at the top, apply each shade with a damp sea sponge and blend the transitions while still wet.
The sponge gives you a natural, organic fade rather than harsh color boundaries. All three colors can come from a Dollar Tree 3-pack of craft acrylics, making this the most budget-friendly elegant look on the list. Total cost: $3–$5. Time: 45 minutes. Difficulty: Easy. Best for: outdoor harvest displays, rustic farmhouse-style decor, Thanksgiving porch setups that need to work across six weeks of fall weather.
4. Nail Polish Marble Effect Pumpkin
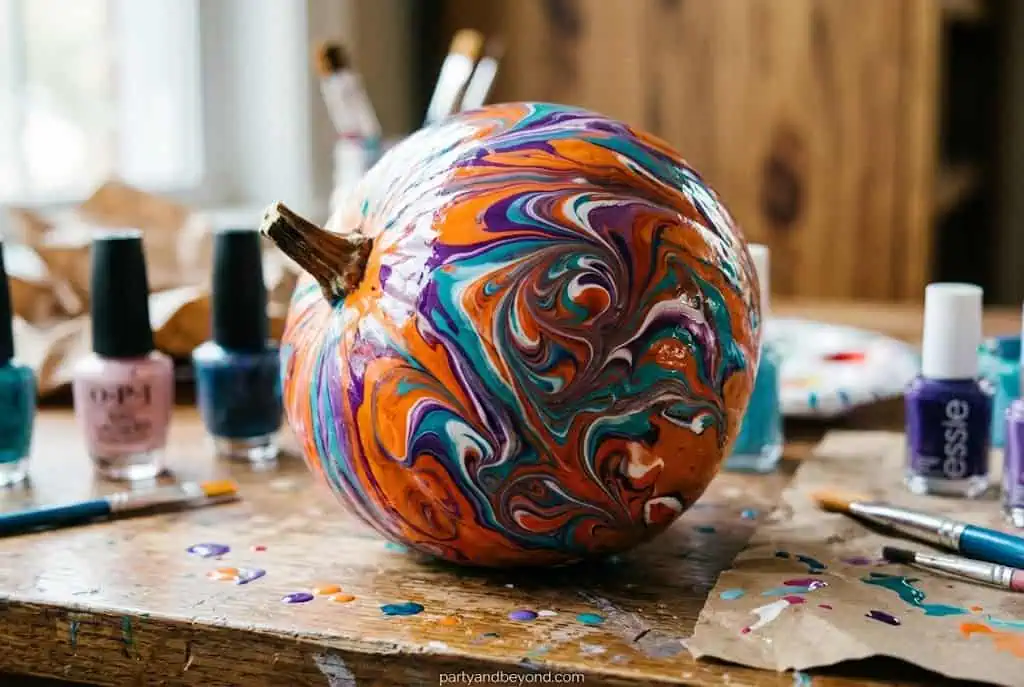
I will be honest with you: I destroyed two pumpkins the first time I tried this technique. The third attempt became the most-pinned craft photo I have ever produced. Here is how it actually works. Fill a disposable container deep enough to submerge your pumpkin with room-temperature water — cold water makes the polish sink too fast. Drop 4–5 colors of nail polish onto the water surface — white, gray, gold, and one dark accent work beautifully together — and swirl exactly once with a toothpick.
Do not over-swirl or the colors merge into brown. Lower your white-painted pumpkin stem-side down slowly into the water, let it sit for 10 seconds, then lift straight up. The nail polish adheres in a genuine marble pattern. Dollar Tree nail polish costs $1.25 per bottle and works identically to expensive art-store versions for this technique. Total cost: $6–$8. Time: 1 hour including base coat drying. Difficulty: Medium — the technique has a real learning curve, so practice on a small gourd first. Best for: dramatic centerpieces, entryway vignettes, gift-giving when you want something no one else has.
5. Sage Green Botanical Pumpkin
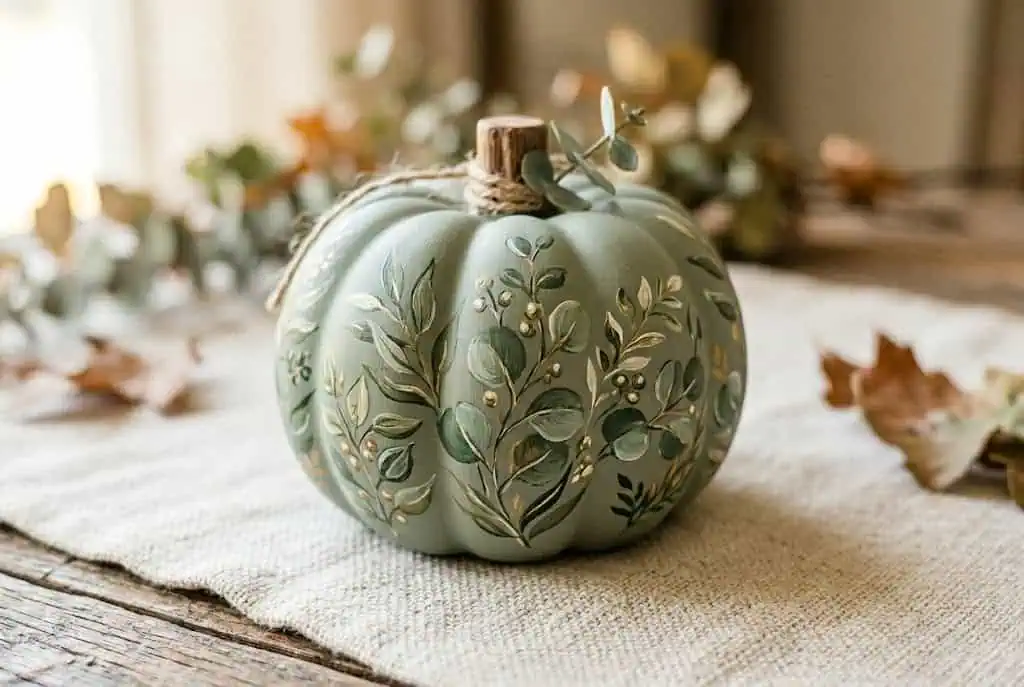
This design sits at the exact intersection of cottagecore and editorial. Start with two coats of muted sage green chalk paint — Rust-Oleum Chalked in “Aged Gray” mixed with a touch of green gets you close, or look for “sage” in the FolkArt Chalk line at Walmart for about $5. Once dry, use a fine detail brush to hand-paint eucalyptus branches and simple elongated leaf shapes in cream and deeper olive across the surface.
You genuinely do not need to be an artist for this — loose, slightly imperfect brushstrokes look more organic and intentional than rigid, precise ones. According to Pinterest Predicts (2026), botanical aesthetics are among the fastest-growing fall decorating trends. This pumpkin is ahead of where most displays will land. Total cost: $5–$8. Time: 1 hour. Difficulty: Medium. Best for: modern farmhouse interiors, boho fall tablescapes, Thanksgiving dinner centerpieces.
💡 Pro Tip: If freehand painting intimidates you, print a eucalyptus branch silhouette, cut it out as a stencil, and trace the outline lightly with a white chalk pencil before filling in with paint. The chalk lines disappear under the paint and give you a confident starting point.
6. Blush Pink and Rose Gold Pumpkin
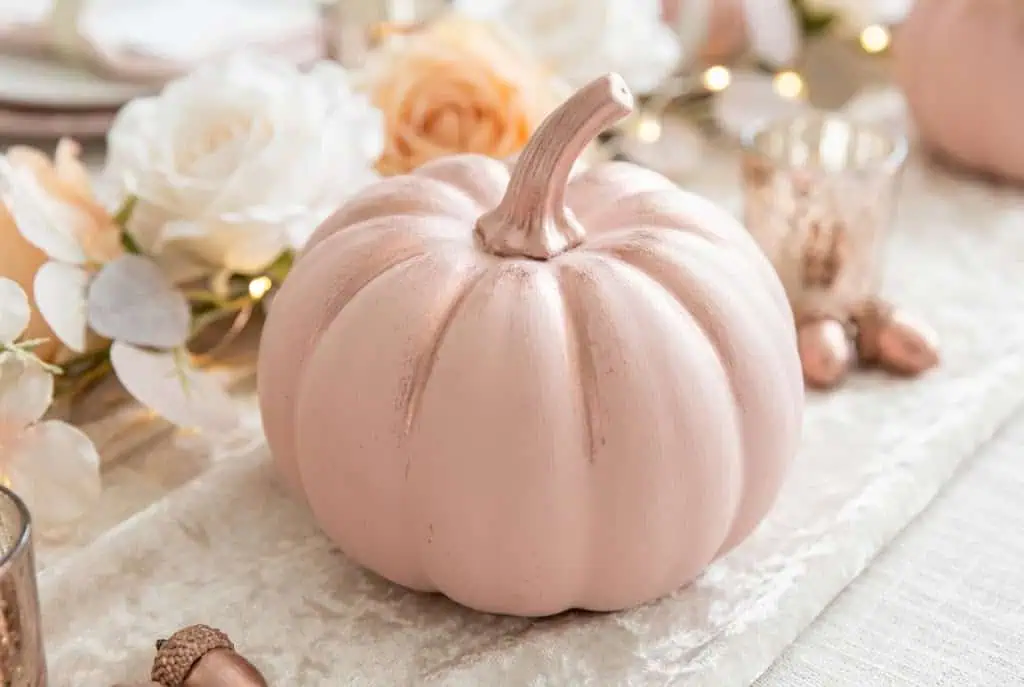
Not every chic pumpkin has to lean dark and moody, and this design makes that case better than anything. Apply two coats of blush pink chalk paint — FolkArt Chalk in “Blush” is $5 at Michael’s. Once fully dry, apply rose gold metallic wax with your fingertip, buffing it lightly over the raised ridges of the pumpkin’s surface. The metallic wax catches light only where the pumpkin’s natural form rises, creating dimension without you having to do much of anything. Pair this pumpkin with ivory taper candles and a small eucalyptus sprig tucked beside it for a complete vignette that photographs beautifully. Total cost: $13 ($5 paint + $8 wax). Time: 25 minutes. Difficulty: Easy. Best for: fall bridal showers, September or October baby showers, feminine tablescapes that need warmth without going orange.
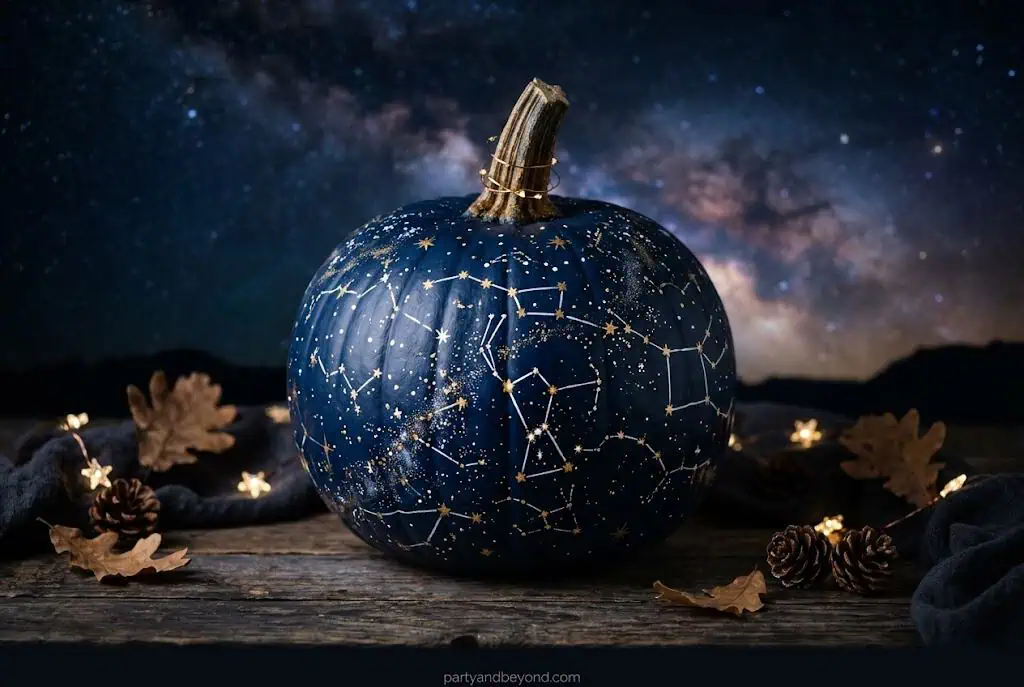
7. Midnight Navy and Constellation Pumpkin
Navy is the most underused pumpkin color in existence, which is exactly why it stands out. Paint your pumpkin in two coats of deep navy blue acrylic, letting it dry overnight if possible — navy can look streaky when rushed. Once the base is fully opaque, use a fine-tipped white paint pen or a thin brush loaded with titanium white acrylic to dot constellations across the surface.
Small clusters of dots with thin connecting lines work beautifully — you do not need astronomical accuracy, just the visual suggestion of starfields. The effect reads as celestial and sophisticated rather than kitschy. Total cost: $6–$8. Time: 40 minutes plus overnight drying. Difficulty: Easy. Best for: outdoor evening porch displays, Halloween party tables where candles will be nearby, moody fall sitting room styling.
8. Drip Effect Pumpkin — The Wax Drip Look Without Wax
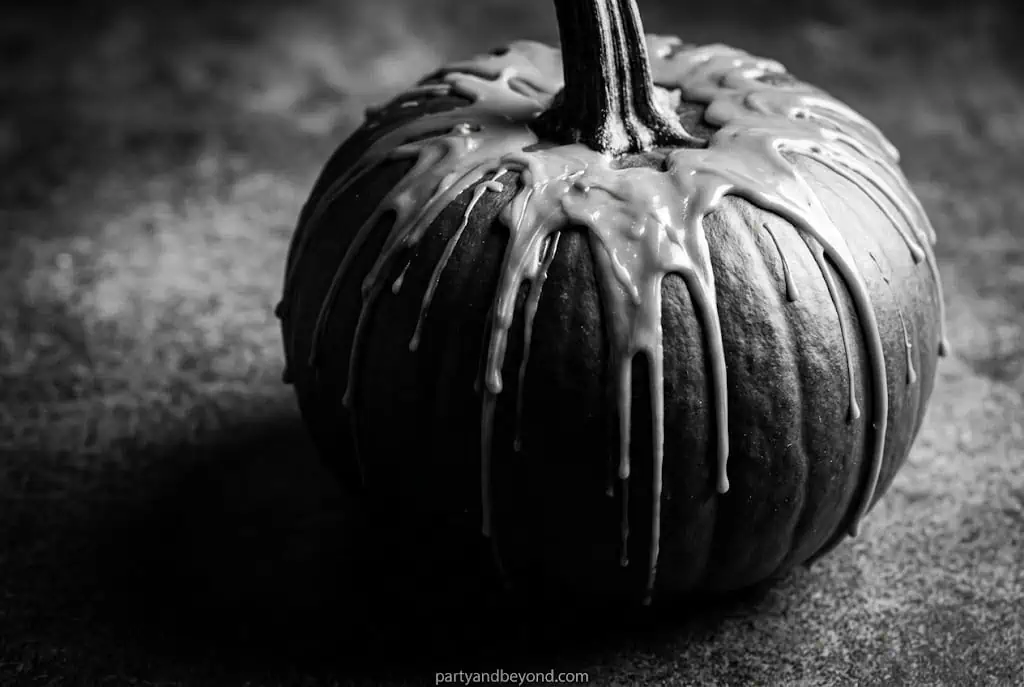
This is one of the highest-impact techniques on the list, and it costs almost nothing. Paint your pumpkin solid matte black and let it dry completely. Then thin white chalk paint with a small amount of water until it reaches the consistency of heavy cream — it should flow slowly off your brush rather than holding its shape. Hold your brush at the top of the pumpkin near the stem and let the paint drip slowly and unevenly downward in strings of varying lengths.
Work around the entire pumpkin and resist every instinct to make the drips uniform or symmetrical. Irregular drips look like melted wax candles and create a genuinely dramatic Halloween aesthetic. Alternatively, a white Elmer’s school glue squeeze bottle drips perfectly and dries matte with zero effort. Total cost: $5–$7. Time: 30 minutes. Difficulty: Easy. Best for: Halloween party tables, dark-themed fall mantles, any display where you want drama without clutter.
9. Geometric Triangle Pumpkin with Painter’s Tape
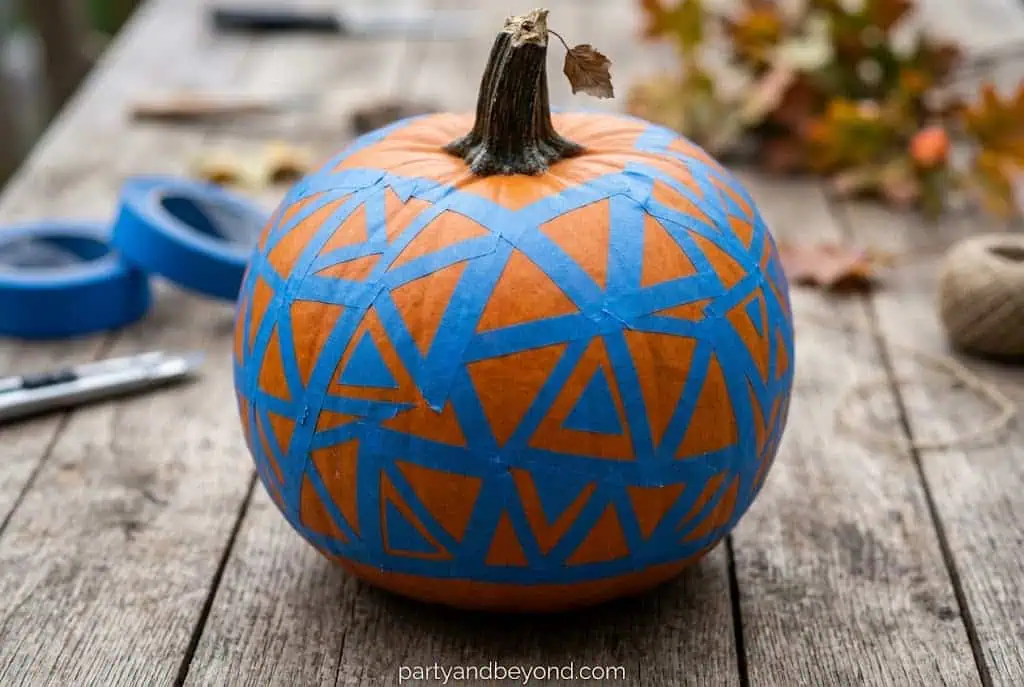
Painter’s tape is one of the most underrated pumpkin decorating tools, and this design proves it. Press strips of painter’s tape across your pumpkin surface in a loose grid of triangles — irregular shapes look better than perfect geometric precision here. Press the tape edges firmly so paint does not bleed underneath. Paint alternating triangles in deep teal, leaving the remaining sections in cream or natural pumpkin tone.
Let dry, then carefully peel the tape while the paint is still slightly flexible rather than fully hardened — waiting too long causes the paint to peel in unintended places. The result is graphic, design-forward, and reads as modern rather than seasonal. Total cost: $6 ($3 painter’s tape + two $1.25 craft paint bottles). Time: 1 hour including drying between paint sections. Difficulty: Medium. Best for: contemporary interior design aesthetics, fall office displays, anyone who finds traditional fall palettes boring.
10. Monogram Pumpkin
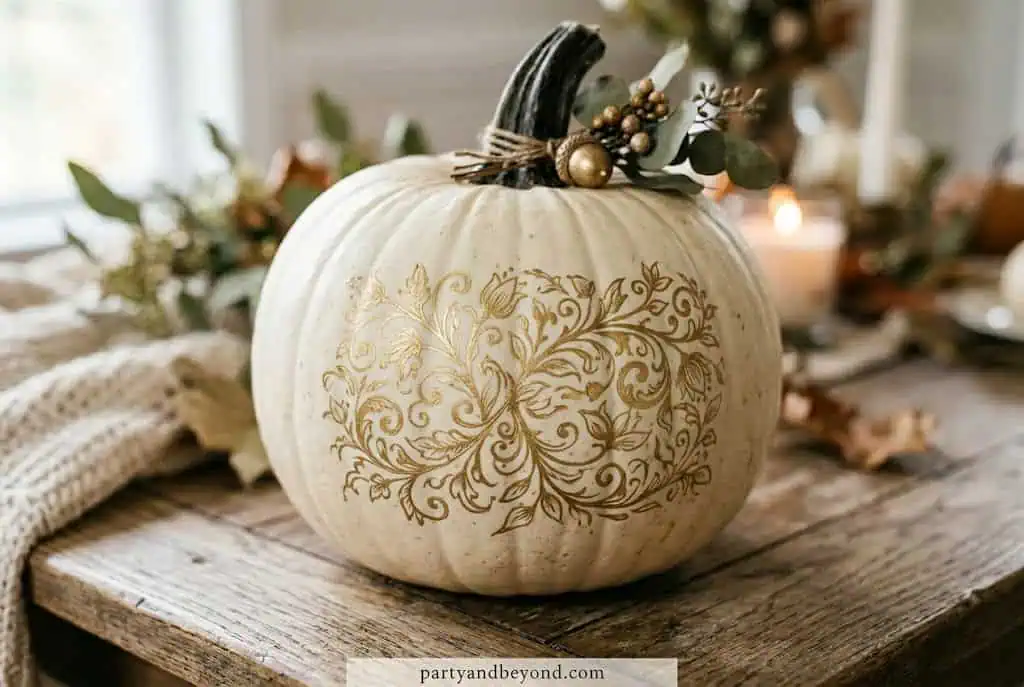
Simple, personal, and genuinely chic when executed with restraint. Paint your pumpkin in ivory or warm white chalk paint and let it dry completely. Sketch your chosen initial in a large, centered script letter using a chalk pencil — the chalk wipes away if you need to adjust placement. Fill in the letter using a fine brush and deep charcoal or black acrylic, keeping your letterforms slightly loose and calligraphic rather than rigid and block-like.
A slightly wobbly script looks hand-lettered and artisan; a stiff, perfectly even letter looks like a font printout. If hand-lettering genuinely intimidates you, print your initial at 400 point font, cut it out as a stencil, and trace. Total cost: $4–$6. Time: 25 minutes. Difficulty: Easy. Best for: front door displays, hostess gifts that feel genuinely personal, home entry vignettes.
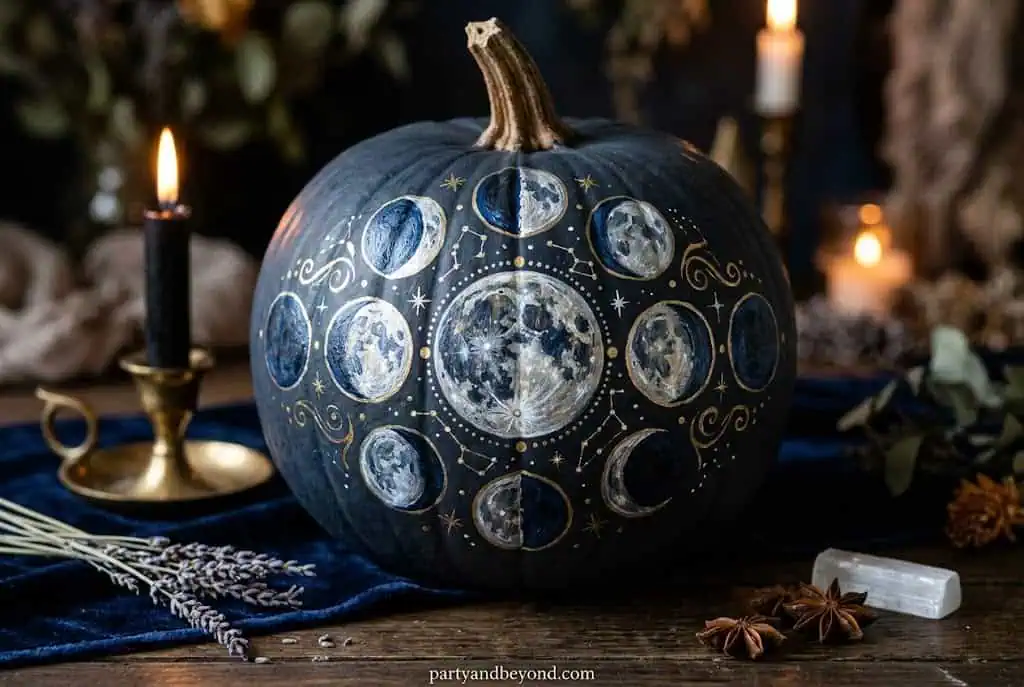
11. Celestial Moon Phase Pumpkin
Paint your pumpkin in solid matte black and let it dry overnight. Using a thin round brush loaded with white acrylic, paint the classic moon phase sequence across the widest middle section of the pumpkin — new moon as a small dot, building through crescent, quarter, gibbous, and full circle, then back down the other side in reverse. Keep each phase small and equally spaced from the next.
The result looks like something from a high-end celestial home goods brand and takes less than an hour of actual painting time. For extra detail, add tiny star dots between the phases using the very tip of a toothpick dipped in white paint. Total cost: $5. Time: 1 hour. Difficulty: Medium — requires patience and a steady hand, not artistic talent. Best for: mystical or celestial-themed fall decor, bedroom nightstand styling, Halloween party mantle displays.
💡 Pro Tip: Keep a moon phase reference image on your phone while painting. Accurate progression makes this look like an informed design decision rather than random circles, and it takes five seconds of research.
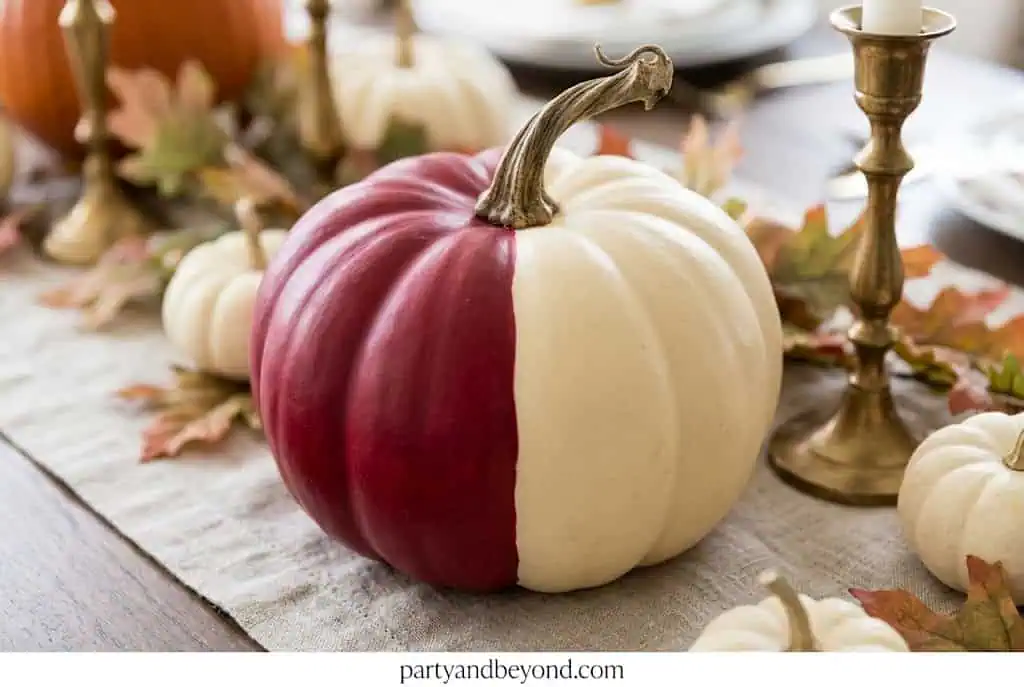
12. Cranberry and Cream Two-Tone Pumpkin
Run a strip of painter’s tape vertically down the center of your pumpkin, pressing the edges firmly against the surface. Paint one half in deep cranberry red acrylic and the other in warm cream chalk paint. Let both sides dry to the touch before peeling the tape — not fully dry, just stable. The dividing line between the two colors does not need to be perfectly clean — a slight imperfection at the meeting point looks hand-crafted and genuine rather than machine-made. Finish by tucking a small dried eucalyptus sprig beside the stem for an organic touch. Total cost: $4–$6. Time: 30 minutes plus drying. Difficulty: Easy. Best for: Thanksgiving table centerpieces, fall dining room displays, anyone wanting maximum visual contrast with minimum technique.
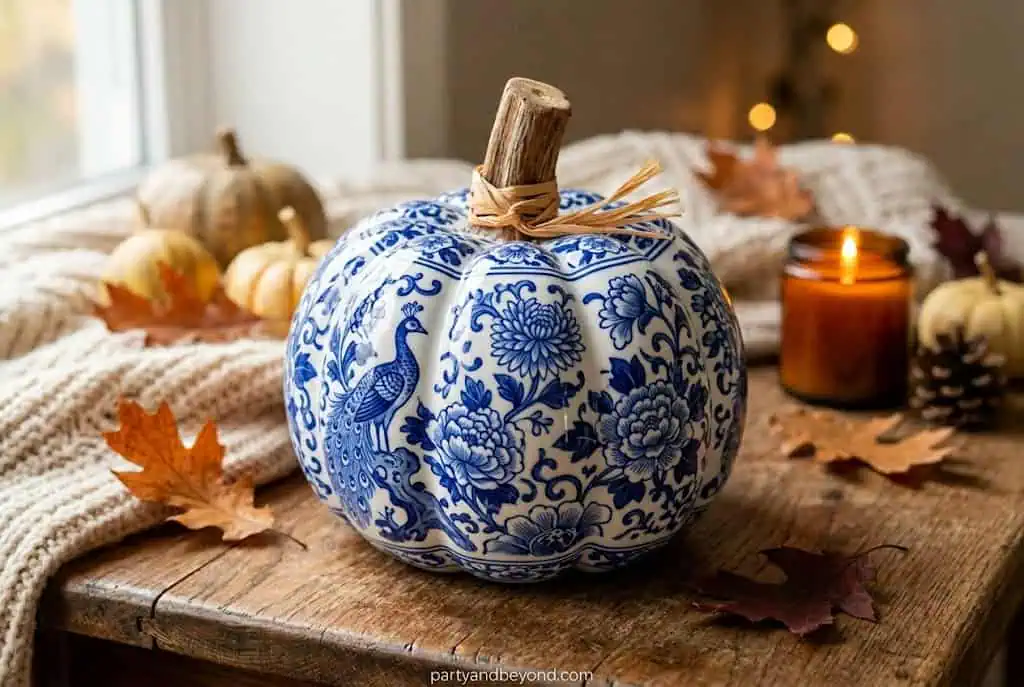
13. Floral Chinoiserie Pumpkin
This one takes time, and I want to be upfront about that. It is the most advanced design on the list and also the most genuinely spectacular. Start with a solid white base coat. Once dry, use a fine brush and cobalt blue acrylic paint to hand-paint loose botanical motifs across the surface — branches, simple blooms, layered leaves — inspired by blue willow china patterns. You do not need precision; Chinoiserie painting is inherently organic and slightly impressionistic.
Pull up a blue willow plate on your phone as reference while you work and capture the general mood rather than exact accuracy. The white-and-blue palette is striking against the warm tones of traditional fall decor and photographs beautifully from any angle. Total cost: $6. Time: 2 hours. Difficulty: Advanced. Best for: elegant fall dining tables, maximalist interiors, any occasion where you want one pumpkin that is genuinely a conversation piece.
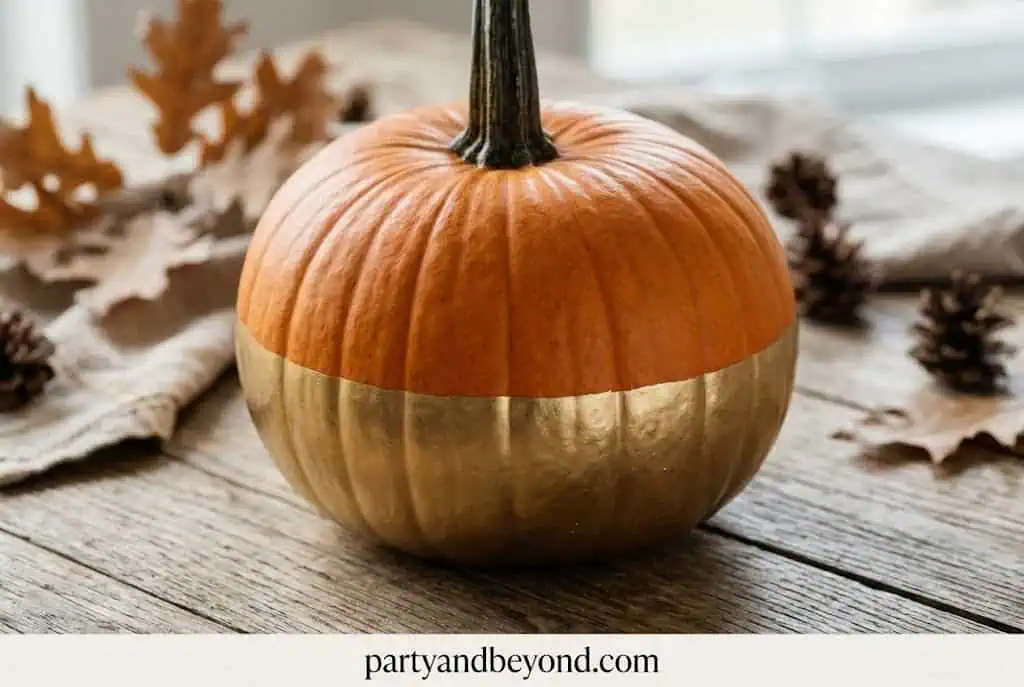
14. Gold-Dipped Base Pumpkin
Leave your pumpkin its natural orange, or paint it first in matte rust for a more sophisticated base. Pour a small amount of gold metallic craft paint into a shallow dish and dip just the bottom 2 inches of the gold dipped base pumpkin into it, holding steady for 10 seconds. Lift slowly and set stem-side down on parchment paper to dry. The gold base creates an elevated, jewelry-like effect — the pumpkin looks like it was sent somewhere to be gilded. Use a craft brush to smooth any drips while still wet. This is the idea I recommend to anyone who says “I don’t have time for crafting” because it genuinely takes 15 minutes and produces something that looks intentional and considered. Total cost: $5 gold metallic paint. Time: 15 minutes active. Difficulty: Easy. Best for: quick elegant setups, gift table styling, holiday mantle displays.
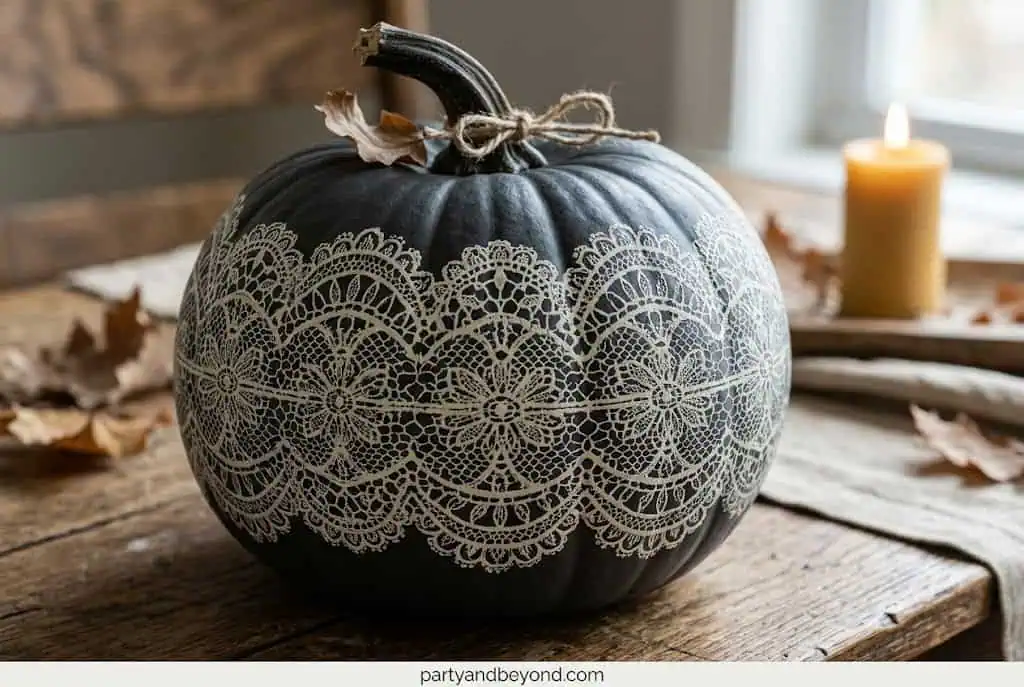
15. Lace Stencil Pumpkin
Pick up a lace doily from Dollar Tree for $1.25 or cut a section from an old lace curtain. Press the lace firmly and flat against the surface of a pumpkin painted in deep navy or dark plum — the darker the base, the more dramatic the reveal. Using a foam sponge brush, dab white chalk paint over the lace with a straight up-and-down pressing motion rather than sweeping strokes, which would push paint underneath the lace pattern. Carefully peel the lace away while paint is still wet to reveal the intricate white pattern transferred to the dark surface beneath. The pattern looks impossibly detailed for the effort involved. This technique works best on smoother pumpkin surfaces rather than deeply ribbed varieties. Total cost: $3–$5 total. Time: 30 minutes. Difficulty: Easy. Best for: feminine fall displays, bridal shower decor in September or October, elegant Halloween party tables.
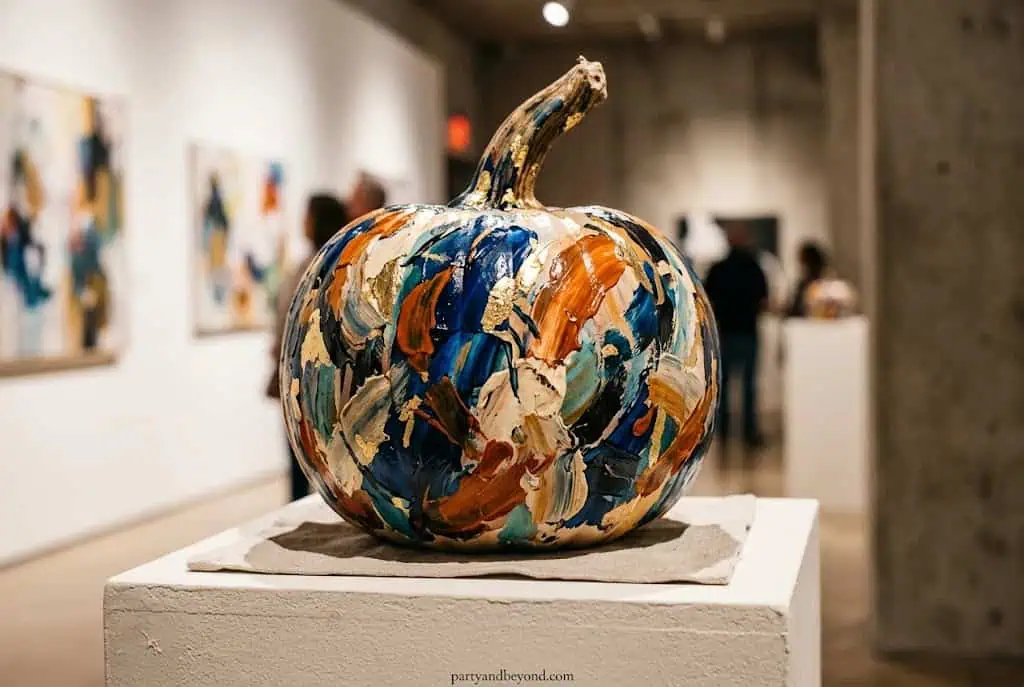
16. Abstract Brushstroke Pumpkin
This is the design I recommend most to people who say they cannot paint. Because this technique is exactly where not being able to paint is an advantage. Load a wide, flat brush with dusty rose acrylic paint and sweep broad, loose strokes across a cream base coat — do not try to cover everything, and do not correct your strokes. Let the base show through in generous gaps. While the rose is still slightly wet, add a few strokes of warm white and blend lightly at the edges where the colors meet. The result looks like abstract fine art, the kind of thing that hangs in a minimalist gallery. Deliberately imperfect is the entire point. Total cost: $4–$6. Time: 45 minutes. Difficulty: Medium. Best for: art-forward home styles, styled bookshelves, creative fall displays where you want something no one else has.
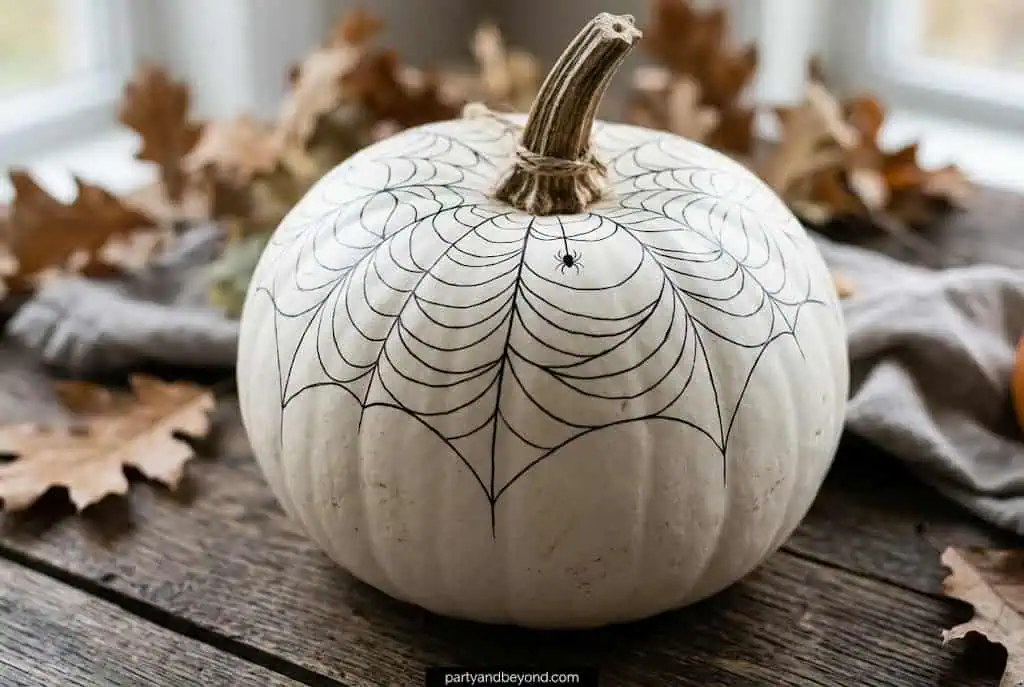
17. Spider Web Linework Pumpkin
This elevates the classic Halloween spider web from kitschy to genuinely sophisticated through exactly one change: making the lines thin. Paint your pumpkin in solid white or ivory. Once dry, use a fine black paint pen or thin brush to draw delicate spider web lines starting from a center point near the top of the pumpkin and radiating outward. Connect them with careful curved arcs at even intervals, working from the center outward in rings. The restraint is everything here — a thick, chunky web looks like clip art. A fine, careful web drawn with a steady hand looks like lacework, and it completely reframes the familiar motif. Total cost: $5 ($3 paint pen + $2 white paint). Time: 35 minutes. Difficulty: Easy. Best for: minimalist Halloween aesthetics, black-and-white fall palettes, those who love Halloween but reject the kitschy approach.
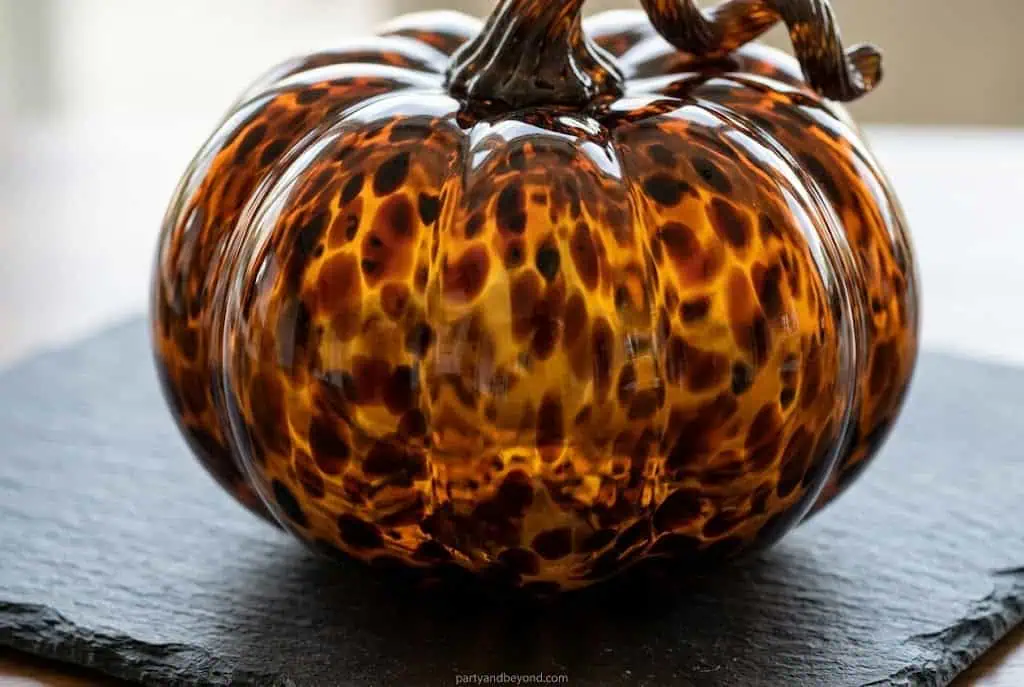
18. Tortoiseshell Pattern Pumpkin
Tortoiseshell is having a genuine moment across home decor in 2026, and it translates to pumpkins better than you might expect. Start with a warm amber base coat. While still slightly tacky, dab irregular patches of dark brown and burnt sienna using a flat brush — let the patches vary in size and overlap slightly at edges so they blend naturally into the base. Then add thin, quick streaks of black through some of the darker patches while everything is still wet. The key is irregularity in every element. Seal with a gloss varnish to mimic the shine of genuine tortoiseshell and the whole thing reads as an expensive decorative object rather than a painted pumpkin. Total cost: $5–$7. Time: 1 hour. Difficulty: Medium. Best for: maximalist fall displays, jewel-tone palettes, kitchen and dining room styling.
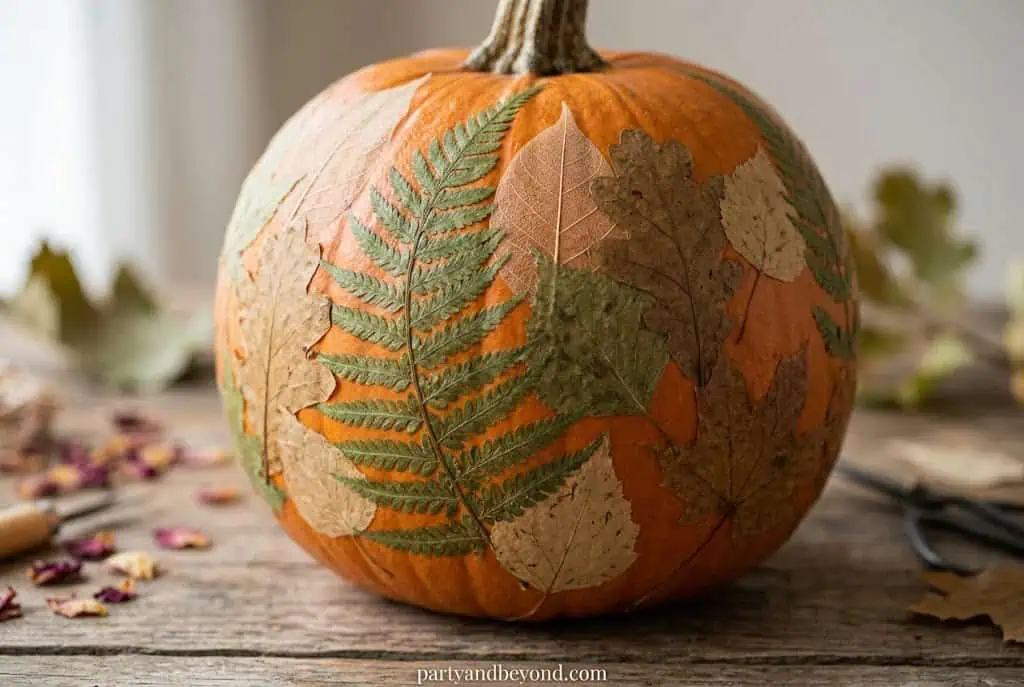
19. Pressed Fern and Leaf Decoupage Pumpkin
Walk outside and collect a handful of ferns, maple leaves, or any flat leaf with interesting shape and strong vein structure. Press them between the pages of heavy books for 24 hours, or use them fresh directly if you want softer, slightly translucent edges after the Mod Podge dries. Paint your pumpkin white or cream first. Brush a thin coat of Mod Podge onto the area where you want a leaf, press the leaf flat onto the pumpkin, smooth out any air bubbles with your finger, and brush another thin coat of Mod Podge on top to seal and flatten the edges. Repeat across the surface. The result is a nature-print pumpkin that costs essentially nothing and looks collected and intentional. Total cost: $4 (Mod Podge only — leaves are free). Time: 20 minutes active, 24 hours for pressing. Difficulty: Easy. Best for: cottagecore fall decor, nature-inspired interiors, sustainable crafting.
💡 Pro Tip: Spray a light coat of clear matte sealer over the finished decoupage pumpkin once dry. This prevents leaf edges from peeling upward as the Mod Podge fully cures, which can happen in the first few days after application.
20. Houndstooth Pattern Pumpkin
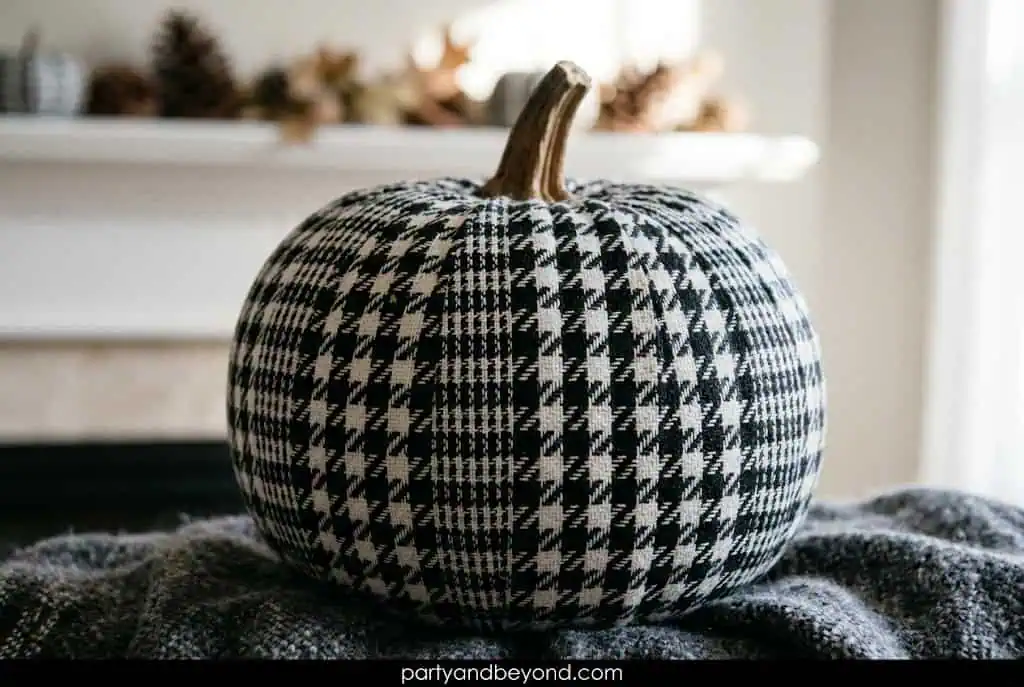
This is the most time-intensive design on the list, and also the one I get the most messages about from people who attempted it. Here is the honest version. Apply a cream base coat. Cut painter’s tape into equal-width diagonal strips and small squares and mask off a houndstooth grid pattern across the pumpkin — work in sections around the circumference rather than trying to plan the whole thing at once. Paint exposed sections flat black. Peel tape slowly while paint is still slightly flexible, not fully hardened. Repeat the masking-and-painting process around the full pumpkin. The pattern looks like a designer fabric stretched across the pumpkin’s surface. Genuinely worth the two hours. Total cost: $7 (tape + paint). Time: 2 hours. Difficulty: Advanced. Best for: fashion-forward fall displays, anyone with patience and attention to detail, statements pieces for a styled entryway.
21. Deep Burgundy with Cream Peony Silhouettes
Paint your pumpkin in deep, moody burgundy — almost wine-dark, closer to merlot than bright red. Let it dry fully. Using a medium round brush and cream acrylic paint, paint simple peony silhouettes in clusters across the surface: overlapping petal shapes that are impressionistic and full rather than botanically precise. Leave generous dark space between the blooms — the negative space is as important as the flowers. The contrast between rich burgundy and soft cream reads as quietly romantic and genuinely sophisticated. Total cost: $5–$7. Time: 1 hour. Difficulty: Medium. Best for: fall wedding decor, romantic dinner party centerpieces, Thanksgiving tablescapes with a sophisticated mood.
22. Copper Metallic Pumpkin — Complete and Singular
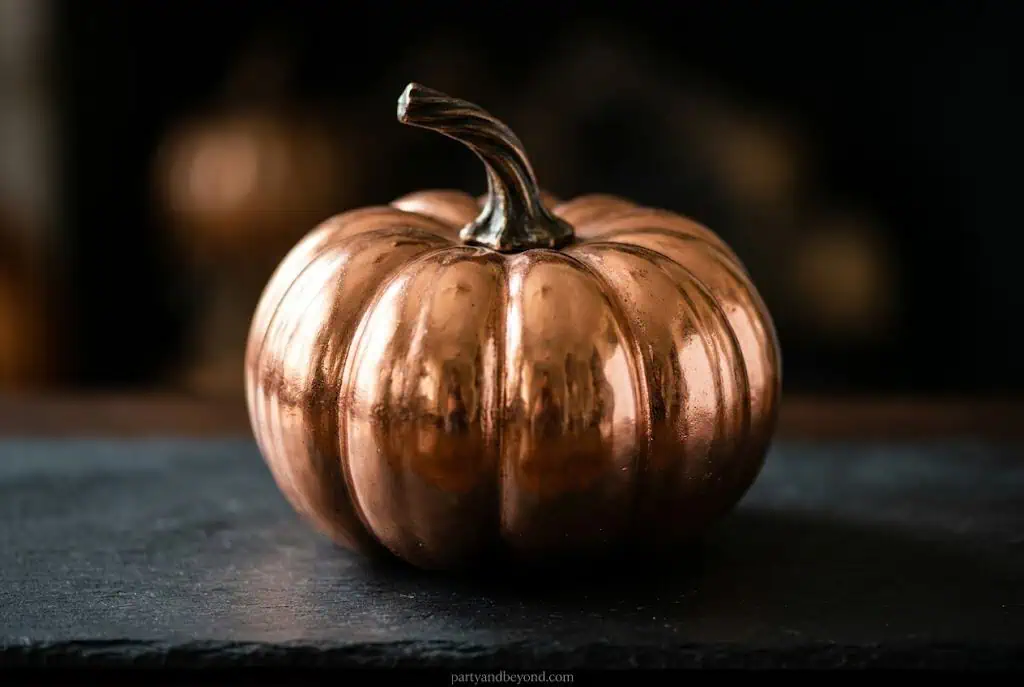
Sometimes the most elegant thing you can do is the simplest thing. Apply two coats of copper metallic craft paint to your pumpkin and stop there. No pattern, no detail work, no layering. Just copper. Set it on a rustic wooden surface or a black slate tile and let the reflective surface do the work — it catches candlelight and lantern glow in a way that flat paint never does. This is the pumpkin that makes a fall mantle look intentionally designed in 15 minutes. Total cost: $5–$6 for metallic craft paint. Time: 15 minutes active. Difficulty: Easy. Best for: minimalist fall displays, metallic-accent interior schemes, last-minute elegant setups when time is genuinely short.
23. Art Deco Gold Linework Pumpkin
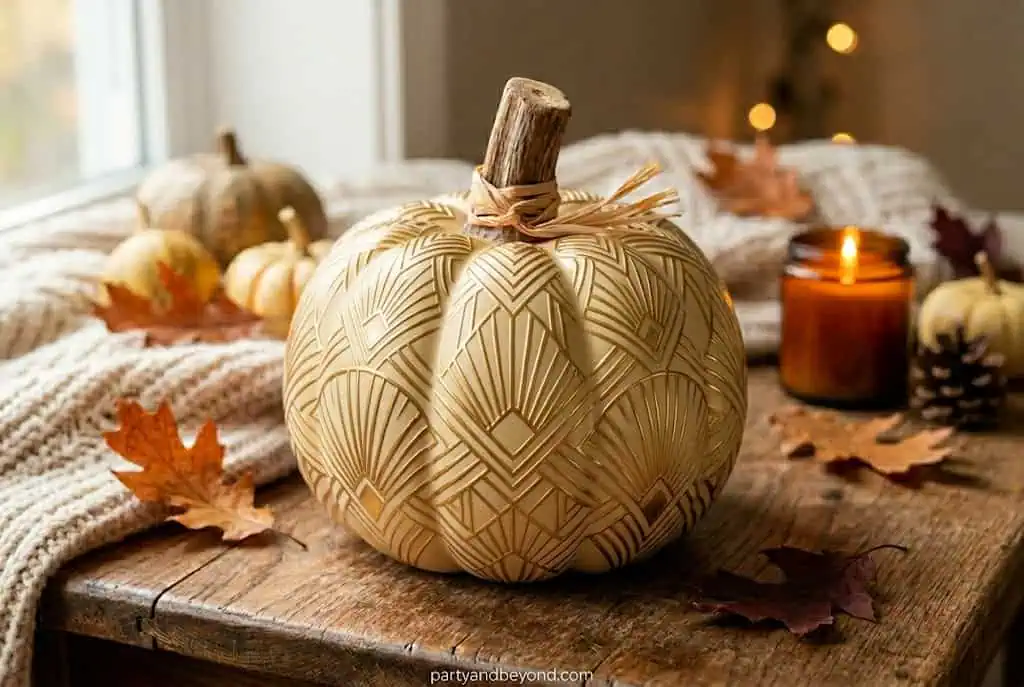
Paint your pumpkin solid matte black and let it cure overnight. Using a gold paint pen — Molotow chrome gold or a Posca metallic both work well — draw geometric Art Deco patterns across the surface: sunburst lines radiating from a center point, stepped chevrons, fan-shaped formations, thin parallel lines. Do not try to cover the entire pumpkin — concentrate the pattern on the lower third or in a band across the widest equator of the pumpkin, leaving negative black space. The result looks like something from a Gatsby-era accessory collection. Total cost: $6 ($3 paint pen + $3 spray paint). Time: 1 hour. Difficulty: Medium. Best for: Great Gatsby themes, Art Deco interiors, sophisticated Halloween parties, fall dinner parties with a glamorous dress code.
24. Dried Flower Decoupage Pumpkin
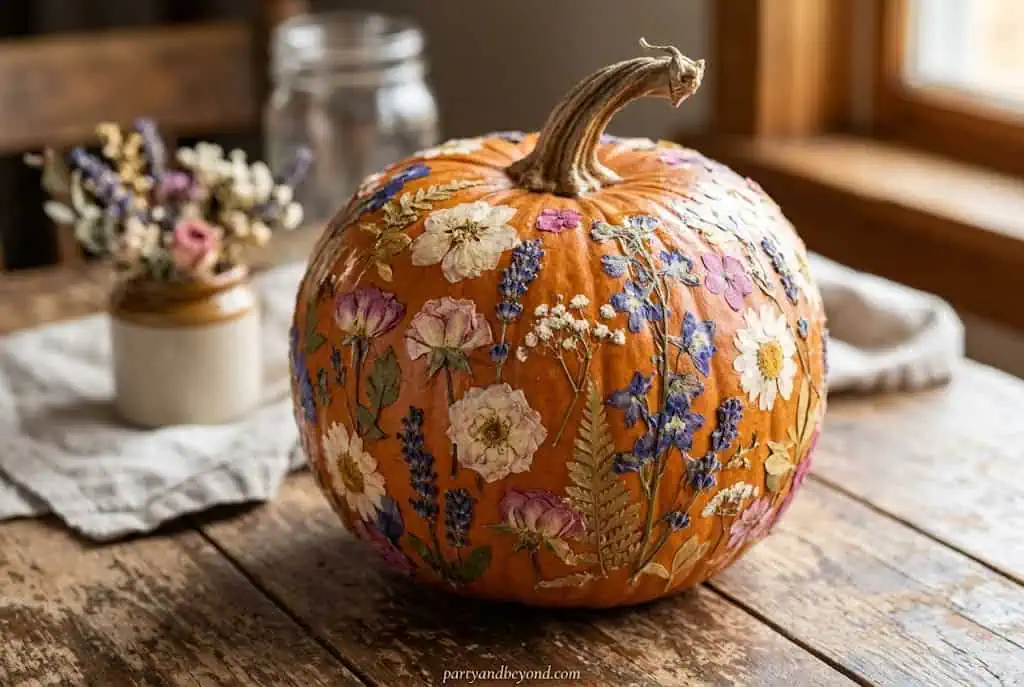
Purchase a small pack of pressed dried flowers look for variety packs that include lavender buds, small daisies, and pansies, which press flat and adhere cleanly to curved surfaces. Lay out your composition on the pumpkin before you apply any Mod Podge so you can plan spacing. Apply flowers one at a time using Mod Podge, pressing each gently flat and sealing with a top coat immediately. Dried florals give this design a vintage, antique botanical cabinet feel that sits in genuinely different territory from any other pumpkin on a fall display. Total cost: $8–$12 ($5–$8 for pressed flower pack + $4 Mod Podge). Time: 30 minutes. Difficulty: Easy. Best for: cottagecore and vintage fall aesthetics, elegant fall baby showers, bridal shower decor, hostess gifts.
25. French Script Pumpkin
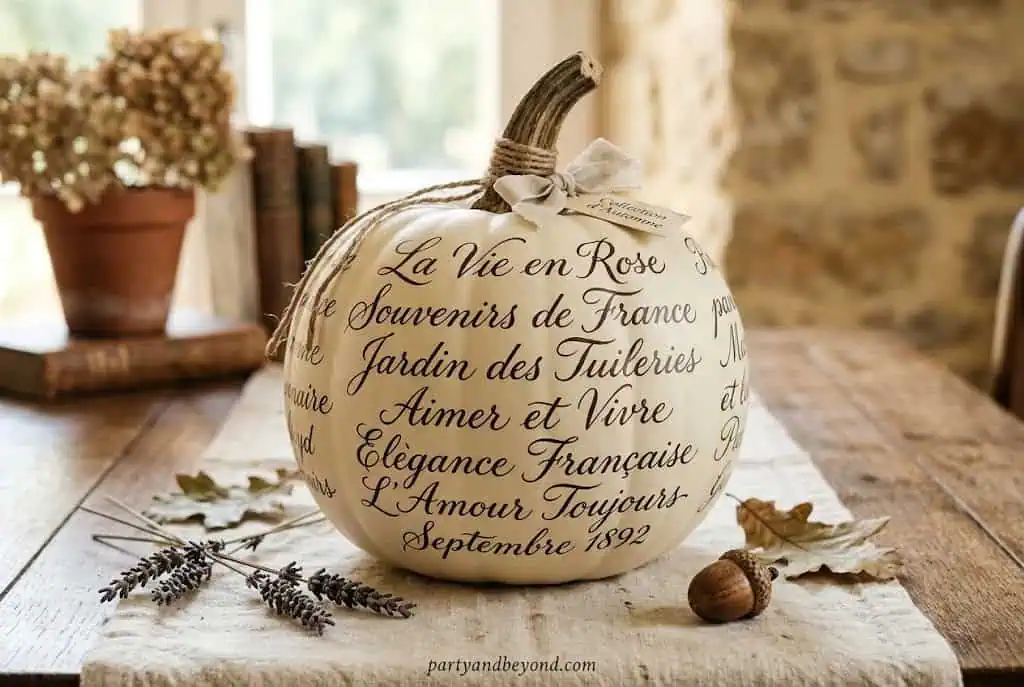
Paint your pumpkin in warm ivory or aged cream chalk paint. Using a chalk pencil, lightly sketch out your chosen text in large, flowing script across the widest surface of the pumpkin — adjust the placement until it feels balanced before committing to paint. Fill in the script with a fine brush and deep charcoal gray acrylic, keeping letterforms loose and calligraphic. French words work beautifully here: “automne” for autumn, “recolte” for harvest, or “citrouille” for pumpkin itself. A short quote in cursive across a larger pumpkin is equally striking. The European typographic sensibility makes this feel imported rather than crafted. Total cost: $5. Time: 30 minutes. Difficulty: Easy. Best for: French country and European farmhouse interiors, romantic fall aesthetics, fall wedding table displays.
26. Poison Apple Dark Fairy Tale Pumpkin
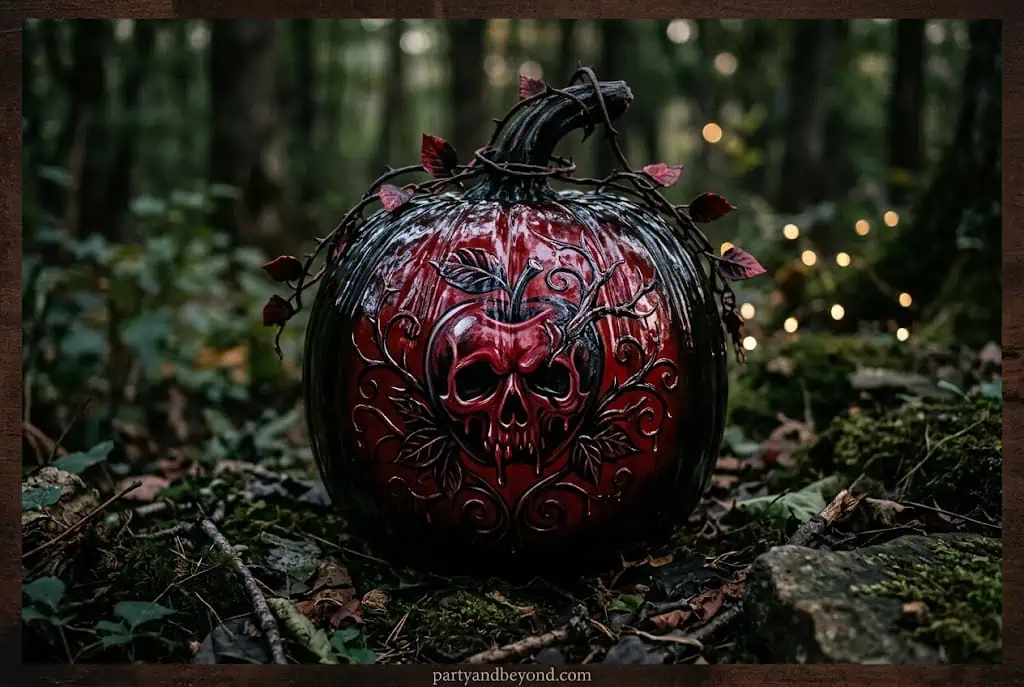
Start with a solid matte black base, fully dry. Using high-gloss red paint — specifically glossy, not matte — paint the front-facing third of the pumpkin surface in deep glossy red, blending the transition to matte black at the edges. The contrast between the glossy red and matte black creates an apple-like visual effect, and the difference in finish texture reads as intentional and designed. Add a simple leaf silhouette near the stem in dark green to complete the apple reference. This pumpkin is conceptual rather than purely decorative, and placed on a dark shelf or Halloween party mantle it reads as genuinely artistic. Total cost: $6. Time: 45 minutes. Difficulty: Medium. Best for: dark fairy tale party themes, literary Halloween aesthetics, adults who want Halloween decor that looks nothing like Halloween decor.
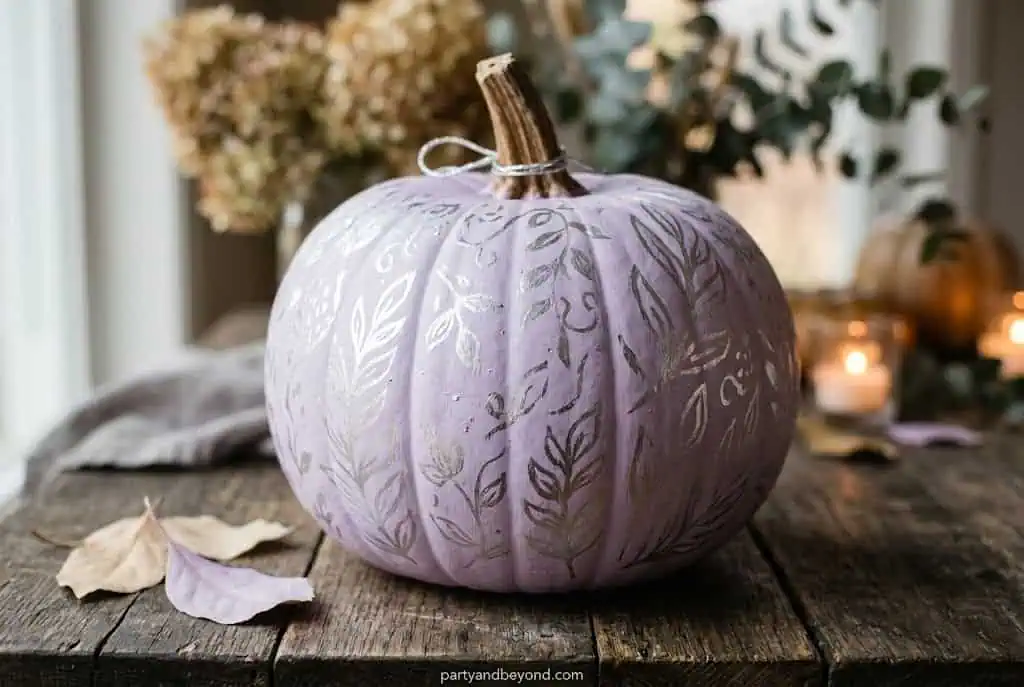
27. Soft Lavender and Silver Pumpkin
Lavender is an unexpected fall color, and that unexpectedness is the whole point. Paint your pumpkin in a soft, dusty lavender chalk paint — not bright or saturated purple, but the muted, almost gray-toned version that sits between purple and blue on a slightly desaturated spectrum. Once dry, dry-brush silver metallic paint lightly over the raised ridges of the pumpkin with a nearly-dry flat brush, barely grazing the surface so the silver only catches on the highest points.
The silver picks up exactly where natural light would hit the pumpkin’s ridges. Pair with white candles and a small dried lavender bundle for a complete, cohesive vignette. Total cost: $7 (chalk paint + metallic paint). Time: 25 minutes. Difficulty: Easy. Best for: non-traditional Halloween palettes, white and silver interior schemes, fall bedroom or bathroom styling.
28. Dark Academia Plaid Pumpkin
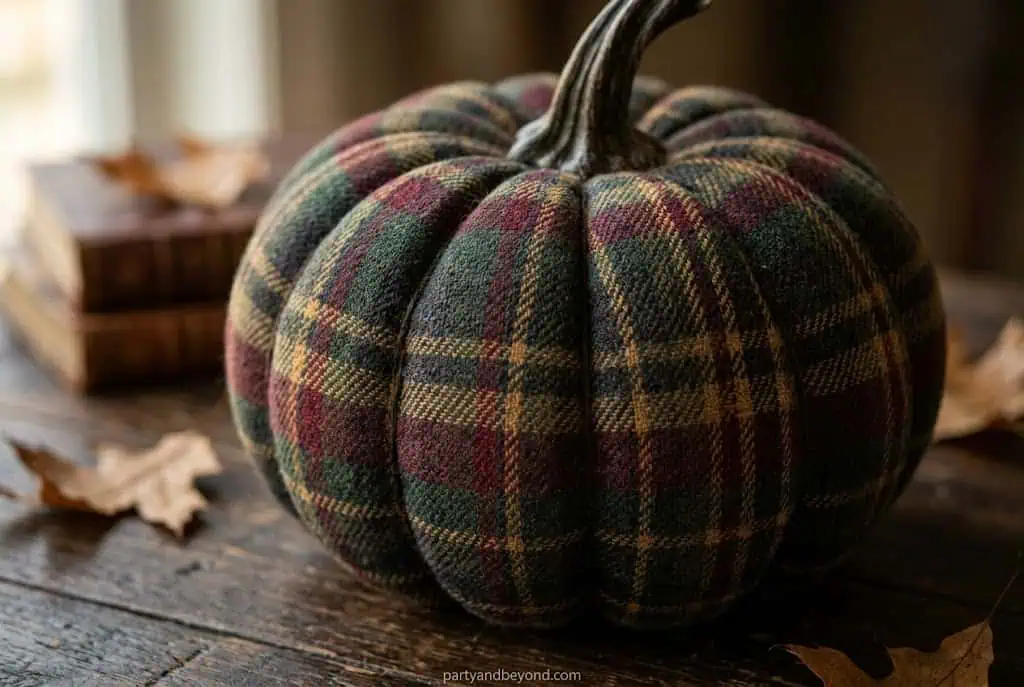
This is the tape project that requires the most planning but produces the most striking result. Apply a camel or warm tan base coat first. Using painter’s tape, create a plaid grid: wider bands running in one direction, narrower crossing bands in the perpendicular direction. Paint the wide bands in deep forest green, the narrower crossing bands in burgundy, and where bands intersect, blend the two colors slightly while still wet to create a natural overlap tone. Peel tape slowly while paint is flexible.
The result is a rich, collegiate plaid that looks like it was lifted directly from a fall wardrobe collection and applied to a pumpkin. Total cost: $8 (three small paint bottles + painter’s tape). Time: 2 hours. Difficulty: Advanced. Best for: dark academia home aesthetics, library or reading room fall styling, fall spaces with a bookish, literary mood.
29. Mushroom and Cottagecore Pumpkin
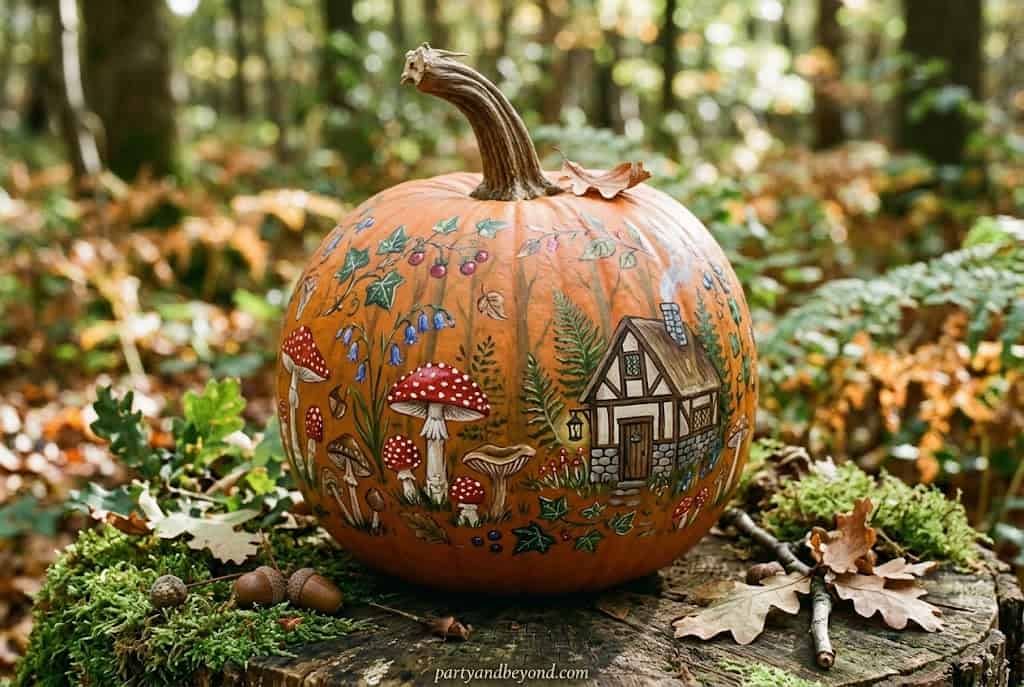
Paint your pumpkin in warm cream. Using a medium round brush and reference from a simple mushroom photograph on your phone, paint small clusters of mushrooms across the lower portion of the pumpkin surface — fat-capped, short-stemmed, in earthy browns and warm whites with a hint of clay. Add thin curved lines suggesting grass at the base of each cluster. Keep the painting style loose and illustrative rather than photorealistic — the slightly storybook quality is exactly what makes this design work. This is one of the fastest-growing fall decorating aesthetics on Pinterest in 2026, according to Pinterest Predicts data, and it translates directly and beautifully into pumpkin painting. Total cost: $5. Time: 1 hour. Difficulty: Medium. Best for: cottagecore fall spaces, kitchen and pantry shelf styling, nature-inspired interiors.
💡 Pro Tip: Watch one 5-minute YouTube tutorial on painting simple mushroom shapes before you start. It takes zero time and gives you a visual vocabulary for the shapes — you will paint faster and more confidently with that reference in your head.
30. Alcohol Ink Abstract Pumpkin
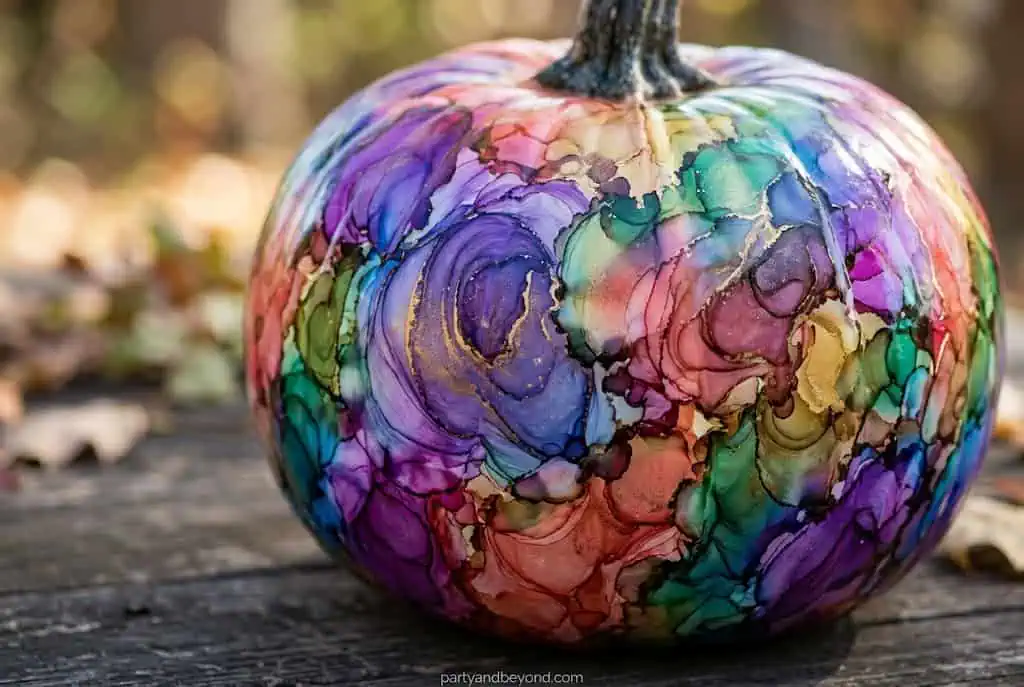
Alcohol inks create the most genuinely unpredictable, beautiful abstract results of anything on this list, and that unpredictability is what makes each one unique. Apply the inks directly to a white foam pumpkin — real pumpkins absorb the ink too quickly for the technique to work well. Drop three or four colors close together on the surface — burnt orange, deep plum, warm gold — then blow gently through a straw or use a heat gun on its lowest setting to spread the colors outward and into each other.
Every pumpkin made this way is completely one-of-a-kind. Total cost: $12–$15 for a small alcohol ink set. Time: 45 minutes. Difficulty: Medium. Best for: artistic fall displays, anyone who loves the process of making as much as the result, statement centerpieces for a styled dining table.
31. Olive Green and Rust Harvest Pumpkin
This specific color combination is the most distinctly autumn palette on the entire list. Paint the top half of your pumpkin in muted olive green and the bottom half in warm rust orange, blending lightly at the center meeting point with a damp sponge while both colors are still wet. Once dry, add simple cross-hatch line details across just the olive green section using a fine brush and cream paint — loose, slightly irregular grid lines that suggest texture without complexity. The result is a harvest-season pumpkin that earns its place on a Thanksgiving table. Total cost: $4–$6. Time: 40 minutes. Difficulty: Easy. Best for: harvest and Thanksgiving displays, outdoor fall decor, rustic farmhouse aesthetic.
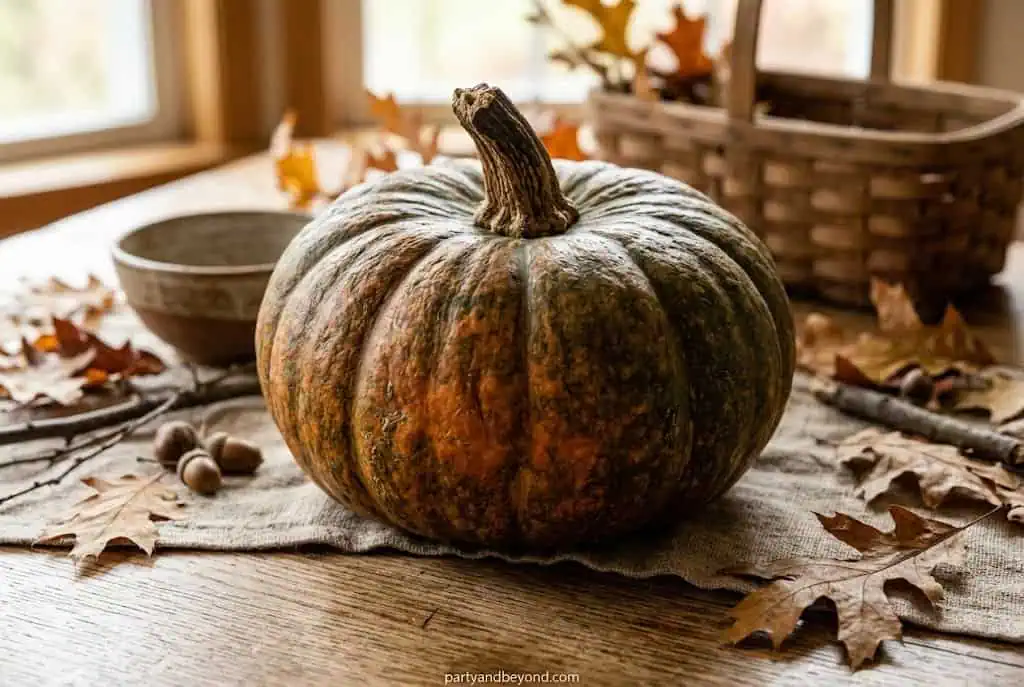
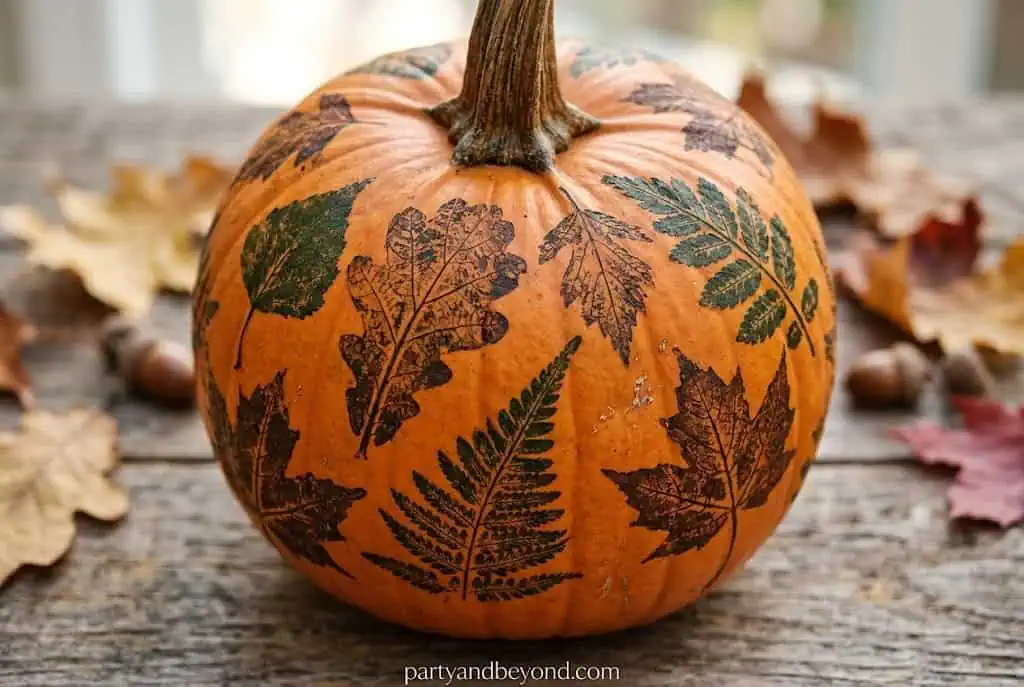
32. Real Leaf Stamp Pumpkin
Collect leaves with strong vein structure from your yard — maple leaves are ideal, oak works excellently, and fern fronds create an unusual and beautiful result. Apply a thin, even coat of acrylic paint directly to the leaf’s underside using a foam brush (the underside carries the most pronounced vein detail).
Press the painted leaf firmly onto your white-base-coated pumpkin, hold for 10 full seconds, then peel slowly and steadily from one edge. The leaf prints in remarkable detail. Repeat with different leaf shapes and one or two complementary paint colors for a layered botanical effect. This technique is essentially free if you already have Mod Podge and paint, and it looks anything but budget.
Total cost: $0–$4 (leaves are free). Time: 20 minutes. Difficulty: Easy. Best for: nature-loving hosts, craft activities with older kids that still produce an elegant result, fall front porch displays.
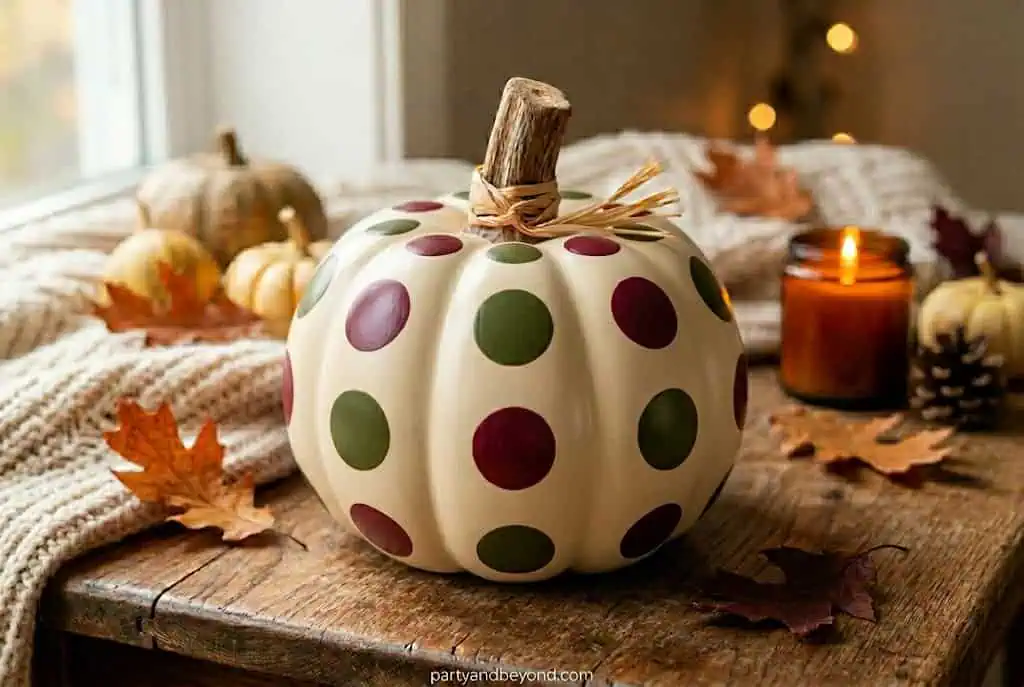
33. Whimsical Oversized Polka Dot Pumpkin
Paint your pumpkin solid matte charcoal or deep slate gray first. Once completely dry, dip a round cosmetic sponge into cream chalk paint and press it straight down onto the surface — do not twist or drag, just press and lift. Repeat across the pumpkin surface in an evenly spaced pattern, letting each impression dry slightly before pressing adjacent dots. The oversized, deliberately soft-edged dots read as graphic and playful without being childish, particularly against the dark base. Display this pumpkin alongside black candlesticks or a dark lantern for a cohesive fall Halloween display that does not look assembled from a seasonal bin.
Total cost: $4. Time: 20 minutes. Difficulty: Easy. Best for: graphic design-adjacent home aesthetics, bold Halloween displays, maximalist fall palettes.
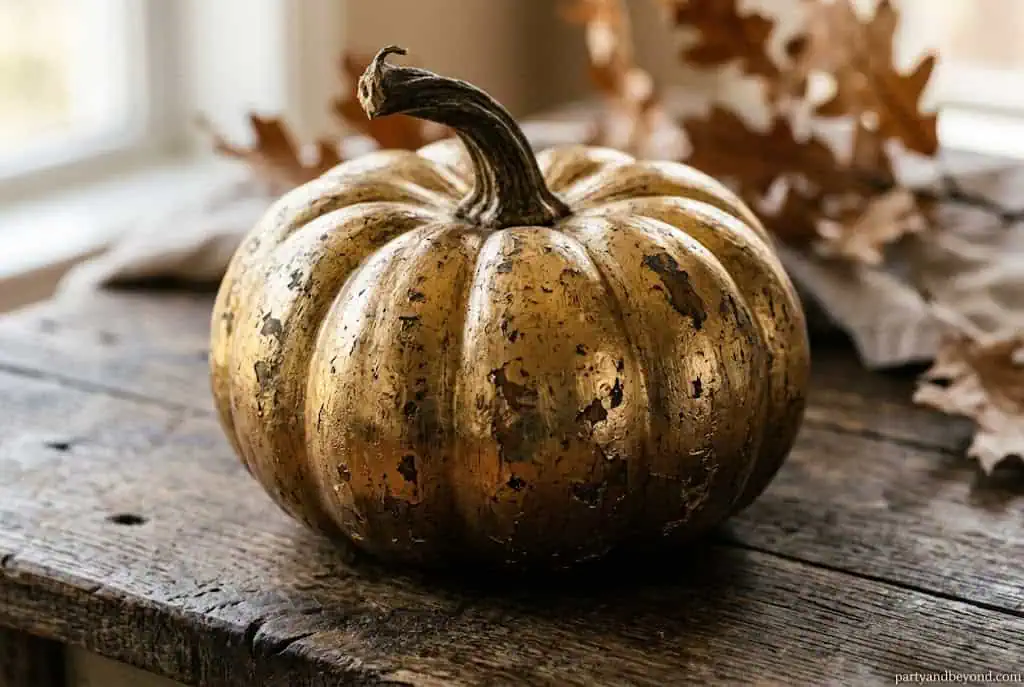
34. Distressed Antique Gold Pumpkin
This technique is how you make a pumpkin look like it has been in a family for decades. Apply a solid black base coat first and let it dry completely. Brush a coat of dark walnut chalk paint over the black and let that layer dry as well. Then dry-brush gold metallic paint over both layers using a stiff brush loaded with just a small amount of paint — drag the brush across the back of your hand first to remove most of the paint before touching the pumpkin. The brush should catch only the highest raised points of the surface. The black shows in the crevices, the walnut in the mid-tones, and the gold only on the peaks. The layered result looks genuinely aged and patinated.
Total cost: $8–$10 for three small paint bottles. Time: 1 hour. Difficulty: Medium. Best for: antique and vintage-inspired fall displays, mantle styling, thoughtful hostess gifts.
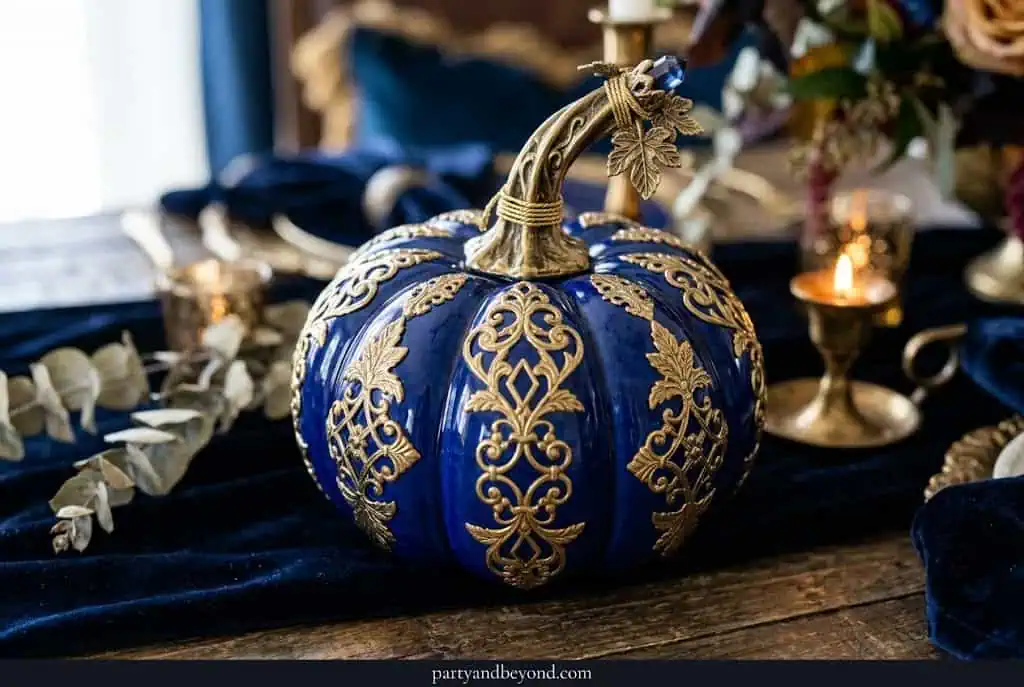
35. Cobalt Blue and Brass Pumpkin
Jewel tones are dramatically underused in fall decor, and cobalt blue in particular looks completely striking in a season dominated by orange, red, and brown. Apply two saturated coats of rich cobalt blue acrylic — the color should look almost gem-like and fully opaque. Once dry, apply brass metallic wax lightly over the stem and in a thin ring around the pumpkin’s widest equator using your fingertip. The combination of cobalt and brass is one of the most visually sophisticated color pairings you can put together for fall, and it photographs exceptionally well in both natural and candlelit settings.
Total cost: $8 ($5 paint + $3–$5 metallic wax). Time: 25 minutes. Difficulty: Easy. Best for: maximalist fall palettes, eclectic and collected home aesthetics, Diwali-adjacent fall celebrations.
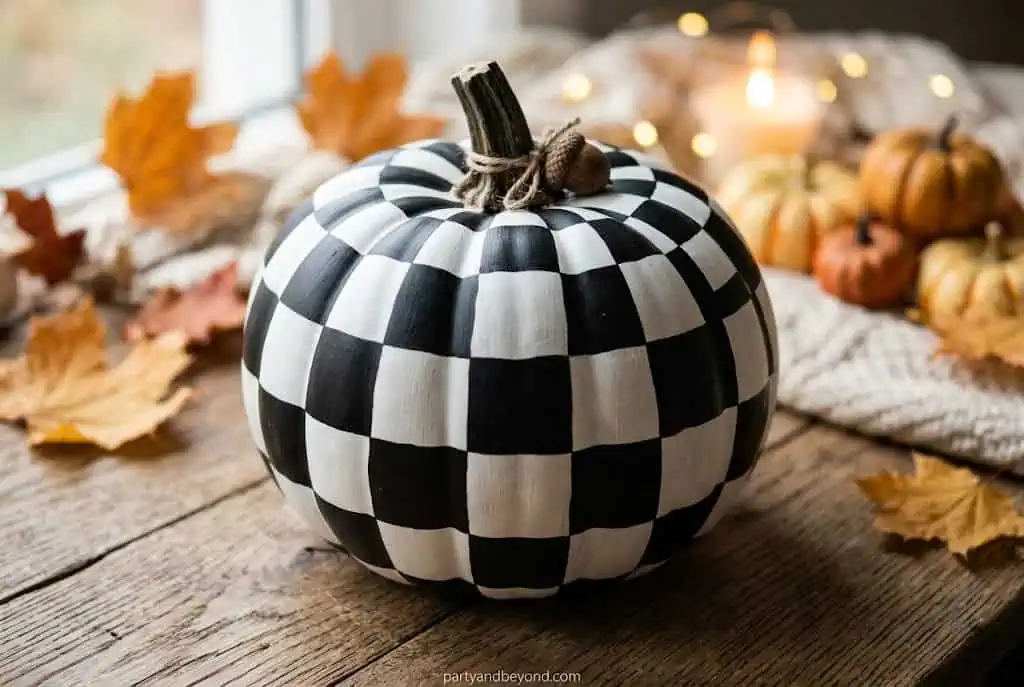
36. Black and White Checkerboard Pumpkin
Apply a white base coat. Using equal-width strips of painter’s tape, create a checkerboard grid across the pumpkin’s surface — work methodically in rows from top to bottom rather than trying to plan the entire grid at once. Paint exposed squares flat black. Peel tape while paint is still slightly flexible, before it fully hardens. The checkerboard reads beautifully on rounder, smoother pumpkins where tape lies flat against the surface. On deeply ribbed varieties, the pattern becomes more irregular and abstract, which can be equally interesting and arguably more organic.
Total cost: $5 (tape + paint). Time: 1.5 hours. Difficulty: Medium. Best for: graphic design lovers, modern and contemporary home aesthetics, black-and-white fall palettes.
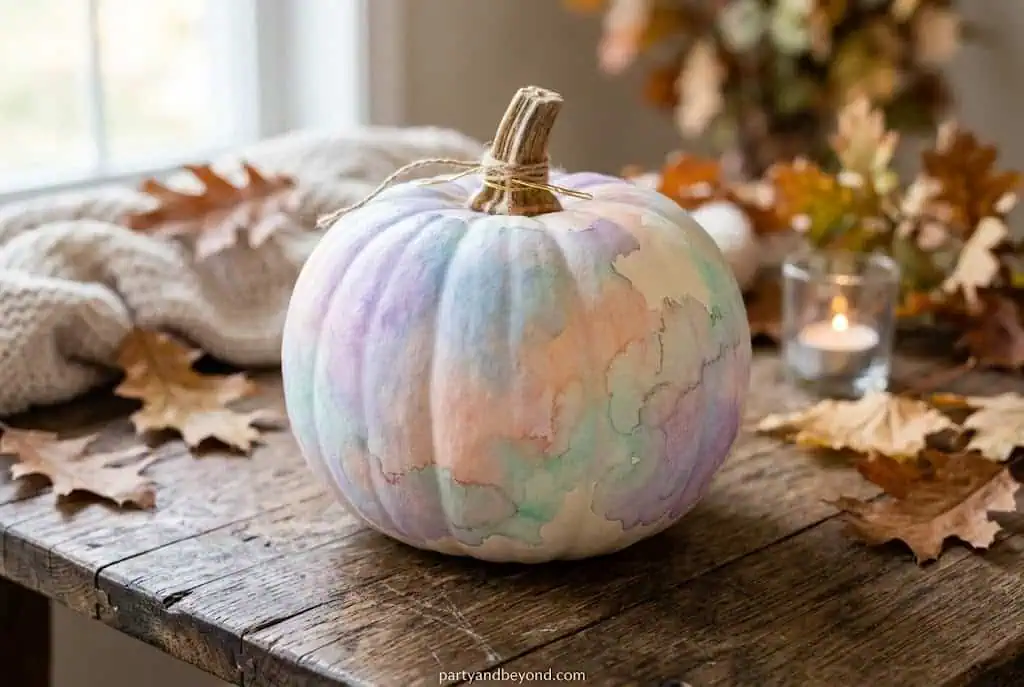
37. Watercolor Wash Pumpkin
Mix acrylic paint with a generous amount of water — you are aiming for very thin, almost transparent tinted water rather than opaque paint. Work with three colors: warm amber, dusty rose, and muted sage. Apply loose washes in overlapping layers onto a white pumpkin surface, letting each layer dry before adding the next so colors do not go muddy. Leave areas of white showing through the washes.
The transparency of each coat builds slowly into something luminous and soft that genuinely resembles watercolor on paper, which is not a look most people associate with pumpkin painting. Total cost: $3–$5 for a few small craft acrylics. Time: 30 minutes. Difficulty: Easy. Best for: delicate fall aesthetics, bedroom and bathroom styling, romantic and soft-toned home palettes.
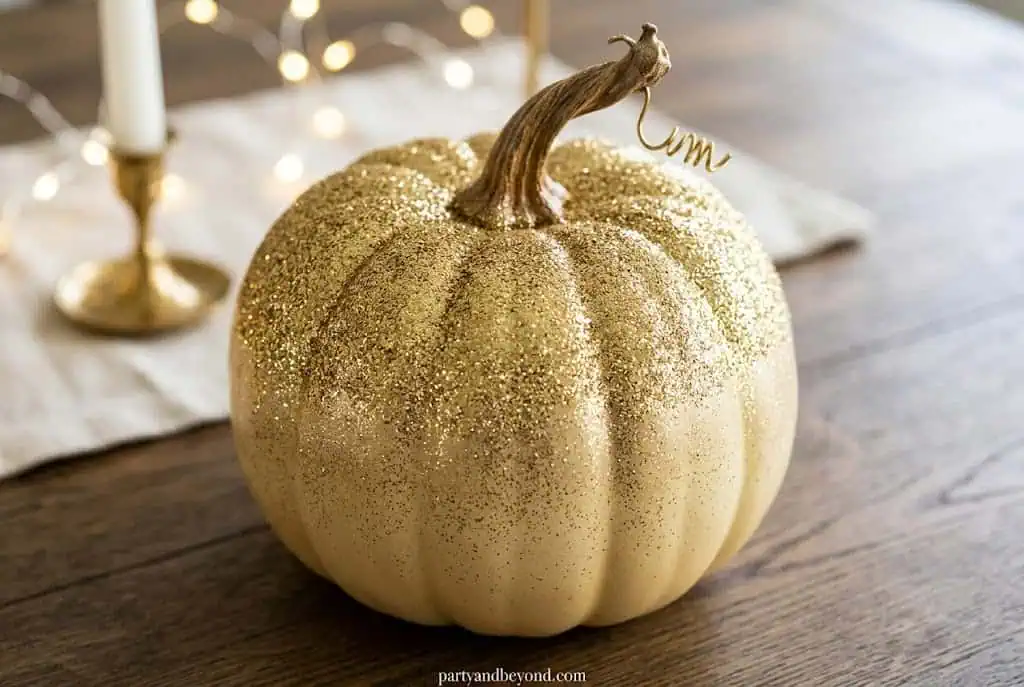
38. Glam Glitter Ombré Pumpkin
Here is the one genuine exception to the restraint rule on this list — done correctly, glitter can be chic. The key word is confined. Apply white chalk paint to your pumpkin and let it dry. While still very slightly tacky at the base, press chunky gold or rose gold glitter firmly into the bottom third of the pumpkin surface, letting the glitter fade naturally as you move upward — do not try to create a sharp line. The top two-thirds remain clean matte white. Seal with a coat of hairspray to fix the glitter in place. The glitter-dipped look reads as intentional and glamorous. A pumpkin entirely covered in glitter reads as unedited. That distinction is everything.
Total cost: $6–$8 ($3 glitter + $3–$5 sealant). Time: 20 minutes. Difficulty: Easy. Best for: glamour-leaning fall displays, gold and white interior schemes, last-minute elegant setups.
39. Editorial Stacked Monochrome Vignette — Three Pumpkins, One Decision
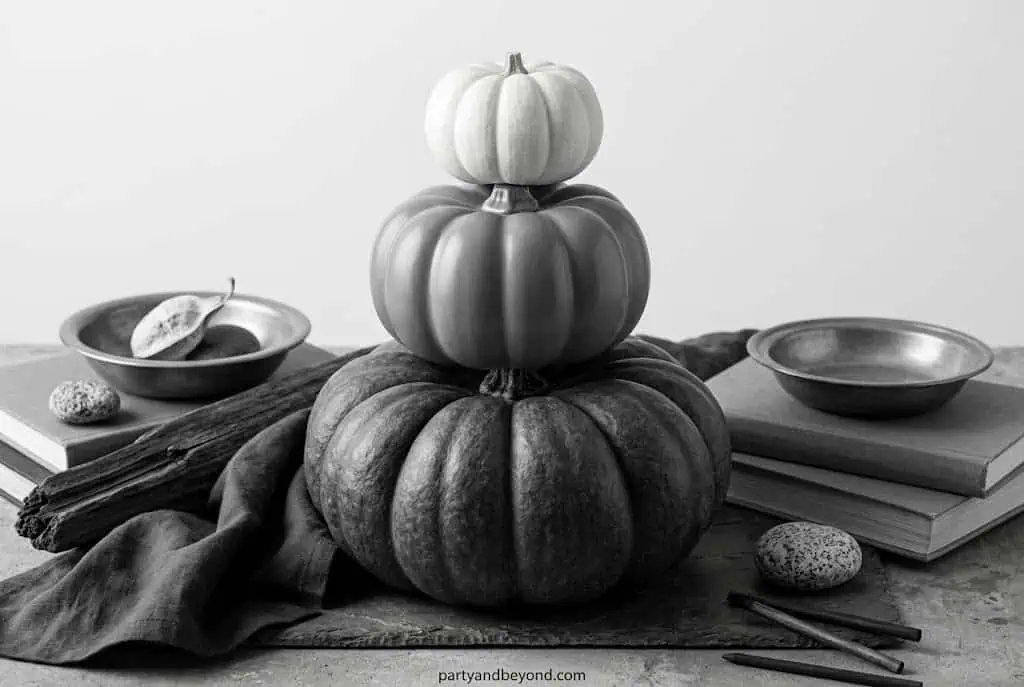
This last idea is less a single pumpkin technique and more a complete display philosophy, and it is the most impactful thing on the entire list. Buy three pumpkins in genuinely different sizes — small, medium, and large. Paint all three in the same color family: three slightly different shades of sage green, or three progressively darker steps along the same cream-to-terracotta range. The tones do not need to match exactly — they need to clearly belong to each other.
Display them together on your front steps, porch surface, or dining table. The monochromatic grouping looks more considered and more expensive than any individual pumpkin technique because it demonstrates a design decision: the commitment to cohesion over accumulation. Add dried pampas grass or eucalyptus branches alongside and the display reads as genuinely gallery-level. This is Emma’s signature move, and it is the reason her front porch stops people mid-conversation every October.
Total cost: $15–$25 total for three pumpkins and paint. Time: 1 hour for all three. Difficulty: Easy. Best for: front porch displays, fall tablescapes, social media content, anyone who wants maximum visual impact through minimum complexity.
Comparison Table: Budget vs. Splurge Pumpkin Painting Options 2026
| Technique | Budget Cost | Splurge Version | Time | Difficulty | Wow Factor |
|---|---|---|---|---|---|
| All-White Gold Leaf | $10 | $20 (real gold leaf) | 20 min | Easy | 8/10 |
| Marble Nail Polish | $6–$8 | $15 (fluid art medium) | 1 hr | Medium | 10/10 |
| Velvet Flocking | $13 | $20 (premium spray) | 30 min | Easy | 9/10 |
| Botanical Decoupage | $4 | $12 (dried floral pack) | 30 min | Easy | 9/10 |
| Alcohol Ink Abstract | $12 | $25 (full ink set) | 45 min | Medium | 9/10 |
| Art Deco Linework | $6 | $15 (gold leaf pen) | 1 hr | Medium | 10/10 |
| Monochrome Vignette | $15–$25 | $50 (large foam pumpkins) | 1 hr | Easy | 10/10 |
| Leaf Stamp | $0–$4 | $8 (metallic leaf paint) | 20 min | Easy | 9/10 |
Common Pumpkin Painting Mistakes to Avoid
The biggest mistake most hosts make is skipping a white base coat. If you apply any color other than black directly onto a natural orange pumpkin, the orange bleeds through and mudifies your colors within hours. Always start with a white or gray base coat and let it dry completely before your design layer goes on.
The second most common mistake is using too many colors. Nine times out of 10, the pumpkin display that looks cluttered went wrong at the palette planning stage — before a single brush touched the surface. Three colors maximum, usually two plus one metallic accent, is the practical rule.
Third: skipping the sealer. An unsealed painted pumpkin displayed outdoors will show cracking and peeling paint within two weeks of rain and temperature changes. A light coat of Mod Podge or clear matte spray takes three minutes to apply and extends the display life dramatically.
And let me be honest about a mistake I made repeatedly in my earlier years of fall crafting — painting over a deeply ribbed pumpkin with tape techniques without pressing the tape firmly into every crevice first. Paint bleeds into every gap you leave. Firm pressure on tape edges is not optional.
🎉 Quick Summary
✅ Best for: Fall porches, Thanksgiving tables, Halloween party displays, home entry vignettes, mantle styling, gift-giving 💰 Budget range: $3–$25 per pumpkin depending on technique and materials ⏱ Setup time: 15 minutes (gold dip) to 2 hours (houndstooth, plaid, Chinoiserie) 🌟 Top pick: Monochrome Vignette — highest collective impact, easiest decision 📌 Don’t skip: White base coat before any color, and sealer coat after the finished design
People Also Ask
Do you need to seal painted pumpkins? Yes, especially for outdoor displays. Apply a thin coat of Mod Podge (matte or glossy) or clear matte spray paint after your design is fully dry. This prevents peeling, protects against moisture, and extends the life of real pumpkins outdoors by 2–3 weeks. Foam pumpkins sealed with clear spray also resist scratching through the full fall season.
How long do painted pumpkins last outdoors? A real pumpkin properly sealed with polyurethane spray lasts 3–5 weeks outdoors before showing decay. An unsealed painted real pumpkin outdoors typically shows cracking and rot within 2 weeks. Foam pumpkins from Dollar Tree or Michael’s last the entire fall season and beyond — they are the more practical choice for outdoor displays in regions with rain or significant temperature variation.
Can you paint pumpkins without primer? You can, but results will be inconsistent. Chalk paint is the exception — it adheres to most surfaces without primer and gives solid coverage in two coats. For acrylic or spray paint applied directly to a real pumpkin, at minimum apply one coat of white chalk paint as your base to prevent color bleed-through from the natural orange skin.
What is trending in pumpkin decorating for 2026? According to Pinterest Predicts (2026), botanical aesthetics and cottagecore-inspired designs — pressed leaves, eucalyptus paintings, mushroom motifs — are the fastest-growing fall decorating trends. Matte black pumpkins and monochromatic vignettes are consistently strong on interior design-focused platforms. The shift is away from orange-and-black and toward neutral, editorial palettes.
Are foam or real pumpkins better for painting? It depends on your priorities. Real pumpkins have natural surface texture and organic weight that photographs beautifully and feels seasonal. Foam pumpkins from Dollar Tree or Michael’s are better for outdoor longevity, for alcohol ink techniques (which real pumpkins absorb too fast), and for keeping your display intact through both Halloween and Thanksgiving without replacing.
FAQ
Q: What kind of paint works best on pumpkins? A: Chalk paint is the top choice — it adheres without primer, covers in two coats, and dries to a matte finish that reads as expensive. Acrylic craft paint works well for detail work and is available in 3-packs at Dollar Tree for $1.25. Spray paint is ideal for base coats and solid-color designs ($5 a can covers 4–6 pumpkins). Avoid regular latex house paint, which stays tacky on pumpkins and never cures to a clean finish.
Q: How do I get the marble effect on a pumpkin? A: Fill a disposable container with room-temperature water. Drop nail polish in 4–5 colors onto the surface, swirl exactly once gently with a toothpick, then dip your white-painted pumpkin stem-down into the water and lift slowly. The polish adheres in a marble pattern. Use Dollar Tree nail polish at $1.25 per bottle. Practice the swirling motion first — over-swirling creates muddy brown results instead of clean veining.
Q: Should I prime pumpkins before painting? A: A white chalk paint base coat is the most effective alternative to a formal primer. It gives you an even-toned working surface, prevents orange bleed-through from real pumpkins, and improves the adhesion and color accuracy of whatever you apply next. For foam pumpkins, most paints adhere without priming, but a base coat still improves final results.
Q: What size pumpkin works best for detailed designs? A: Medium-sized pumpkins with relatively smooth surfaces work best for tape techniques, linework, and detailed painting. Deep ribs make tape masking difficult to execute cleanly and freehand work more challenging. For beginner designs, a smooth-skinned medium pumpkin around 8–10 inches across gives you the most workable surface area.
Q: Can I use spray paint on pumpkins? A: Yes — spray paint works excellently for base coats and solid-color designs. Use light, even passes from 10–12 inches away and let each coat dry before adding the next. Matte and chalky-finish spray paints are best for elegant aesthetics. Avoid glossy spray as a base coat if you plan to add brush-applied detail work on top — the slick surface causes paint to bead rather than adhere.
Q: How do I make a pumpkin look expensive without spending much? A: Commit to a two or three color palette, choose a matte finish rather than glossy, add one metallic accent in gold or copper, and group pumpkins in odd numbers with varied heights. The monochromatic vignette — three pumpkins in the same color family in different sizes — is the single most effective approach to a display that reads as designed rather than assembled.
Q: How do I keep a painted pumpkin from rotting outdoors? A: Apply two coats of polyurethane spray after your design is complete and fully dry. Bring pumpkins inside during rain when possible. Elevate them off direct ground contact on a wooden board or slate tile to prevent moisture from accumulating underneath. Rubbing petroleum jelly into the cut stem area can also slow the decay process.
Q: What is overrated in pumpkin painting for 2026? A: Full glitter coverage reads as unedited effort rather than elegant intention. Face-painted pumpkins with eyelashes and lips have thoroughly run their course. And the mistake of applying multiple trending techniques to a single pumpkin — marble base with gold drips with glitter stem with stencil overlay — always produces a cluttered result. One technique, committed to and executed cleanly, beats five mediocre ones every time.
Q: Can kids participate in elegant pumpkin painting? A: Yes, with the right technique selection. Leaf stamping, polka dot sponging, watercolor wash, and lace stenciling are all kid-accessible and still produce genuinely nice results. Limit the palette to two colors for the cleanest outcome and set up proper coverage on the work surface. The key is giving older kids a specific, bounded technique rather than open-ended creative freedom.
Q: How many pumpkins should I display together? A: Odd numbers always look more intentional — three or five. Vary heights using small wooden crates, overturned terracotta pots, or stacked books covered with a cloth. A grouping of three pumpkins in coordinating colors and genuinely varied sizes reads as deliberately designed. A grouping of four in identical sizes at the same height reads as accidental.
Q: Do I need expensive supplies for elegant pumpkin painting results? A: Not at all. Dollar Tree chalk paint, $1.25 nail polish, a $1.25 lace doily, free backyard leaves and ferns — many of the most impactful techniques on this list cost under $5. The real investment is in patience and technique, not in materials. Budget matters primarily for foam pumpkins (which extend longevity significantly) and in quality metallic wax for the shiniest finishes.
Q: What is the best pumpkin painting idea for a complete beginner? A: Gold-dipped base pumpkin — 15 minutes, one color, zero artistic skill required, genuinely elegant result. Dip the bottom of your pumpkin into gold metallic paint, hold for 10 seconds, lift, dry, done. It is the design I recommend to anyone who says they are not creative, because it removes creativity from the equation entirely and replaces it with a single decisive action.
Q: How do I add texture to a painted pumpkin? A: Three easy options: velvet flocking spray adds a suede-like surface texture over any base paint; baking soda mixed into chalk paint creates a rough, plaster-like application; dry-brushing with a nearly-dry stiff brush creates streaked, layered depth. All three cost under $10 and require no specialized crafting skills.
Read More:
- 41 Unique Pumpkin Carving Ideas
- 21 Easy Halloween Crafts That Sell Like Crazy
- 17 DIY Halloween Wood Crafts Hot Sellers
- 25 Unique Halloween Makeup Ideas
- 21 Halloween Party Game Ideas for Adults