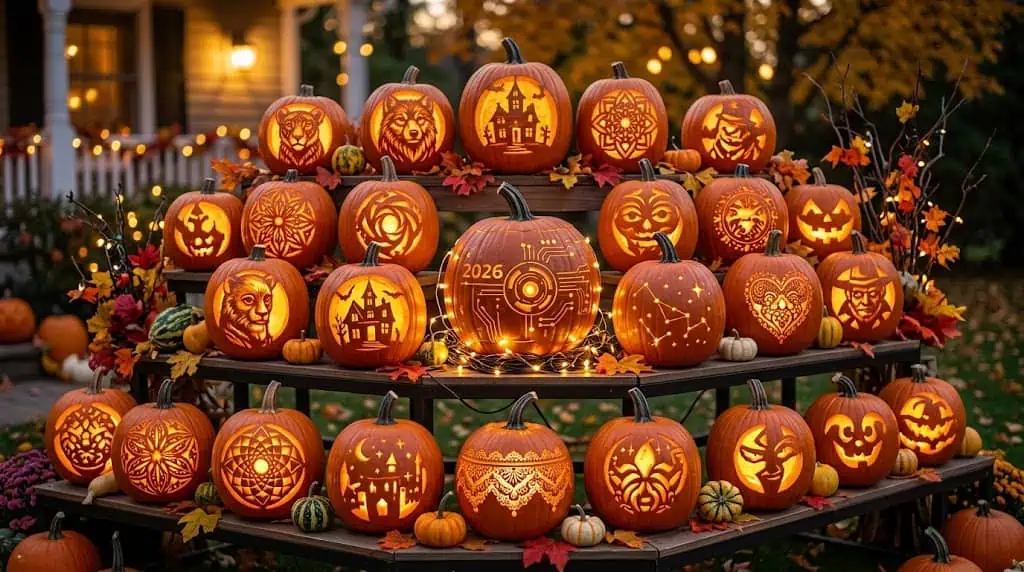
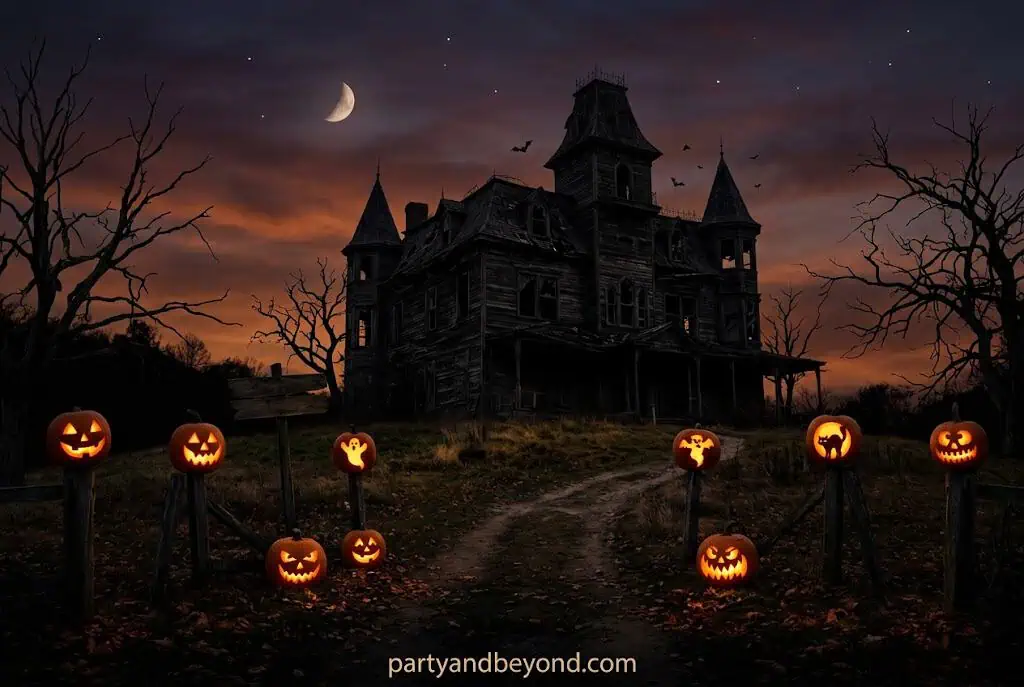
Picture this: it’s 7 p.m. on Halloween night. The sky has just gone dark. You’re standing on your porch, and the air smells like fallen leaves and something faintly smoky — candles, maybe. Your carved pumpkin display is doing exactly what you hoped it would. Trick-or-treaters stop at the bottom of your steps before they even climb them. A neighbor slows their car. Someone asks if you bought them somewhere.
That’s what happens when you use unique pumpkin carving ideas instead of the same basic jack-o’-lantern everyone else on the block is doing.
After testing dozens of these designs over years of Halloween hosting and helping friends pull off their own front porch displays, here are 41 pumpkin carving ideas that stand out from everything else on the block. Some take 15 minutes. A few will take your whole afternoon. All of them look dramatically better than the default triangle-eyed, zigzag-mouthed jack-o’-lantern most people carve every year.
What Are the Best Pumpkin Carving Tools for Beginners?
Let me be honest: the $2 plastic carving kits at every grocery store in October are largely a waste of money. The serrated knife snaps by the second pumpkin. The scoop is undersized. Trust me on this — I’ve been through four of those kits across as many Halloweens before I finally upgraded.
What actually works:
Lino cutter set — $8–$12. Used for etching, relief carving, and all fine detail work. The single most important upgrade you can make.
Thin serrated knife — for main cutout carving
Metal scoop or large serving spoon — for gutting
Dry-erase marker — for tracing stencils directly onto the skin
Petroleum jelly — applied to all cut edges after carving, this extends pumpkin life by 3–5 days
Total toolkit cost: $15–$25. Reused every year. According to NRF 2025, Americans spent $4.2 billion on Halloween decorations — your carved pumpkin display is one of the few places where the DIY version is objectively better than anything you can buy.
💡 Pro Tip: Dollar Tree now carries clay sculpting tool sets for $1.25 — these work beautifully for skin etching on pumpkins. Buy two or three packs and keep them in your Halloween kit.
What Makes a Pumpkin Carving Display Actually Stand Out?
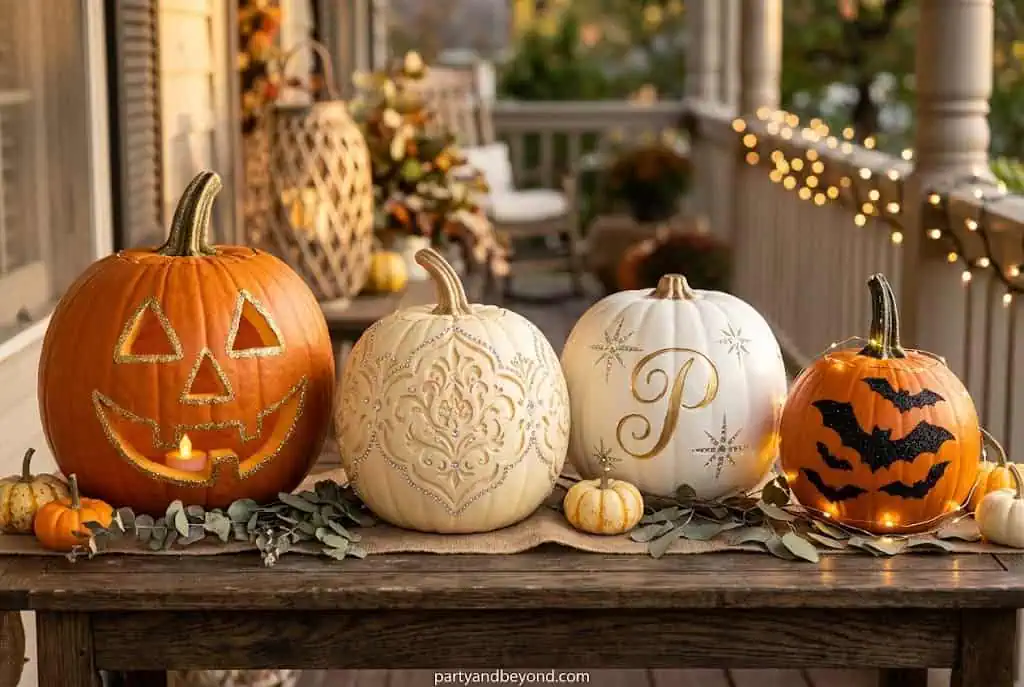
Here’s what most blogs won’t tell you: one great carved pumpkin rarely makes a display. The porches you remember — the ones that stop foot traffic — are collections of 3 to 5 pumpkins using different techniques, different sizes, and consistent lighting.
What it IS:
One statement carve (your most complex design) flanked by two simpler pieces
Varied sizes: at least one large, one medium, one small
All lit the same way — either all battery LED or all candles, never mixed
A cohesive feel: either “spooky,” “elegant,” or “whimsical” — pick one
What it ISN’T:
Five identical jack-o’-lanterns in a row
Every pumpkin carved to maximum complexity with no visual breathing room
Paint AND glitter AND carved elements on every single pumpkin
The trick is restraint. One pumpkin gets the showstopper carve. The others support it.
The 41 Pumpkin Carving Ideas
Classic Reimagined
1. Triple-Threat Jack-o’-LanternBest for: Statement front porch display | Difficulty: Medium | Time: 60 min | Cost: $6–$8
One pumpkin, three carved faces — one facing front, one on each side — each with a different expression: happy, surprised, and sinister. As guests walk around it, the face changes. Kids love it; adults take a second look. Use a large pumpkin (12+ inches) so the walls don’t crack between faces. Light with a battery pillar candle centered inside.
Skip the eyes entirely. Just carve a massive, uneven lower-jaw smile — teeth longest at center, shorter toward the edges. No eyes means nothing to signal where you’re “supposed” to look, which is what makes this design feel genuinely unsettling in a funny way. Works especially well on a tall, narrow pumpkin. Light from below.
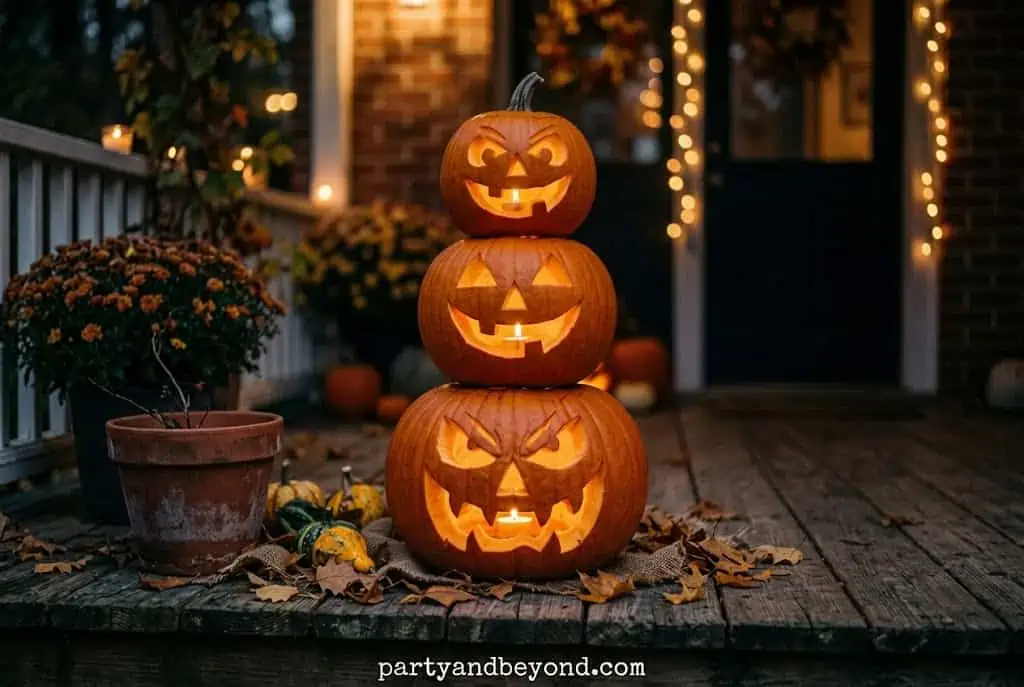
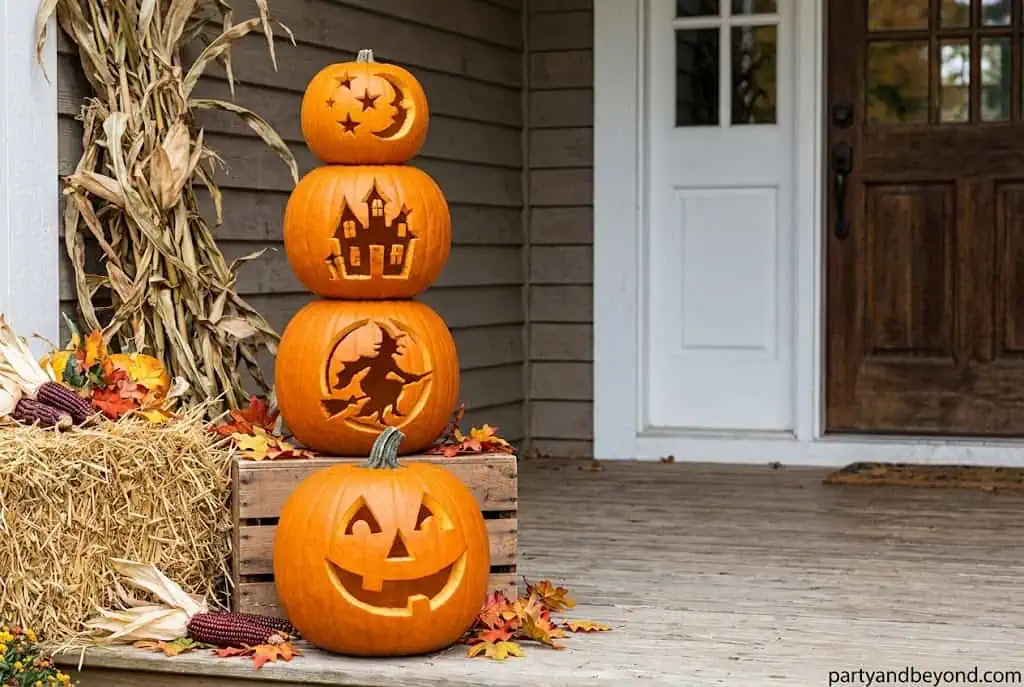
3. Stacked JackBest for: Porch centerpiece | Difficulty: Easy | Time: 45 min | Cost: $10–$15 for three pumpkins
Three carved pumpkins stacked by size: large on bottom with a menacing face, medium in the middle with a surprised face, small on top with sleepy eyes and a tiny smile. Secure with bamboo skewers. Light all three with battery tea lights. I’ve helped three different friends do this design — every single time, someone asks where they bought it.
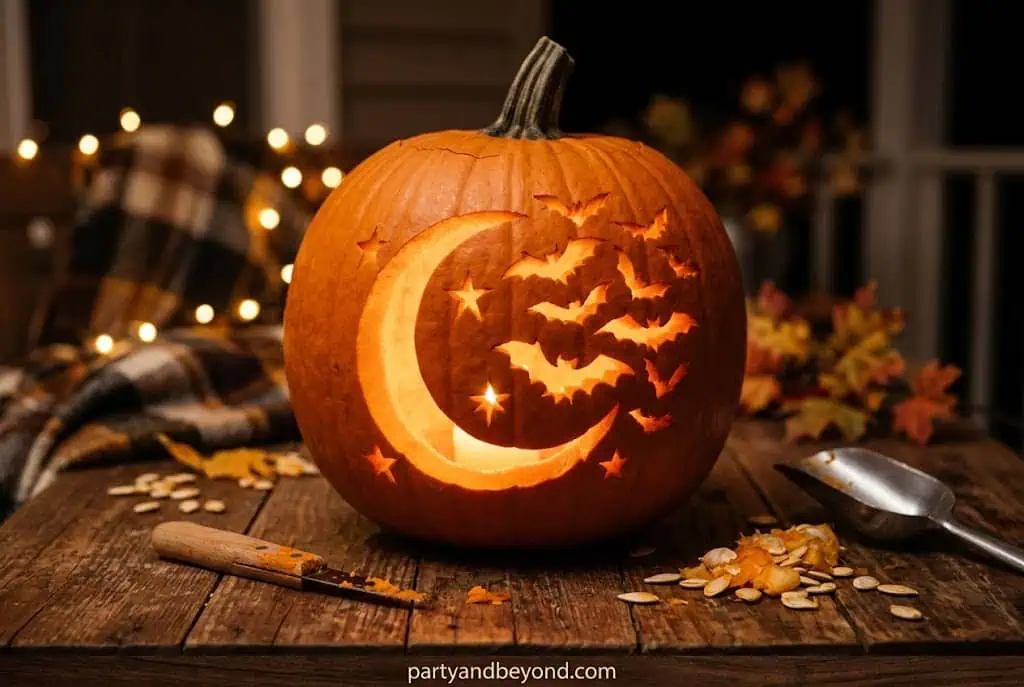
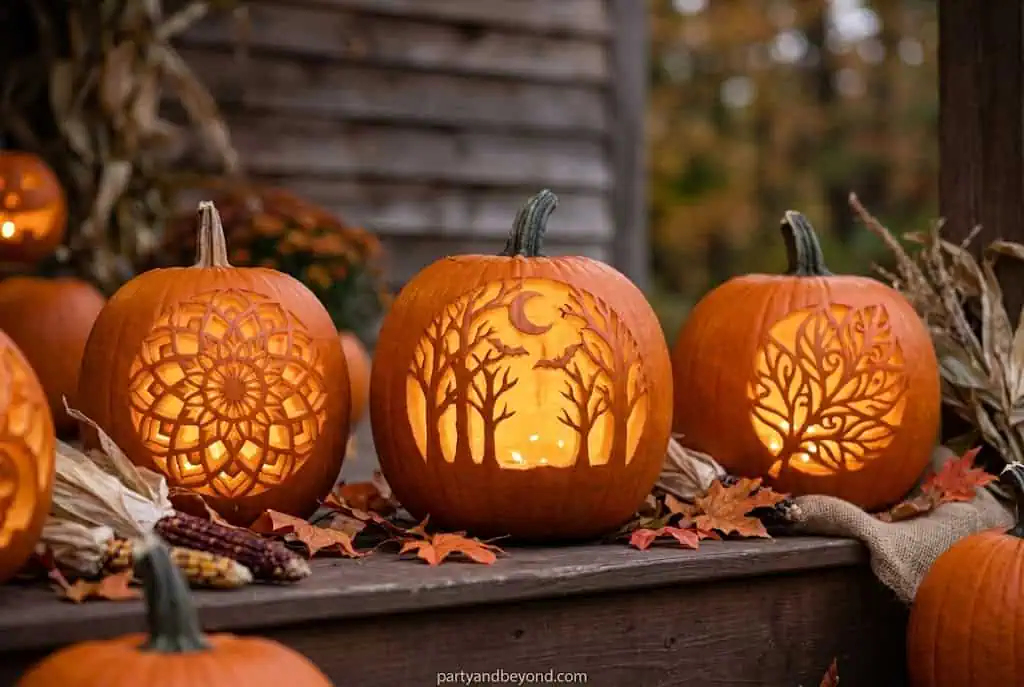
4. Crescent Moon + BatsBest for: Window display | Difficulty: Medium | Time: 40 min | Cost: $5–$6
Carve a crescent moon in negative space — background removed, moon stays as the pumpkin wall. Three or four small bat shapes punched outward from the moon. Download a free bat stencil from Pinterest, tape it on, trace with a toothpick. When lit, this casts a shadow onto nearby walls or window curtains that’s genuinely beautiful.
Traditional triangle eyes and grinning mouth — but before carving, apply decoupage glue to the exterior and dust with gold chunky glitter. Let it cure for two hours, then carve. The face glows warm orange from within; the exterior glitters gold. Looks like it cost $40. Costs $8.
What Are the Best Modern and Geometric Pumpkin Carving Designs?
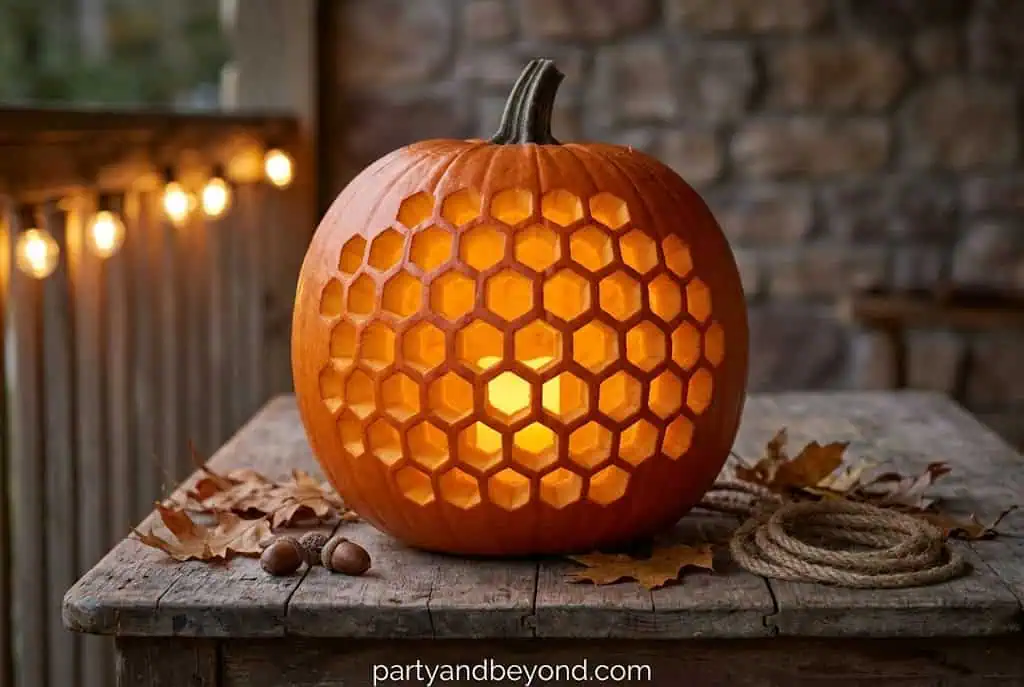
Draw a honeycomb grid with a ruler and marker. Cut every other hexagon fully through, leave alternating ones solid. Lit from within, the pattern looks like a handmade lantern. Print a hexagon grid from any geometry website, tape it on, and poke corner guides with a toothpick. Worth every minute.
7. Diamond FacetsBest for: Modern aesthetic | Difficulty: Medium | Time: 50 min | Cost: $6–$8
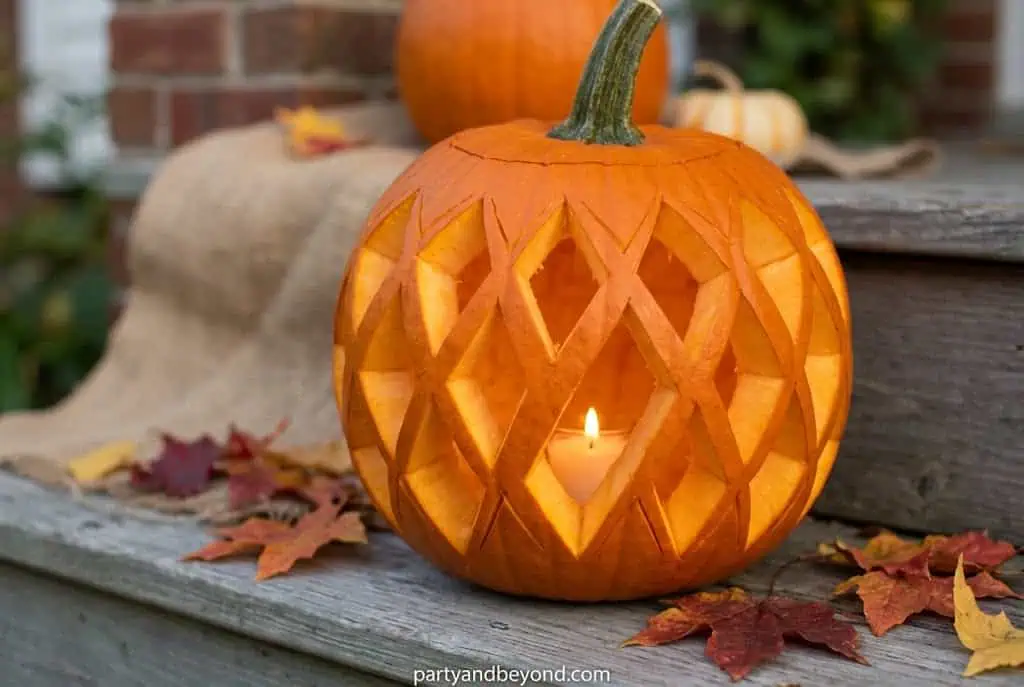
All straight cuts — large triangles and diamonds across the front face, like a geometric gem. No curves. Makes a round pumpkin look architectural. Slight imperfections read as handmade, not mistake. One of the most photogenic designs in daylight.
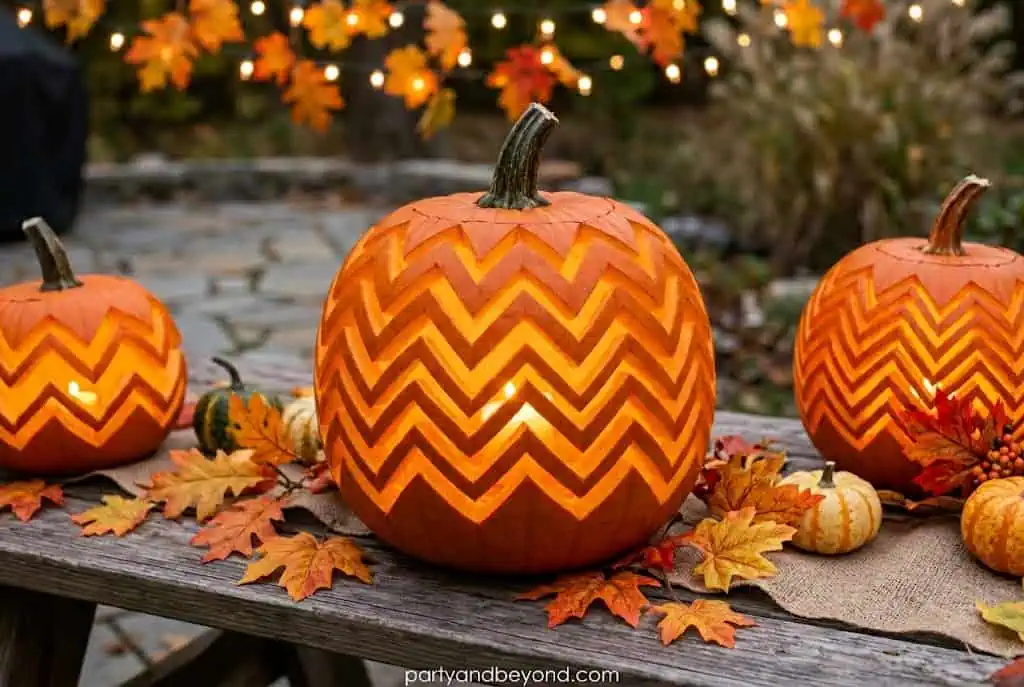
Three or four V-shaped chevron stripes drawn across the pumpkin face, then cut through. Long straight cuts — beginner-friendly. When lit, clean diagonal stripes of light glow across the surface. One of the fastest modern designs on this list.
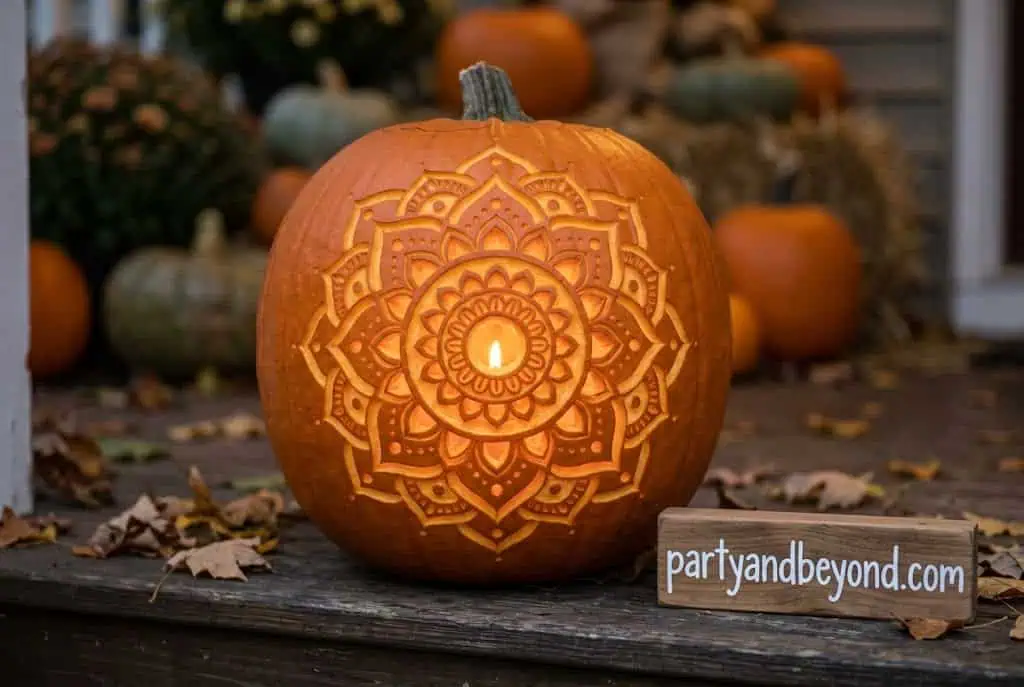
This is the one people stop and photograph. Concentric rings of carved petals and geometric details radiating from a center point across the full front face. Use a lino cutter for the etched details between carved rings. Print a mandala coloring page, tape it on, pierce the outline with a toothpick, carve what you transferred.
The first time I attempted this, I cracked the wall trying to rush the inner ring. Patience and a soaked lino blade (warm water, 10 minutes) made all the difference on the second try. The result looked like something from a high-end decor store.
💡 Pro Tip: Soak your lino cutter blades in warm water for 10 minutes before using — the pumpkin skin carves cleanly and you’re far less likely to crack the wall mid-design.
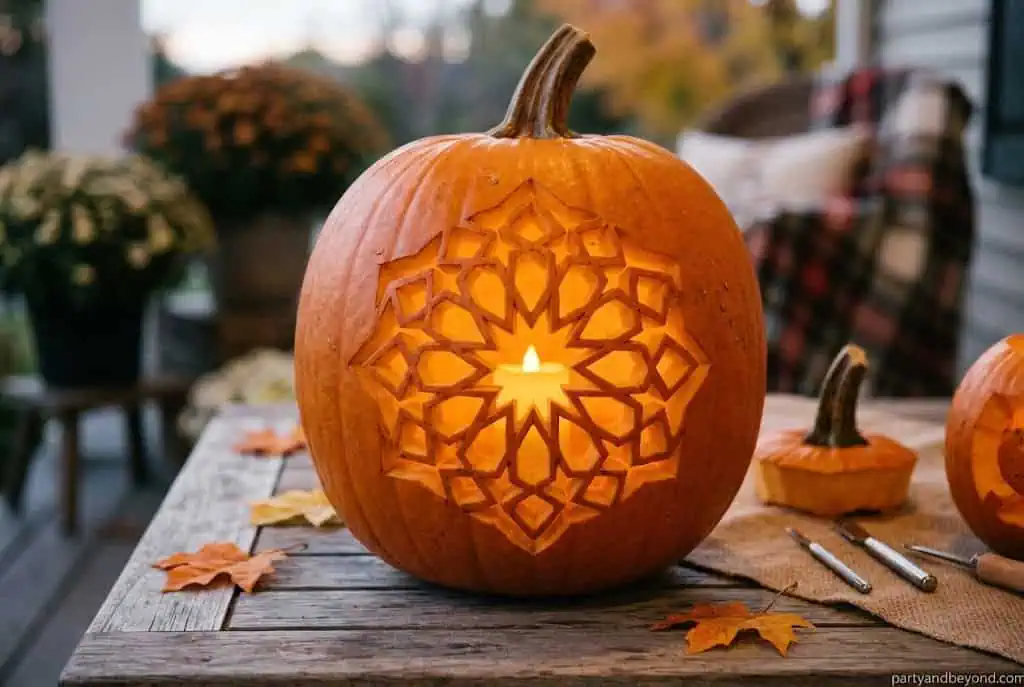
Repeating arch-shaped cutouts across the entire pumpkin surface — the effect is identical to a Moroccan metal lantern. When lit, this throws the most spectacular shadow pattern of any technique on this list. It requires patience and a steady lino tool. It is completely worth it.
Animals & Nature
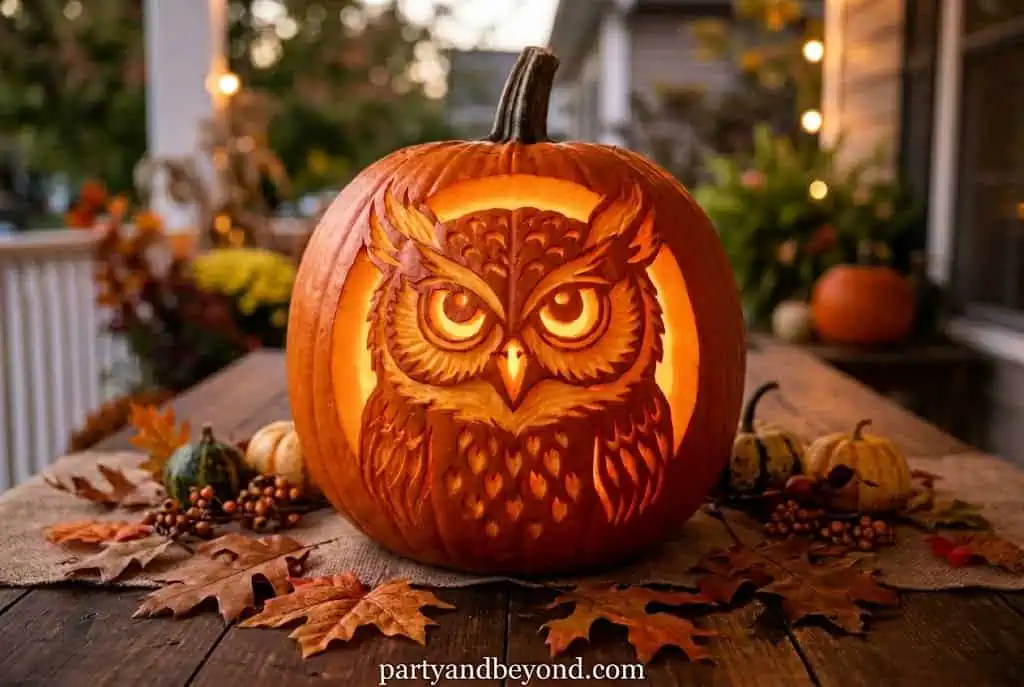
11. Owl FaceBest for: Kids’ displays | Difficulty: Medium | Time: 45 min | Cost: $6–$8
Large round eyes (trace with a coffee mug), a downward V beak, etched feather texture below the eyes. Owls photograph beautifully and feel festive rather than frightening — good for displays you want the whole neighborhood to enjoy, not just the brave ones.
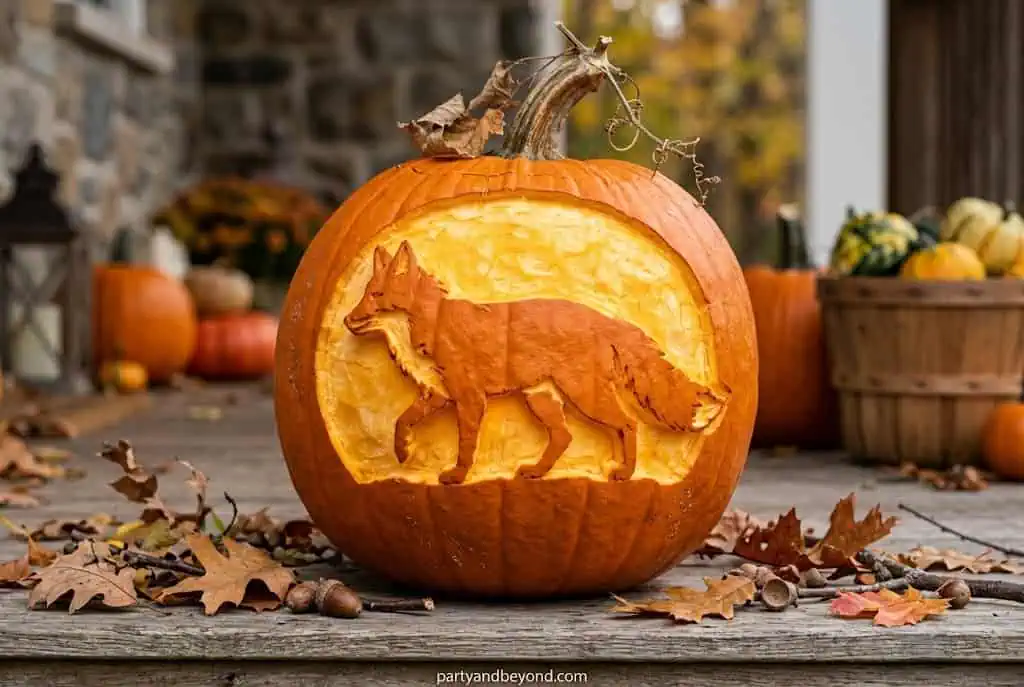
12. Fox Silhouette (Relief Carve)Best for: Fall-themed porch | Difficulty: Medium | Time: 60 min | Cost: $8–$10
Use a lino cutter to remove only the top layer of skin in the shape of a sitting fox — pumpkin wall stays solid, but the fox glows softly through the thinned skin when lit. Subtle. Sophisticated. Perfect if you love fall aesthetics but aren’t committed to full Halloween spookiness.
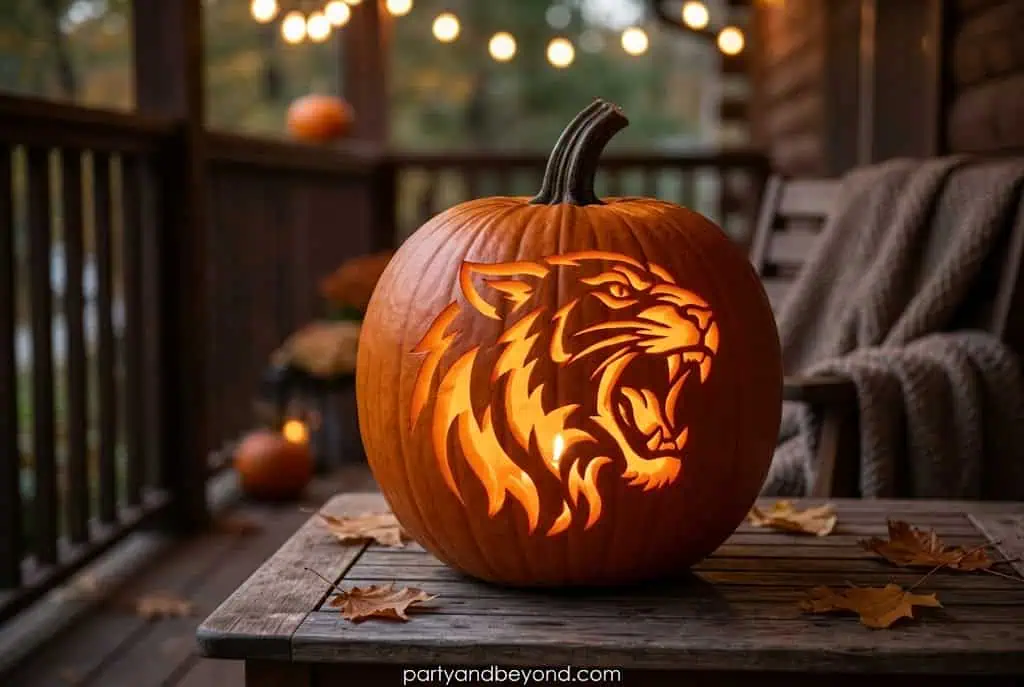
13. Roaring CatBest for: Beginners with personality | Difficulty: Easy | Time: 25 min | Cost: $5
Wide-open cat mouth with sharp upward teeth, narrow slit eyes, whisker dots. Simple carve, big personality. Works best on a small-to-medium pumpkin placed low on a step where guests see it face-to-face.
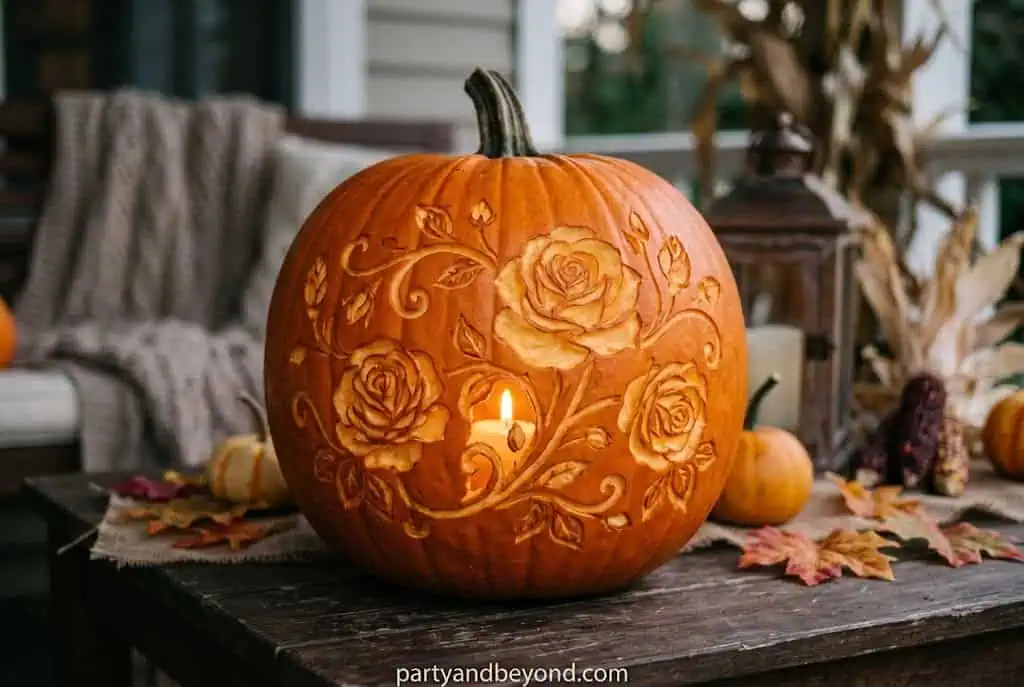
A single open rose carved in relief — skin only removed, not cut through — with layered petals casting their own shadows. Combined with soft LED candlelight, this is the least-spooky and somehow one of the most striking options on the list. My friend Emma had one on her porch two years ago. I still think about it when I see a round orange pumpkin.
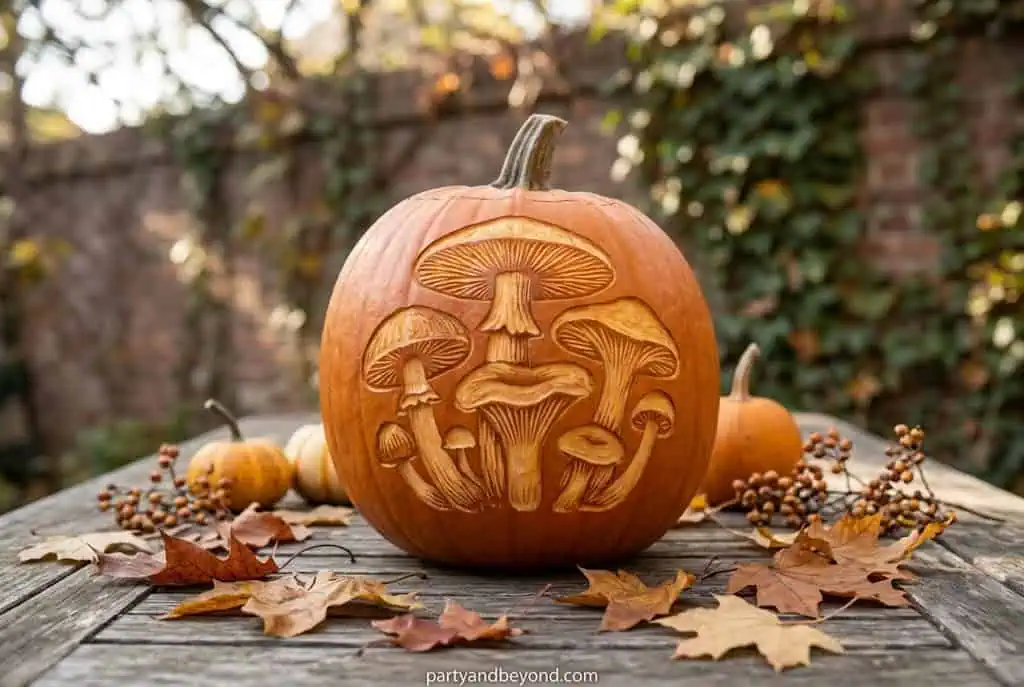
15. Mushroom ClusterBest for: Cottagecore / boho aesthetic | Difficulty: Medium | Time: 60 min | Cost: $7–$9
Three etched mushrooms of different sizes clustered on the front face — stems and cap ridges etched in relief, cap shapes fully cut for glow effect. Not everyone is doing this design. Which is exactly why you should.
16. Haunted Treeline SilhouetteBest for: Outdoor statement piece | Difficulty: Medium | Time: 45 min | Cost: $6–$8
A band of bare, gnarled trees cut around the pumpkin’s entire equator — like a horizon line. Bats flying upward optional. When lit and placed on a step, the tree shadow wraps onto the ground below. Genuinely eerie. One of the most underrated designs on this entire list.
Pop Culture & Characters
17. Jack SkellingtonBest for: Nightmare Before Christmas fans | Difficulty: Medium | Time: 60 min | Cost: $7–$9
X-stitch mouth, hollow oval eyes, bone-thin cheekbones. Print the stencil free from Pinterest. Rub the exterior with white chalk if you want the white-skull look even before lighting. Always recognizable. Always a crowd-pleaser.
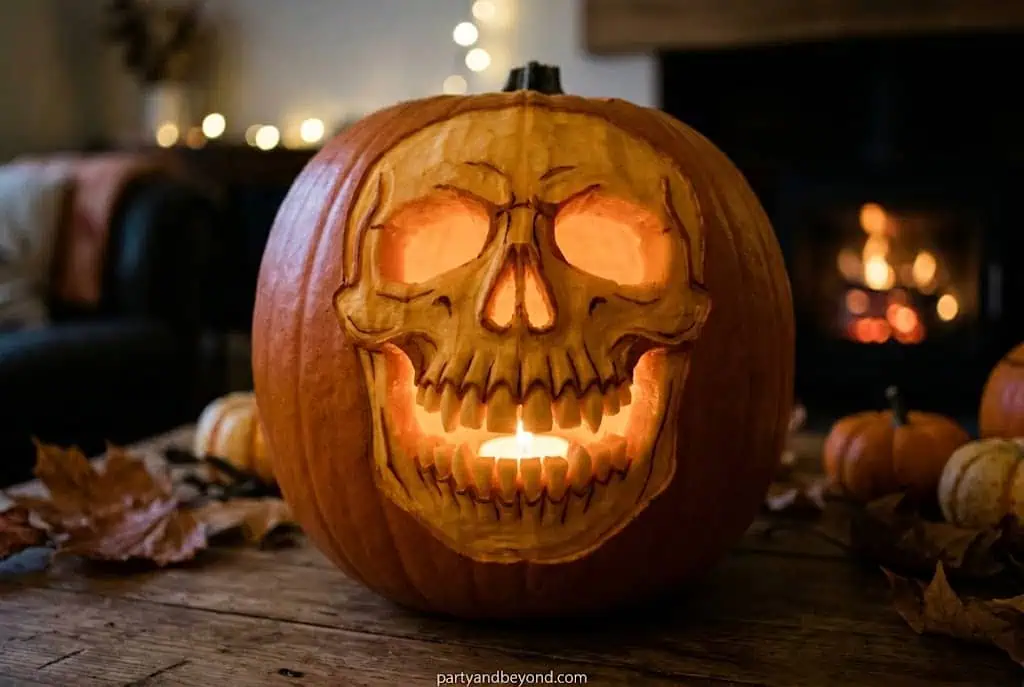
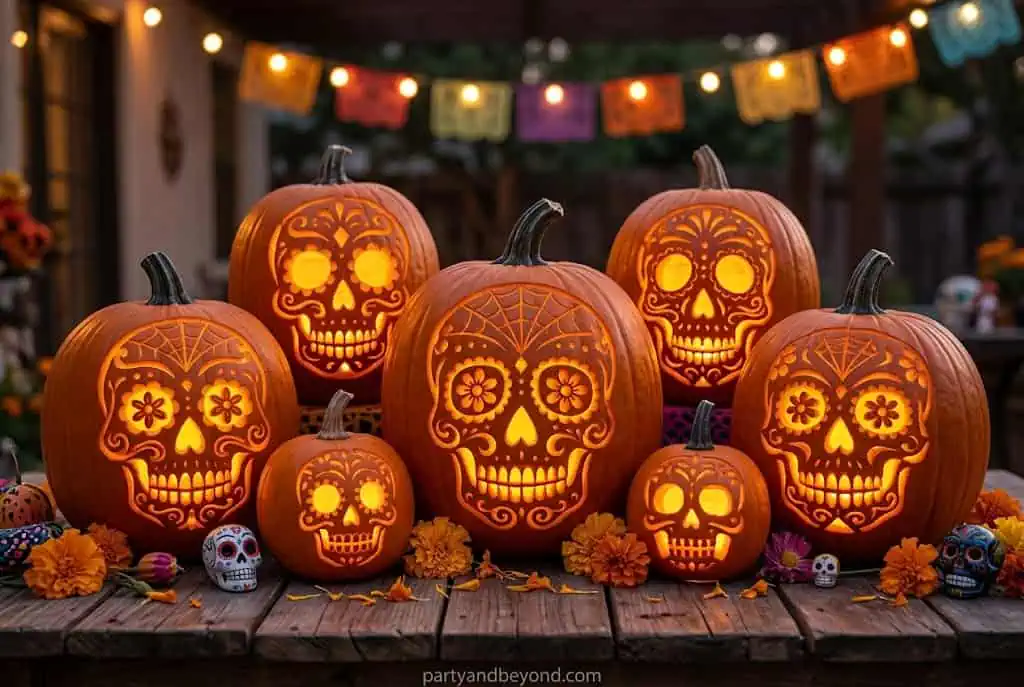
18. Day of the Dead Sugar SkullBest for: Elaborate centerpiece | Difficulty: Advanced | Time: 2 hours | Cost: $10–$14
Ornate sugar skull with floral etching around the eye sockets, detailed brow arch work, decorative chin pattern. Combines full carving (sockets) with relief etching (flowers). This is the crown jewel of any pumpkin display. 9 times out of 10, this is the pumpkin guests photograph.
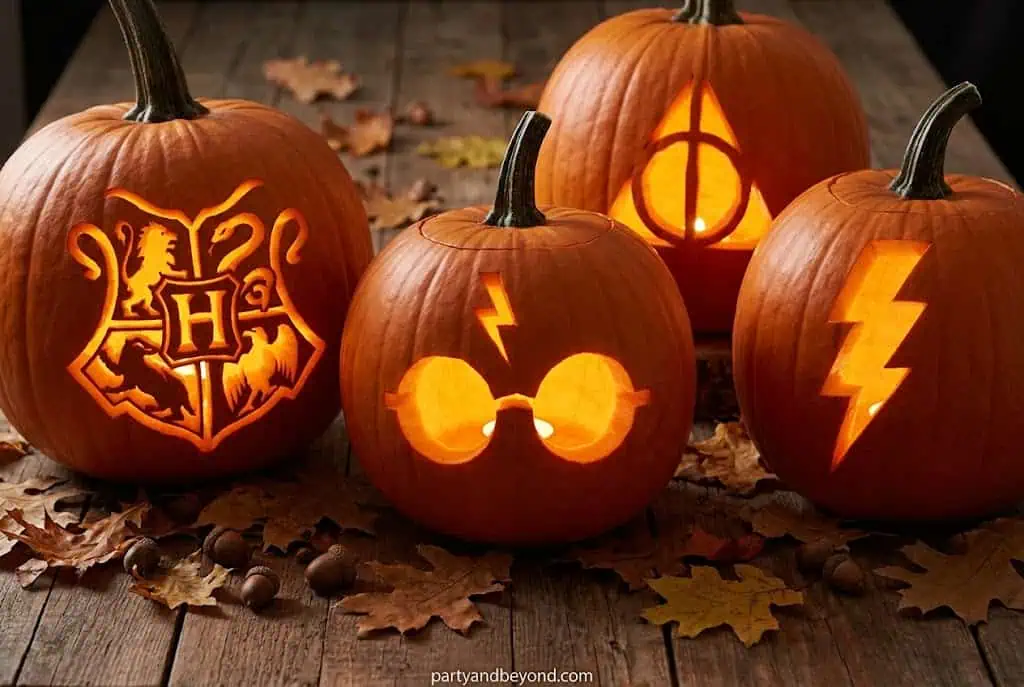
19. Harry Potter Lightning Bolt + GlassesBest for: Kids ages 6–12 | Difficulty: Easy | Time: 20 min | Cost: $4–$5
Two connected round circles for glasses, lightning bolt etched on the upper face. Twenty minutes on a small pumpkin. Kids know immediately what it is. Place it next to a candle for perfectly glowing glasses.
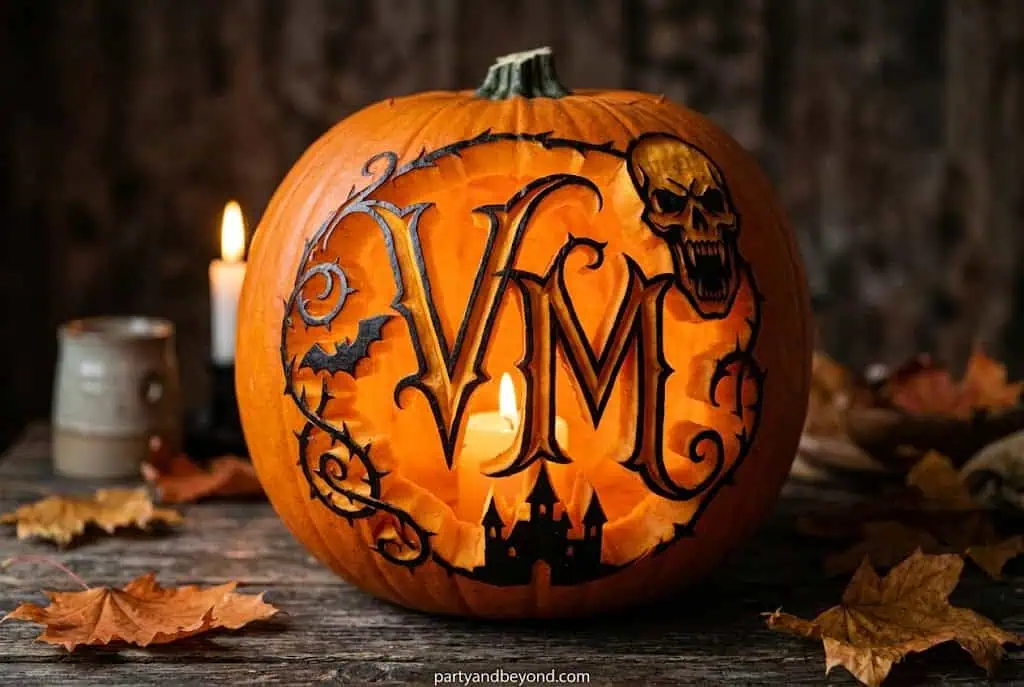
A single Gothic initial letter carved center-face, spider webs etched in the corners. Clean, personal, fast. Print any Gothic font letter large from your computer, tape it on, trace with a toothpick, carve. Works beautifully as the front door statement piece.
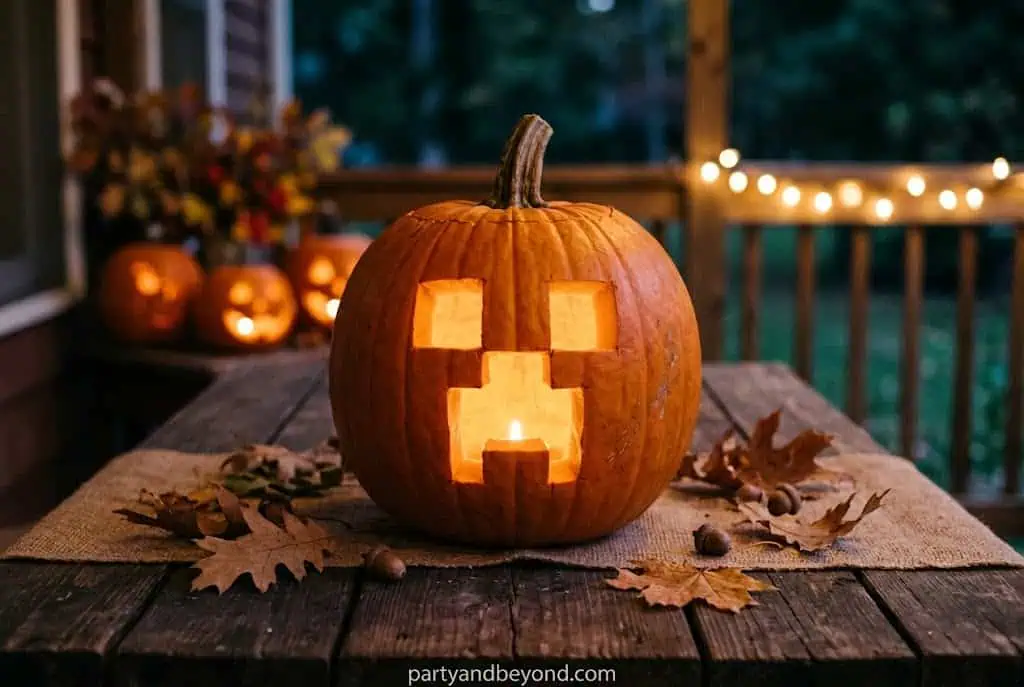
21. Minecraft CreeperBest for: Kids ages 7–13 | Difficulty: Medium | Time: 45 min | Cost: $6
Entirely grid-based. Use a ruler to draw perfect squares, then carve the exact pixel pattern: two rectangular eyes, three-square-wide nose, no mouth. Works best on a flat-faced pumpkin. Kids recognize it from ten feet away.
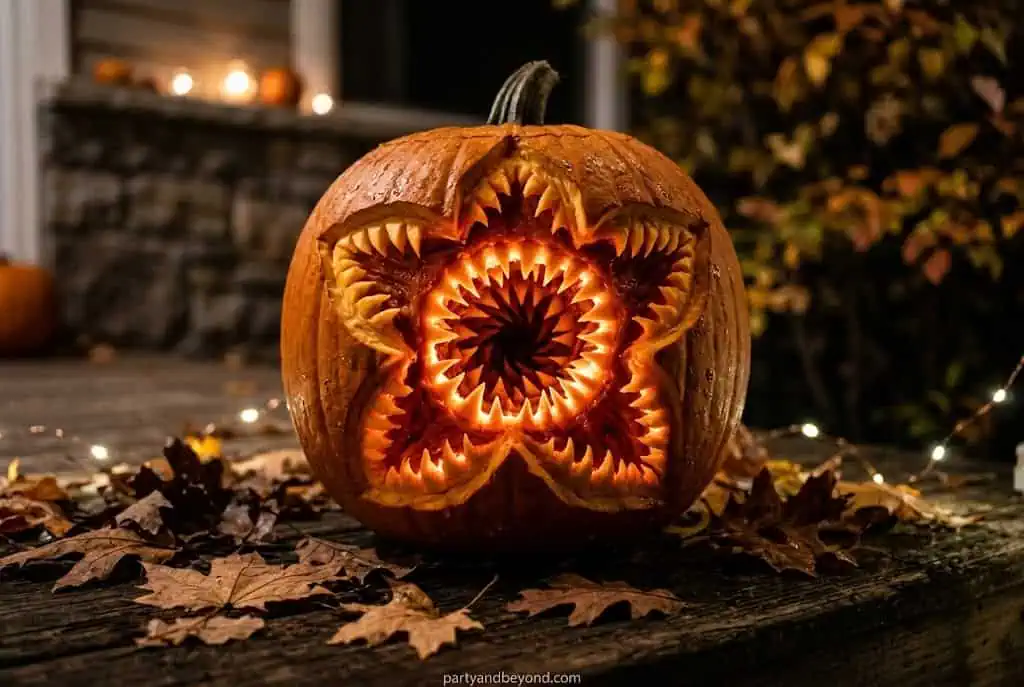
Six to eight petal-shaped flaps carved open across the full face, dark hollow center. Best on a very round, wide pumpkin. When lit inside, the petals glow and the center goes dark. Deeply unsettling in the best possible way.
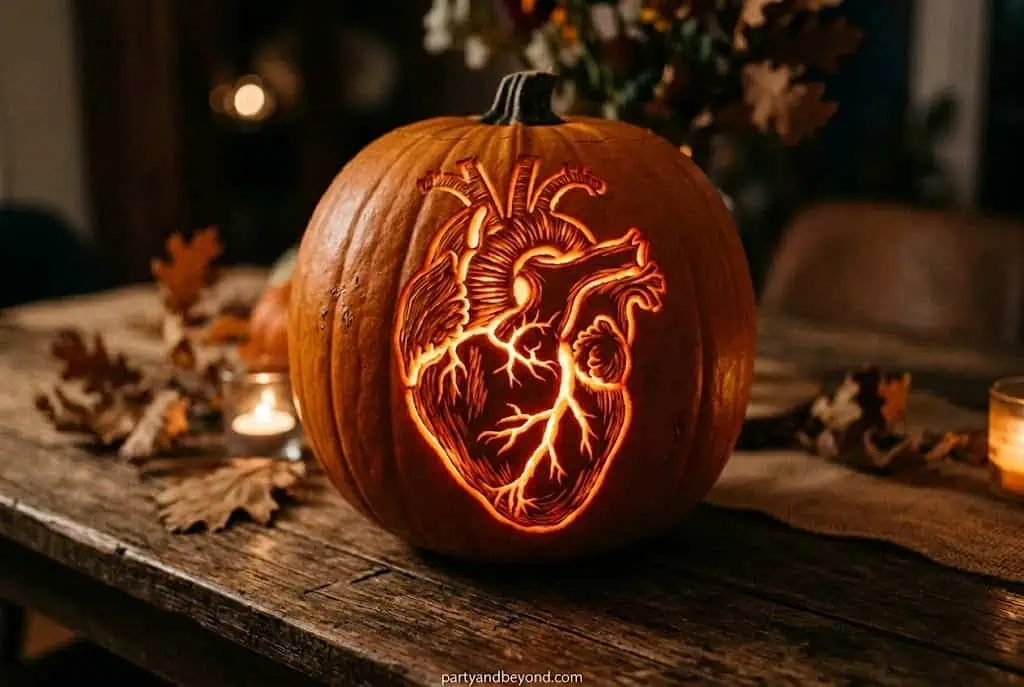
A medically accurate human heart with aorta and pulmonary arteries carved in relief on a dark-matte-exterior pumpkin. Use a reference image. The etched muscle ridges and blood vessel texture are what separate this from a generic heart. Unsettling and impressive simultaneously.
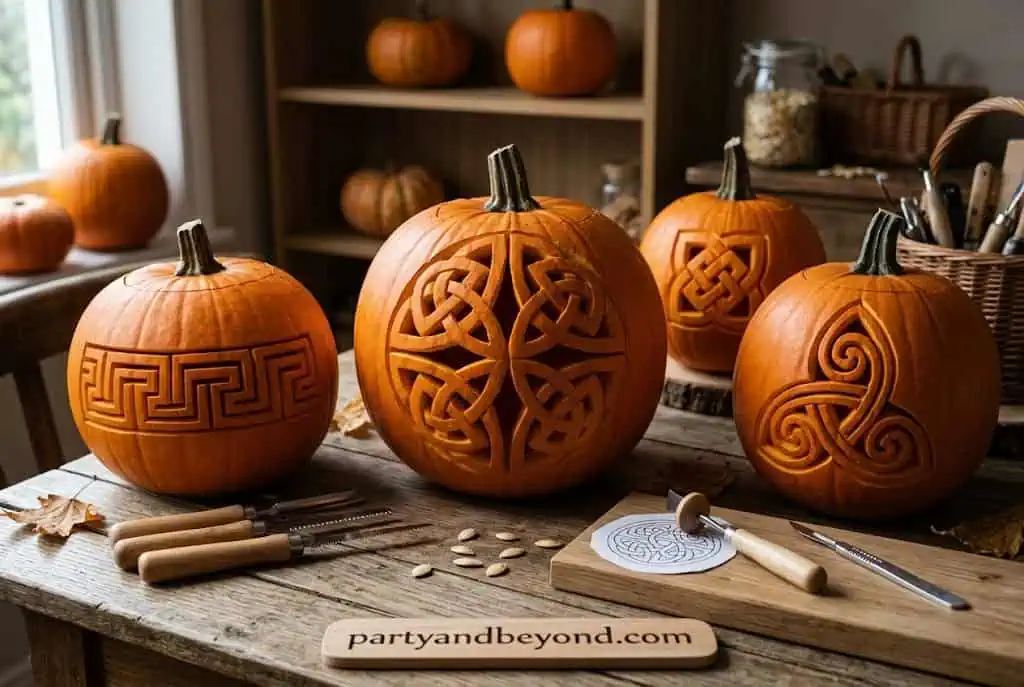
Interlocking carved loops weaving over and under each other across the full surface. You alternate between full cuts and etched underpasses. Download a Celtic knot pattern for free and transfer it on. The finished pumpkin looks like a carved stone artifact.
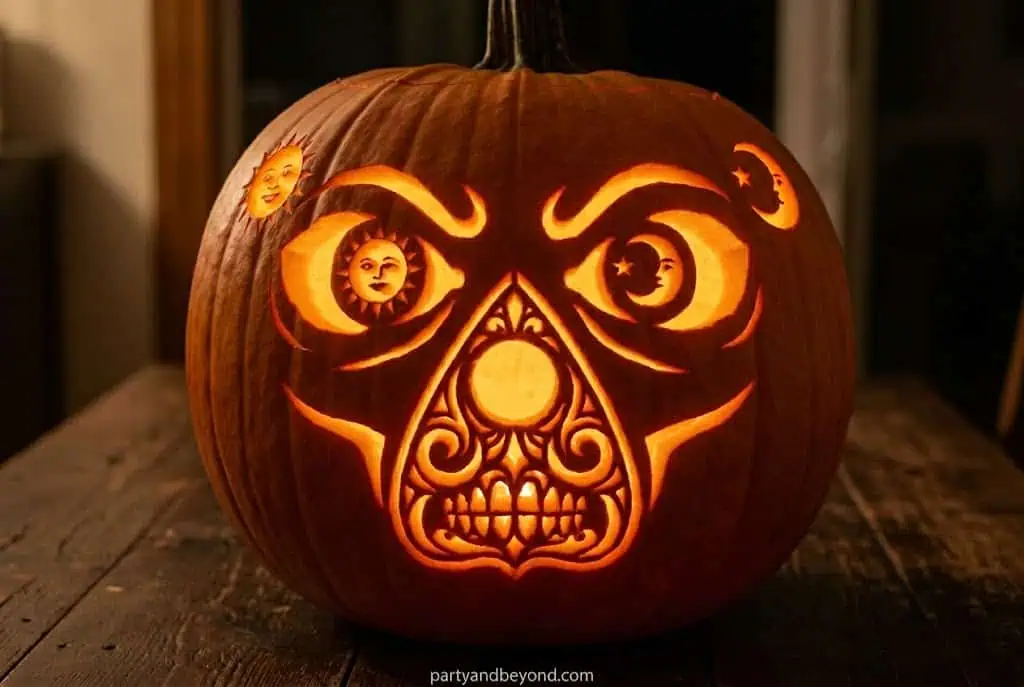
25. Ouija Board FaceBest for: Spooky dinner party | Difficulty: Medium | Time: 60 min | Cost: $8–$10
Planchette-shaped eye socket centered, alphabet letters etched around the midsection, “YES” and “NO” carved top and bottom. Theatrical. Eerie. Light it with warm orange LED from within. This is the pumpkin your guests will be talking about.
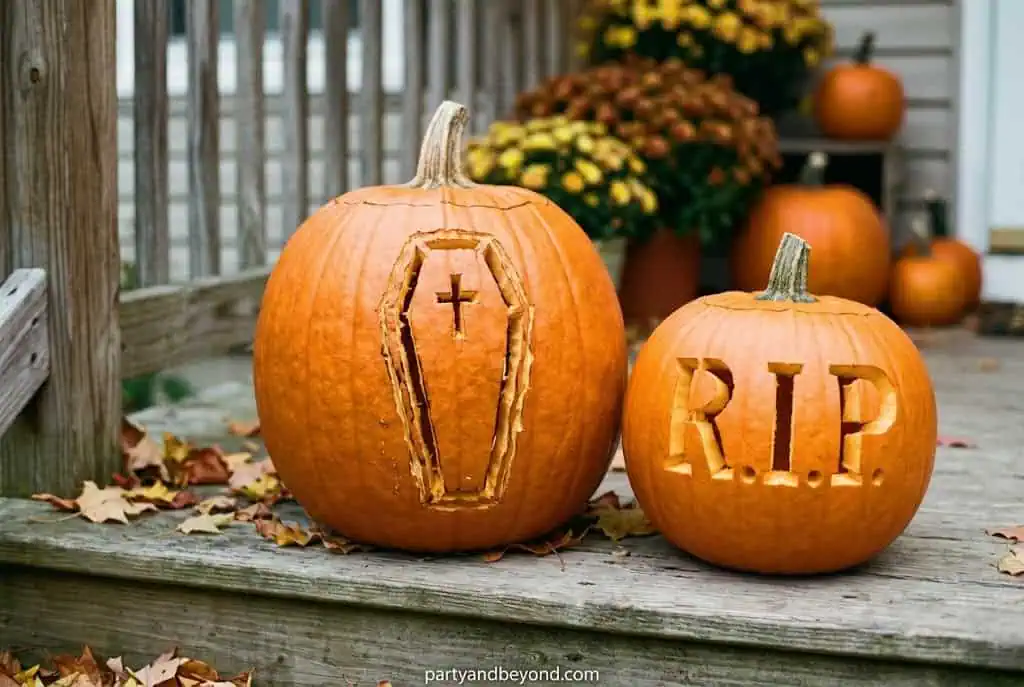
26. Coffin & R.I.P.Best for: Beginner wanting something different | Difficulty: Easy | Time: 20 min | Cost: $4–$5
Coffin shape carved front and center, “R.I.P.” lettered inside. Simple, fast, immediately reads as Halloween. Best used as a supporting piece in a larger display rather than the centerpiece.
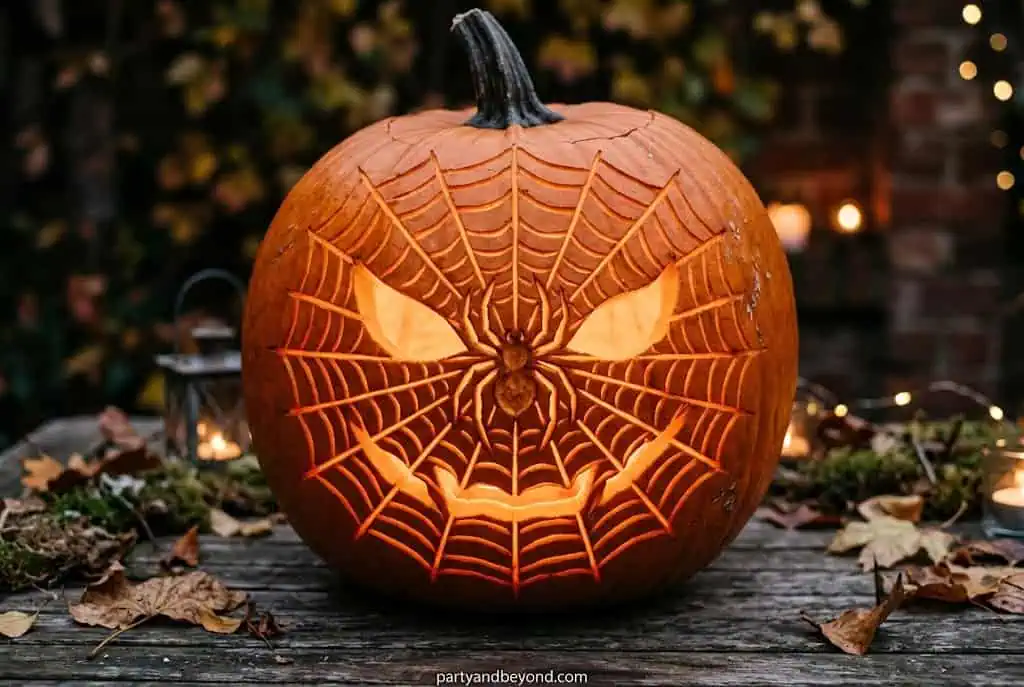
27. Spider Web Full-FaceBest for: Classic Halloween lovers | Difficulty: Medium | Time: 50 min | Cost: $6–$8
Web radiating from a center point — each concentric ring connected by spokes, alternating segments cut through. A carved spider dropping from one corner adds the finishing detail. Classic, done with precision instead of laziness.
Funny & Whimsical
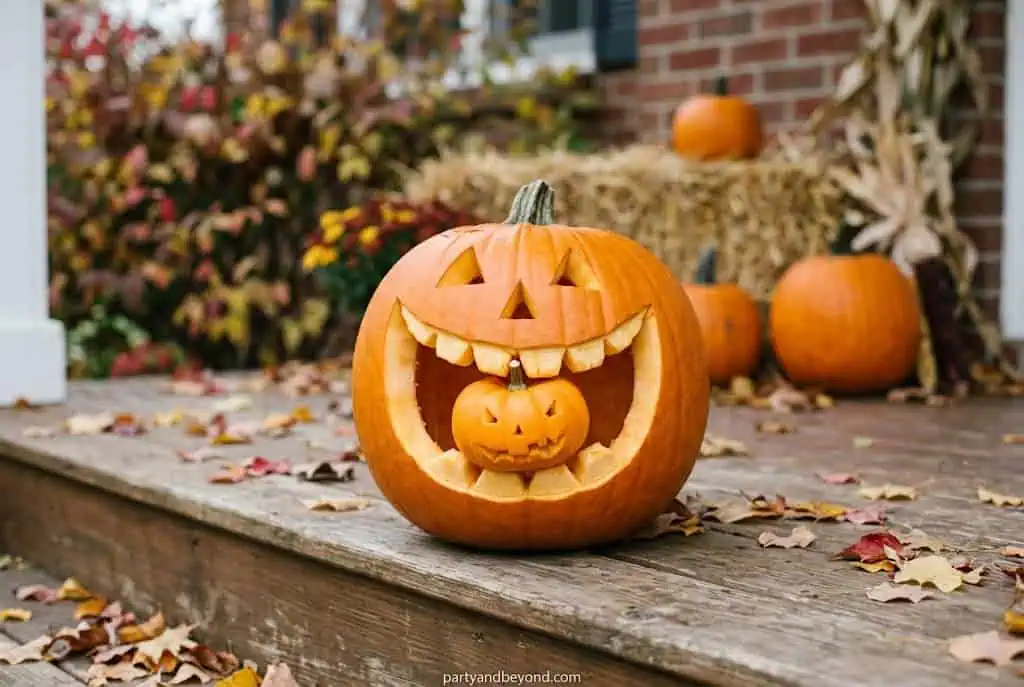
28. Pumpkin Eating PumpkinBest for: Social media viral potential | Difficulty: Medium | Time: 60 min | Cost: $8–$10
Large pumpkin with wide open mouth. Small carved pumpkin — looking appropriately horrified — placed partially inside. Two pumpkins. One sight gag. Secure the small one with a bamboo skewer through the large pumpkin’s base. Photograph this from the front. It goes everywhere.
💡 Pro Tip: Carve the small “victim” pumpkin with genuinely scared eyes and a small open O mouth. The more expressive it is, the funnier the whole setup reads.
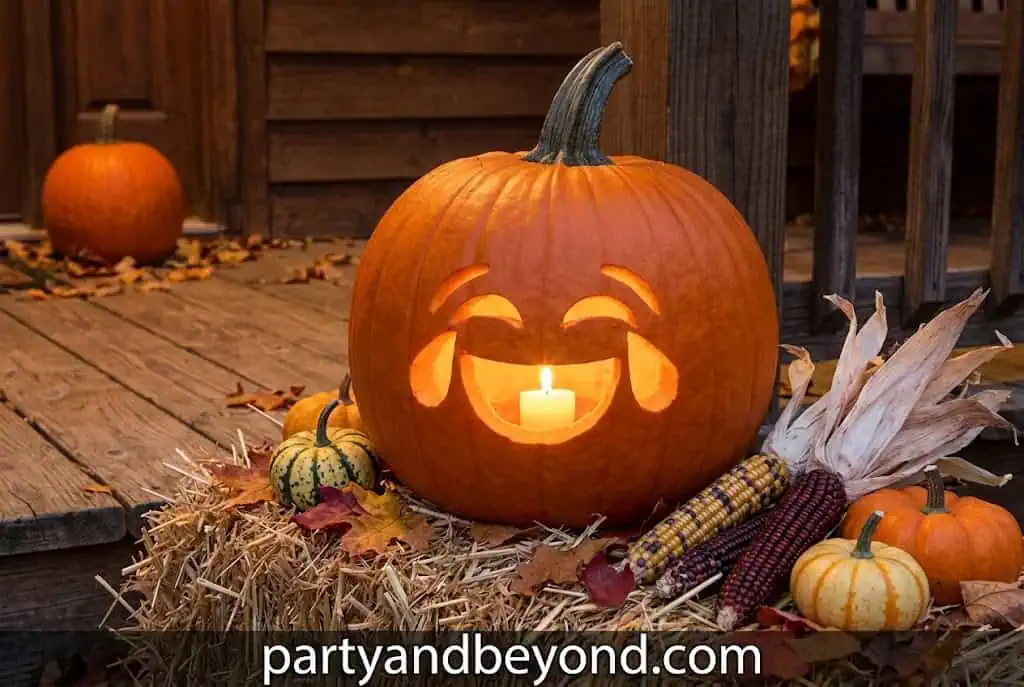
The 😱 shocked emoji — large O mouth, round wide eyes. Unmistakable. Instantly funny. Fifteen minutes. Best on a small round pumpkin placed at eye level. This is also a great “emergency” carve when you realize it’s October 30th and you still haven’t done anything.
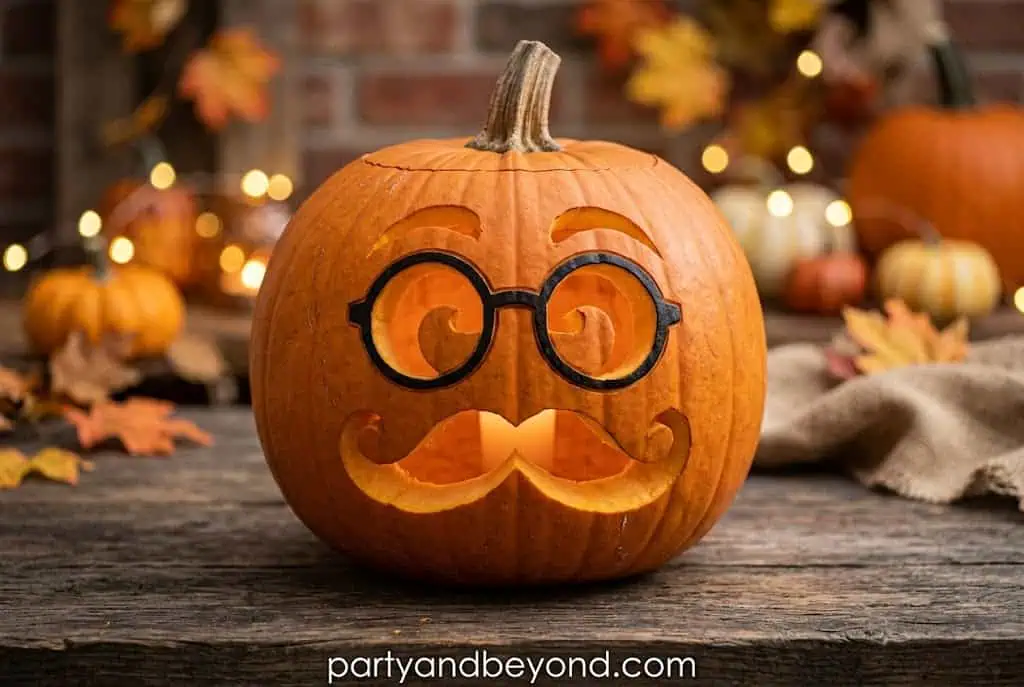
Carved square eyeglasses, etched swooping mustache, optional carved bow tie at the base. Add an “academic” vibe by using a round pumpkin that already looks a little stuffy. Pairs perfectly on a step next to a menacing, expertly carved companion piece.
Three or four uneven gapped teeth, squinting narrow eyes, furrowed brow lines etched above. Works best on a lumpy, irregular pumpkin — the imperfections become the character. One of the few carving ideas where a “bad” pumpkin actually improves the result.
32. Pumpkin Puking SeedsBest for: Quick and funny | Difficulty: Easy | Time: 20 min | Cost: $4–$5
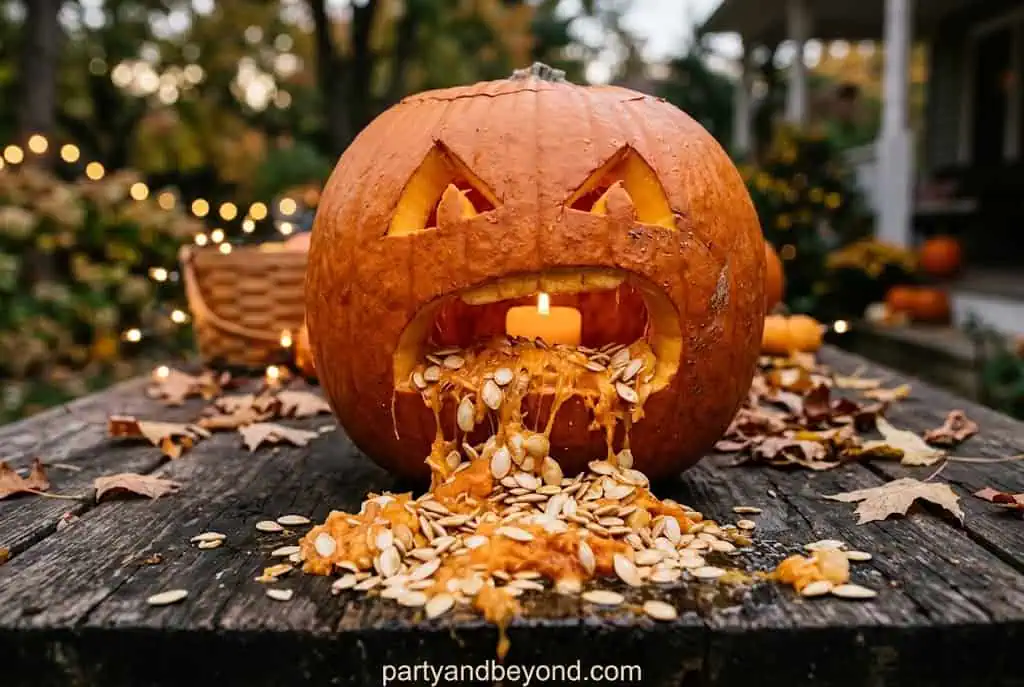
Wide-open O mouth carved first. Save your seeds when gutting. Arrange seeds spilling from the mouth down the pumpkin face. Add dramatic shocked eyes. Twenty minutes. Wildly shareable on social media every single October because it looks like a dedicated bit and takes almost no time.
Remove pumpkin skin in graduated layers top to bottom — deepest cuts at the crown (more light passes through), barely-there etching at the base. No full cutouts. When lit, true ombré glow from bright amber at top to warm dim at base. Looks like sculpture. Requires a steady hand and a quality lino set.
34. Negative Space DesignBest for: Dramatic lighting effects | Difficulty: Medium-Advanced | Time: 60 min | Cost: $8–$10
Remove everything that ISN’T the design — the pumpkin wall becomes the subject, surrounded by glowing open space. Works with any silhouette: witch, cat, tree, bat. Counterintuitive but creates some of the cleanest, most dramatic results of any technique here.
Van Gogh’s swirling sky translated into relief etching — no full cutouts, just swirl lines at different depths, stars punched through with a skewer. When lit, deep-carved swirls glow brighter than shallow ones, creating real dimensional depth. The most technically demanding design here, and possibly the most rewarding when it’s done.
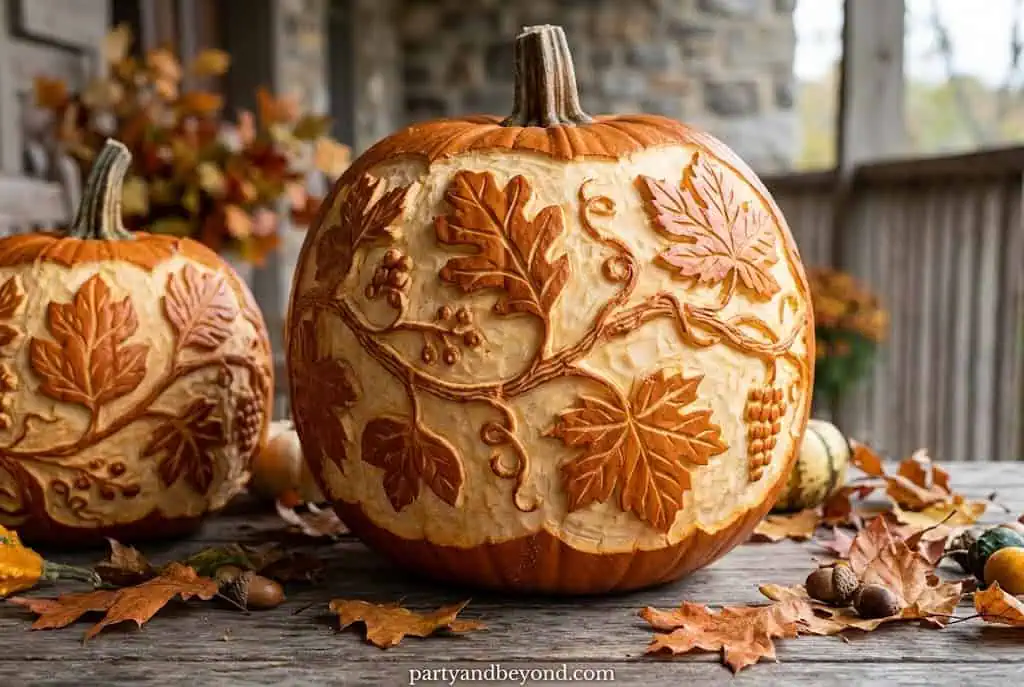
36. Relief Leaves + VinesBest for: Elegant fall porch | Difficulty: Medium | Time: 75 min | Cost: $8–$10
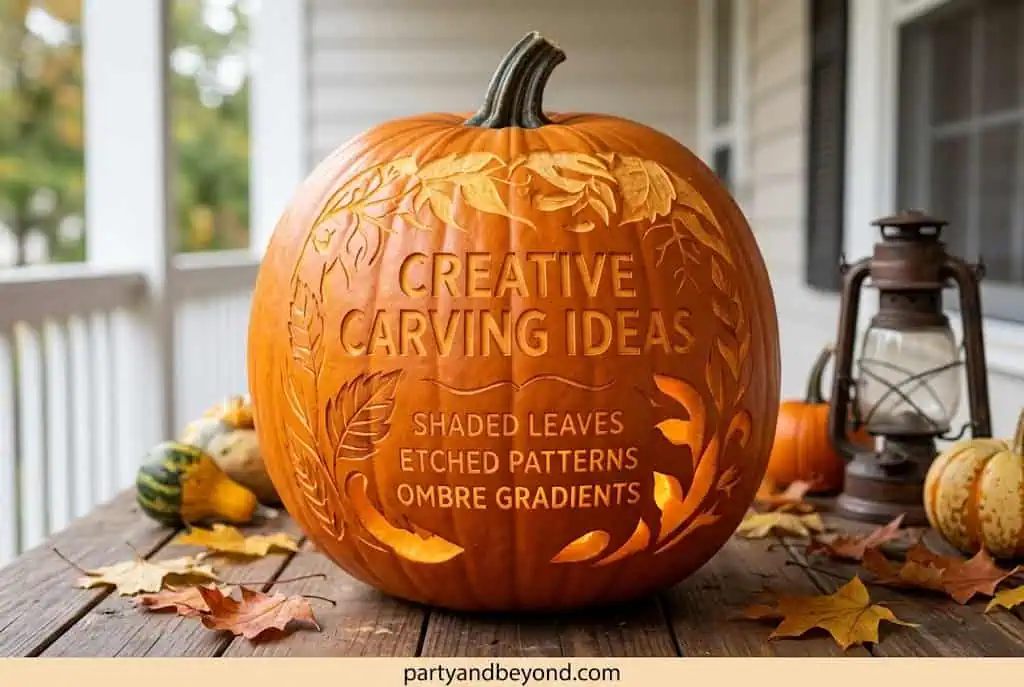
Autumn leaves and winding vines etched in relief across the entire pumpkin — no hard edges, no cutouts, just soft organic shapes that glow rather than shine. Looks painted rather than carved. Perfect for the host who wants fall, not frightening. Pairs with mums, dried corn, and lanterns.
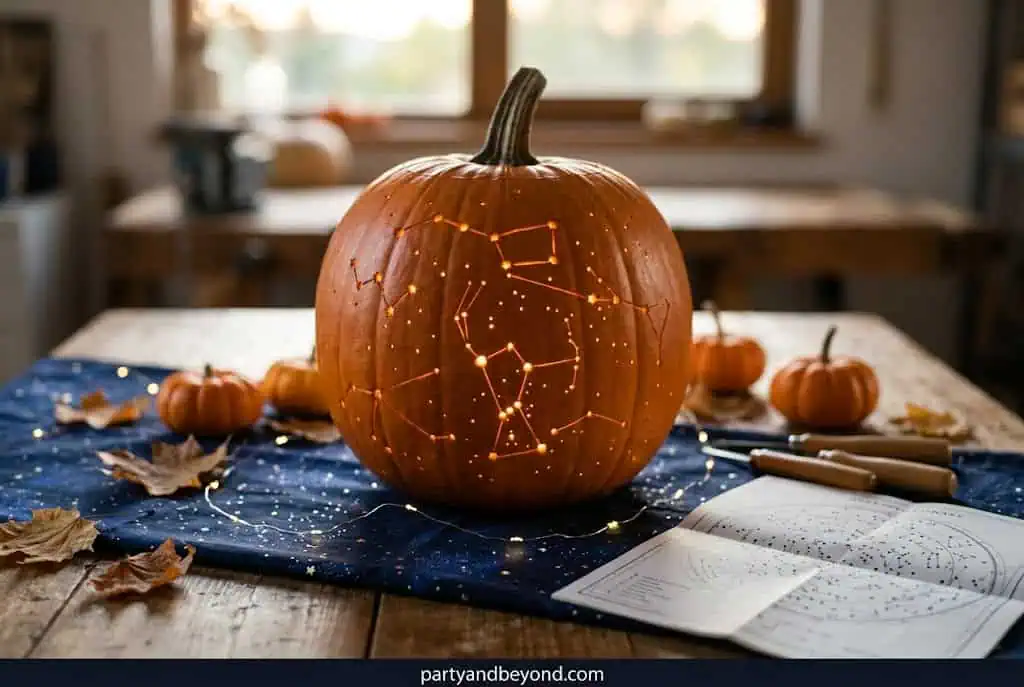
37. Galaxy Constellation MapBest for: Night display | Difficulty: Medium | Time: 60 min | Cost: $7–$9
Stars punched through with a skewer in the pattern of Orion, the Big Dipper, or Scorpius — etched constellation lines connecting them. When lit and placed near a light wall at night, the stars project outward. Photographs poorly in daylight. Spectacularly after dark. Use a star chart app for accurate patterns.
💡 Pro Tip: Place your lit constellation pumpkin near a white or light-colored wall to see the full projection effect. Position it before your guests arrive — watching the stars appear is half the magic.
Statement & Themed Sets
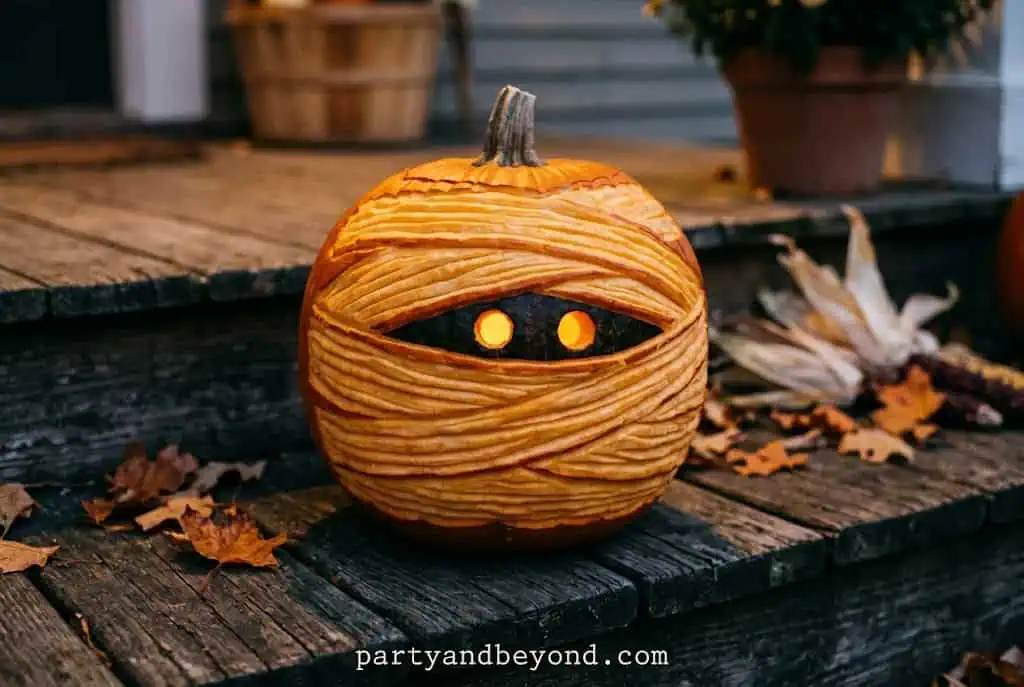
38. Mummy WrapBest for: Beginners wanting something different | Difficulty: Easy | Time: 30 min | Cost: $5–$6
Thin horizontal strips cut at slight angles across the pumpkin face, two small oval eyes peeking through near the top. The interior glows through all the strips at once for a soft striped effect. Easy to cut, reads immediately as a mummy, looks different from every other pumpkin in the neighborhood.
39. Haunted House SilhouetteBest for: Statement centerpiece | Difficulty: Medium | Time: 60 min | Cost: $7–$9
Full haunted mansion — pointed turrets, arched windows, bats in a full-moon sky — carved across the entire front and sides of a large pumpkin. Print a free Halloween silhouette template, tape it on, trace and cut. At night, every carved window glows like a lit square in a real house.
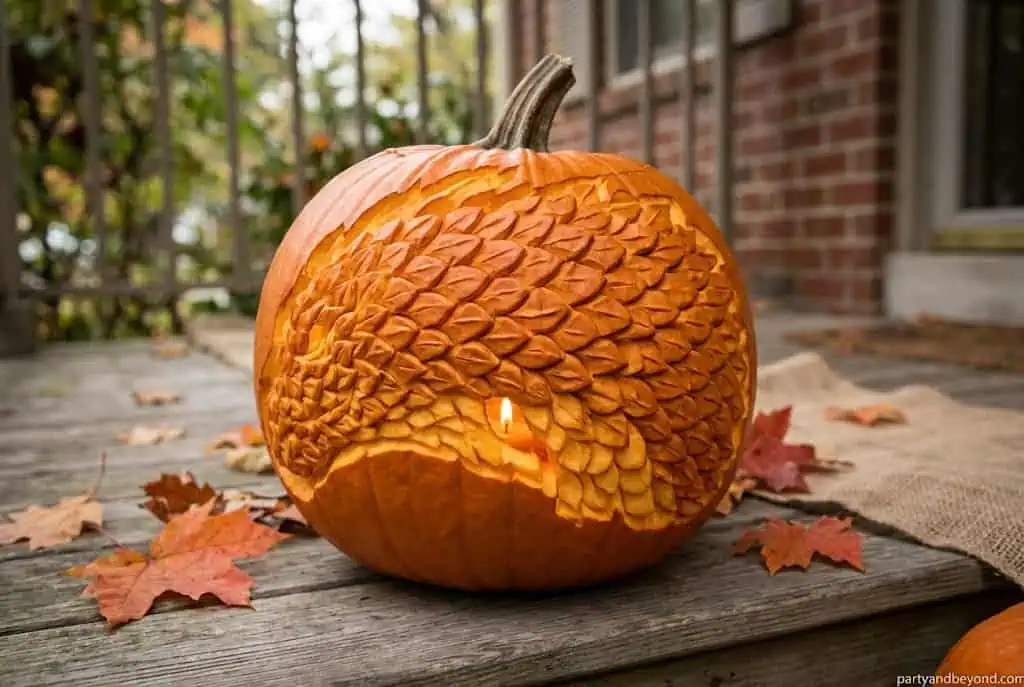
40. Dragon ScalesBest for: Fantasy fans | Difficulty: Advanced | Time: 90 min | Cost: $10–$12
Overlapping U-shaped scales carved in relief — deeper at the top edge of each scale, shallower at the bottom — across the entire pumpkin surface. Every scale catches the light differently when illuminated. Requires patience to align the rows, but the result looks almost alive.
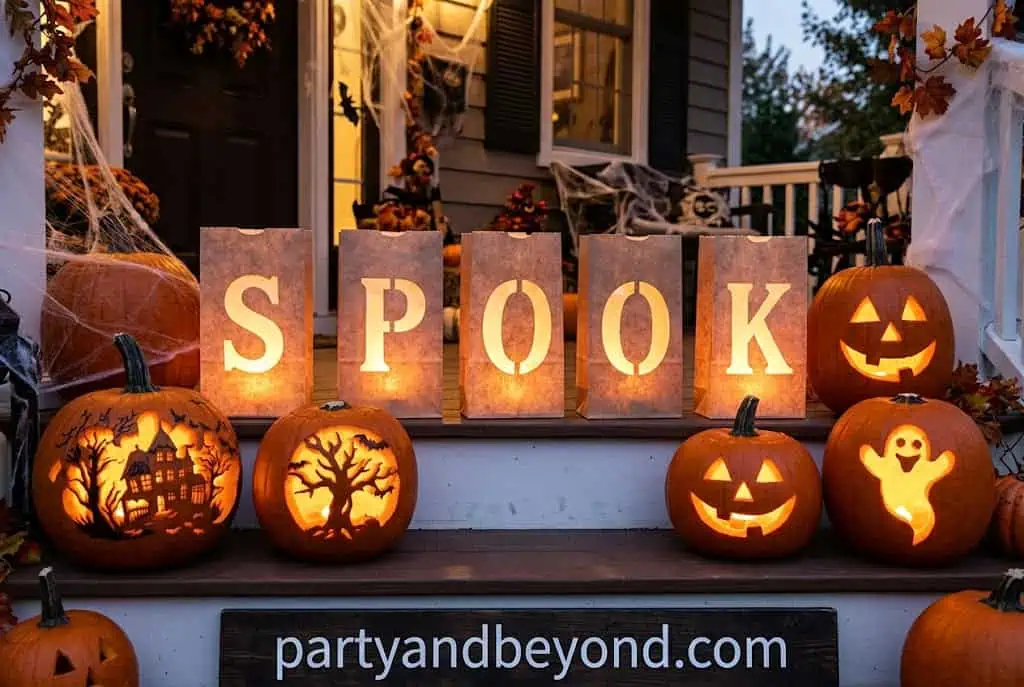
41. S-P-O-O-K Luminary SetBest for: Mantle, steps, or windowsill display | Difficulty: Easy | Time: 20 min per pumpkin | Cost: $6–$8 total
Five Dollar Tree small pumpkins, each carved with one letter: S · P · O · O · K. Block letters, one per pumpkin, arranged in a row on your front steps. Battery tea lights in each one. Small decorative pumpkins tucked between them for spacing.
Emma did this across her front porch steps last October. Three cars slowed down. One person parked and knocked on her door to ask how she did it. Five small pumpkins. Thirty letters between them. This is what restraint-driven decorating looks like — simple idea, perfect execution, done right.
How Do You Keep a Carved Pumpkin From Rotting Before Halloween?
Carved pumpkins last 5–7 days in cool outdoor temperatures (below 65°F). In warmer weather, expect 3–4 days maximum. Here’s what actually extends their life:
Apply petroleum jelly to every cut edge immediately after carving. Store the pumpkin in the refrigerator overnight if temperatures are still warm. Mist the carved surfaces with a 1:10 bleach-to-water solution every 2 days. Bring it inside overnight if temperatures drop below freezing. Use battery LED tea lights — real candles generate heat that accelerates rot from the inside.
Carving window: October 27th is the sweet spot. Early enough to enjoy your display for a few days, late enough that it holds through Halloween night.
Comparison: DIY Carving Tools vs. Store Kits
Feature
$2 Store Carving Kit
$9 Lino Cutter Set (Amazon)
Durability
Breaks mid-pumpkin
Lasts multiple seasons
Detail capability
Low
High
Etching / relief carving
No
Yes
Safety
Low (snapping plastic)
Medium (controlled blade)
Best for
Nothing
Everything
Verdict
Skip it
Buy this
🎉 Quick Summary
✅ Best for: Front porch displays, Halloween party decor, DIY projects across all skill levels 💰 Budget range: $4–$15 per pumpkin (tools included at $15–$25 one-time cost) ⏱ Setup time: 15 minutes for easy designs, up to 2.5 hours for advanced 🌟 Top beginner picks: Stacked Jack (#3), Emoji Pumpkin (#29), Mummy Wrap (#38), SPOOK Luminary Set (#41) 🌟 Top advanced picks: Mandala Circle (#9), Moroccan Lattice (#10), Day of the Dead Skull (#18), Starry Night Swirls (#35) 📌 Don’t skip: Petroleum jelly on all cut edges. Five minutes of effort adds five days of display life.
People Also Ask
How do I make a carved pumpkin last longer? Apply petroleum jelly to every cut edge immediately after carving. Store in a cool location (or refrigerate overnight). Mist carved surfaces with diluted bleach solution every two days. Use battery LED lights instead of candles — the heat from real candles accelerates rot from inside.
What’s the easiest pumpkin carving idea for complete beginners? The Emoji Pumpkin (#29) takes 15 minutes and requires only a basic knife. The SPOOK Luminary Set (#41) is equally fast and requires minimal skill. Both look intentional and well-executed despite the low difficulty.
What’s trending in pumpkin carving for 2026? According to Pinterest’s official trend reports, nature-inspired carvings (constellations, forest silhouettes, floral relief work) continue to trend upward as alternatives to traditional jack-o’-lanterns. Geometric designs — honeycomb and mandala patterns — are increasingly popular among adult decorators.
Is etching different from carving a pumpkin? Yes. Carving cuts all the way through the pumpkin wall, creating open holes that glow brightly when lit. Etching (or relief carving) removes only the outer skin layer, leaving the wall intact — the etched area glows softly through the thinned skin. Etching allows for much finer detail and is less structurally risky.
Can I carve fake craft-store pumpkins? Foam pumpkins can be cut with similar tools, but they don’t illuminate the same way and the material is less satisfying to work with. They’re better suited for painting and no-carve decorating. For actual carving with light effects, real pumpkins are always the better choice.
Frequently Asked Questions About unique pumpkin carving ideas
Q: What size pumpkin works best for detailed carving? A: For intricate designs like mandalas or sugar skulls, use the largest pumpkin you can find — at least 12–14 inches across. More surface area means more working room and thicker walls that won’t crack mid-design. Smaller pumpkins work best for simple designs or luminary sets.
Q: How do I transfer a stencil onto a pumpkin? A: Print your stencil, tape it flat against the pumpkin surface, and use a toothpick or poker tool to pierce through the paper along every line of the design. Remove the paper — you’ll have a dotted outline on the pumpkin skin. Connect the dots with a dry-erase marker and carve.
Q: What unique pumpkin carving ideas work best for young kids? A: Harry Potter Lightning Bolt (#19), Minecraft Creeper (#21), Emoji Pumpkin (#29), and the SPOOK Luminary Set (#41) are all kid-appropriate in design and execution. For kids carving themselves, supervise closely and let them do the marker drawing while an adult handles all knife work.
Q: Can I carve a pumpkin without any special tools? A: Technically yes — a sharp kitchen knife handles basic cutout carving. But you’ll sacrifice safety and control compared to a proper serrated carving knife. For anything beyond a basic face, a $9 lino cutter set from Amazon is non-negotiable.
Q: What’s the difference between “carving” and “relief carving”? A: Traditional carving cuts fully through the pumpkin wall. Relief carving removes only the outer orange skin, leaving the wall intact. Relief-carved designs glow softly when lit — they look almost painted rather than cut. Designs #12, #14, #33, and #36 all use this technique.
Q: How do I light a carved pumpkin safely? A: Battery-powered LED tea lights are the safest option for most displays — no fire risk, no heat buildup, no accelerated rot. Real candles look warmer and more traditional but require adult supervision and shorten the pumpkin’s life due to internal heat. For outdoor displays, always choose battery LED.
Q: How early should I carve my pumpkins? A: No more than 5 days before Halloween for outdoor displays in cool weather. In warm climates (above 65°F consistently), carve no more than 3 days out. October 27th or 28th is the ideal target date for most US climates.
Q: What pumpkins last longest after carving? A: Choose firm, unblemished pumpkins with no soft spots. Thicker walls hold up longer. Smaller pumpkins tend to shrivel faster than large ones. After carving, petroleum jelly on cut edges and cool overnight storage add meaningful extra days.
Q: Are there unique pumpkin carving ideas that don’t require a knife at all? A: Yes — etching and relief carving with a lino cutter requires no knife. The lino cutter removes skin rather than cutting through the wall. Designs #12, #14, #15, #33, #35, and #36 can all be executed with a lino tool alone, making them safer options for those uncomfortable with knife work.
Q: What’s overrated in pumpkin carving that I should skip? A: The $18 big-box store carving kits — the plastic snaps and the tools are imprecise. “Glow-in-the-dark” pumpkin spray — it’s dim and fades within two hours. Carving more than 5–6 days before Halloween — you’ll have a sad, shriveled display by October 31st. And honestly? Trying to execute an advanced design on your first carving session — start with something you can finish confidently.
Q: What’s the best way to photograph carved pumpkins? A: Shoot after dark with the pumpkins lit from within. Turn off all exterior lights. Use your phone’s “night mode” setting. Get low — shoot at the pumpkin’s level, not from above. A light-colored wall behind the pumpkins catches shadow projections beautifully. Galaxy constellation (#37) and Moroccan lattice (#10) are the two most photogenic designs specifically after dark.
Q: How do I make a pumpkin display feel cohesive, not chaotic? A: Choose three to five pumpkins maximum. Pick one dominant technique and let the others support it. Use the same lighting source in every pumpkin. Vary the heights (use wooden boxes, stacked bricks, or plant stands to lift some pumpkins) but keep the aesthetic consistent. Done right, a display feels collected. Done wrong, it looks like a checklist.
Conclusion
Pumpkin carving is one of the most exciting ways to showcase your creativity during the Halloween season, and these unique pumpkin carving ideas prove that there’s so much more to pumpkins than the traditional jack-o’-lantern. Whether you prefer cute animal designs, funny character pumpkins, spooky monsters, or intricate artistic creations, there’s an idea here for every skill level and decorating style.
The beauty of pumpkin carving is that you can personalize each design to match your personality, Halloween theme, or fall décor. From family-friendly projects to eye-catching showpieces that impress guests and trick-or-treaters, these creative pumpkin carving ideas can transform an ordinary pumpkin into a memorable work of art.
Pick your favorite design, gather your carving tools, and let your imagination take over. With a little creativity and effort, your pumpkin display can become the highlight of your Halloween decorations and leave a lasting impression on everyone who sees it. Happy carving and have a spooktacular Halloween!
Chloe Parker is the DIY decor and Halloween writer at Party & Beyond. Based in Denver, Colorado, she specializes in budget-friendly party decorations, family Halloween costumes, and creative crafts. With 10+ years of crafting experience, Chloe believes parties don't need to be perfect to be memorable , just made with love and a little hot glue.