

Disclosure: This tutorial includes affiliate links to recommended supplies. As an affiliate, I earn from qualifying purchases at no additional cost to you. Every product I recommend has been used in actual party setups.
patriotic snack board for July 4th
Before: a plain rectangular cutting board sitting empty on your kitchen counter.
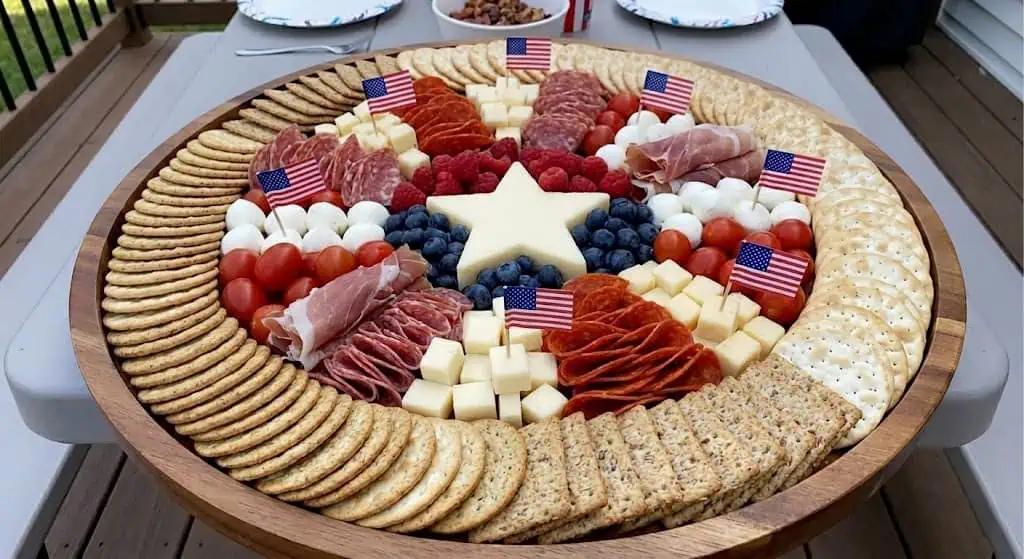
After: a stunning red, white, and blue patriotic grazing board — strawberries fanned in perfect rows, blueberries clustered like the starfield, white cheddar cubes catching the afternoon light, salami roses tucked into the corners, crackers fanned in arcs around every edge — that makes every person who walks through your back door stop and reach for their phone.
The dividing line? Eight steps, about 30 minutes, and $30–$50 in ingredients.
I helped plan a backyard celebration a few summers ago where a friend set out three patriotic boards on a folding table lined with a red-checked cloth. Total cost for all three boards: under $100. Guests talked about that spread for weeks — two people asked if she’d hired a catering company. She had not. She spent a Sunday afternoon at Costco and a Tuesday evening at the dollar store.
That is exactly what budget DIY can do. Here’s how to build your own, step by step.
What You’ll Need for a Patriotic Snack Board
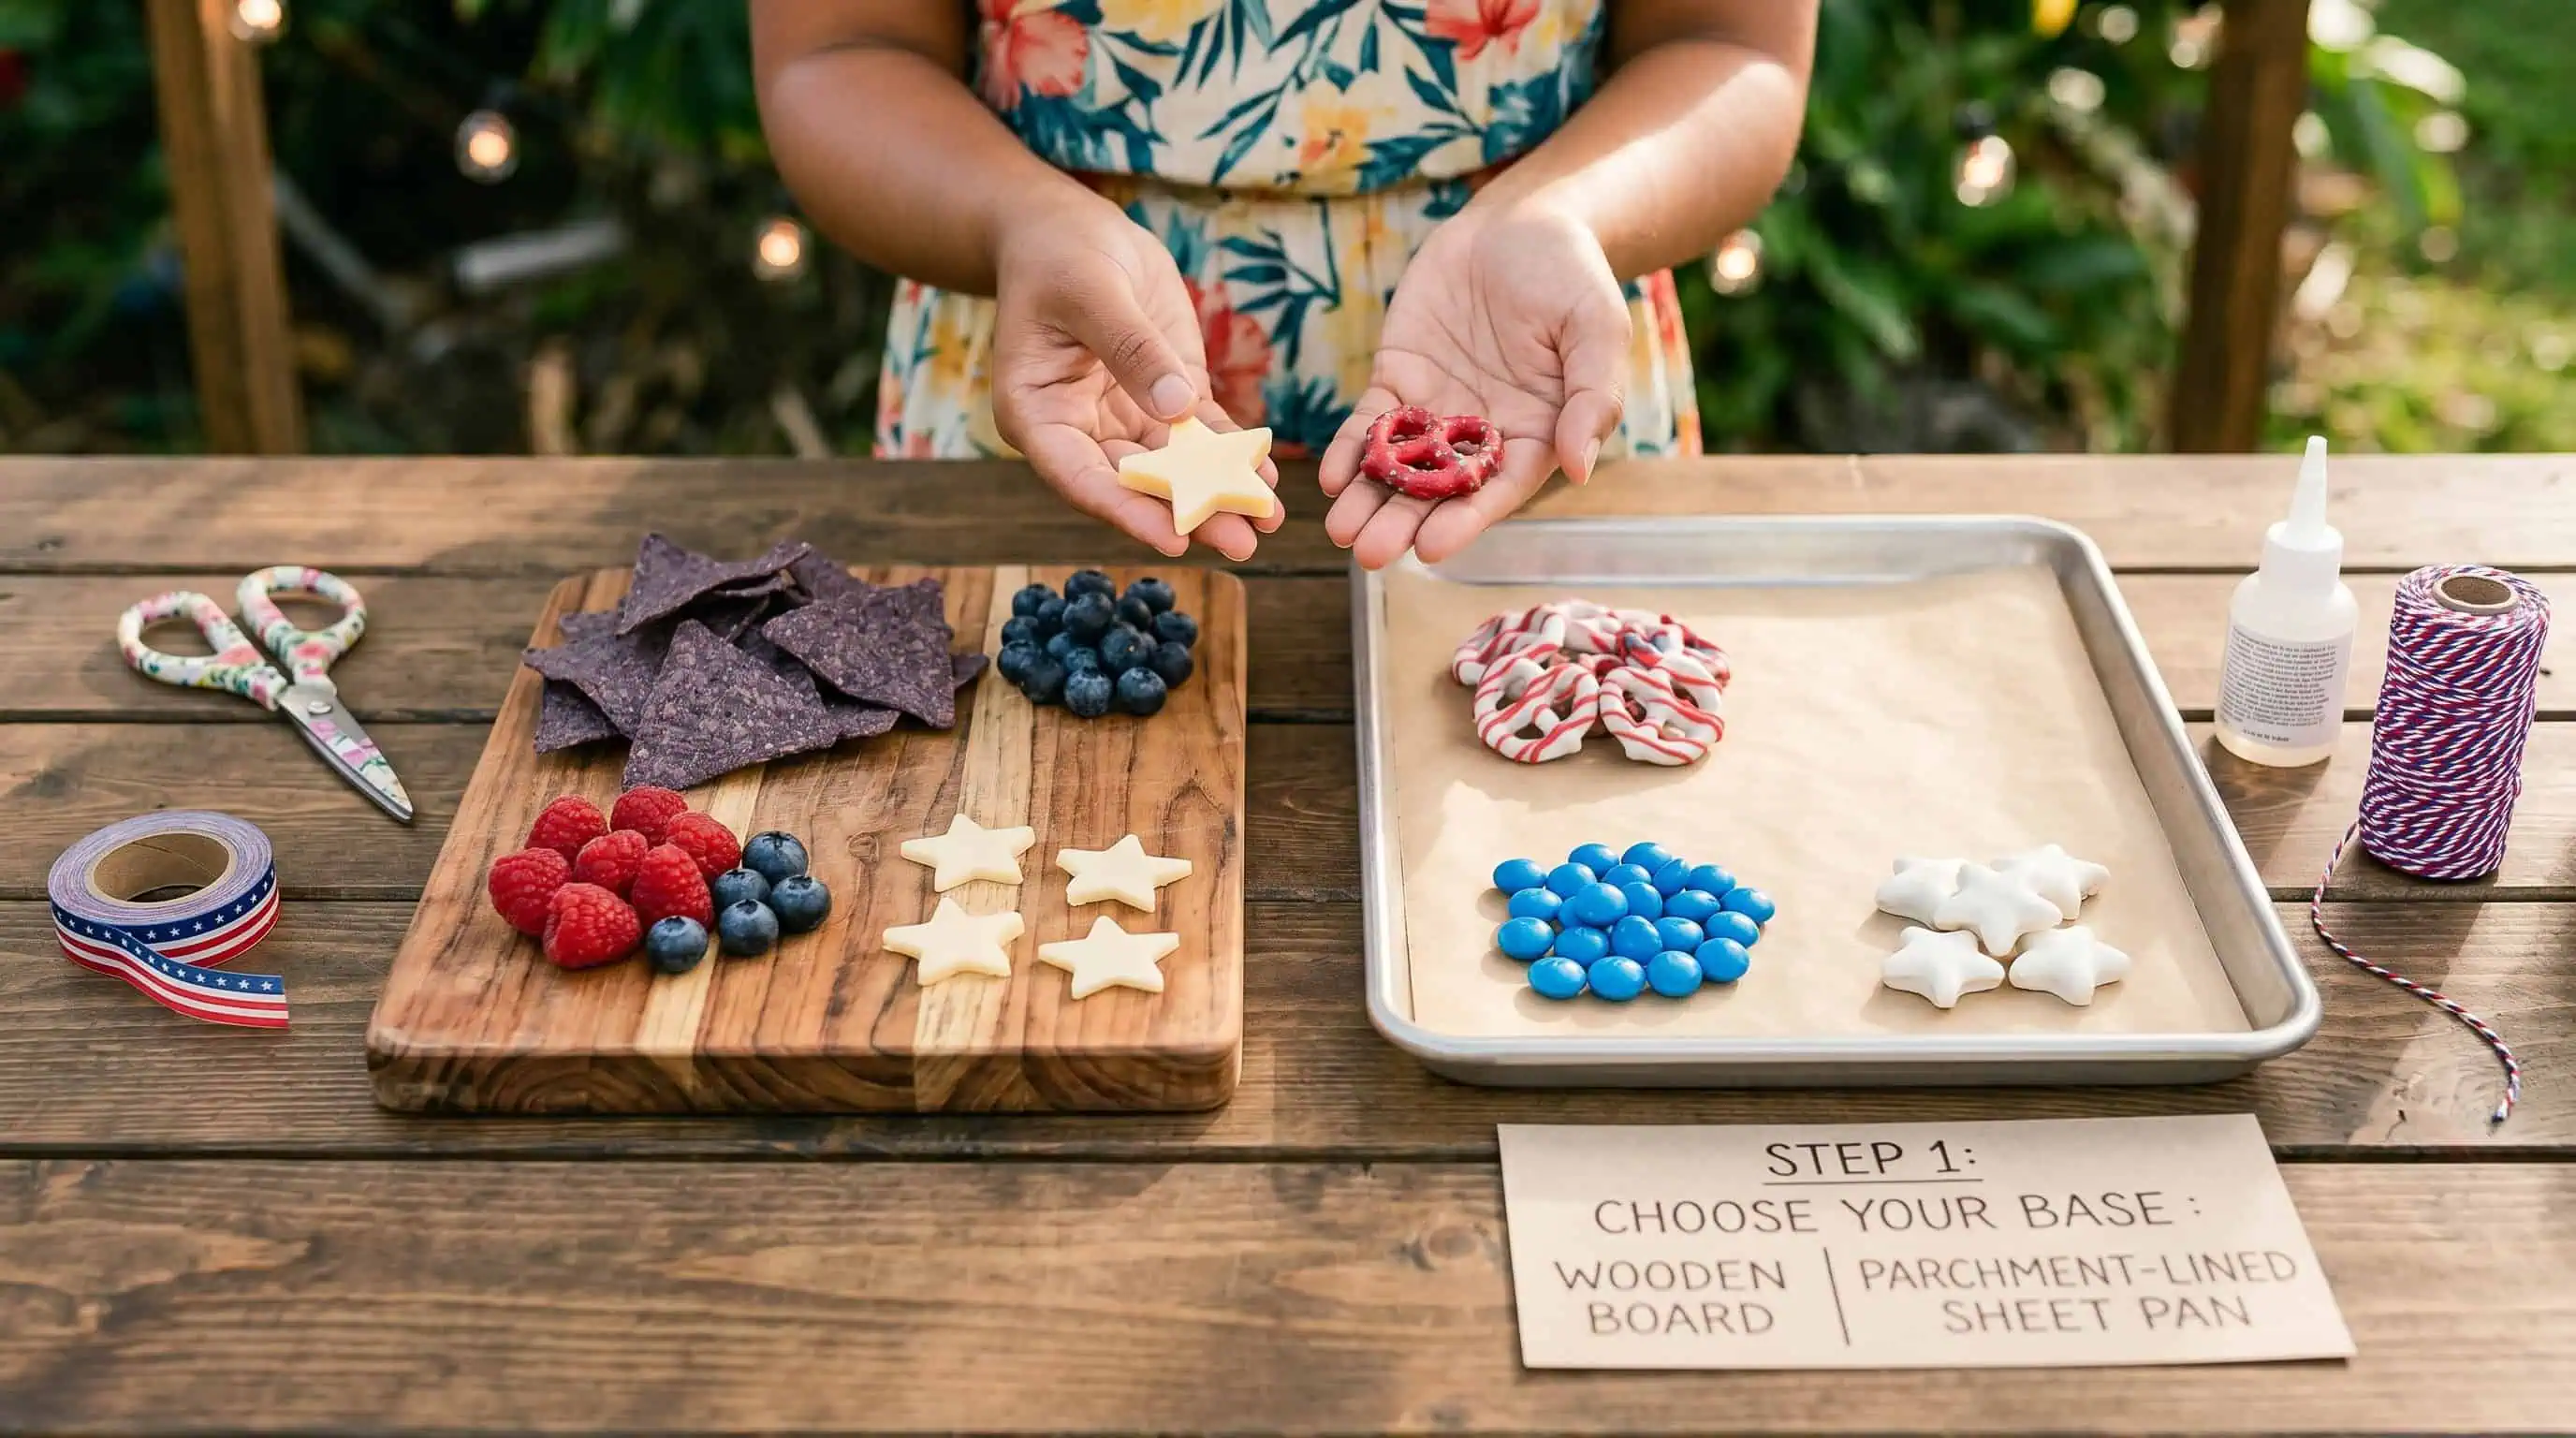
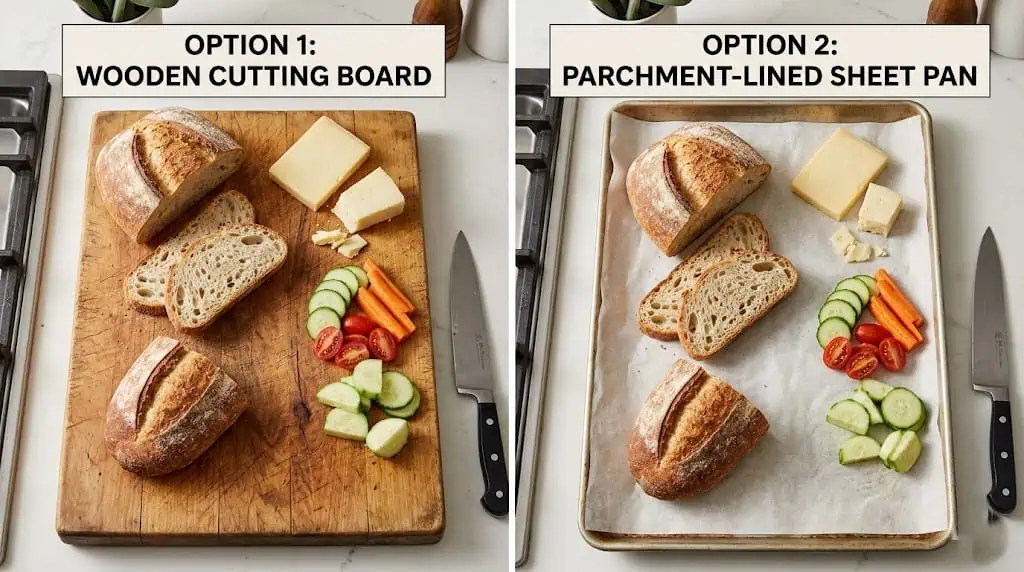
Board or base: Large wooden cutting board ($15–$25) or a large rimmed sheet pan lined with white parchment paper (no extra cost — works perfectly)
Red zone items: 1 pint strawberries, half-pint raspberries, 4–6 oz pepperoni or salami, optional red grapes or red pepper strips
White zone items: 8 oz white cheddar block, 1 small wheel of brie ($6–$8), 8 oz fresh mozzarella balls, optional white grapes or cauliflower florets
Blue zone items: 1 pint blueberries, half-pint blackberries, optional purple grapes or blue cheese crumbles
Supporting items: 2–3 cracker varieties, 1–2 small ramekins of honey or jam, fresh rosemary sprigs, patriotic star picks, small star cookie cutter, handful of almonds or walnuts (for gap-filling)
Total estimated cost: $30–$50 for 10–15 guests
How to Build a Patriotic Snack Board for July 4th
Step 1: Choose and Prepare Your Board
Time: 2 minutes
For 10–15 guests, you want a board surface of at least 16×12 inches. Options that work well: a large wooden cutting board (18×12 inches is ideal), a marble pastry slab, or a large rimmed sheet pan lined with white parchment paper.
Don’t underestimate the sheet pan method. Lined with parchment, it looks clean and intentional in every photo. The rim also keeps items from sliding off when guests reach. I’ve used this at outdoor parties for years — it’s practical and it costs nothing extra.
Place the board in its final serving location before you start loading it. A fully assembled snack board is heavier than it looks and difficult to move without things shifting.
Pro Tip: For parties of 20+ guests, use two boards side by side. It creates an instant grazing table effect and gives guests room to reach without crowding each other.
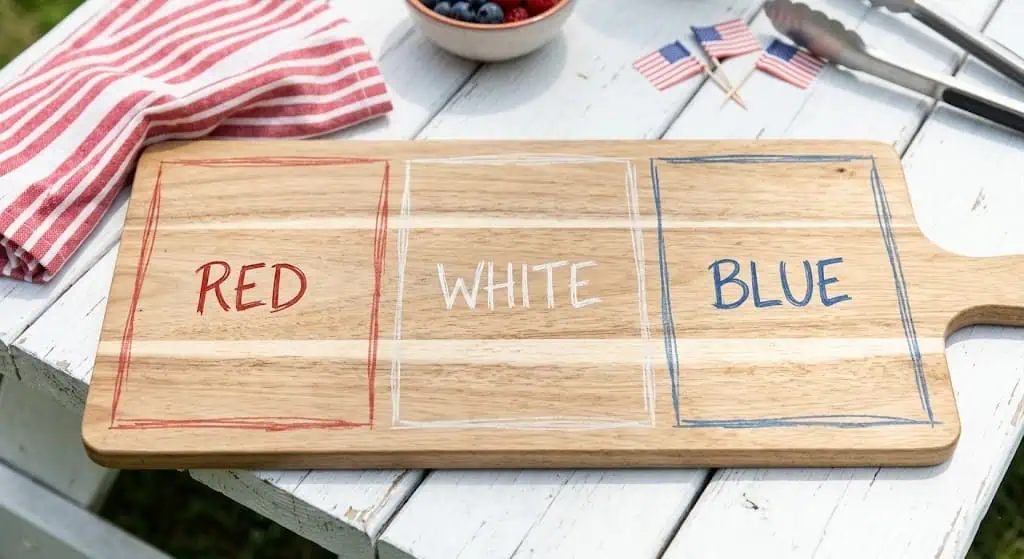
Step 2: Map Out Your Color Zones Before You Touch the Food
Time: 1 minute
This step is the one most people skip — and it’s the reason some boards look intentional and others look like a pile.
For a flag-inspired layout: the top-left corner is your blue zone (the starfield), and the remaining space runs in horizontal red and white sections like flag stripes. For a simpler approach: blue right, white center, red left.
You don’t need to draw anything. Just decide before you place the first item. This 60-second decision prevents the most common snack board mistake: mixing all three colors together until none of them pop individually.
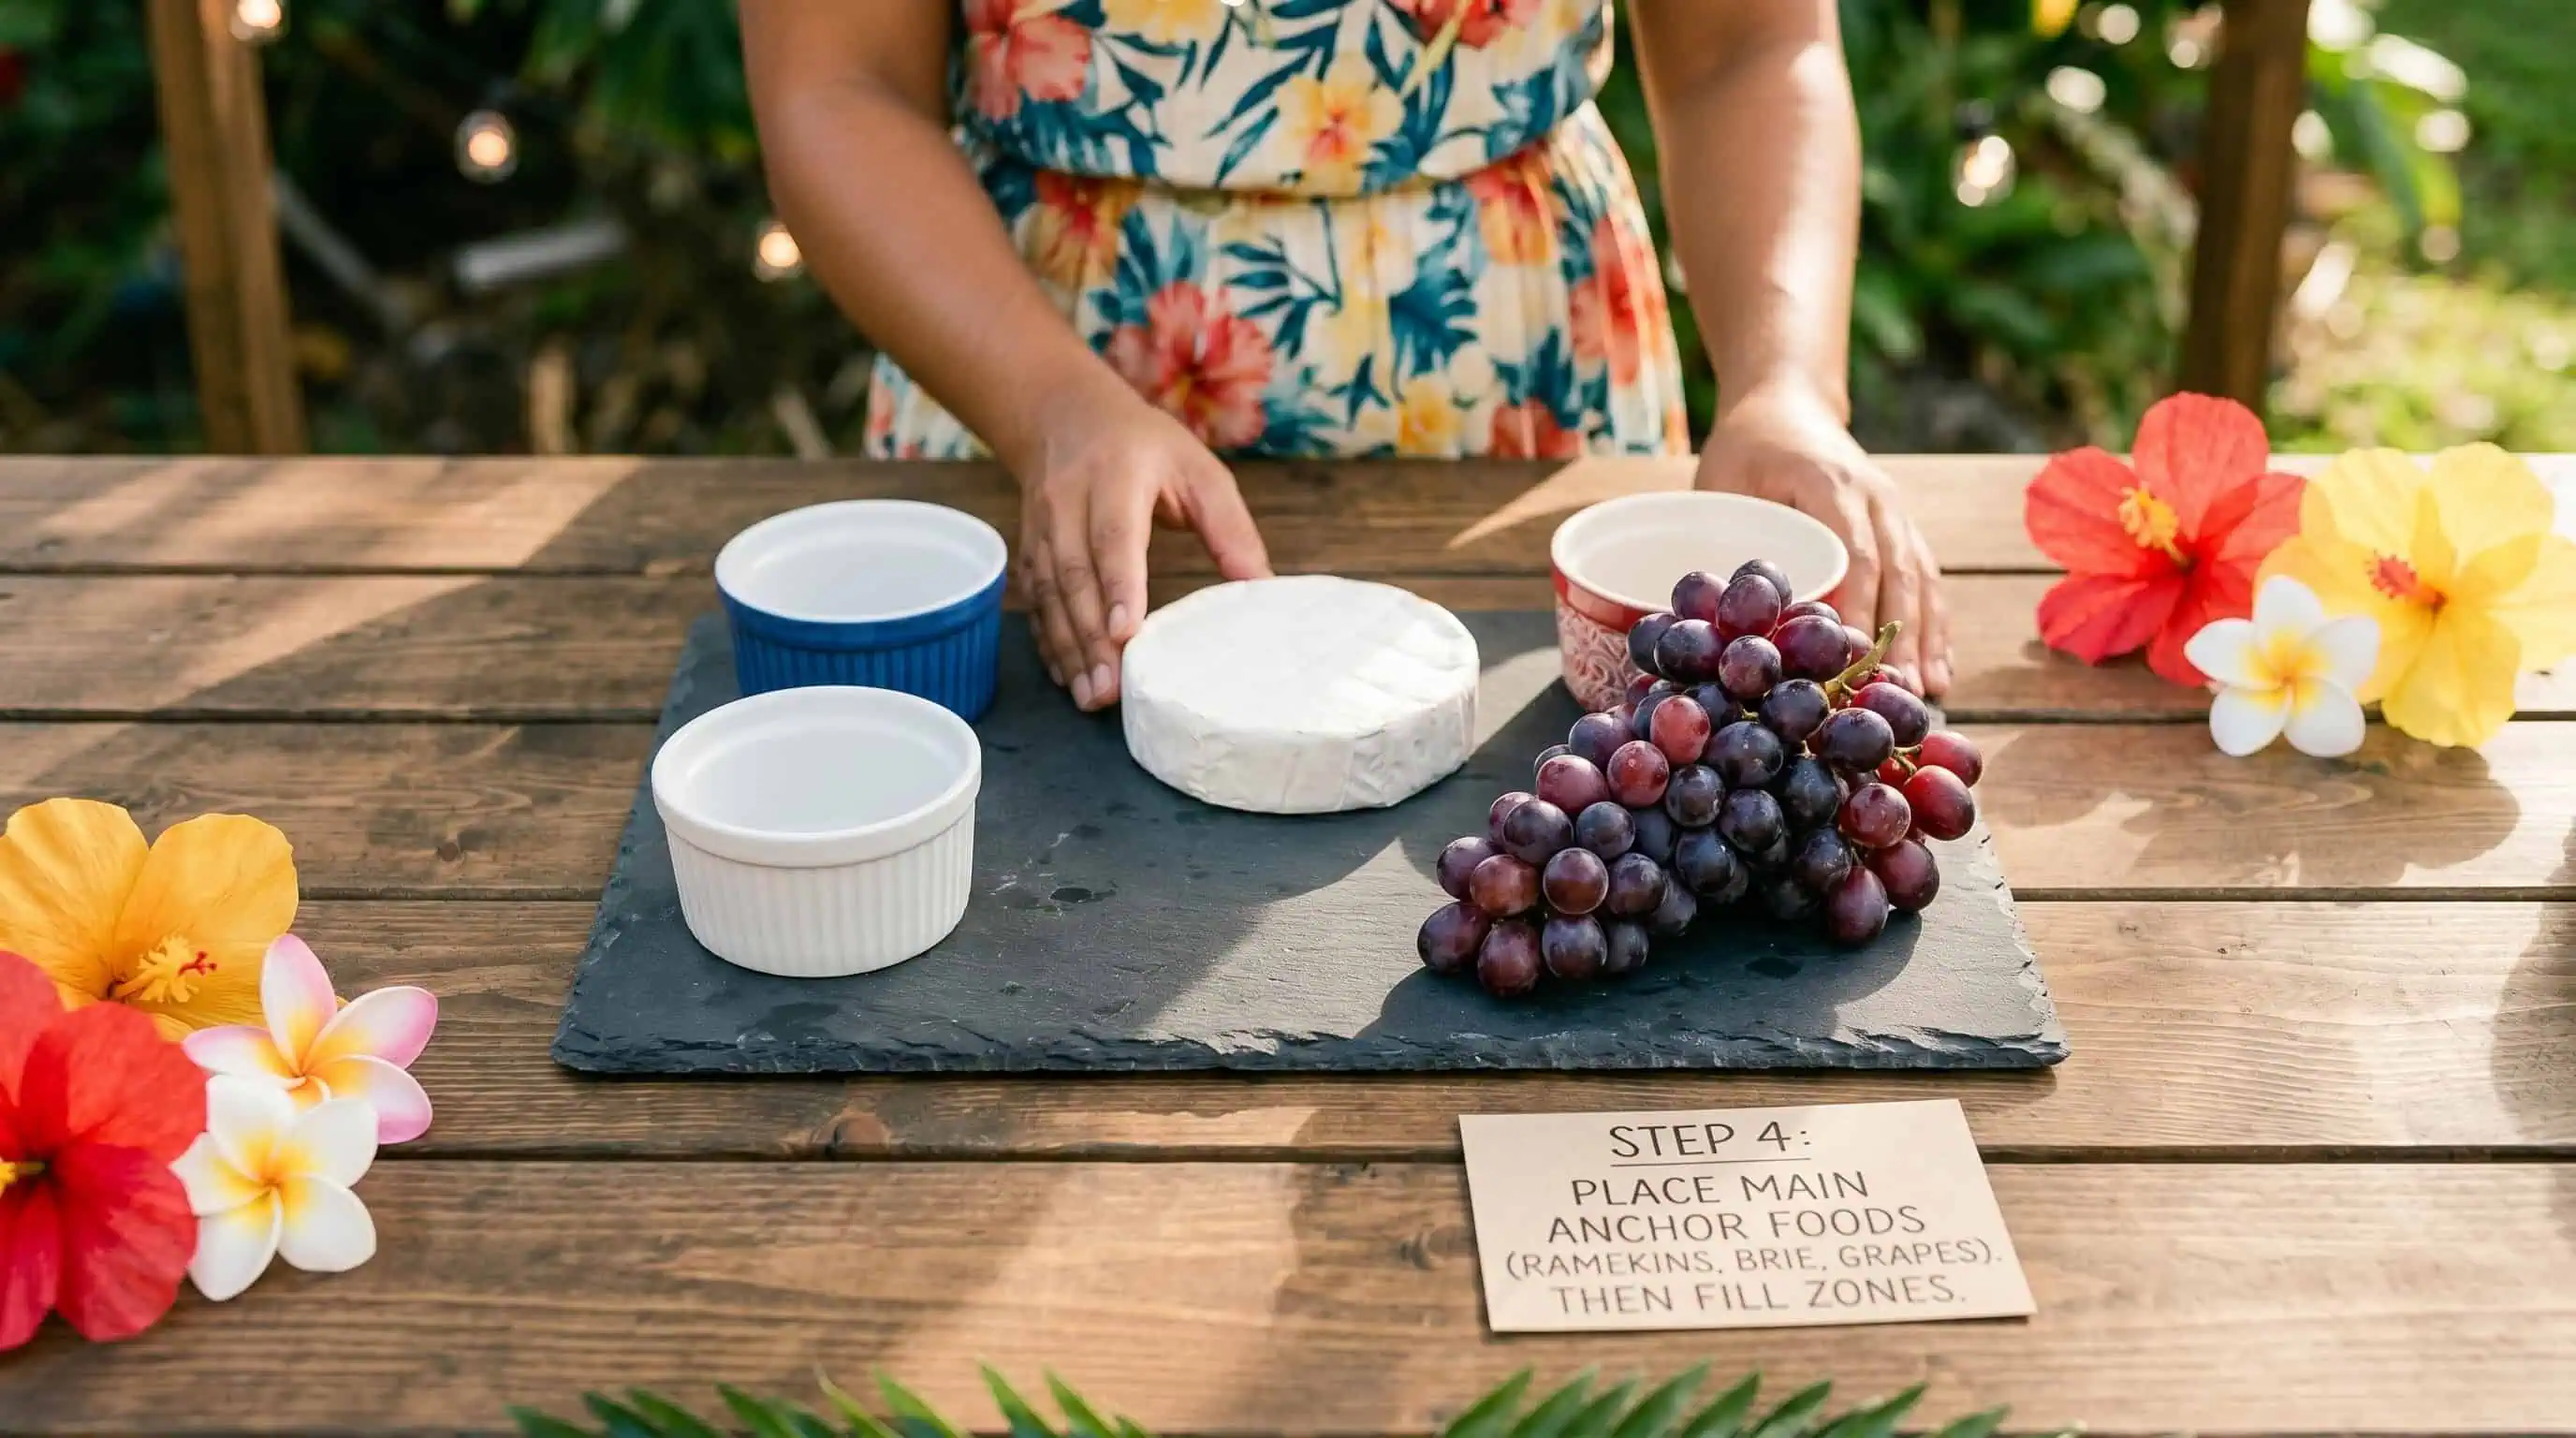
Step 3: Place Your Anchor Items First
Time: 3 minutes
Anchors are the items that won’t move once placed: small ramekins of honey or jam, a brie wheel, a large cluster of grapes, any tall item that creates height on the board.
Place these first. They define the zones and create the structure everything else builds around.
Standard anchor setup for a 16×12 board: 1 small ramekin of honey (top-right), 1 small ramekin of jam or Dijon (near center), 1 brie wheel (white zone, slightly left of center), 1 large blueberry cluster (blue zone, top-left corner).
Once anchors are placed, you have your map. Everything fills in around them.
Step 4: Build the Red Zone
Time: 8 minutes | Items: strawberries, raspberries, pepperoni or salami, optional red grapes
Start with the strawberries. Hull them, then make 4–5 vertical cuts most of the way through, leaving the top 1/4 connected. When you gently press them flat, they fan open like a flower. Fan a row of these and you’ve created the most visually impressive section of the board for about $4.
For pepperoni: fold each round in half, then in half again (quarter-fold). Stack 6–8 folded pieces in a loose cluster. This simple fold makes pepperoni look professional rather than flat and thrown-on.
And here’s the magic: a salami rose. Roll one slice of salami tightly into a tube. Fold it in half lengthwise with the curved edge facing up. Press 5–6 of these folded halves into a small ramekin, curved edges pointing up — they bloom into a rose shape. This takes 60 seconds and gets more compliments than anything else on the board.
Fill remaining red zone gaps with raspberries clustered in groups of 7–10. They don’t require arranging — pour them into the space and nudge with your finger.
Pro Tip: Let the red zone items slightly overlap the border into the white zone. Natural color blending where zones meet looks intentional and polished.

Step 5: Build the White Zone
Time: 7 minutes | Items: white cheddar, brie, mozzarella balls, optional white grapes
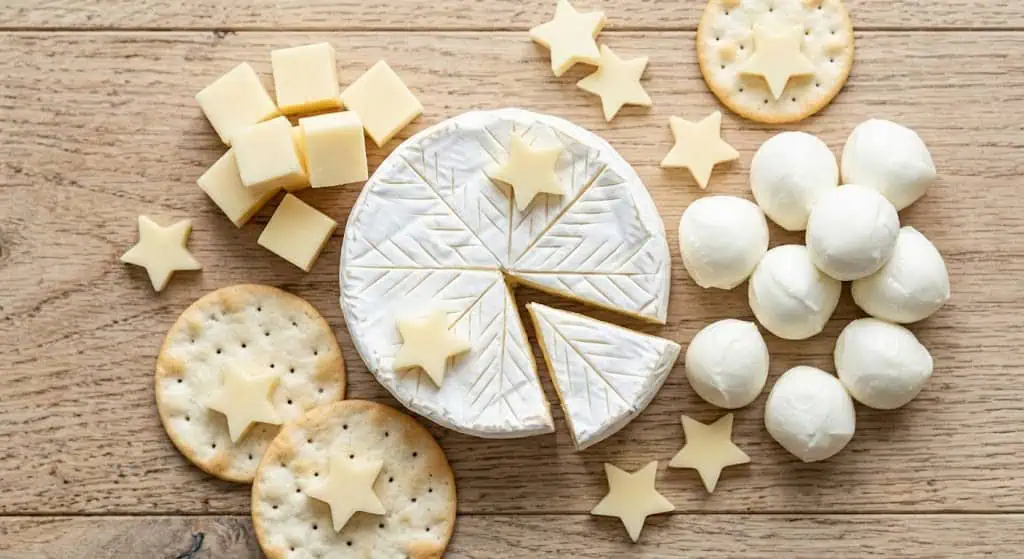
The white zone is where the star-shaped cheddar happens — and it’s the detail that makes guests say “Wait, you made that?”
Press a small star cookie cutter firmly into a 1/4-inch slice of white cheddar. Pop the star out. Repeat. Scatter these across the white zone and a few spots throughout the board. Total added cost: $0 if you have the cutter, or $1.25 from the dollar store. Visual payoff: completely disproportionate to the effort.
For the rest of the white zone: cube the cheddar block into 3/4-inch pieces and group them loosely. Score the top of the brie in a crosshatch pattern (press a knife lightly — don’t cut through). Set mozzarella balls directly from the container. Add white grapes in a small cluster near the brie.
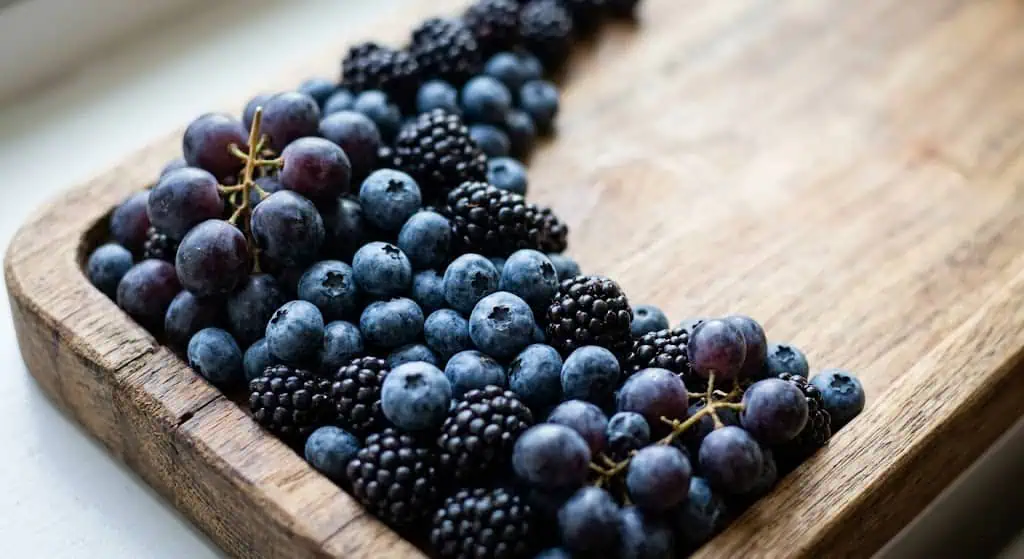
Step 6: Build the Blue Zone
Time: 3 minutes | Items: blueberries, blackberries, purple grapes, optional blue cheese crumbles
This is the easiest zone on the board.
Pour blueberries into the top-left corner. Nudge them into their zone with your finger — they cluster naturally. Add blackberries mixed throughout for depth and texture. Tuck a small cluster of purple grapes alongside. For adult boards, a tablespoon of blue cheese crumbles scattered through this zone adds flavor interest while keeping the color theme going.
The blue zone doesn’t need precision. Blueberries find their own arrangement. Trust the process.
Step 7: Add Crackers and Bread Around the Edges
Time: 4 minutes | Items: 2–3 cracker varieties, optional crostini or breadsticks
Crackers go last — or near last — because they soften quickly if they sit under heavier items.
Fan crackers along the perimeter of the board in overlapping arcs. Keep crackers at the edges, not the center. Using two or three cracker types creates the visual texture variation that makes the board look more abundant than it is. Thin water crackers plus multigrain rounds plus breadsticks is a combination that photographs well and appeals to a wide range of preferences.
Fan crostini slices near the brie — natural pairing, and the visual storytelling guides guests toward that combination.
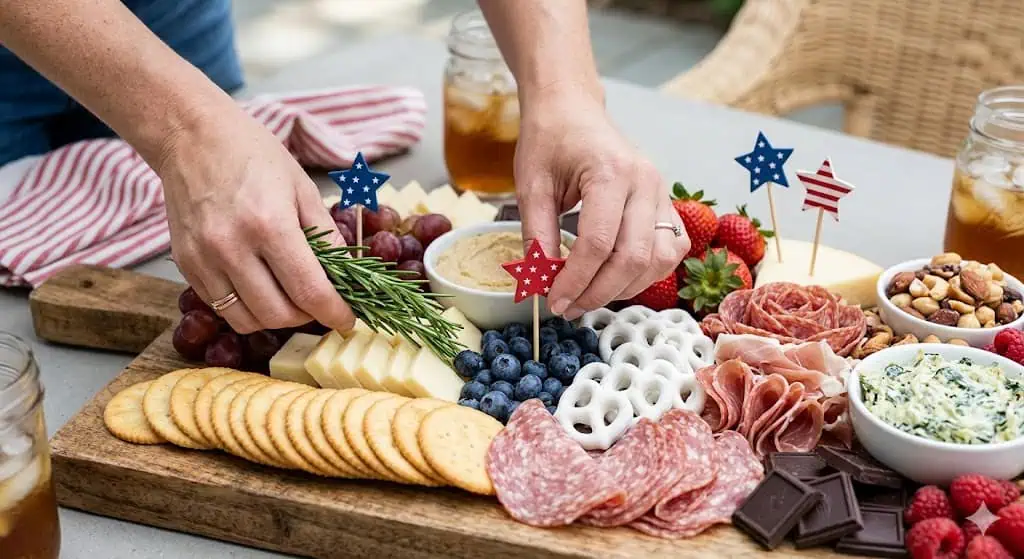
Step 8: Fill Gaps, Add Greenery, and Finish
Time: 4 minutes | Items: rosemary sprigs, patriotic picks, star-shaped cheese, nuts
Every gap is an opportunity.
Fresh rosemary sprigs are the secret weapon. The dark green provides the visual contrast the board needs — it makes the red and blue zones pop more dramatically by comparison. Tuck small sprigs throughout the board wherever there’s an empty corner or gap. They also smell incredible and add an herby note to the overall aroma of the spread.
Scatter patriotic star picks throughout — stand them upright in soft cheeses or lay them diagonally across sections. Set any remaining star-shaped cheddar cutouts across the board. Lean a honey dipper against the honey ramekin for height variation. Fill any remaining tiny gaps with almonds or walnuts.
Step back. The board that looked chaotic and random at 80% completion looks completely different now. That last 20% is where it transforms.
Pro Tip: Take your photo now, before guests arrive. You have about 30 seconds after the first person reaches in before it becomes a different board entirely. The “before guests” board photo is what goes on Pinterest.
Patriotic Snack Board Variations: Which Style Is Right for You?
| Board Style | Best For | Cost (10–15 guests) | Active Time | Difficulty |
|---|---|---|---|---|
| Classic Cheese Board | Adult gatherings | $35–$50 | 30 min | Easy |
| Kid-Friendly Board | Family parties | $25–$35 | 20 min | Easiest |
| Vegetarian Board | Dietary needs | $28–$40 | 25 min | Easy |
| Budget Fruit-Forward | Large casual crowds | $20–$30 | 20 min | Easiest |
| Full Grazing Table | Events of 30+ guests | $80–$150 | 60–90 min | Medium |
Kid-friendly swaps: Remove blue cheese and salami. Add string cheese, Babybel wheels, Ritz crackers, mini pretzels, and more fruit. Same flag layout — fully kid-accessible.
Vegetarian version: Skip all meats. Double the cheese variety — add gouda, gruyère, or goat cheese to the white zone. Fill the red zone with roasted red peppers in olive oil alongside extra strawberries. Just as beautiful and crowd-friendly.
Budget version: Skip the brie (the most expensive single item). Double up on white cheddar. Use more fruit and fewer specialty items. A $20 board built around fresh fruit and one good cheese block looks stunning when the zones are clearly defined.
Common Mistakes to Avoid
Mixing colors before establishing zones. Once blueberries get scattered into the strawberry area, the flag effect disappears. Build each zone completely before moving to the next.
Loading crackers too early. Crackers placed under heavier items or sitting for more than an hour go soft. Add them within 30 minutes of serving time.
Building the board, then trying to move it. A fully loaded board weighs more than it looks and slides on smooth surfaces. Assemble it in its final serving spot.
Skipping the rosemary. It’s $1.25 at most grocery stores or free from a herb garden. The green is not optional — it’s what makes the red and blue zones pop visually. You will notice the difference.
Summary: Your Patriotic Snack Board Quick Guide
🏆 BEST OVERALL: Classic cheese board — $35–$50 — brie, white cheddar, salami roses, full fruit zones 💰 BEST BUDGET: Fruit-forward board — $20–$30 — skip the brie, double the fruit 💎 BEST FOR ADULTS: Full charcuterie board — $45–$60 — blue cheese, prosciutto, fig jam 🎯 BEST FOR KIDS: Simplified kid board — $25–$35 — string cheese, Ritz, all fruit, no blue cheese ⚡ BEST LAST-MINUTE: Sheet pan + parchment + whatever fruit and cheese you have — 20 minutes flat
Frequently Asked Questions
How big should a patriotic snack board be for 10 people?
For 10–12 guests, aim for a board surface of at least 16×12 inches. For 15–20 guests, use a 20×15 inch surface or two standard boards side by side. Plan for 2–3 ounces of total food per person when the board is served alongside other party food, or 4–5 ounces per person if it’s the main appetizer spread.
What’s the best cheese for a 4th of July patriotic snack board?
White cheddar is the foundation — it fits the white color zone, most people love it, and an 8 oz block costs about $5–$7. Brie adds elegance and pairs naturally with jam and fruit. For adults, a crumble of blue cheese in the blue zone is both thematic and delicious. Choose two from: white cheddar, brie, fresh mozzarella, or gouda.
How far in advance can I build a charcuterie board?
Assemble the board up to 2 hours in advance and keep it covered tightly with plastic wrap in the refrigerator. Add crackers within 30 minutes of serving. The base board (cheese, fruit, meats) can technically be assembled the night before — just keep it cold and add crackers, rosemary, and picks fresh on the day.
How much does a patriotic charcuterie board cost to make?
A classic patriotic board for 10–15 guests costs $30–$50 in ingredients. The biggest cost variables are the brie ($6–$8) and charcuterie meats ($5–$8). A budget version without brie and with minimal meat runs $20–$30 and looks equally beautiful when the fruit is fresh and generous. Per person, that’s $2–$5 — significantly less than store-bought charcuterie trays.
How do I make salami roses for a snack board?
Roll one slice of salami tightly into a tube. Fold it in half lengthwise with the curved side facing up. Repeat with 5–6 slices and press them together into a small ramekin or shot glass, all curved edges pointing up. They bloom into a rose shape. Total time: about 60 seconds. They look advanced; they are not.
Can I make a patriotic snack board without meat?
Absolutely. A vegetarian patriotic board built around varied cheeses, fresh fruit, roasted vegetables, and quality crackers looks stunning. Simply double the cheese and fruit quantities to compensate for the volume the charcuterie would have added. Most guests won’t even notice the absence of meat when the board is this visually full.
How do I keep the board from getting soggy?
Keep wet items in their own zones and don’t let them sit directly on crackers. Pat strawberries dry before placing. Don’t add crackers until 20–30 minutes before guests arrive. If serving outdoors in summer heat, keep the board in shade and refresh wet items as needed throughout the party.
What is the blue food on a patriotic charcuterie board?
Blueberries are the standard blue item — visually perfect and universally loved. Blackberries add depth. Purple grapes extend the blue zone visually. For adults, blue cheese crumbles add a genuinely blue food element with a strong flavor payoff. All four together make for a rich, layered blue zone.
How do I make star-shaped cheese for a snack board?
Press a small star-shaped cookie cutter firmly into a 1/4-inch slice of white cheddar. Pop the star out. A pack of mini cookie cutters costs about $5–$6 and works across multiple uses. This detail takes 3 minutes and makes guests assume it required significant effort.
Where do I buy patriotic picks and decorations for a snack board?
Dollar stores (Dollar Tree, Five Below, Deals) reliably stock patriotic picks and small flags around early July — usually $1.25–$1.50 per pack of 20–30. Amazon carries patriotic toothpick sets in larger quantities. Michael’s and Hobby Lobby carry star cookie cutters year-round in the baking section.
Can I build a patriotic board for a large crowd of 30+ guests?
For 30+ guests, build a grazing table rather than a single board. Use three boards side by side, or spread food directly on a butcher paper-lined table. Triple all quantities and add charcuterie cups — small individual cups filled with rolled meats and a cracker — for easy grabbing without crowding. Budget approximately $80–$150 total and plan 60–90 minutes of assembly time.
What crackers work best on a patriotic snack board?
Use two or three cracker types for visual variety: thin water crackers (delicate, ideal with soft cheese), multigrain rounds (hearty, better with hard cheese), and breadsticks or crostini for height and visual interest. Avoid strongly-flavored crackers that compete with cheese. For kid-friendly boards, Ritz is the crowd-pleaser every time.
Build It, Photograph It, Eat It
Here’s the thing nobody tells you about snack boards: they’re designed to be touched. The messy, partially-attacked board after 20 guests have reached in is actually the best version of it — because it means it worked.
Build it beautifully. Photograph it immediately. Then step back and let your guests do what guests do.
And when someone asks — “Wait, how did you make this?” — that’s your moment. “Eight steps,” you tell them. “Thirty minutes. And a lot of blueberries.”
Happy 4th of July, friend.
Read More: 4th of July Party Ideas on a Budget: Make It Feel Special Without Spending a Fortune

")
")
")
")
")
")