

Disclosure : This post contains affiliate links. If you buy through them, I may earn a small commission at no extra cost to you. All recommendations come from personal crafting experience and research.
The numbers actually surprised me. Americans poured a record $13.1 billion into Halloween in 2025, about $4.2 billion of it on decorations alone, with 78% of celebrants buying decor (NRF, 2025) — decoration spending has officially passed candy spending. But here’s my honest take after years of doing this: most of that store-bought plastic looks worse in person than a $10 craft you made yourself. The handmade version has a warmth the mass-produced one never gets.
Below are 25 DIY decorations sorted by where they go — indoors, the front door, the yard, your pumpkins, and the table. Most cost under $15 and use stuff you already own.
What makes a DIY Halloween decoration look good?
A DIY decoration looks good when it’s lit, grouped, and kept to a tight color palette — not when there’s simply a lot of it. This is a budget list that runs from kid-friendly-cute to genuinely creepy, so pick your lane before you start. None of it needs special skills: if you can run a hot glue gun and hold a paintbrush, you can make every project here. My one honest rule — don’t try to make all 25. Pick five or six that fit your space and do those well.
Are DIY Halloween decorations cheaper than store-bought?
Yes — DIY decorations typically cost $3–$15 each versus $20–$40 for store-bought equivalents, and they often look better. Here’s how the most popular pieces compare.
| Decoration | DIY cost | Store-bought | Reusable? |
|---|---|---|---|
| Floating cheesecloth ghost | ~$10 | ~$30 | Yes |
| Foam tombstone (each) | ~$5 | ~$20 | Yes |
| Giant spider web | ~$8 | ~$15 | Sometimes |
| No-carve decorated pumpkin | $0–$10 | $15–$25 | Yes (faux) |
| Colored uplighting | $8–$15 | $25+ | Yes |
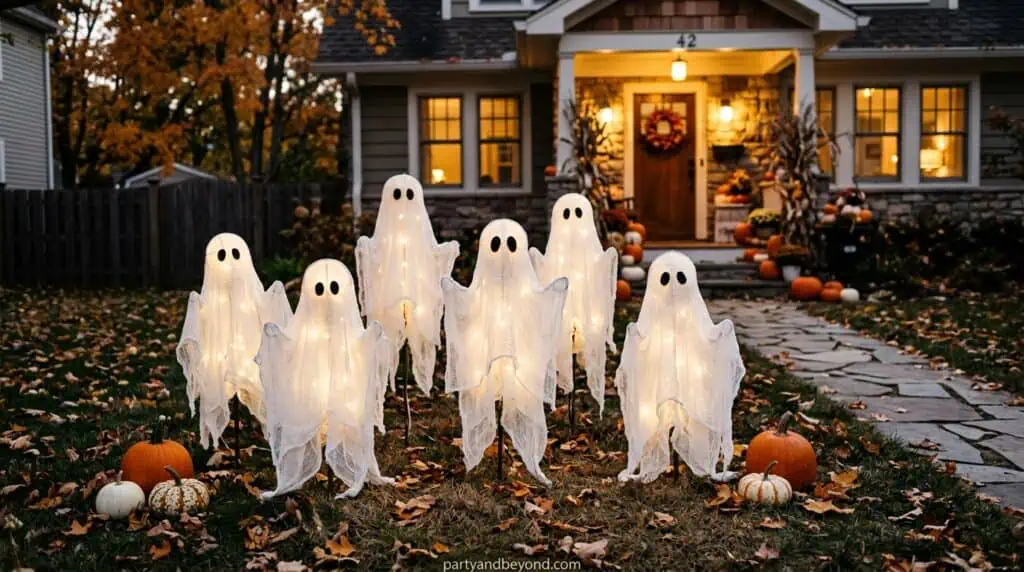
What are the best DIY indoor Halloween decorations?
The best indoor decorations are cheesecloth ghosts, paper bats, and jar luminaries, because they glow softly and cost under $12 each. Here are seven that transform a room.
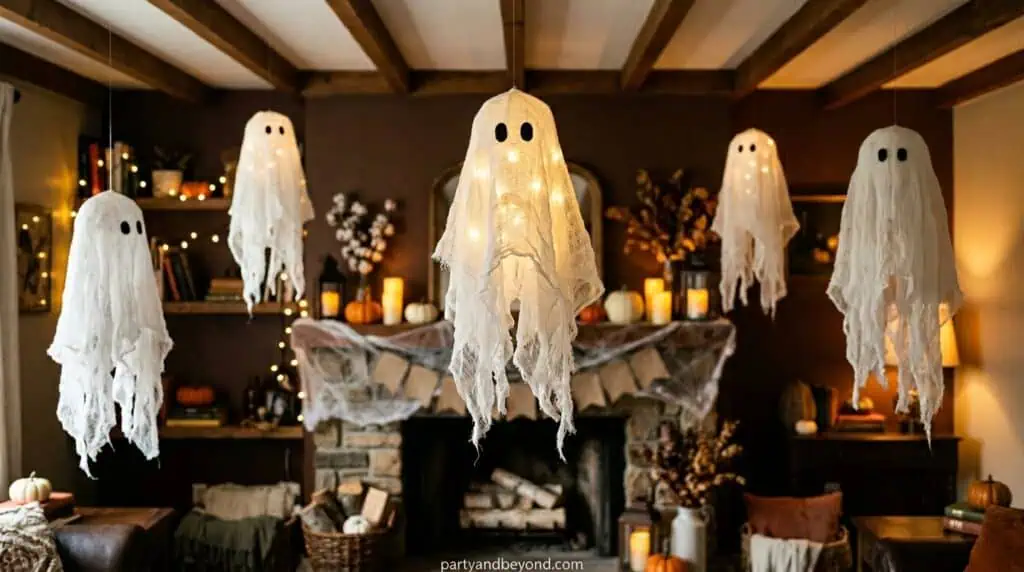
1.Floating cheesecloth ghosts
Drape cheesecloth over a balloon on a stand, paint it with watered-down glue or fabric stiffener, and let it dry overnight. Pop the balloon, add felt eyes and an LED tea light underneath, and you’ve got a ghost that glows ($8–$12). About 30 minutes hands-on. Stiffen it more than you think you need to, or it slumps by morning. Best for: indoor or porch, spooky-but-elegant.
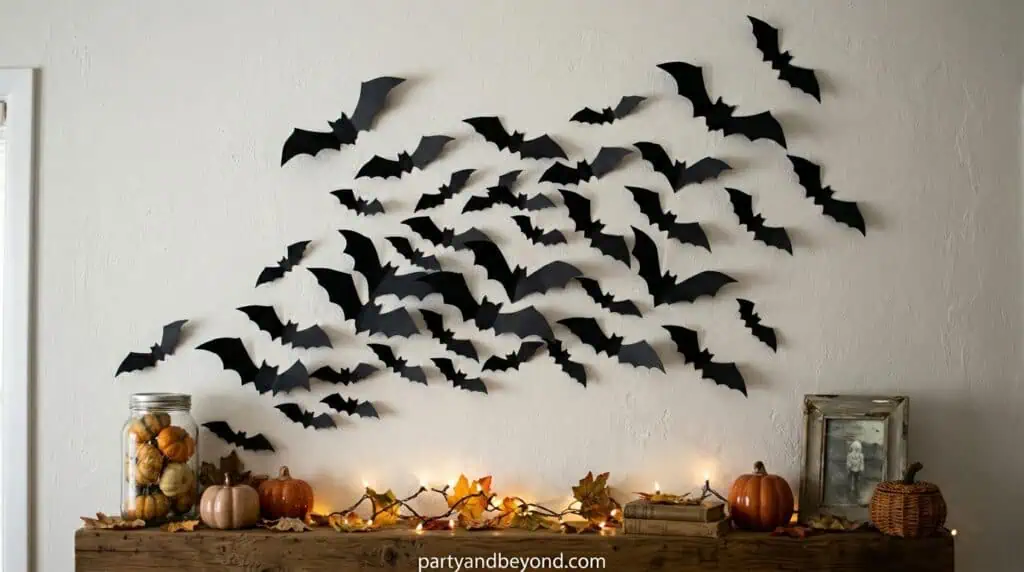
2.Paper bat wall colony
Trace a bat template onto black cardstock, cut 15–20 in two or three sizes, fold the wings up for dimension, and tape them flying up a wall from small to large ($3–$5). Half an hour. The folded wings are what make flat paper read as mid-flight. Best for: a feature wall and the cheapest high-impact project here.
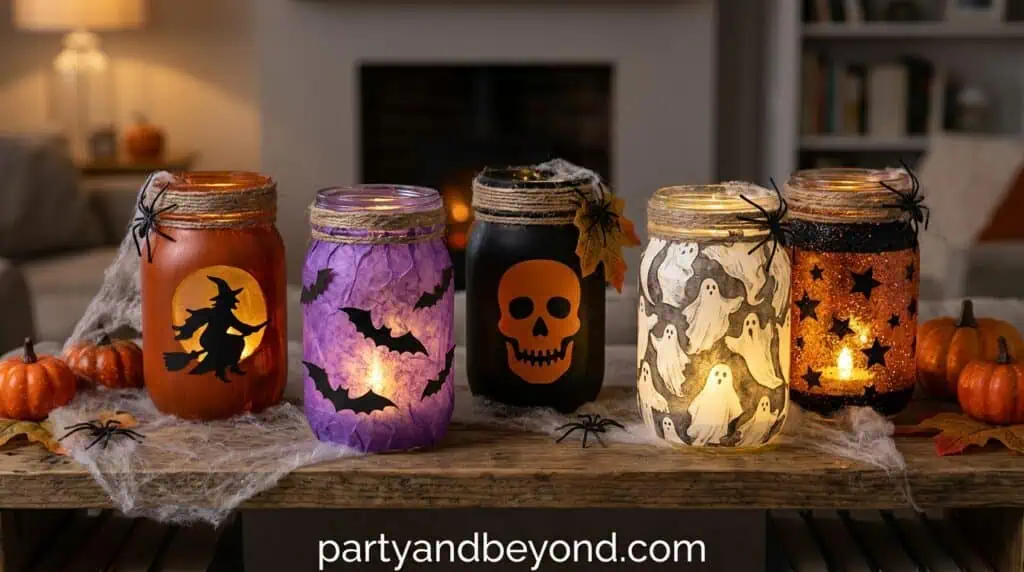
3.Mason jar luminaries
Wrap clean jars with tissue paper and Mod Podge or paint simple faces on the glass, then drop in an LED tea light ($6–$10 for a few). Twenty minutes. One per surface does nothing; a cluster of three or four does everything. Best for: mantels, windowsills, and tables.
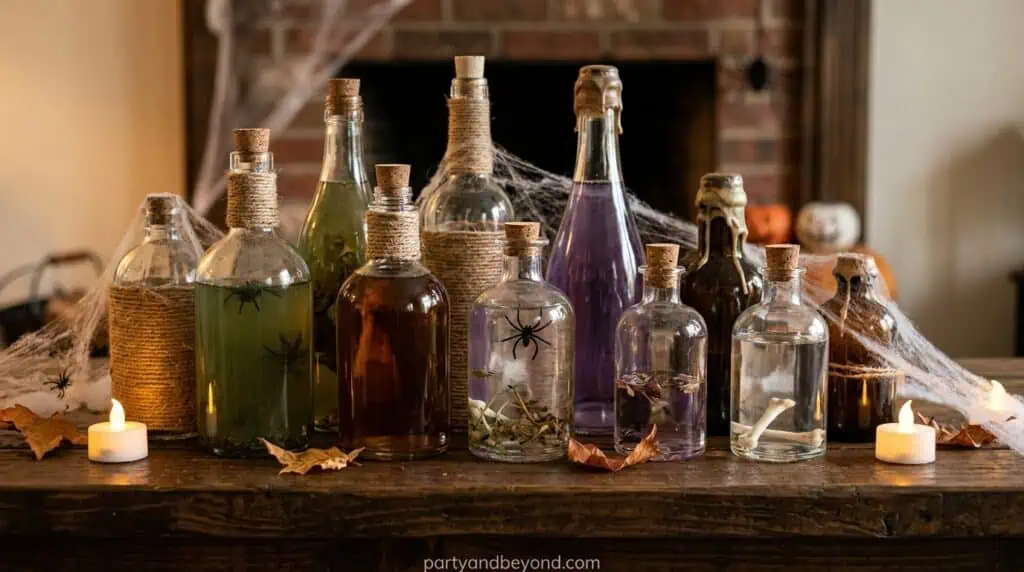
4.Apothecary potion bottles
Collect old glass bottles, print creepy labels, age them with a swipe of cold coffee, and finish with a cork or twine ($5–$10). About 30 minutes. The coffee-aging step is what separates “convincing apothecary” from “paper taped to a jar.” Best for: shelf or bar-cart styling, adult-spooky.
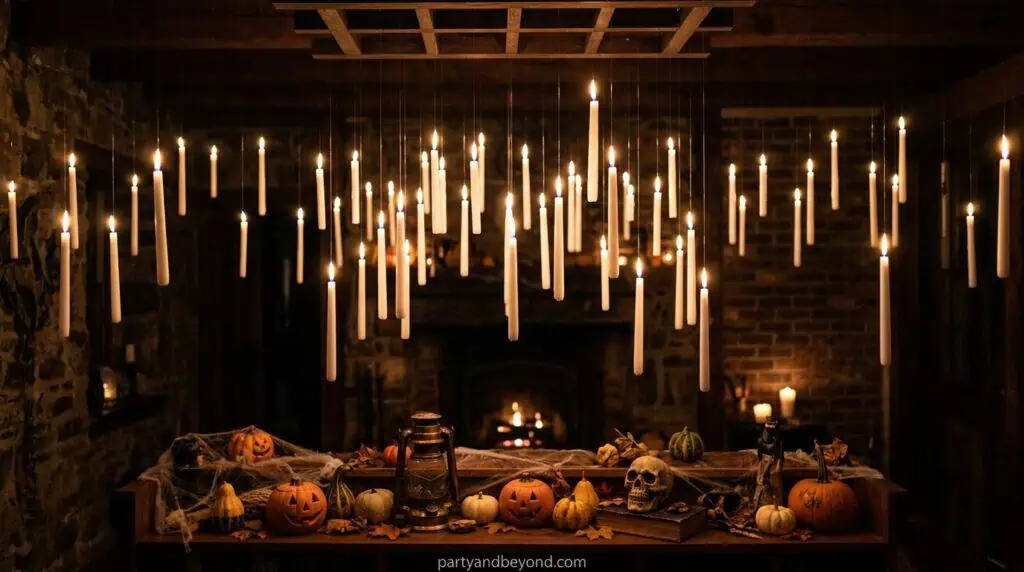
5.Floating candles
Cut paper tubes to different heights, drip hot glue down the sides for a melted-wax look, paint them white, and top each with an LED tea light ($8). Forty minutes. Be generous and uneven with the glue — perfectly even candles look fake. Best for: a dramatic entryway or mantel.
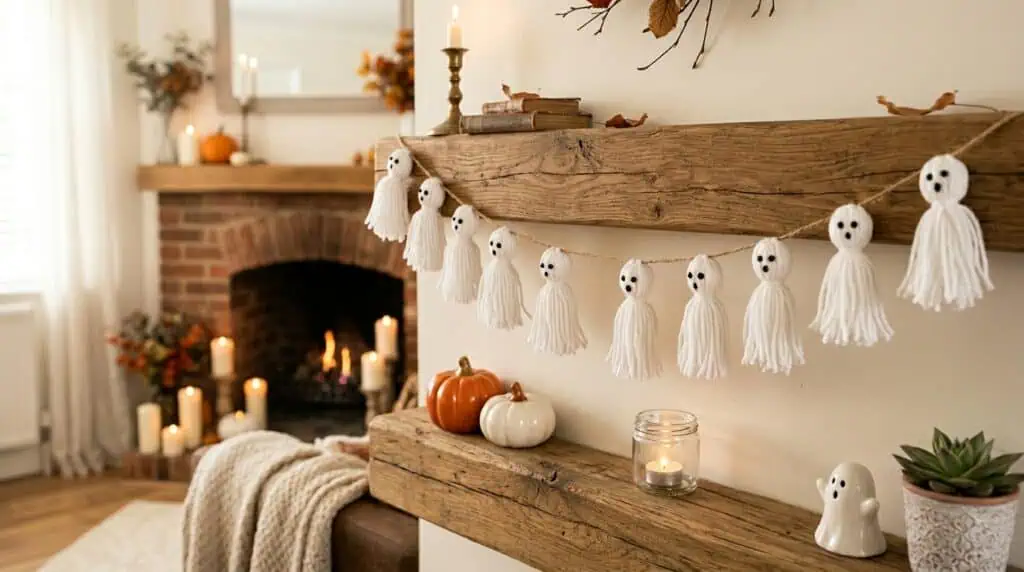
6.Yarn ghost garland
Wrap white yarn around cardboard, tie off little tassels, snip the bottoms, add tiny felt eyes, and string them on twine ($5). Twenty-five minutes. Best for: a kid’s room or light fixture — cute, not scary.
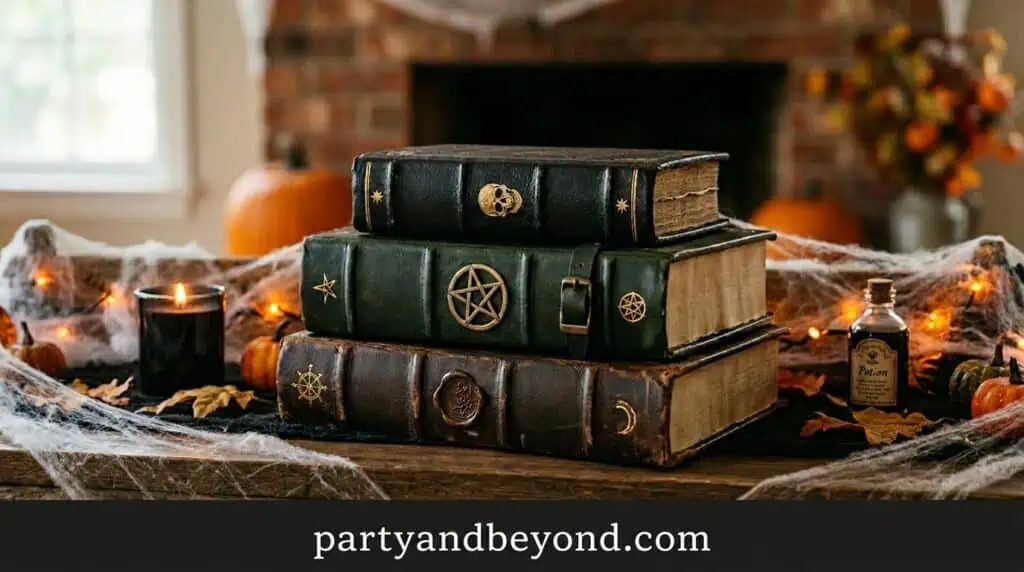
7.Stacked spell books
Wrap a few old hardcovers in craft paper or faux leather, hand-letter spooky titles down the spines, stack them, and dust with cotton “cobweb” ($0–$8). Forty minutes. Raid a thrift store’s book bin and these are basically free. Best for: a styled mantel or shelf.
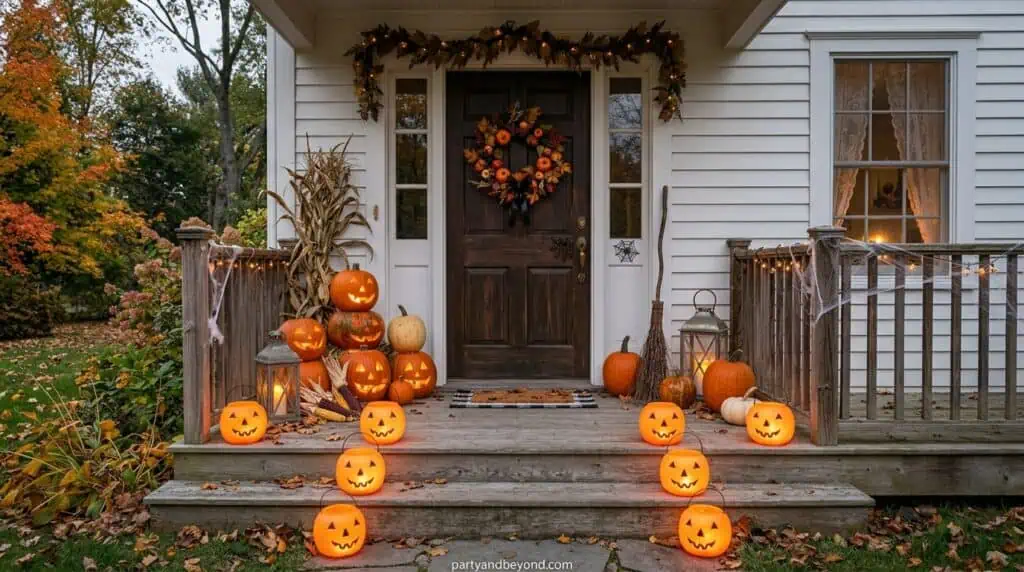
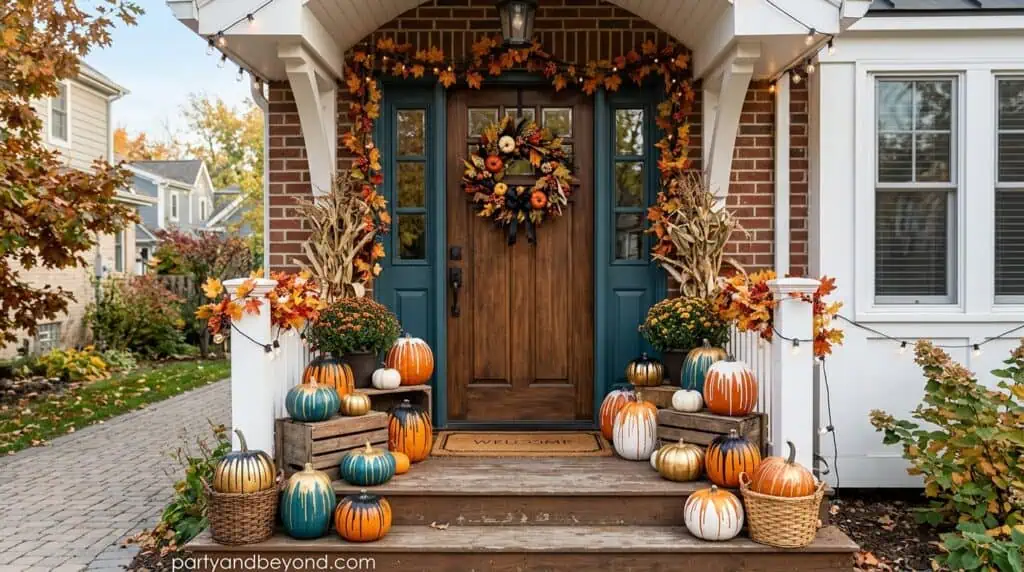
How do you decorate a front door and porch for Halloween?
The fastest entrance upgrades are a mummy door, lit window silhouettes, and a walkway of luminaries — each under $12 and done in about 20–30 minutes. These five greet everyone before they ring the bell.
8.Mummy front door
Crisscross white crepe-paper streamers across your door like bandages, then add two big googly eyes peeking through the middle ($5–$8). Twenty minutes. Overlap the strips at messy angles — neat ones look like wrapping paper. Best for: an all-ages door statement.

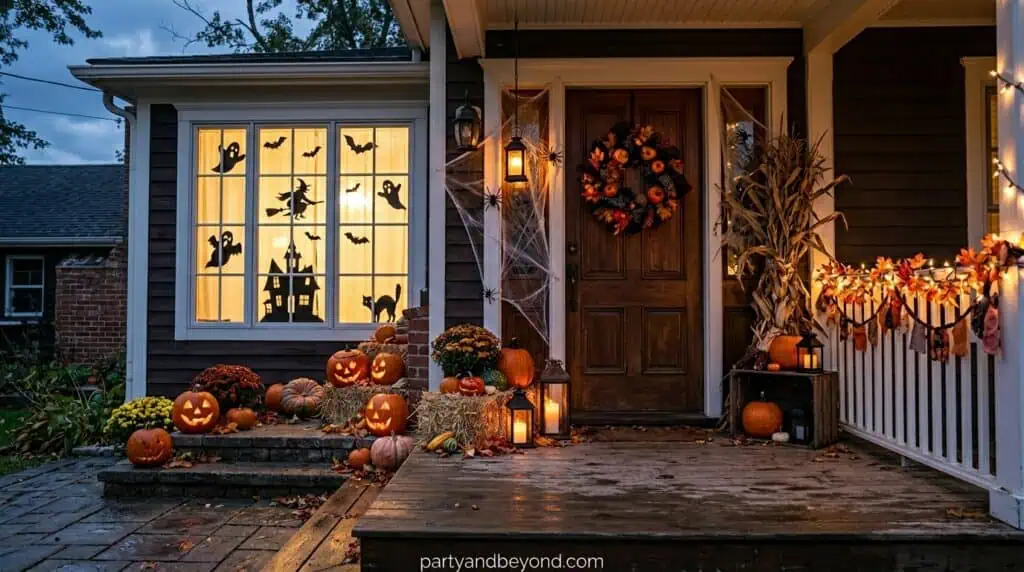
9.Window silhouettes
Cut witches, cats, or bats from black poster board, tape them inside your windows facing out, and put a lamp behind them at night ($4–$6). Thirty minutes. From the street, your lit windows become spooky silhouettes. Best for: high drama for almost no money.
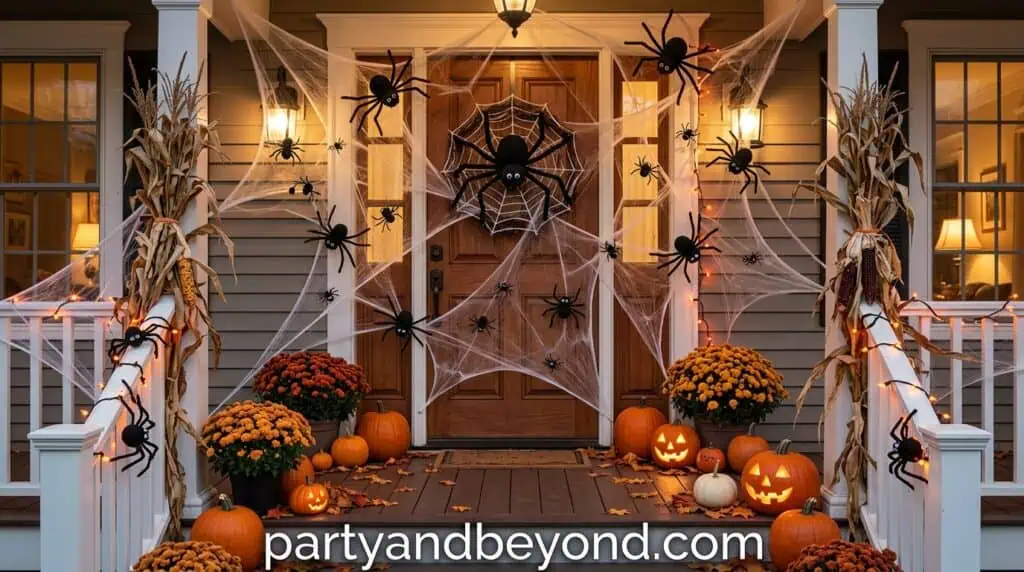
10.Foam-ball spiders and web
Spray-paint styrofoam balls black, push in bent pipe-cleaner legs and googly eyes, then nest them in stretched cotton webbing in a porch corner ($8–$12). Forty-five minutes. Go oversized — a goofy two-foot spider beats a creepy life-size one. Best for: a porch corner with personality.
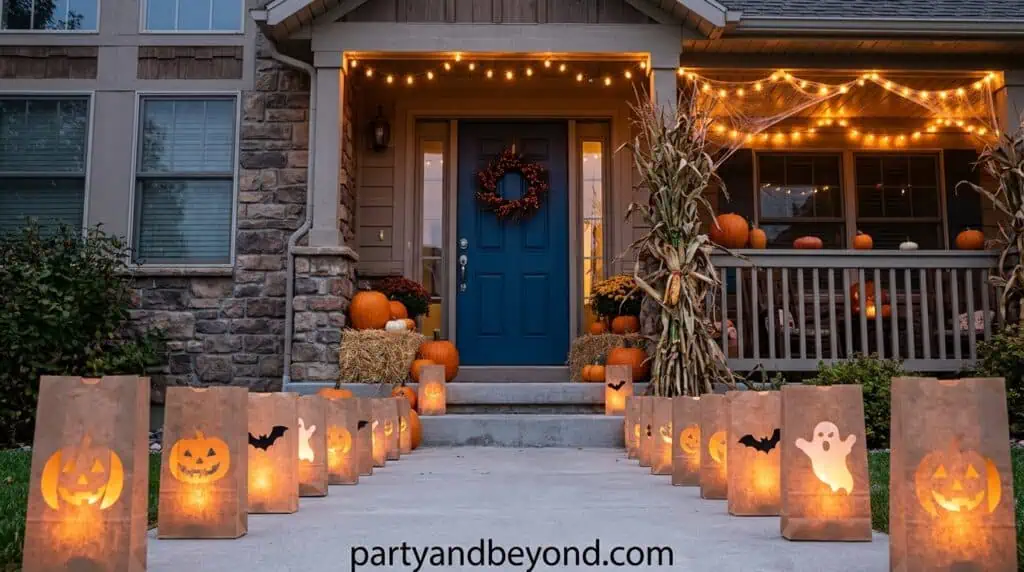
11.Paper-bag luminaries
Weight plain white paper bags with a cup of sand, cut a bat or face shape into the front, and drop an LED candle inside ($6). Twenty minutes. LED candles only — never real flames near paper. Best for: guiding trick-or-treaters up the walkway.
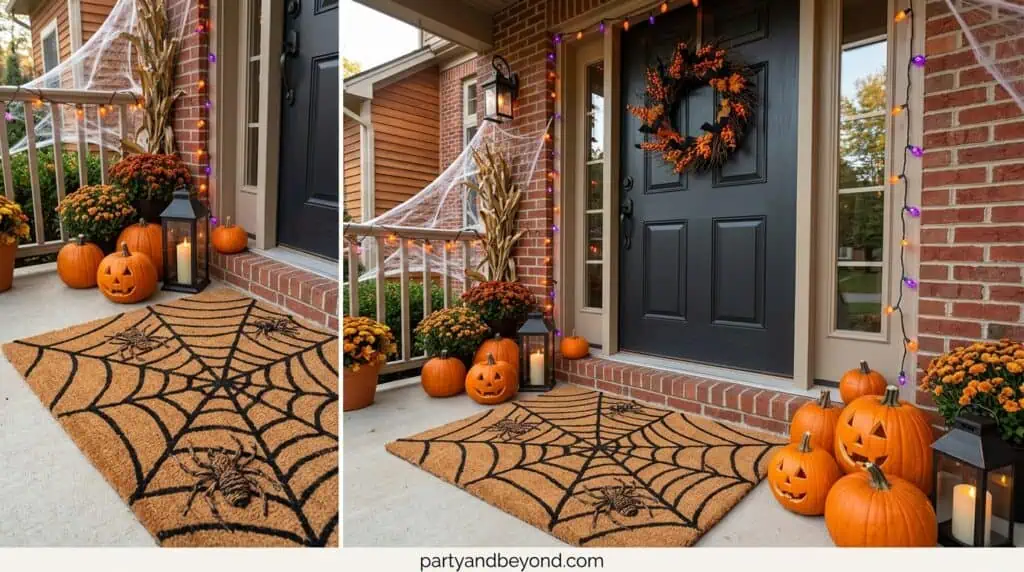
12.Spiderweb doormat
Paint a white spiderweb across a plain black dollar-store doormat with acrylic and a stencil ($5). Twenty minutes. A stencil is the smarter move; freehand webs go lopsided fast. Best for: a subtle touch at shoe level.
What are easy DIY outdoor Halloween decorations?
The easiest outdoor projects are cheesecloth yard ghosts, a hula-hoop web, and foam tombstones, each costing $6–$15 and holding up on stakes or hooks. Group them into one scene near the entrance for the strongest curb appeal.
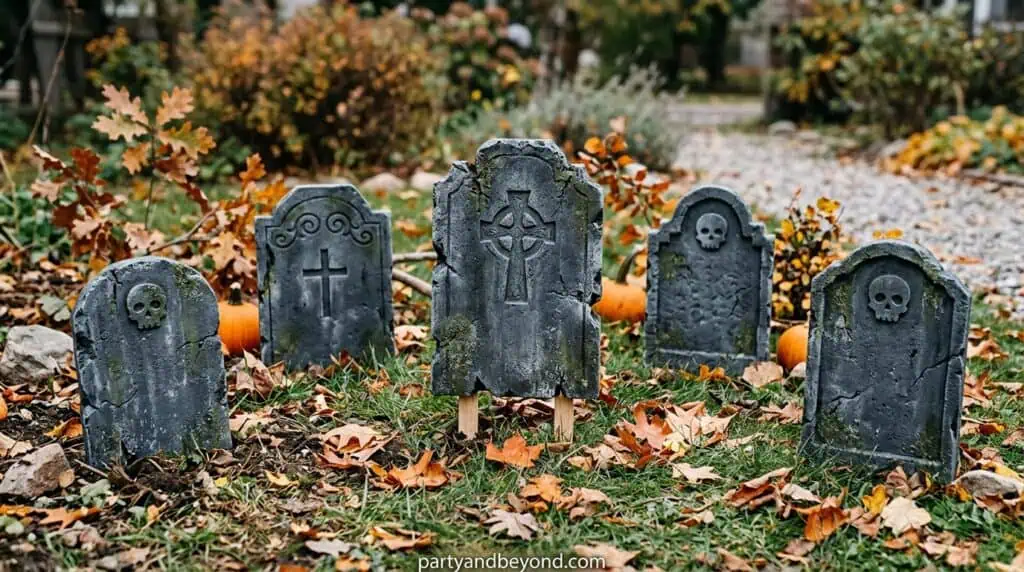
13.Foam tombstones
Cut headstone shapes from foam insulation board, round the edges, paint them weathered gray with a funny epitaph, and stake them into the lawn ($15–$25 for three or four). One to two hours. Dry-brush black and green into the cracks so they look aged, not flat. Best for: a front-yard graveyard.
14.Cheesecloth yard ghosts
Drape cheesecloth over a tomato cage, stiffen it so it billows, add a foam-ball head, and light it from below at night ($10–$15). Forty-five minutes. The uplight is the whole magic — skip it and they’re just laundry on a stick. Best for: the most atmospheric piece on a dark lawn.
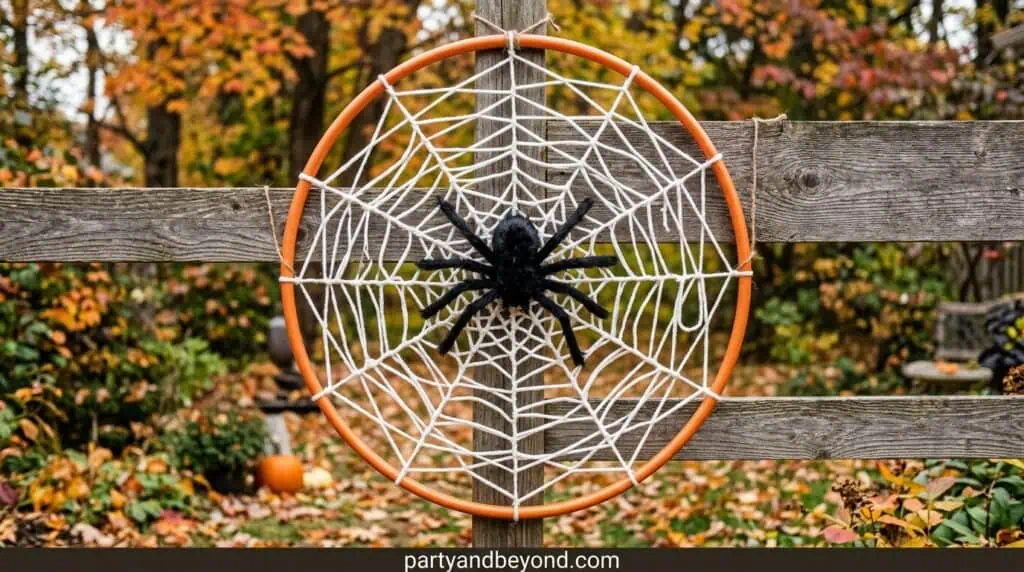
15.Hula-hoop spider web
Tie white rope across a hula hoop in a spoke-and-spiral pattern, hang it from the porch ceiling, and perch a spider in the center ($8). Thirty minutes. Pull the lines taut and irregular so it reads as a web, not macramé. Best for: a bold piece that shows from the curb.
16.Pumpkin-pail lanterns
Arrange plastic pumpkin pails along the walkway with solar or LED lights inside, and drape a white tablecloth over an upside-down tomato cage for a glowing ghost beside them ($12). Forty-five minutes. Best for: a walkway with no nearby outlet — it glows day and night.
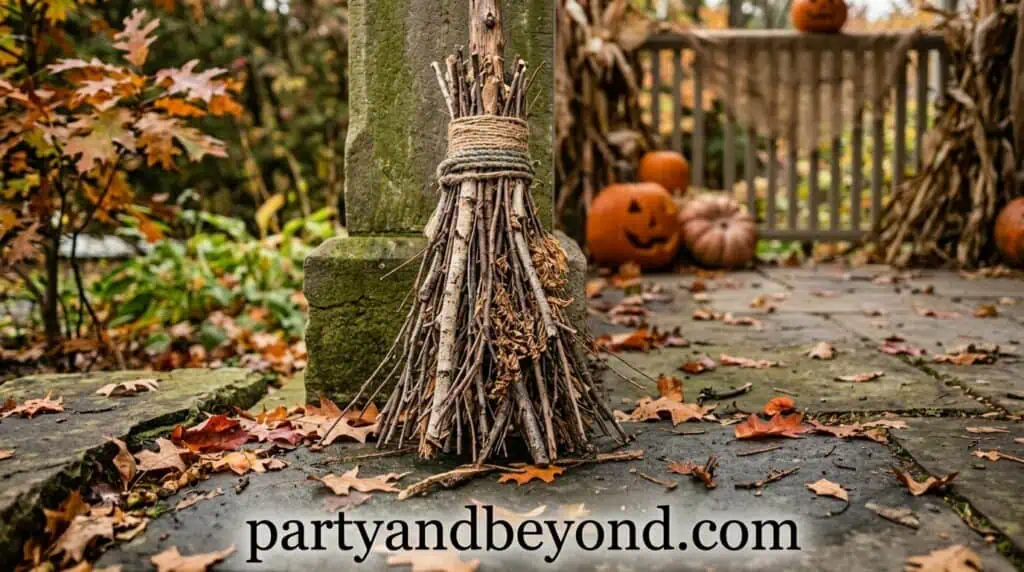
17.Branch witch’s broom
Bundle thin branches from your yard around a sturdy stick, tie it tight with twine, and lean it by the door ($0–$3). Fifteen minutes. Best for: a rustic, basically-free accent that photographs like a boutique buy.
What are the best no-carve pumpkin ideas?
The best no-carve pumpkins are painted, decoupaged, glittered, or “dripped” — all $0–$10, mess-free, and lasting for weeks without rotting. Here are four ways to skip the knife.
18.Painted pumpkins
Paint pumpkins in soft pastels for cute, matte black or white for chic, or metallic gold for glam ($0–$10 for paint). About 20 minutes each. They last the whole month instead of caving in by November 1st. Best for: an ombré row on the front steps.
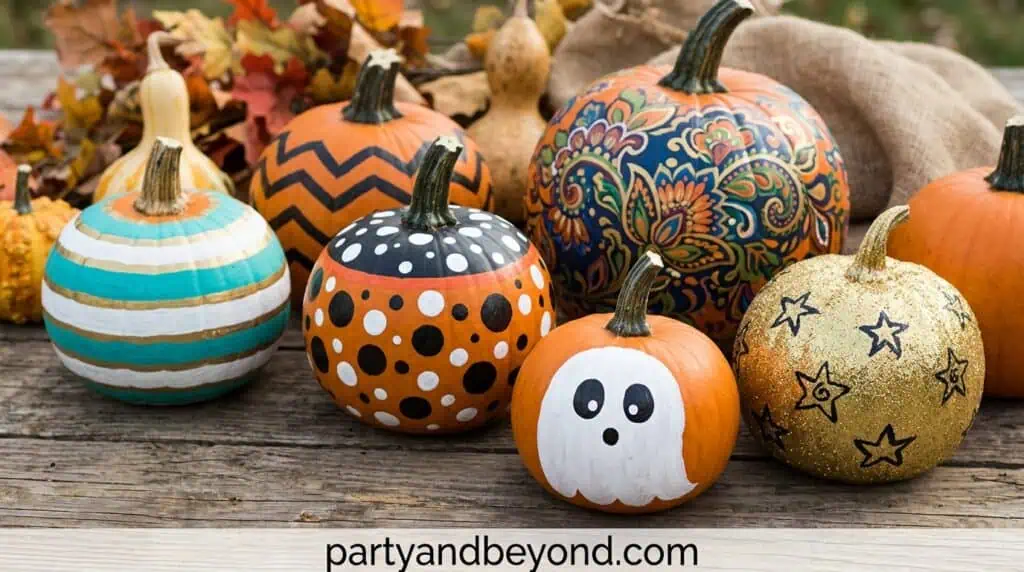
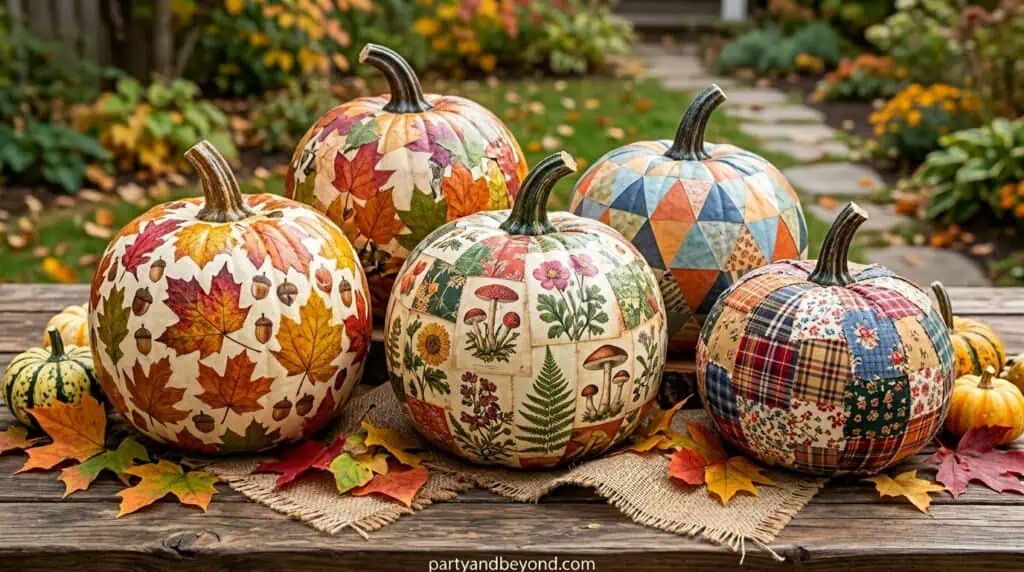
19.Decoupage pumpkins
Brush Mod Podge over a pumpkin, press on patterned napkins or lace, and seal it ($5–$8). Thirty minutes. Smooth out every wrinkle — trapped air bubbles give the trick away. Best for: an elegant centerpiece.
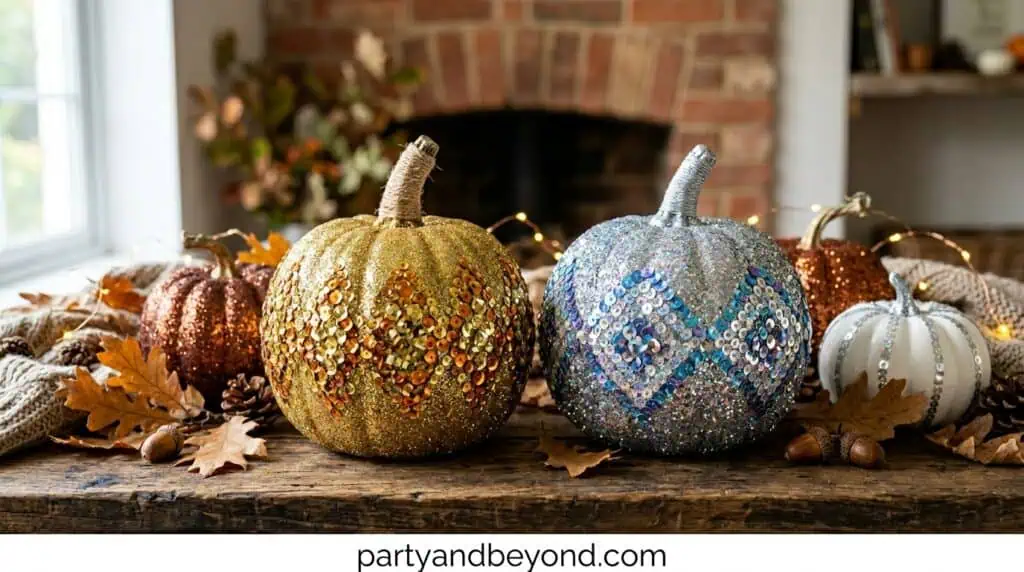
20.Glitter and sequin pumpkins
Coat a pumpkin in glue, then roll it in glitter or press on sequins ($6). Twenty-five minutes. Do it over newspaper you’ll throw away — glitter gets everywhere. Best for: glam table accents.
21.Drip pumpkins
Pipe hot glue or puffy paint from the top so it looks like dripping wax, then paint over it in a bold color ($5). Thirty minutes. Vary the drip lengths so they read as melting, not as a neat fringe. Best for: a spooky-modern display.
How do you set a Halloween table and light a room?
A Halloween table works when you layer heights and add a moody light, not when you pile on props. These three pieces set the whole mood — and the lighting one is the biggest bang for your buck on the entire list.
22.Spooky tablescape
Lay a dark runner, set a tall centerpiece, scatter faux crows, and mix in thrifted candlesticks and mini pumpkins ($15–$25). About an hour. Tall branches plus low pumpkins plus mid-height candles is what makes it look stylist-done. Best for: a dinner or party table.
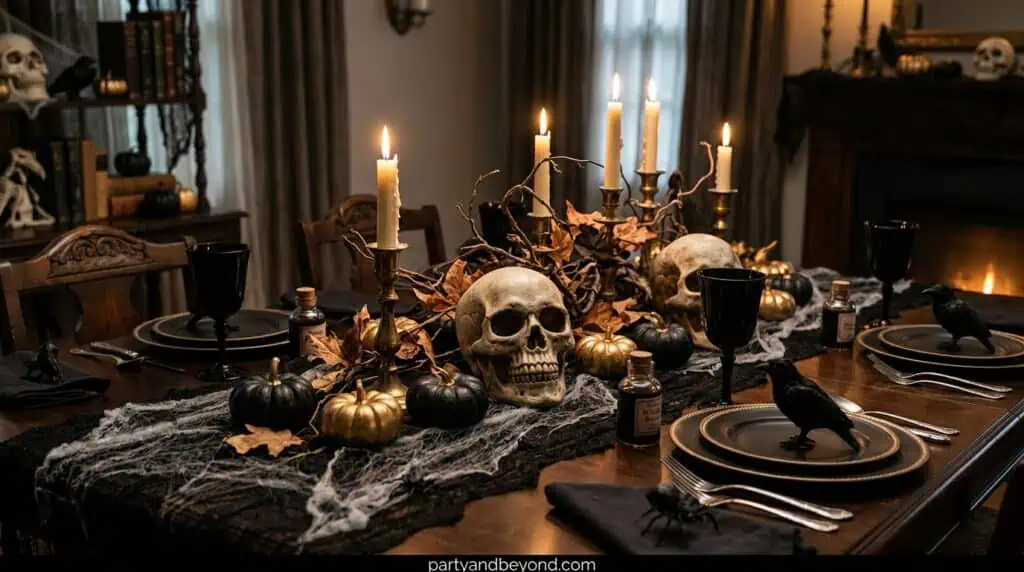
23.Colored uplighting
Swap in colored LED bulbs — red, green, or purple — or clip colored gels over existing lamps, then aim a couple up at the wall ($8–$15). Fifteen minutes. If you do only one thing from this article, change your light to a moody color. Best for: whole-room ambiance.
24.Painted-branch centerpiece
Spray bare branches black, set them in a vase with rocks, and hang tiny bats, spiders, or orange ornaments ($5–$10). Thirty minutes. Best for: a table or console focal point that quietly doubles as fall decor.
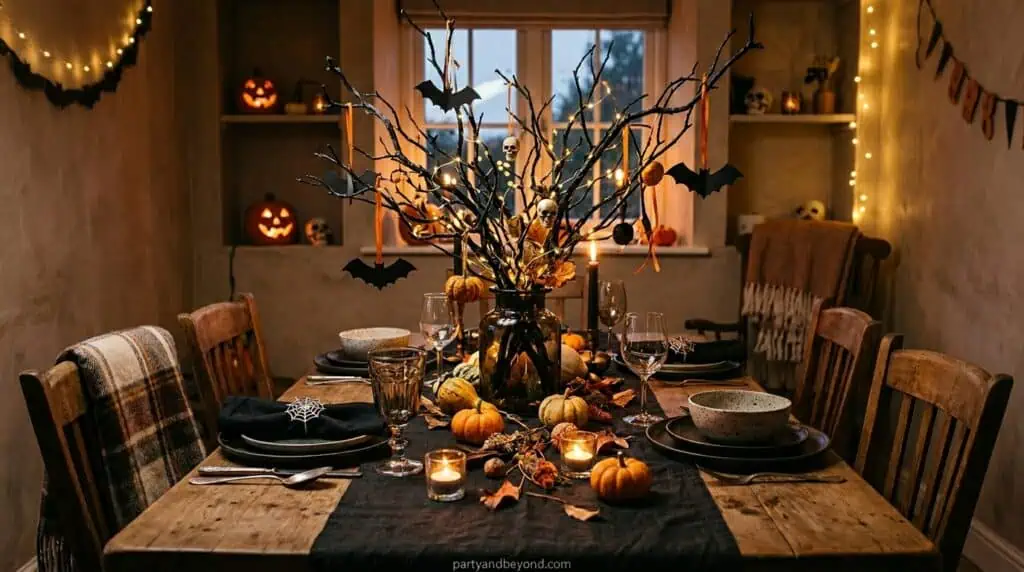
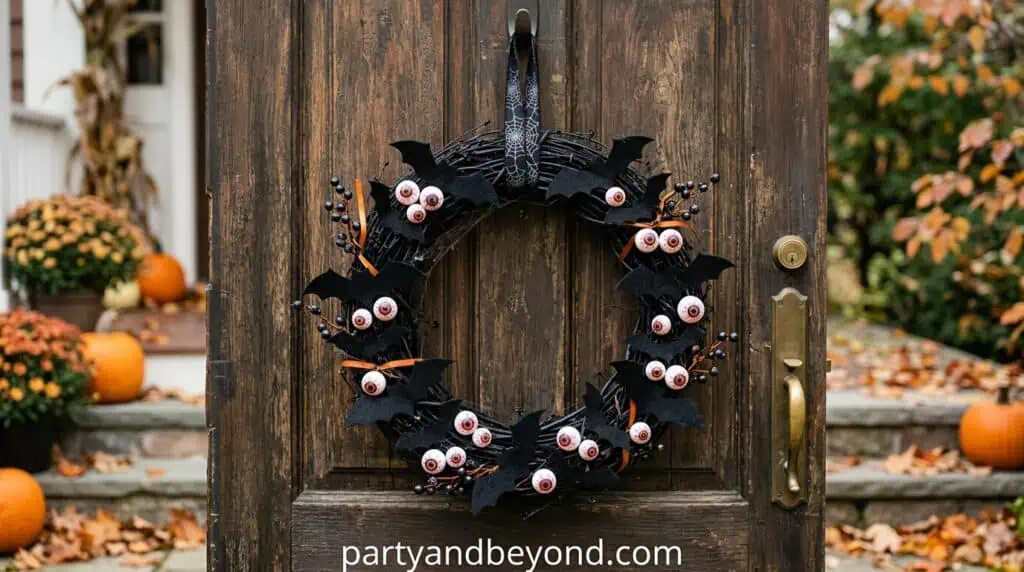
What’s the easiest DIY Halloween wreath?
The easiest wreath starts with a grapevine or foam base you cover completely in craft bats or painted “eyeballs.” It’s the finishing touch that ties an entryway together.
25.Bat or eyeball wreath
Hot-glue craft-foam bats all over a grapevine or foam wreath — or ping-pong balls painted as bloodshot eyeballs — and finish with a dark ribbon ($10–$15). Forty-five minutes. Cover the form completely; bare patches make it look unfinished. Best for: a front door that signals “we go all out.”
What’s trending for Halloween decor in 2026?
For 2026, the trends lean toward not-too-scary “cute” displays, glowing and color-changing lighting, and no-carve painted pumpkins in moody or pastel palettes. With decoration spending at a record $4.2 billion and now outpacing candy (NRF, 2025), the store aisles are more crowded than ever — which is exactly why a handful of well-lit DIY scenes stands out more than another mass-produced inflatable.
Pro tips after years of decorating
Light everything. Even the simplest decoration reads as magic once it’s glowing. Use LED tea lights and string lights over real flames — every time, around paper and fabric. No exceptions.
Build scenes, don’t scatter. Group three or four pieces in one spot for real impact. Concentrated decor looks intentional; scattered decor looks like you’re mid-move with boxes everywhere.
Stick to two or three colors. Black plus orange plus one accent — purple, green, or white — keeps a display deliberate instead of chaotic. A tight palette costs you nothing but restraint.
Shop your house and yard first. Branches, old sheets, glass jars, cardboard, leftover paint. The best DIY decorations start free; the store run is for filling gaps.
Weatherproof anything outdoors. Seal your paint, use solar or LED lights, and anchor your stakes deep, or the wind will relocate your tombstones to the neighbor’s yard overnight.
Common mistakes that flatten a Halloween display
The number one mistake is scattering lots of tiny decorations everywhere — it reads as mess, not magic, so group them into two or three strong scenes instead. A close second is real candles near paper or fabric decor: it’s a genuine fire risk, and LED tea lights look nearly identical for a couple of dollars, so there’s no reason to chance it.
The rest are quick traps: forgetting lighting entirely so everything falls flat in daylight, blowing your whole budget on one big animatronic when three DIY scenes would do far more (those props also tend to break after a single season), and skipping weatherproofing on outdoor pieces that then sag in the first rain.
🎉 Quick Summary
✅ Best for: a high-charm Halloween look on a real budget
💰 Budget: $3–$15 per project; under $50 for a full display
⏱ Time: 15–45 minutes for most pieces
🌟 Top pick: Colored uplighting — under $15 and transforms a whole room
📌 Don’t skip: light everything, and group decor into 2–3 scenes
DIY Halloween decorations FAQ
How do I decorate my house for Halloween on a budget?
Start with lighting and a few DIY focal points instead of buying lots of small props — colored bulbs, cheesecloth ghosts, and paper bats cost under $15 total and transform a space. Shop your own house first for jars, branches, and old sheets, then spend only on gaps. Concentrating decor into two or three scenes always beats scattering cheap items everywhere.
What are the cheapest DIY Halloween decorations?
The cheapest are paper bats ($3–$5), a branch witch’s broom (free to $3), and window silhouettes ($4–$6), all made from black cardstock, yard branches, or poster board. Each uses materials you likely already have, so the only real cost is a sheet of paper or a can of spray paint. They also deliver some of the highest visual impact per dollar.
How do you make floating ghosts?
Drape cheesecloth over a balloon on a stand, paint it with watered-down glue or fabric stiffener, and let it dry overnight. Pop the balloon, add felt eyes, and tuck an LED tea light underneath so it glows — the whole project costs $8–$12 and takes about 30 minutes of hands-on time. Hang several at staggered heights for the best effect.
How do you make paper bats for the wall?
Trace a bat template onto black cardstock, cut out 15–20 bats in two or three sizes, and fold the wings up slightly for dimension. Tape or pin them flying up a wall from small to large for about $3–$5. The folded wings cast little shadows, which is what makes a flat paper bat look like it’s mid-flight.
What household items can I use for Halloween decorations?
Old white sheets become ghosts, glass jars become luminaries or potion bottles, bare branches become centerpieces, and cardboard becomes tombstones. Cotton balls stretch into cobwebs, and leftover black paint covers almost anything. Most of the best DIY decorations start with things already in your closet, kitchen, or recycling bin.
How do you decorate a Halloween table?
Layer a dark runner, a tall centerpiece like painted branches or candlesticks, and low scattered pieces such as mini pumpkins and faux crows ($15–$25 total). Mixing heights is what makes a table look composed rather than crowded. Add LED candles for flicker and keep to a two- or three-color palette so it reads intentional.
What are easy outdoor Halloween decorations?
Cheesecloth yard ghosts, a hula-hoop spider web, paper-bag luminaries, and foam tombstones are the easiest outdoor projects, each costing $6–$15. They use stakes, hula hoops, or sand-weighted bags, so they hold up outside, and most glow at night with solar or LED lights. Group them into one scene near the entrance for the strongest curb appeal.
How do I make no-carve pumpkin decorations?
Skip the knife and decorate the surface instead — paint pumpkins in pastels or matte black, decoupage them with napkins, add glitter, or pipe hot-glue “drips” down the sides. Each method costs $0–$10 and takes 20–30 minutes. No-carve pumpkins last for weeks without rotting, so you can decorate early and keep them all season.
What are good last-minute Halloween decorations?
The fastest last-minute decorations are a mummy front door (white streamers and googly eyes, 20 minutes), window silhouettes (poster board, 30 minutes), and colored uplighting (swap in colored bulbs, 15 minutes). All cost under $10 and need no drying time. Lighting alone can rescue a bare room in the time it takes to change a few bulbs.
How do you make a giant spider web?
Stretch white rope or twine across a hula hoop in a spoke-and-spiral pattern, then hang it from the porch ceiling and add a spider in the center for about $8. For a wall, anchor the lines with removable hooks instead. The bigger and more irregular the web, the more realistic and dramatic it looks.
Are DIY Halloween decorations cheaper than store-bought?
Yes — DIY decorations typically cost $3–$15 each versus $20–$40 for store-bought equivalents, and a homemade cheesecloth ghost often looks better than a $30 plastic one. The savings come from using household materials and craft-store basics instead of finished products. Many DIY pieces also store and reuse well, lowering the cost further every year.
What dollar store items work best for Halloween decor?
Dollar-store winners include plain doormats (paint a spiderweb on them), glass jars and bottles, plastic pumpkin pails, fake spiders, white tablecloths for ghosts, and battery tea lights. These cheap bases become custom decor with a little paint or glue. A $1 mat or pail turned into something handmade is the heart of budget Halloween decorating.
People also ask
How early should I put up Halloween decorations?
Most people decorate in early October, and no-carve pumpkins or painted decor can go up even sooner since they don’t rot. Outdoor lighting and weatherproofed pieces hold up for the whole month, so there’s no harm in starting early — just save real carved pumpkins for the last week or two.
Are DIY Halloween decorations safe with kids and pets around?
Yes, if you stick to LED lights instead of real candles and keep small parts like googly eyes and fake spiders out of reach of toddlers and pets. Secure anything hanging at low height, and use battery tea lights inside paper or fabric decor so there’s no flame to knock over.
How do I store DIY Halloween decorations for next year?
Pack flat paper and foam pieces between cardboard in a labeled bin, wrap cheesecloth ghosts loosely so they don’t crush, and keep LED lights coiled in a separate bag. Most DIY decorations reuse for several years if you store them dry and out of direct sun, which lowers your cost every season.
What’s the highest-impact DIY decoration for the least effort?
Colored uplighting wins — swapping in a few red, green, or purple bulbs takes 15 minutes, costs under $15, and changes the mood of an entire room or facade. Lighting consistently does more than any single prop, which is why it’s the one thing worth doing even if you skip everything else.
Go make your house the one people slow down for
You don’t need a big budget or a single special skill to have the best-decorated house on the block — you need a few good ideas, a hot glue gun, and a free afternoon. Pick five or six of these that fit your space, build them into a couple of strong scenes, and light them up. Houses don’t have to be elaborate to be the ones kids remember for years. They just have to feel like someone had fun making them.
Conclusion
The best DIY Halloween decorations aren’t the most expensive ones—they’re the ones that feel personal, creative, and fun to make. Whether you choose glowing cheesecloth ghosts, budget-friendly paper bats, no-carve pumpkins, or a dramatic porch display, a handful of well-planned DIY projects can transform your home without draining your wallet.
Remember, lighting is often more important than the decoration itself. A few strategically placed LED lights, grouped decor scenes, and a simple color palette can make even the cheapest craft look impressive. Instead of filling every corner with decorations, focus on creating memorable focal points that welcome trick-or-treaters and guests alike.
This Halloween, skip the overpriced store displays and put your own creativity to work. With just a few basic supplies and a little imagination, you can create a festive, unique space that stands out from every other house on the block—and becomes the one everyone remembers long after Halloween night is over.
Read More :19 indoor wedding games
17 Summer BBQ Games for Adults
19 Murder Mystery Dinner Party Ideas
")


")
")