
Disclosure: This post contains affiliate links. If you buy through them, I may earn a small commission at no extra cost to you.
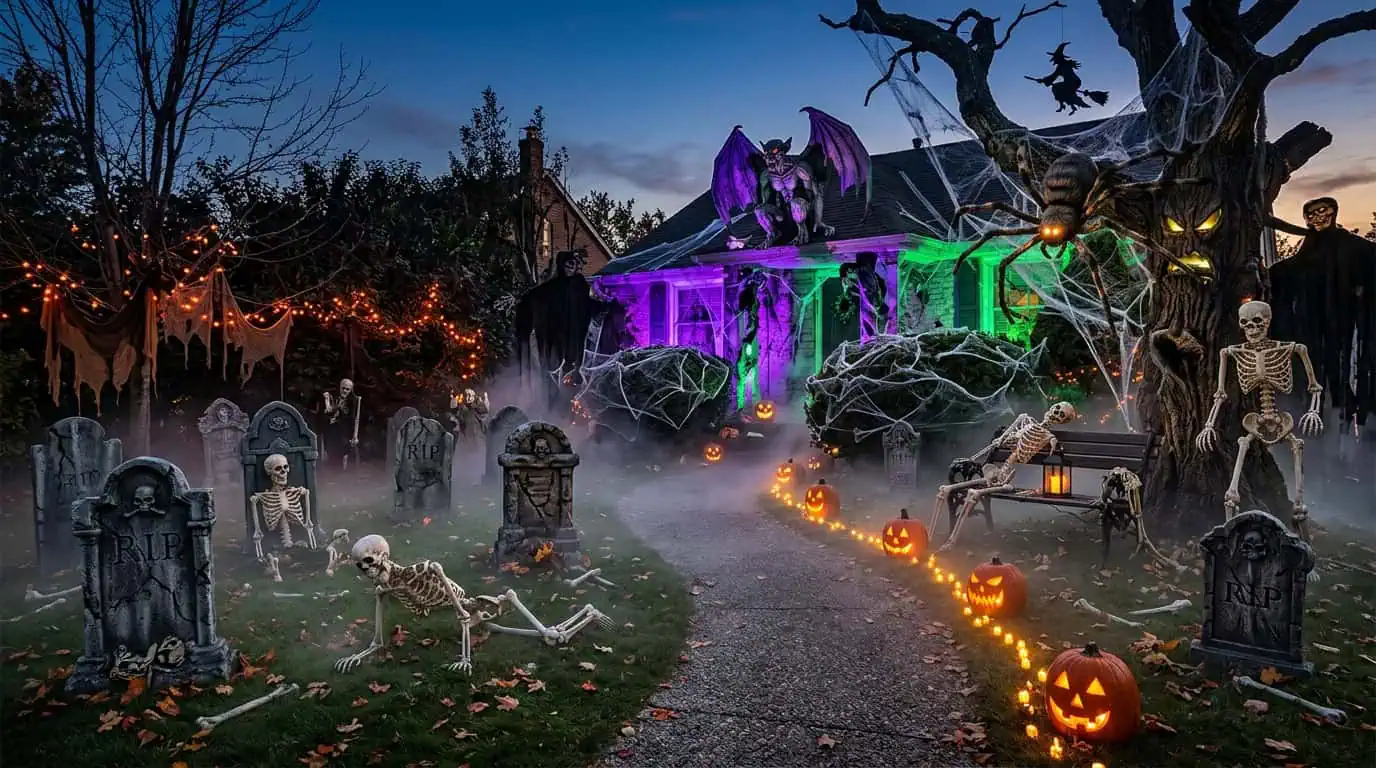
Every street has one. The house where trick-or-treaters slow way down, dare each other to walk up, and then sprint back to the sidewalk laughing a little too loudly. After years of being that house, here’s what I’ve figured out: it almost never costs a fortune. Halloween outdoor decoration ideas aren’t really about the biggest prop — they’re about atmosphere. A bit of fog rolling across the lawn, faint glowing eyes in the bushes, a graveyard that feels half-hidden in shadow.
And plenty of us are leaning into it — 51% of Halloween celebrators decorate their home or yard, and spending on décor hit around $4.2 billion in 2025, even outpacing candy (NRF, 2025). But the truth is, the most memorable Halloween outdoor decoration ideas rarely come from the most expensive setups. They come from smart use of light, shadow, and timing — especially a slow reveal as people walk closer.
Below are 17 outdoor decorations sorted the way you’d actually build a scene — starting with a graveyard centerpiece, then moving through creatures, lurking figures, porch setups, and finally the lighting tricks that tie all Halloween outdoor decoration ideas together into something genuinely unsettling.
When done right, Halloween outdoor decoration ideas don’t just decorate a yard — they turn it into a story people walk through and remember long after the night ends.
What makes outdoor Halloween decorations scary?
Scary outdoor decorations come from atmosphere — light, shadow, fog, and a slow reveal — far more than from any single expensive prop. This list leans creepier than cute, so it’s built for adult parties and brave trick-or-treaters; for friendlier, kid-safe ideas, my DIY Halloween decorations guide has the gentle stuff. Everything here is DIY and budget-minded, and the one rule that matters most is to build one strong scene near the path instead of scattering props across the yard.
Are DIY outdoor decorations cheaper than store-bought?
Yes — a DIY outdoor scene runs a fraction of the store-bought version and often looks scarier because you control the lighting and fog. Here’s how the signature pieces compare.
| Decoration | DIY cost | Store-bought | Scare level |
|---|---|---|---|
| Graveyard scene | ~$30 | $100–$150 | High |
| Giant spider + web | ~$15 | $35–$50 | Med–High |
| Hanging tree ghosts | ~$12 | $25–$40 | Med–High |
| Glowing eyes in bushes | ~$5 | $12–$18 | High (per $) |
| Posed skeleton | $25–$40 | $30–$60 | Medium |
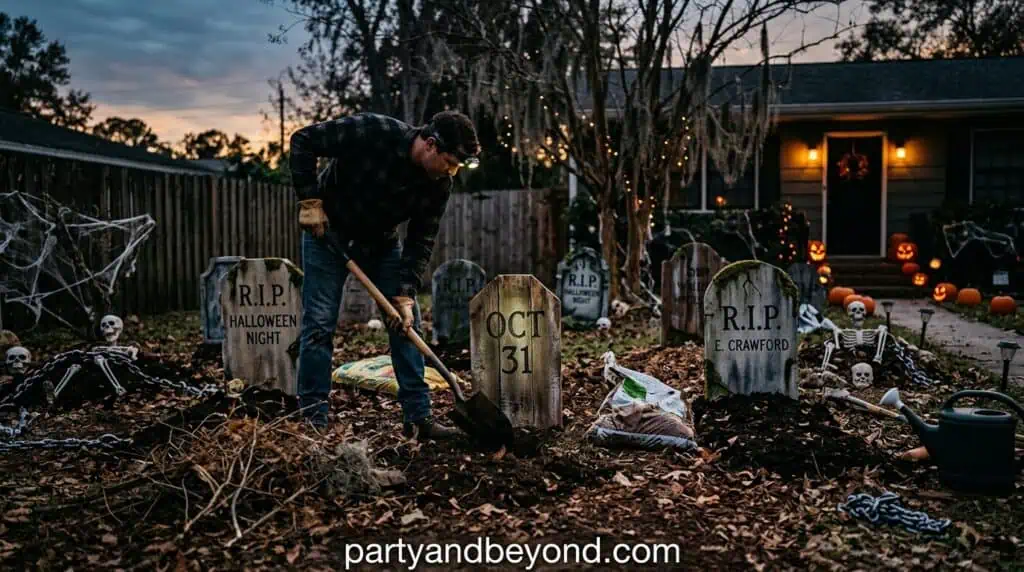
How do you build a Halloween graveyard in your yard?
You build a graveyard by cutting weathered foam tombstones, staking them in uneven rows, and selling it with skeleton hands, fog, and low lighting — a full scene runs $25–$45. These two pieces are your centerpiece.
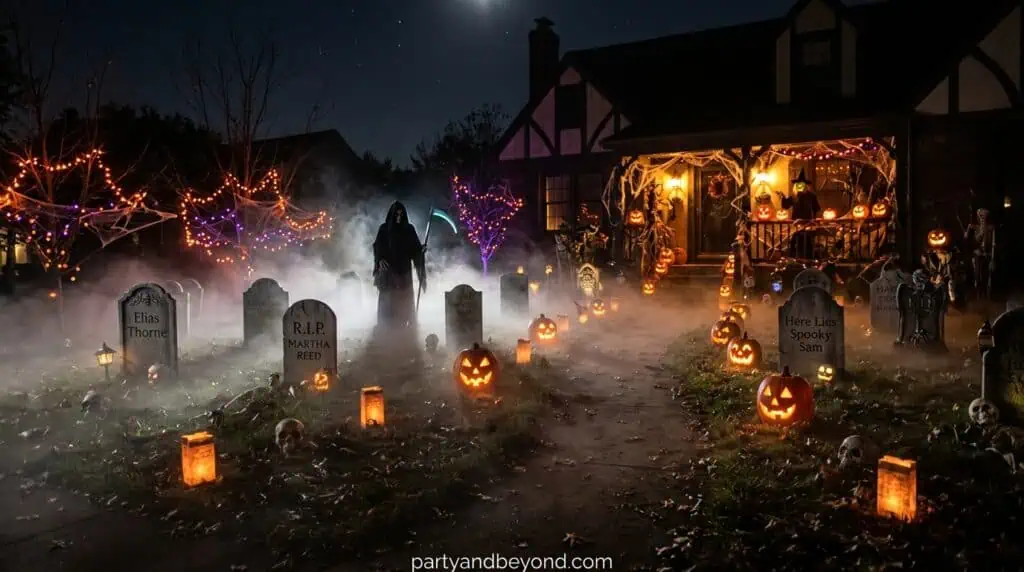
1.Rising graveyard scene
Cut headstones from foam insulation board, round and weather the edges with gray and black paint, and stake them in uneven rows ($25–$45 for a full scene). About 1.5–2 hours. A graveyard in fog at night, lit from below, is genuinely unsettling; the same tombstones flat and bright in daylight look like gray foam in your grass. Stagger the heights — identical aligned headstones read as a craft project, not a cemetery. Best for: a front-yard centerpiece.
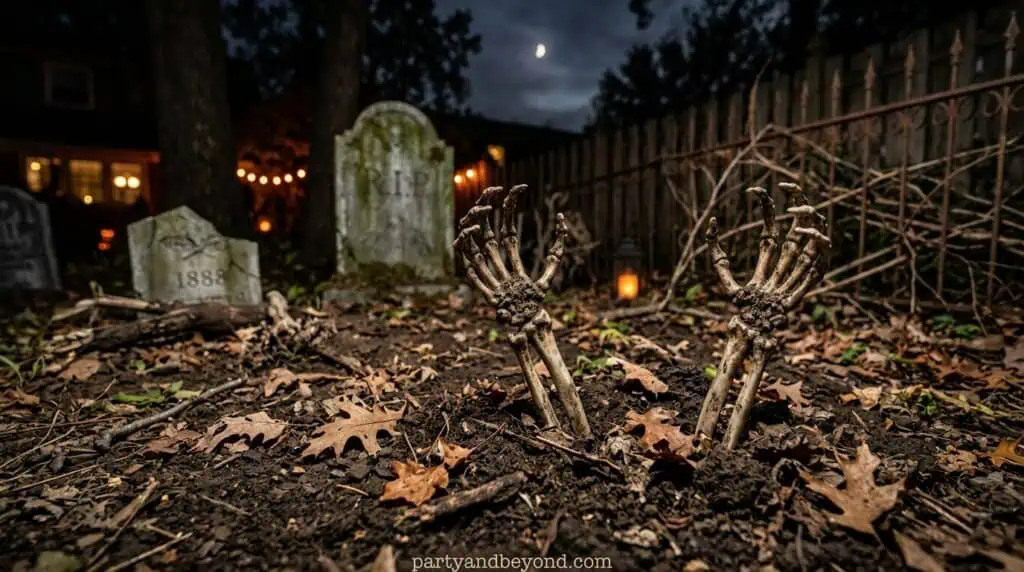
2.Skeleton hands clawing from the ground
Push latex or foam hands and forearms onto garden stakes and “plant” them rising out of flower beds and lawn edges ($8–$15). Thirty minutes. The trick is partial burial — a hand half-emerged from the mulch is far creepier than a whole arm lying on the grass. Cluster three or four right along the path. Best for: flower beds and lawn edges where people pass close.
What scary creatures can you DIY for the yard?
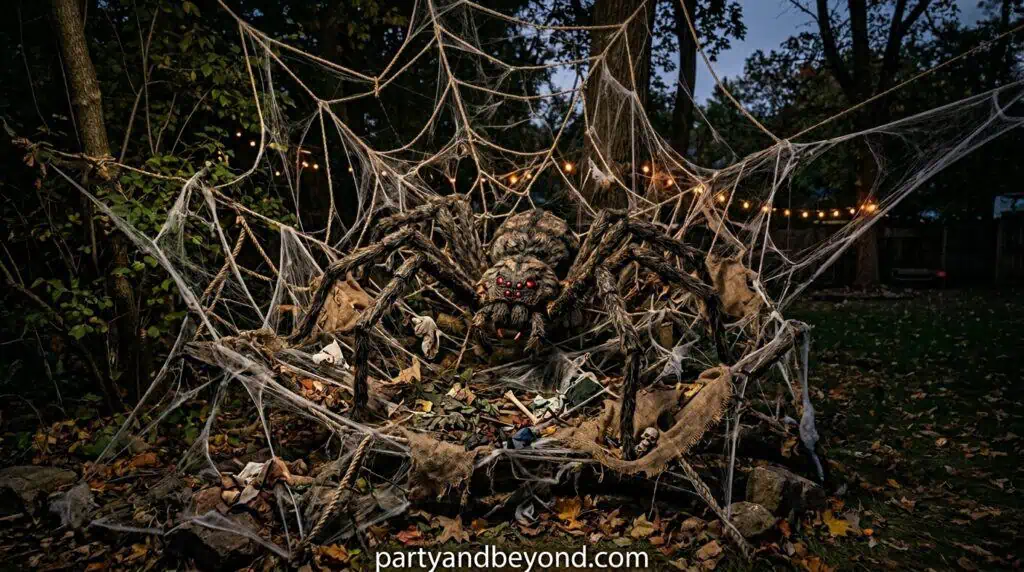
The best DIY creatures are oversized and lit — a giant spider with glowing eyes and a swarm of hanging bats read as scary from the curb for $8–$20 each. Both hold up outdoors when built from the right materials.
3.Giant spider lair
Stretch cotton webbing across a porch corner, the bushes, or the garage door, then add oversized spiders and — for a real jump — a motion-activated one ($10–$20). Forty-five minutes. Go big on the main spider; a two-foot one with glowing eyes is the sweet spot for a house with foot traffic. Pull the webbing thin and uneven so it reads as cobweb, not cotton. Best for: a porch, bushes, or garage wall.
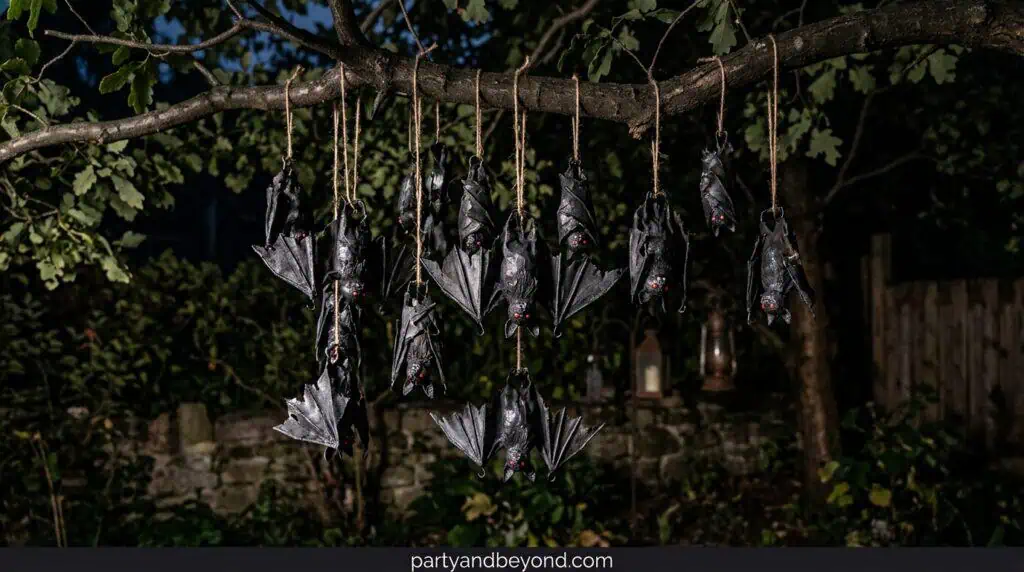
4.Hanging bat colony
Cut large bats from black coroplast or foam board, fold the wings, and hang them on fishing line from the eaves, doorway, or branches so they swarm overhead ($8–$15). Forty-five minutes. Stagger the heights and let them sway — moving bats in the porch light are eerie, while flat pinned ones look like decals. Use coroplast over paper so they survive the weather. Best for: porch eaves, doorways, and trees.
What outdoor Halloween figures are the scariest?
The scariest figures are still and lifelike — a slumped scarecrow, a posed skeleton, or a glowing ghost that drifts — because stillness unsettles people more than anything that jumps. These four set the lurking mood.
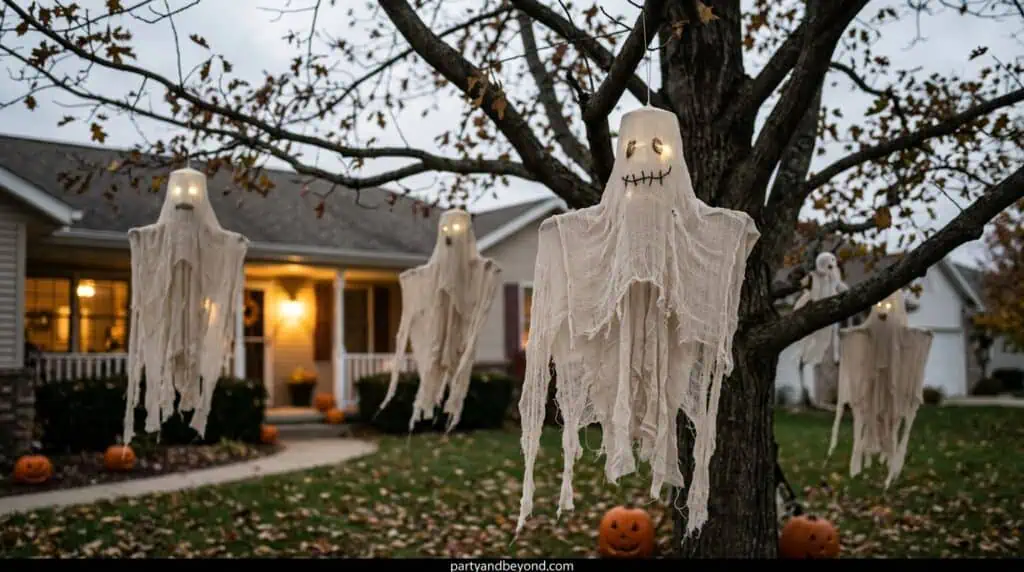
5.Hanging tree ghosts
Drape white sheets or cheesecloth over a foam-ball head, tie it off, add an LED inside, and hang it from a branch so it drifts ($10–$15). Forty-five minutes. Give it slack on the line — the movement in a breeze is what makes someone do a double-take from the sidewalk, while a dead-still ghost loses the effect. Best for: yards with trees.
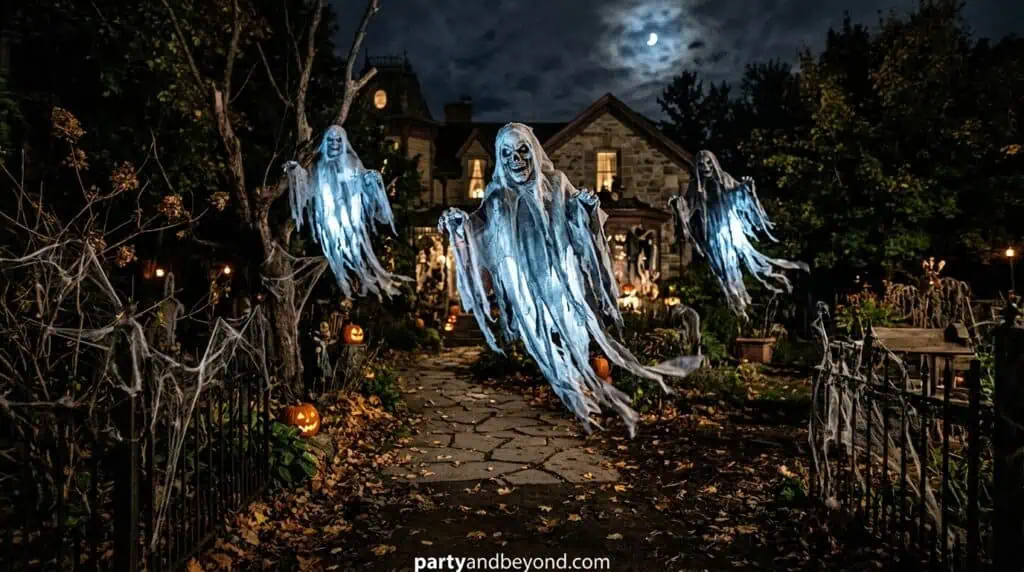
6.Hovering ghost figures
Shape a cheesecloth-and-fabric ghost over an upside-down tomato cage or chicken-wire form, stiffen it so it billows, and light it from within ($12–$20). About an hour. The internal glow is what sells “hovering” — without it, you’ve just got fabric draped on a tomato cage. Best for: porch or yard specters.
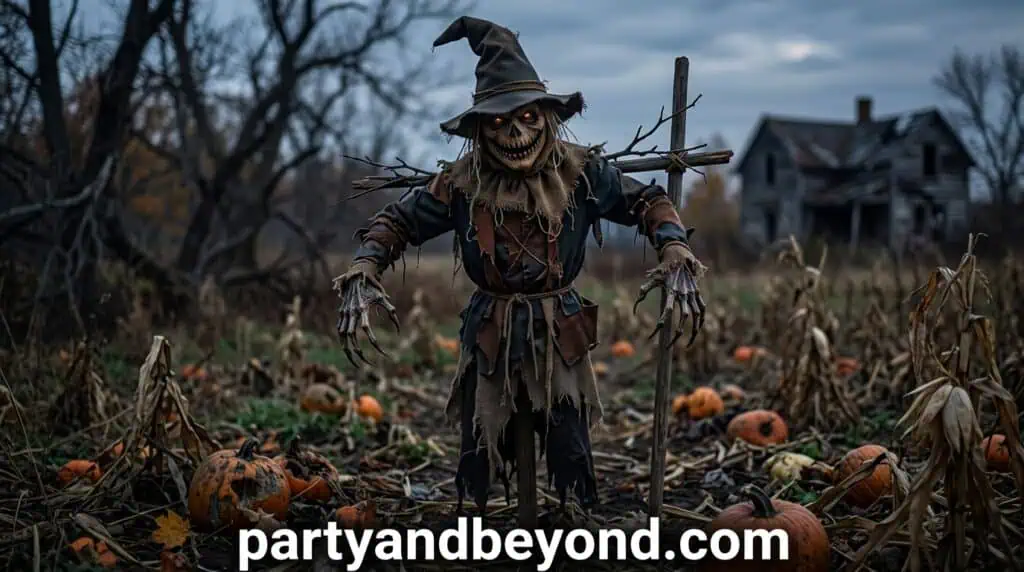
7.Sinister scarecrow
Stuff old clothes with hay or plastic bags, top it with a burlap-sack head and a painted or masked face, and prop it by the door or stake it in the yard ($10–$20). About an hour. A scarecrow slumped in a chair, still and just a little too lifelike, unsettles people more than anything that jumps — their brain can’t decide if it’s real. Best for: a porch chair or yard focal point.
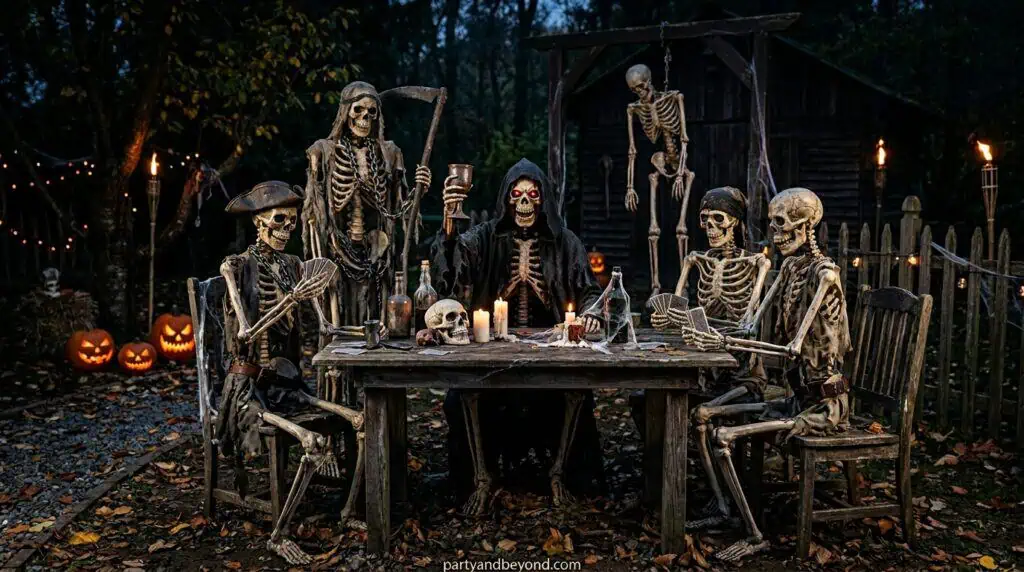
8.Posed skeleton scene
Pose a life-size plastic skeleton doing something — climbing a fence, digging a grave, peering in a window ($20–$40). Thirty minutes to stage. The posed-skeleton trend is everywhere for good reason: it’s funny, creepy, and endlessly shareable, so neighbors photograph it. Wire the joints so the pose holds against wind. Best for: a humorous-creepy focal point.
How do you make a scary Halloween porch?
A scary porch layers a glowing pumpkin display, wrapped columns, and a warning sign so the dread builds before anyone reaches the door. Each piece costs $5–$30 and ties your entry into the scene.
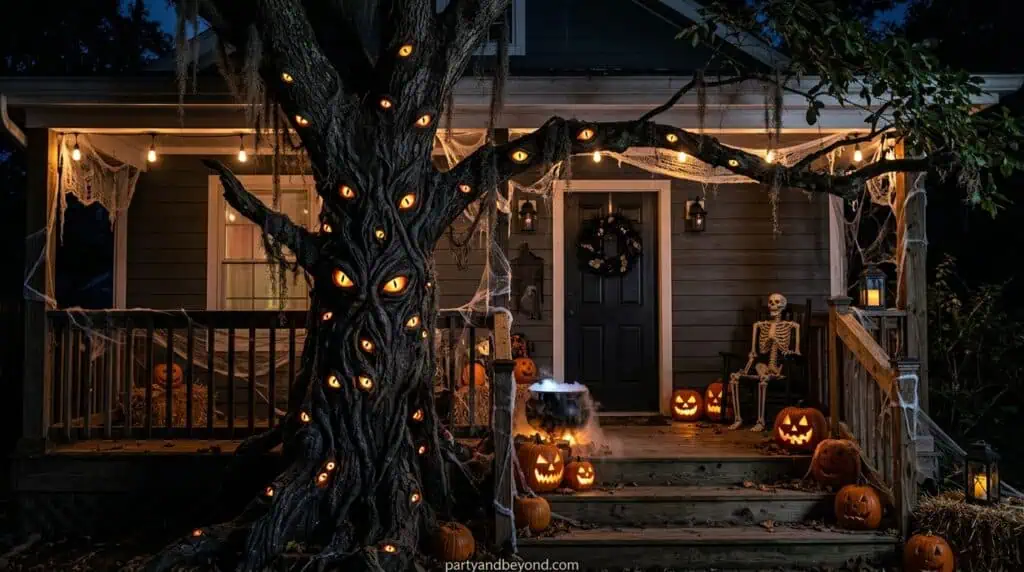
9.The “watching” tree
Wrap a front-yard tree in gauze or cheesecloth, mount a few giant eyes — printed, foam, or LED — peering from the bark, and uplight it ($6–$12). Thirty minutes. Place the eyes at human height so they meet someone’s gaze; eyes up in the branches lose the effect. Best for: one big front tree.
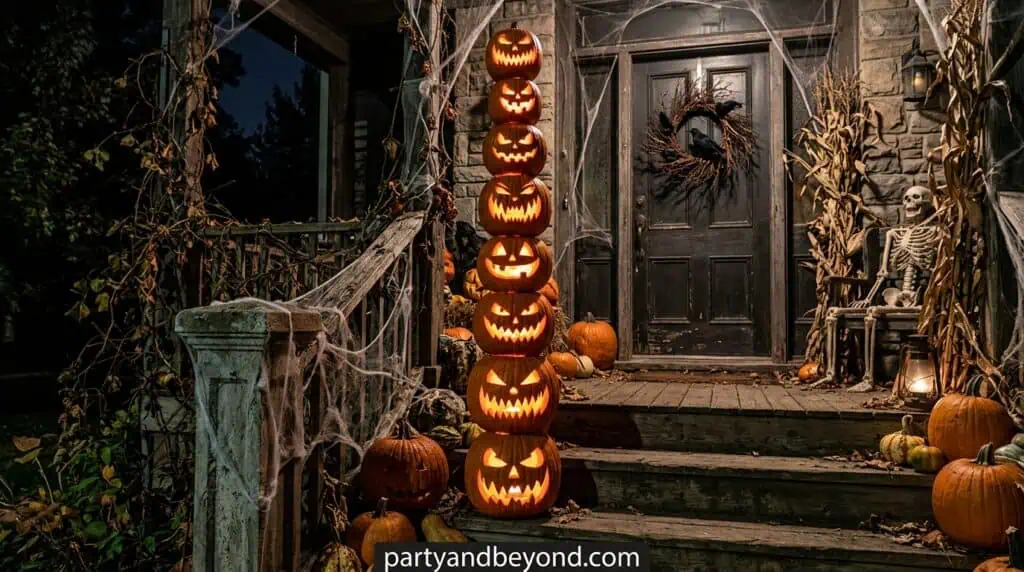
10.Stacked jack-o’-lantern tower
Carve or paint scary faces into pumpkins — real or faux — stack three in a graduated tower, and light each with an LED ($10–$30). Time varies with carving. Faux pumpkins won’t cave in halfway through October, and battery LEDs keep flames away from passing costumes. Best for: the porch steps.
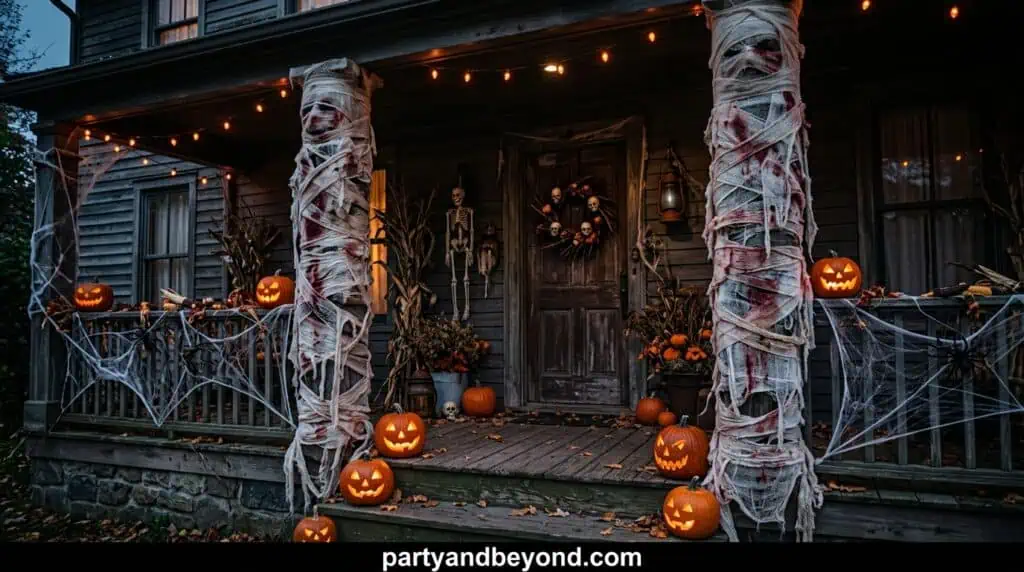
11.Mummy-wrapped porch columns
Wind cheesecloth or gauze around your porch posts like bandages, then add a pair of glowing eyes peering out from each ($6–$10). Thirty minutes. Wrap loosely and unevenly with a few trailing ends — neat, tight bandaging reads as “I wrapped a pole,” not “something is in there.” Best for: framing the entry.
12.“Beware / Enter if you dare” signs
Paint or print warning signs, stake them along the walk, and string a little caution tape ($5–$12). Thirty minutes. Signage primes guests to expect a scare so everything after hits harder; keep the wording playful-ominous rather than disturbing if little ones visit. Best for: the gate or walkway entrance.

How do you light a scary Halloween yard?
You light a scary yard with fog, glowing accents, and uplighting aimed up at figures — the atmosphere does the work, and it’s the cheapest scare per dollar on this list. These four are the real scare-makers.
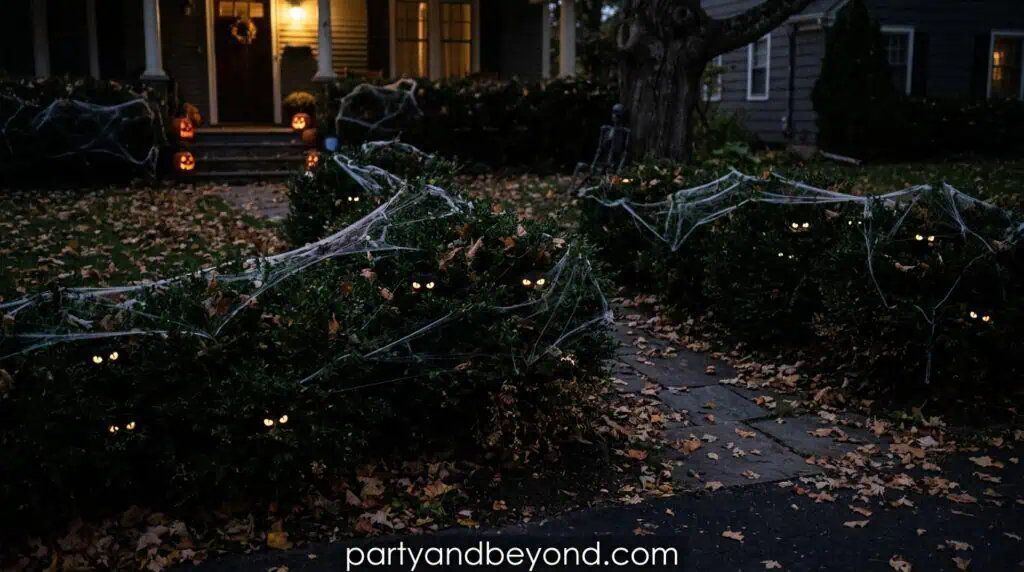
13.Glowing eyes in the bushes
Cut eye holes into black paper or toilet-paper tubes, drop a yellow glow stick or small LED inside, and tuck them into your shrubs ($3–$8). Twenty minutes. This is the best scare-per-dollar on the entire list — pairs of eyes peering from dark hedges for about the price of a coffee. Space a few pairs at different heights for the “how many are there?” effect. Best for: shrubs lining the path.
14.Creepy lighted pathway
Line the walkway with colored path lights — orange, purple, or green — or scary-face luminaries, so guests walk a glowing gauntlet to the door ($10–$20). Thirty minutes. It’s eerie and it keeps trick-or-treaters from tripping in the dark, which matters more than the scare. Best for: walkway drama plus safety.
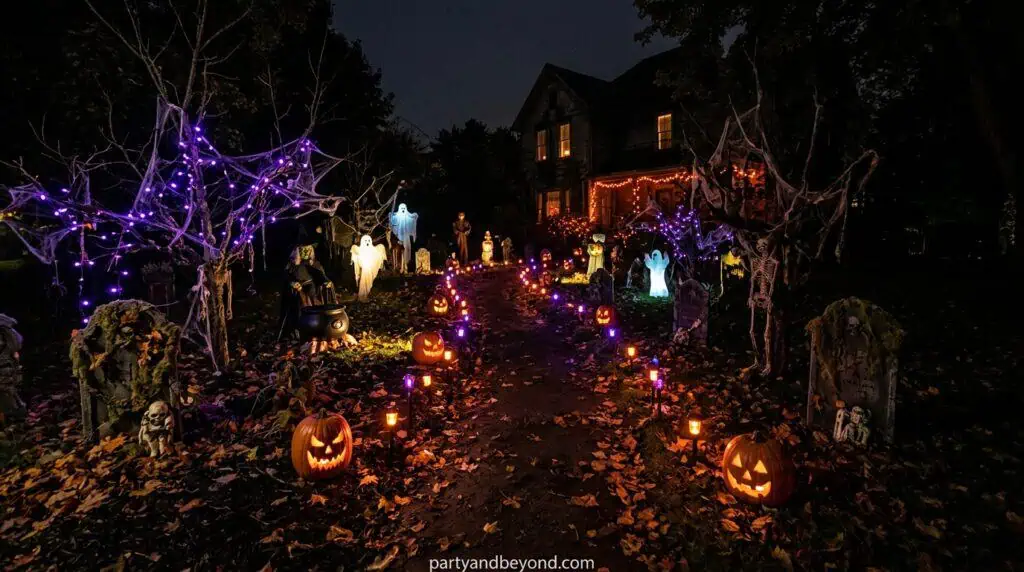
15.Low-lying fog
Set a fog machine in the graveyard, behind bushes, or near the path so a low mist rolls across the ground ($25–$45). Fifteen minutes to set up. Fog is the single biggest atmosphere upgrade there is — it turns a handful of props into a full haunted scene. Aim it low and keep it off walking surfaces, since it leaves them slick. Best for: boosting any scene.
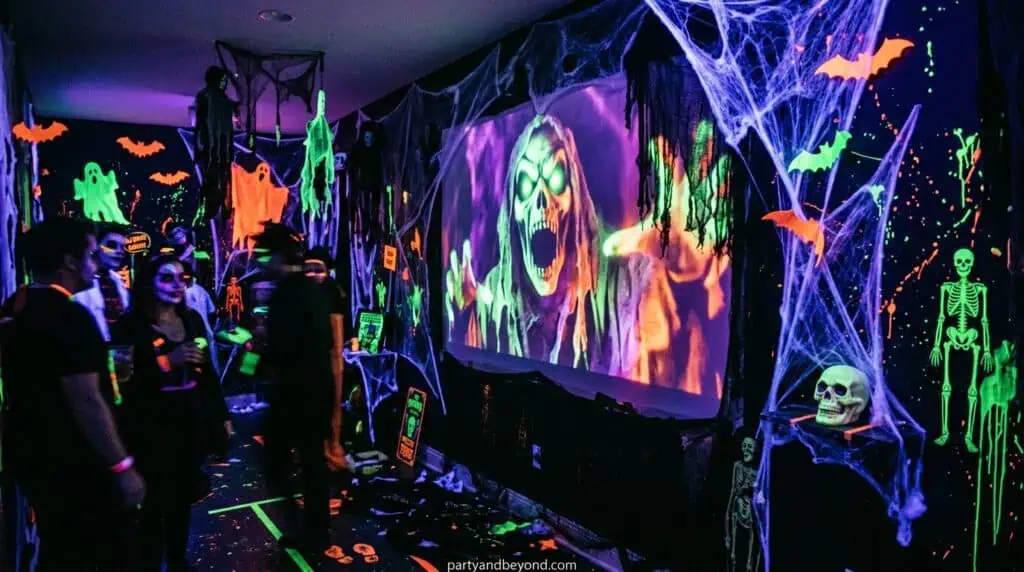
16.Blacklight, projection, and glow
Swap a porch bulb for a blacklight with glow-in-the-dark webs and bones ($15–$25), or aim a Halloween projector at your house for moving shadows ($20–$35, or about $5 for a paper-cutout shadow on a hung sheet). Forty-five minutes or less. Both need real darkness to show up, so they’re nighttime payoffs. Best for: a porch or facade that turns eerie after dark.
What outdoor Halloween decorations are trending for 2026?
For 2026, the trending outdoor looks are posed skeletons doing everyday activities, digital house projections, motion-activated jump scares, and atmospheric fog-and-light scenes over bulky props. With 51% of celebrators decorating their home or yard (NRF, 2025), the competition for the scariest house is real — and a well-lit DIY scene stands out more than another mass-produced inflatable that sags by mid-evening.
Pro tips after years of decorating outdoors
Fog and light do the heavy lifting. Before you buy another prop, add a fog machine and an uplight or two. A simple scene that’s lit and foggy out-scares an elaborate one sitting flat in daylight.
Light faces from below. A light pointed up at a scarecrow, pumpkin, or ghost throws the shadows that make it sinister. The same face lit from above just looks normal — and this trick is free.
Keep the path clear and lit. Lit walkways, no cords across the path, nothing to trip over in the dark. No scare is worth a sprained ankle on your steps.
Weatherproof and anchor everything. Seal your paint, use outdoor-rated cords on a GFCI outlet, and stake props deep. Wind will flatten an un-anchored graveyard overnight, and rain turns anything paper to pulp.
LED only, never real flames. Costumes, dry leaves, fog, and fabric are everywhere outside. Battery candles look nearly identical and remove the fire risk completely.
Common mistakes that flatten a scary yard
The number one mistake is forgetting the lighting and fog — people build great props, leave them under one yellow porch bulb, and wonder why nothing feels scary, when atmosphere is the entire game. A close second is blocking or darkening the walkway: a pitch-black path with cords snaking across it isn’t spooky, it’s a liability, so keep it lit and run cords along the edges.
The rest are quick traps: scattering props across the whole yard instead of building one strong scene near the path, skipping weatherproofing so everything sags after the first rain, leaning on a giant inflatable that deflates by 9 p.m., and using real flames anywhere near costumes or dry decor.
🎉 Quick Summary
✅ Best for: a scary yard for adults and brave trick-or-treaters
💰 Budget: under $20 per piece; under $50 for a full scene
⏱ Time: 20 minutes to 2 hours depending on the build
🌟 Top pick: Glowing eyes in the bushes — ~$5, biggest scare per dollar
📌 Don’t skip: fog, and light every figure from below
Outdoor Halloween decorations FAQ
How do I decorate my yard for Halloween?
Build one strong scene near the walkway — usually a graveyard or a ghostly grouping — then add fog and low lighting to tie it together. Most yards look scariest with a single focused display rather than props scattered everywhere. Plan for $20–$50 for a full DIY scene, and light everything from below for shadows.
What are the scariest outdoor Halloween decorations?
The scariest setups choose atmosphere over objects: low fog, glowing eyes in the bushes, uplit figures, and a half-lit graveyard. A still, lifelike scarecrow or a skeleton mid-activity unsettles people more than anything that jumps. The fright comes from light, shadow, and a slow reveal, not from how much you spent.
How do you make a Halloween graveyard in your yard?
Cut headstones from foam insulation board, weather them with gray and black paint, and stake them in uneven rows, then add skeleton hands rising from the ground, dead leaves, fog, and a low uplight ($25–$45 for the scene). About 1.5–2 hours. Aging the foam and lighting it from below are what make it convincing.
How do you make cheap outdoor Halloween decorations?
The cheapest scares use household and dollar-store materials: glowing eyes from paper tubes and glow sticks ($3–$8), mummy-wrapped columns from cheesecloth ($6–$10), and painted “Beware” signs ($5–$12). Each takes under 30 minutes. Add a single fog machine or some colored bulbs, and an inexpensive yard reads just as scary as a pricey one.
How do you make glowing eyes for the bushes?
Cut eye-shaped holes into black paper or toilet-paper tubes, drop a yellow glow stick or small LED inside, and tuck the tubes into your shrubs so the eyes peer out ($3–$8). Twenty minutes. It’s the cheapest high-impact outdoor decoration there is — pairs of eyes glowing from dark hedges as guests walk up.
How do you make outdoor Halloween decorations weatherproof?
Seal painted pieces with a clear outdoor sealer, build with weather-tough materials like coroplast and foam board instead of paper, and use outdoor-rated extension cords plugged into a GFCI outlet. Stake or weight everything against wind. Bring electronics like projectors and fog machines inside if heavy rain is coming.
How do you make a giant spider web for outside?
Stretch cotton webbing across a porch corner, bushes, or the garage, pulling it thin and irregular, then anchor the edges and add oversized spiders ($10–$20). For a wall or railing, white rope or yarn in a spoke-and-spiral pattern works too. The bigger and more uneven the web, the more realistic it looks.
What lights are best for outdoor Halloween decorations?
Colored LED floodlights or path lights in orange, purple, and green create the most atmosphere, and a single uplight aimed at a figure throws the shadows that make it scary. Blacklight makes white webs and bones glow eerily. Use LED and battery lights rather than real flames, and rate all cords for outdoor use.
How do you make a Halloween scarecrow?
Stuff old clothes with hay or plastic bags, add a burlap-sack head with a painted or masked face, and prop it in a chair or stake it upright ($10–$20). About an hour. A scarecrow slumped and still on the porch is creepier than one that moves — stillness and a slightly lifelike pose do the unsettling work.
How do you keep outdoor decorations from blowing away?
Stake lightweight props deep into the ground, weight bases with sandbags or bricks, and tie taller figures to a fence, railing, or tree. Wire skeleton and prop joints so poses hold. For anything on the porch, command-style hooks rated for the weight keep hanging pieces from sailing off in a gust.
What’s the cheapest way to make my yard look scary?
Glowing eyes in the bushes ($3–$8) plus a fog effect and a couple of colored bulbs transform a plain yard for under $20 total. Atmosphere is cheaper than props — light and fog do more than any single expensive decoration. Add a painted “Beware” sign at the gate and you’ve set a whole mood for pocket change.
How early should I put up outdoor Halloween decorations?
Most people set up in early October, and weatherproofed props like foam tombstones and coroplast bats can go up early and hold the whole month. Save real carved pumpkins for the last week or two so they don’t rot. Hold off on electronics like fog machines and projectors until party week if storms are forecast.
People also ask
How do I make my outdoor Halloween decorations scary but not too scary for kids?
Keep the scares atmospheric — fog, glowing eyes, and uplit figures — rather than gory, and lean on classic monsters like ghosts and skeletons instead of graphic horror. Keep wording on signs playful-ominous and skip realistic blood. A spooky-but-fun yard delights most trick-or-treaters without sending the little ones running.
What household items can I use for scary outdoor decorations?
Old white sheets become hanging ghosts, cardboard and foam scraps become tombstones, toilet-paper tubes become glowing eyes, and old clothes stuffed with bags become a scarecrow. Branches, dead leaves, and cobweb from a $2 pack fill in the scene. Most scary yards start with things already in your garage or recycling bin.
Do I need a fog machine for a scary yard?
You don’t strictly need one, but fog is the single biggest atmosphere upgrade for $25–$45 and turns a few props into a full haunted scene. If you skip it, lean harder on low colored lighting and glowing accents to build mood. For a true graveyard effect, though, fog is worth it.
How do I light outdoor decorations for the scariest effect?
Aim lights up at figures from below so they cast long, sinister shadows, and use colored LEDs in orange, purple, or green for mood. A single uplight on a scarecrow or ghost does more than a yard full of props. Keep pathway lighting bright enough that guests can still see where they’re walking.
Conclusion
Outdoor Halloween decorations don’t have to be expensive or complicated to feel truly scary — the real impact comes from atmosphere, not price tags. When you combine fog, low lighting, shadows, and a few well-placed props, even a simple DIY setup can turn an ordinary yard into something unforgettable. From glowing eyes in the bushes to eerie graveyards and hanging ghosts, the goal is to create a scene that feels alive when the sun goes down.
The best approach is to focus on one strong visual story instead of cluttering the entire yard. A clear theme, smart lighting, and a few handmade elements will always look more impressive than random store-bought inflatables. With just a small budget, a bit of creativity, and attention to detail, you can build a Halloween display that feels cinematic, spooky, and fun for every visitor who dares to walk up your path.
Read More : 18 minute to win it balloon games
26 fun ways to give money as a gift
21 Funny Halloween Costumes For Women (That’ll Win Every Party in 2026)

")
")
")


")