Disclosure: This post contains affiliate links. If you buy through them, I may earn a small commission at no extra cost to you. Every recommendation comes from real party planning experience and research.
Here’s a thing I learned the embarrassing way: you can spend a week on a costume and still lose the whole vibe because of something small — like chipped, three-week-old polish. Nails are the quiet finish on a full look. That’s exactly why Halloween nail ideas matter so much — they’re the tiny detail people notice when they’re standing close enough to talk to you.
With 73% of Americans celebrating Halloween and 51% dressing up (NRF, 2025), Halloween nail ideas have become one of the easiest ways to join the fun without committing to a full costume. A good set of nails can carry your entire Halloween vibe, even if everything else is simple.
And here’s the part most glossy beauty guides don’t say: you don’t need a salon or advanced skills. Most Halloween nail ideas can be done at home with basic polish, a toothpick, and a little patience — nothing more.
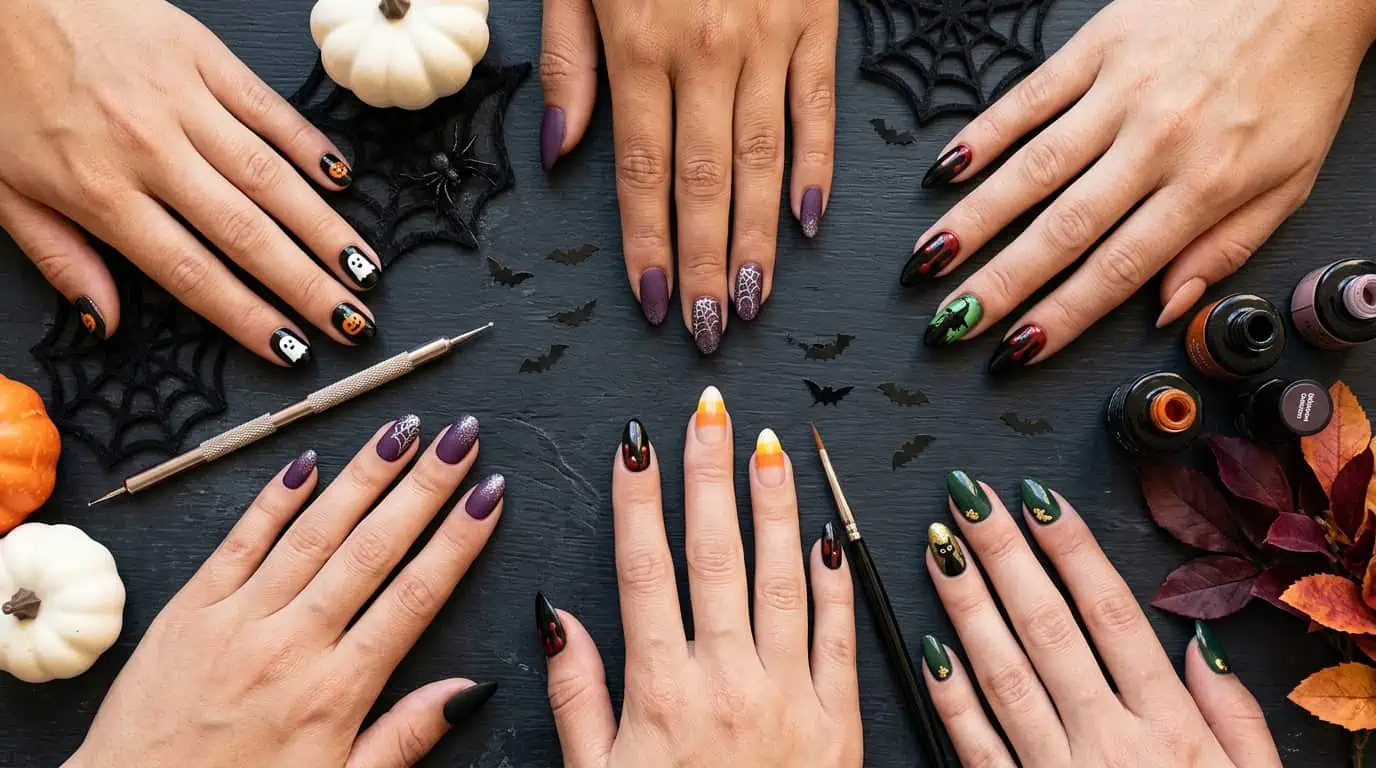
Below are 31 designs sorted by skill and vibe — easy beginner looks, spooky classics, chic minimal sets, cute pastels, and 2026 trends — all paired with DIY tips that actually make them achievable.
When you scroll through these Halloween nail ideas, you’ll see how small details can completely change a costume, even when everything else stays simple.
What makes a good Halloween nail design?
A good Halloween nail design matches your actual skill level and reads clearly without looking crowded — one clean idea beats ten shaky ones. This list runs from “I’ve never done nail art” to “I’ve got a steady hand,” so jump to your level; everything is doable at home, with skill, tools, and vibe flagged on each. My one rule for beginners: start with a single accent nail and keep the rest a solid color, because it looks intentional instead of messy.
Is it cheaper to do Halloween nails at home?
Yes — doing them at home costs a fraction of a salon, and press-ons land in between. Here’s how the three options compare so you can pick by budget, time, and skill.
Option
Cost
Time
Skill needed
Lasts
DIY at home
$0–$15
30–60 min
Any (start with an accent)
3–7 days (2+ wks gel)
Press-ons / stickers
$8–$15
15–20 min
None
1–2 weeks
Salon
$40–$90+
1–2 hours
None (they do it)
2–3 weeks
What are the easiest Halloween nails for beginners?
The easiest beginner designs layer one simple shape over a solid color, so they look intentional and take five to ten minutes. These eight need one tool or none.
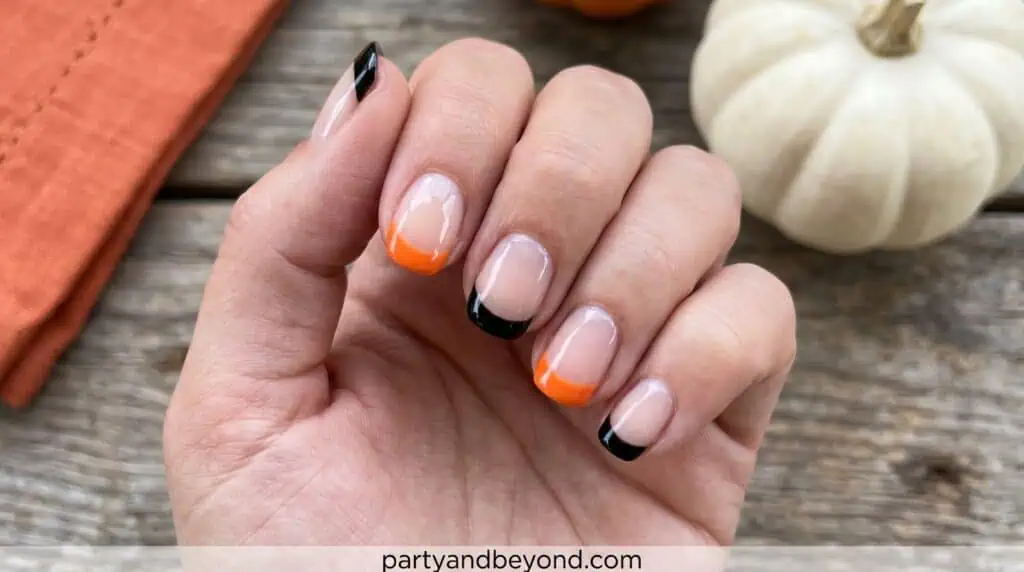
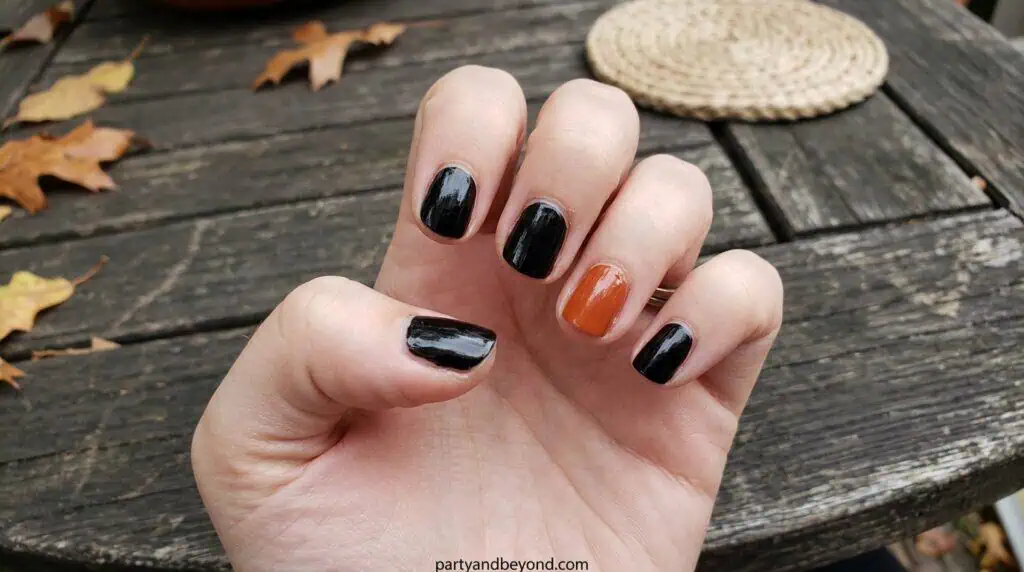
1.Black & orange French tips
Paint your tips in alternating black and orange instead of classic white, using French guide stickers if freehand makes you nervous. Thin, even tips look chic; thick, wobbly ones look like you missed, so go thinner than feels natural. Skill: Beginner. Works just as well on short nails as long.
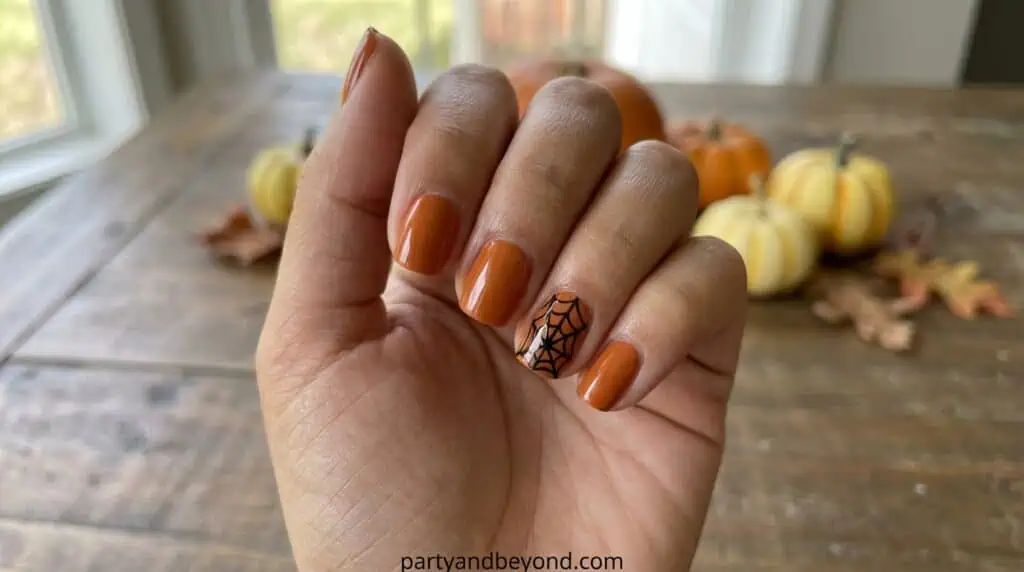
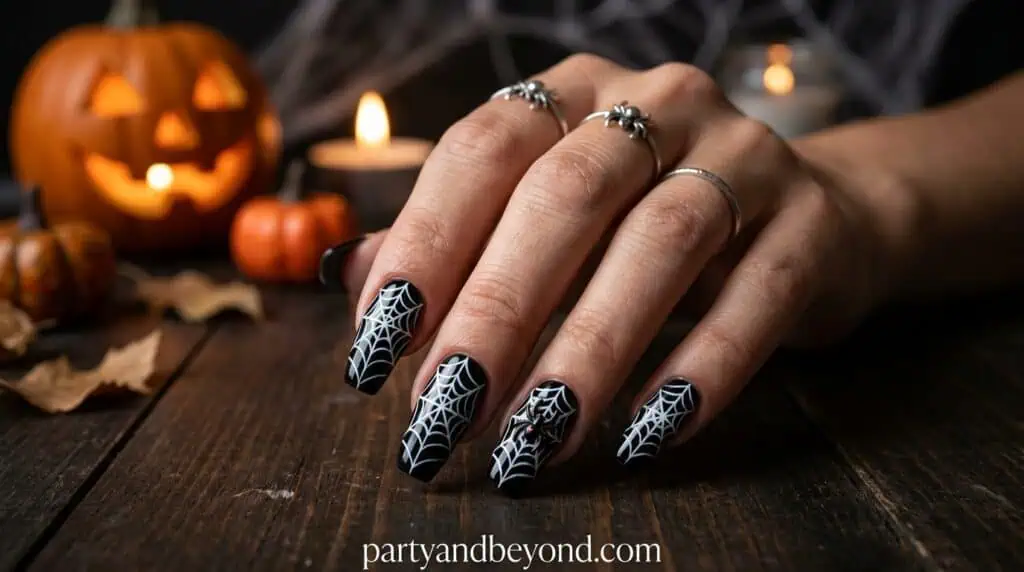
On one nail, draw a few thin lines from a corner outward, then connect them with little curved arcs using a striping brush. Five minutes. Thin polish is the secret — gloopy polish turns a delicate web into a black blob. Skill: Beginner, the most forgiving spooky look there is.
Do French tips, but swap the line for a row of tiny black bats — a small dot for the body, two wing swipes on each side. Keep them small and slightly uneven, since perfectly identical bats look fake. Skill: Beginner, with a dotting tool and a thin brush.
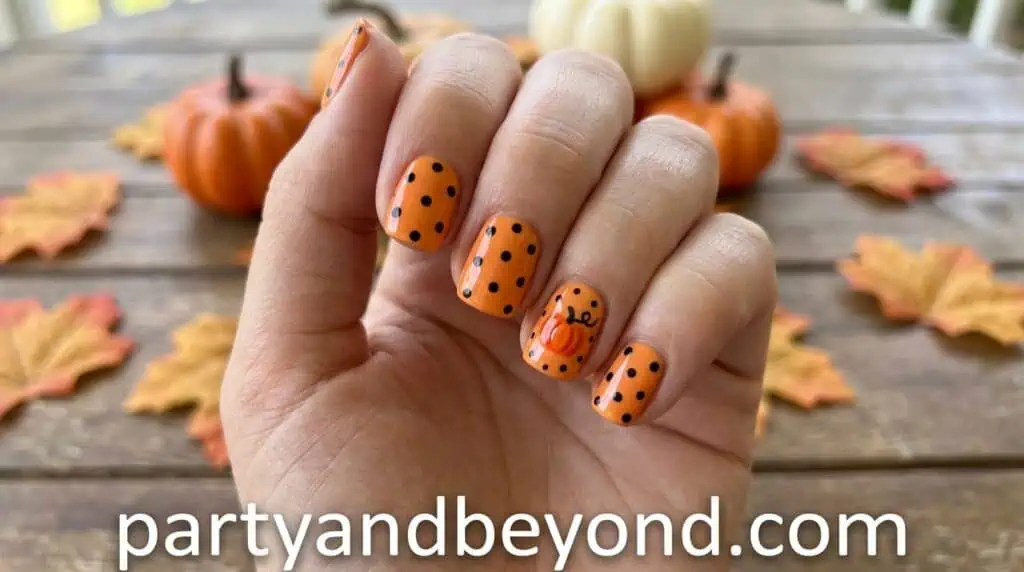
4.Polka-dot pumpkins
Dot orange circles across a clear or cream base with a dotting tool (or the end of a bobby pin), then add a tiny green stem and two black dots for eyes. About ten minutes. Skill: Beginner — dots are round on purpose, so there’s nothing to mess up.
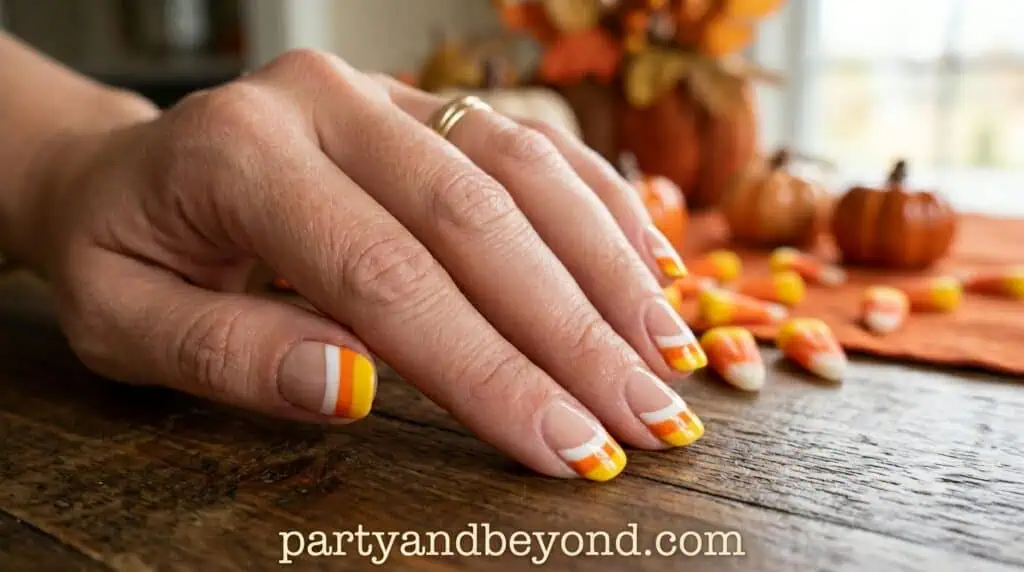
5.Candy corn tips
Sponge three stripes — white at the base, orange in the middle, yellow at the tip — onto a couple of accent nails. Dabbing with a small makeup sponge blends the gradient and hides streaks. Skill: Beginner, far easier than painting clean lines freehand.
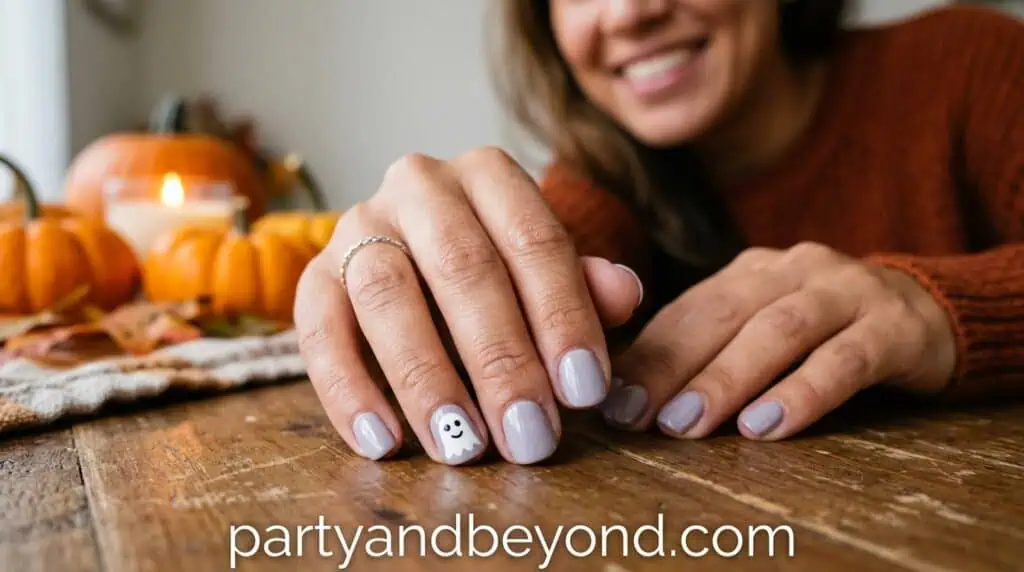
6.Single smiling ghost accent
Paint one white ghost with a wavy bottom and two dotted eyes on a clear or black accent nail. A small brush is all you need, and a little smile keeps it cute instead of creepy. Skill: Beginner, far less intimidating than ten ghosts.
7.Glossy vs. matte combo
Paint all ten nails the same color — black, deep red, or plum — then add a matte topcoat to just a few for a glossy-and-matte mix. There’s no art at all, yet the finish contrast reads as deliberate and expensive. Skill: Beginner, the true zero-art option.
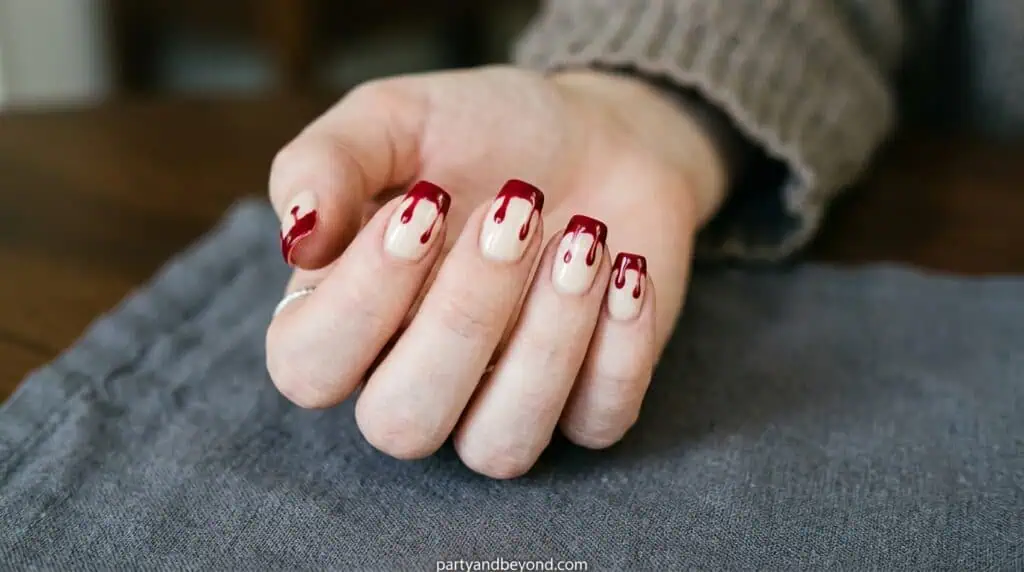
8.Blood-drip tips
On a nude or black base, drip red polish from the tips down in uneven runs using a thin brush or a toothpick. A little messy is the point — even drips look like stripes, uneven ones look like dripping blood. Skill: Beginner–Intermediate, quicker than it looks.
What are the best spooky Halloween nail designs?
The best spooky designs use classic icons — webs, ghosts, pumpkins, bats, bones — kept to a shared color story so they read as one set. These nine range from beginner to intermediate.
9.Full spiderweb design
Take the accent-nail web across more nails, or fill one whole nail corner-to-corner with a dense web using a striping brush. A full web on every nail can tip into busy, so do two or three web nails and keep the rest solid. Skill: Intermediate.
On an ombre or sheer base, scatter tiny white ghosts at different angles so they look like they’re drifting, and dot the eyes last. The soft base is what makes it eerie and pretty rather than a kids’ craft. Skill: Beginner.
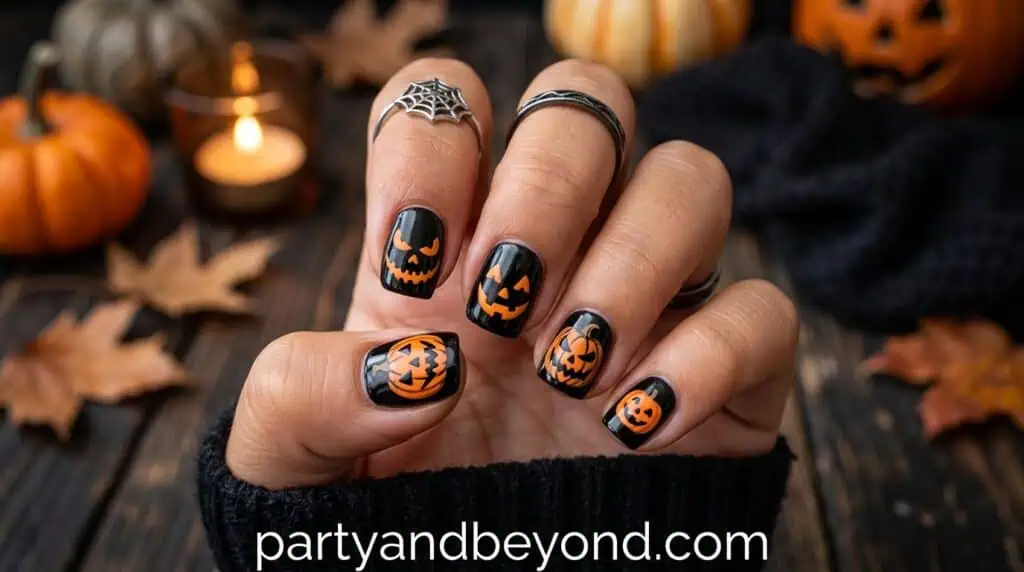
11.Jack-o’-lantern faces
Paint orange ovals and add black triangle eyes and a jagged grin — one pumpkin per nail or a single accent. Keep the faces simple so they read clearly even on short nails. Skill: Beginner–Intermediate, with a small brush and a light touch.
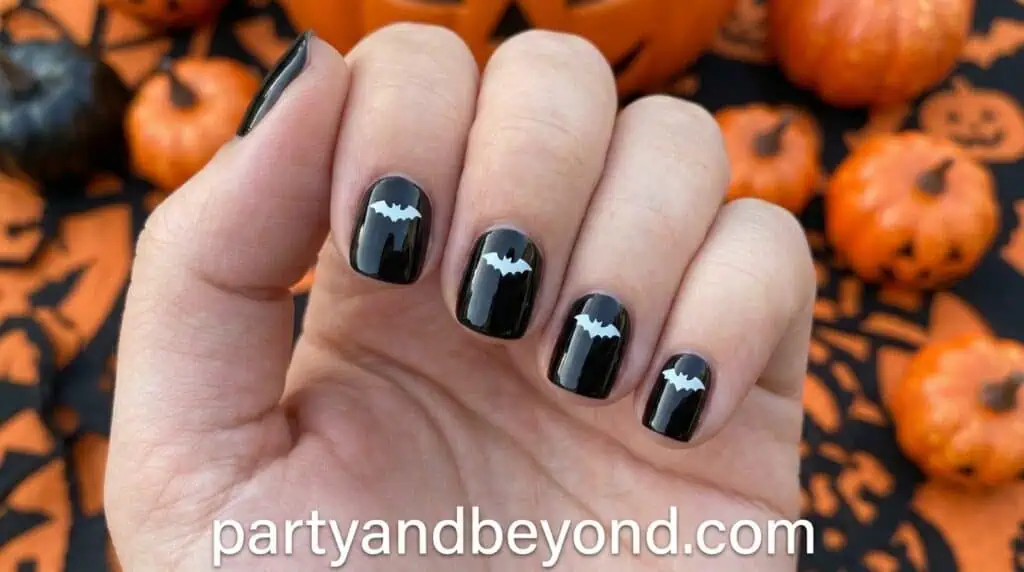
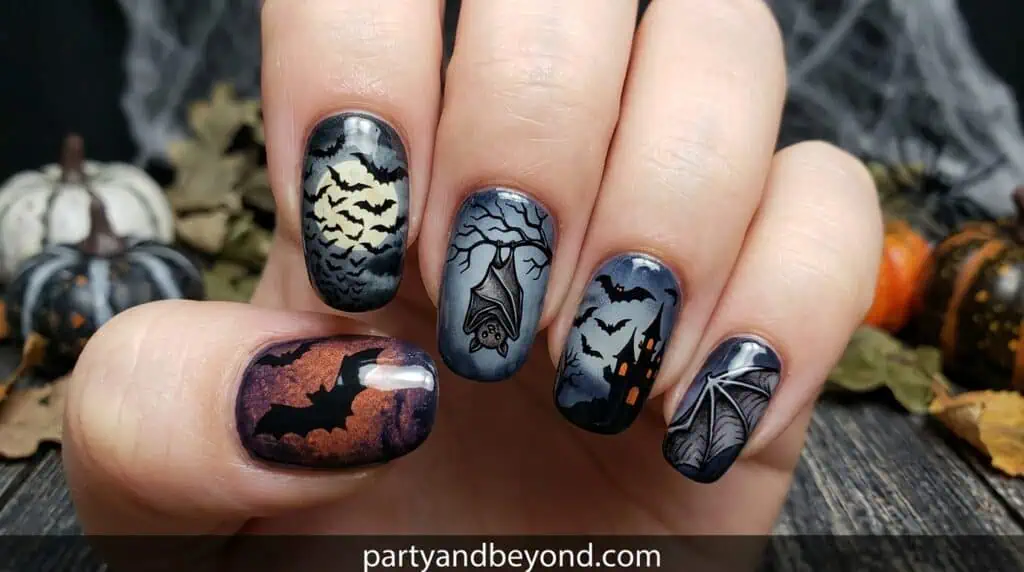
12.Bat colony
Cover your nails in little black bats flying in a cluster. This is where a stamping plate earns its place, giving crisp, repeatable bats that freehand can’t match. Skill: Beginner with stamping — no shame in it, it’s how clean sets get made.
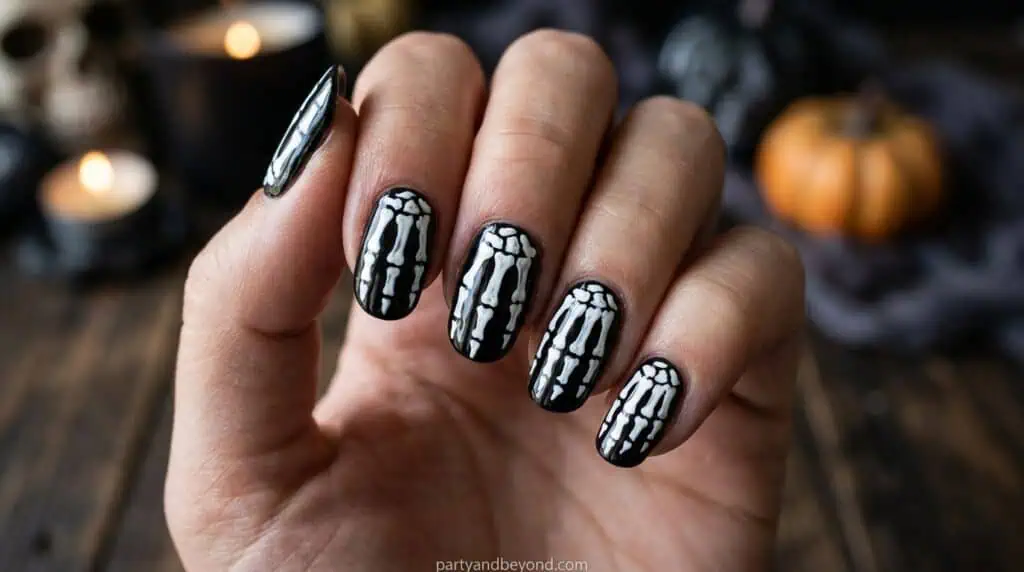
Draw thin white bones down the nail, or a little skeleton hand on an accent. It rewards a thin brush, thin polish, and patience, so do it on one accent nail rather than all ten if your hand isn’t steady yet. Skill: Intermediate, a real statement.
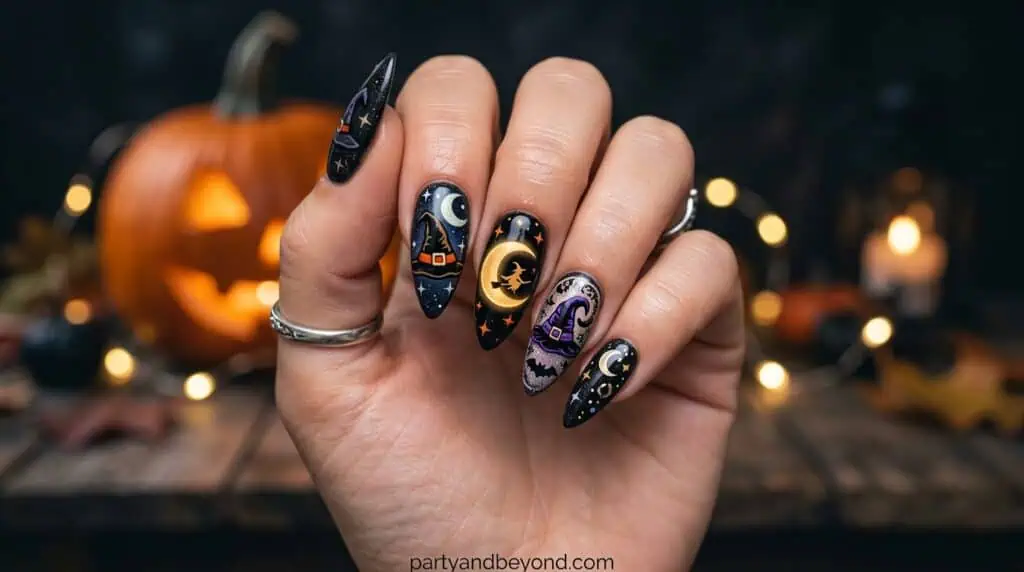
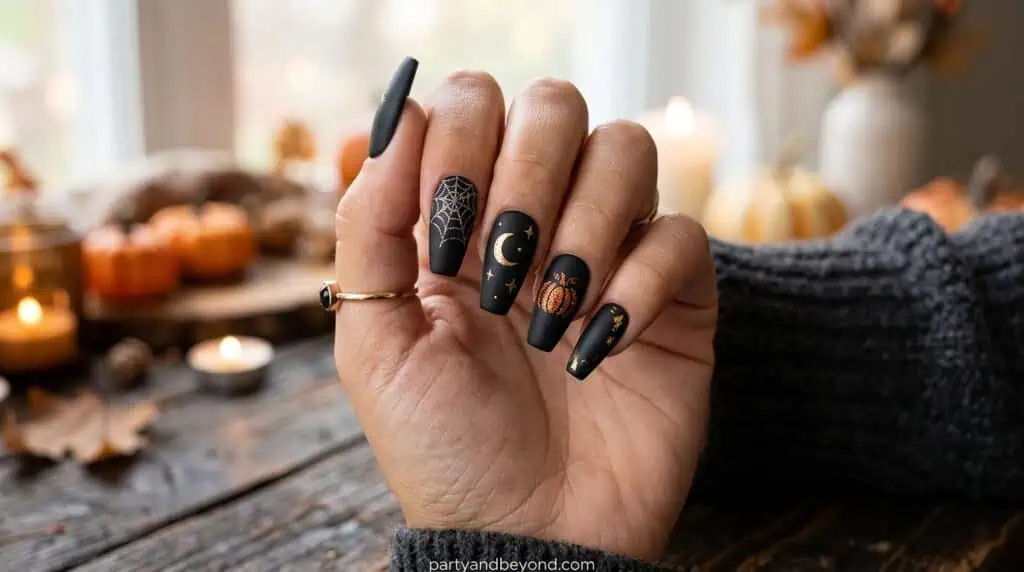
14.Witch hat + crescent moon
Paint a black witch hat on one nail and a crescent moon on another, against a midnight or deep-purple base. Both are simple geometry, which makes this a great confidence-builder. Skill: Beginner, whimsical and witchy.
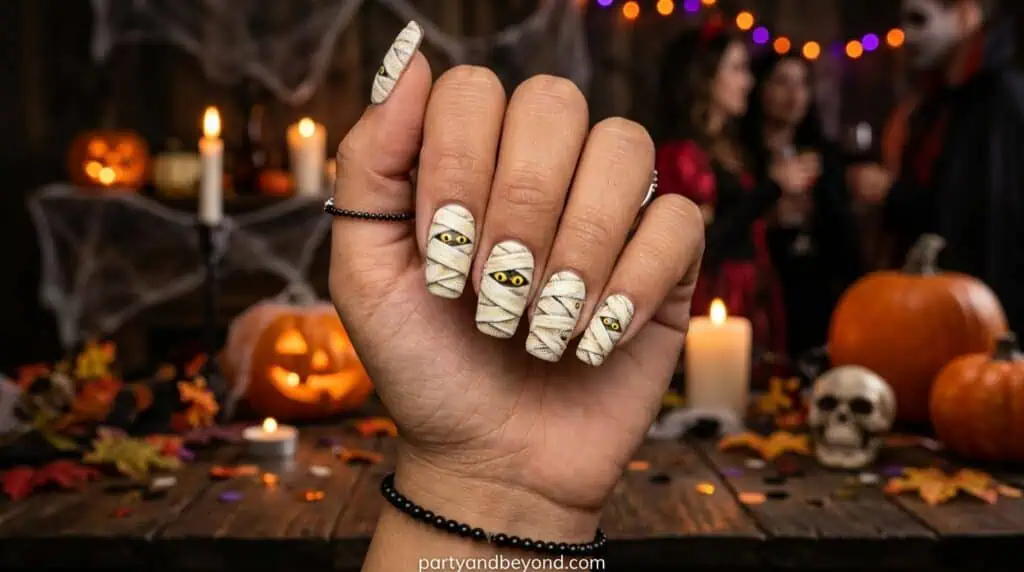
15.Mummy wrap nails
Cross thin white or cream “bandage” stripes over a nude base with a striping brush, then add two tiny googly-style dots peeking through. Layer the stripes unevenly and overlapping — neat parallel stripes look like a pattern, not bandages. Skill: Beginner.
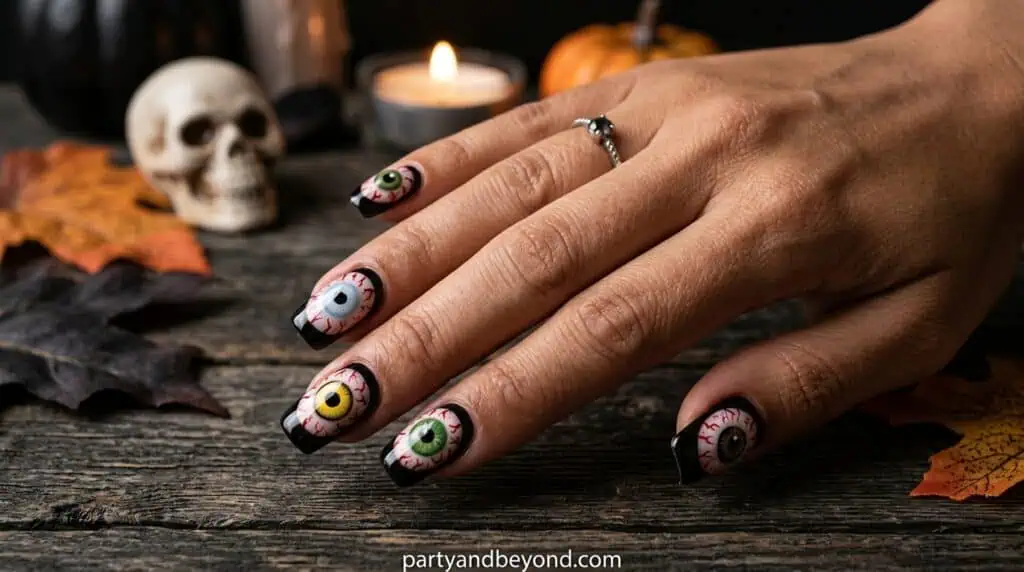
16.Eyeball nails
Dot a colored circle, a smaller black pupil, and a few red “veins” with a thin brush for creepy little eyeballs. Keep the veins thin and sparse, since too many turn the eye into a red mess. Skill: Beginner–Intermediate, always a crowd-pleaser.
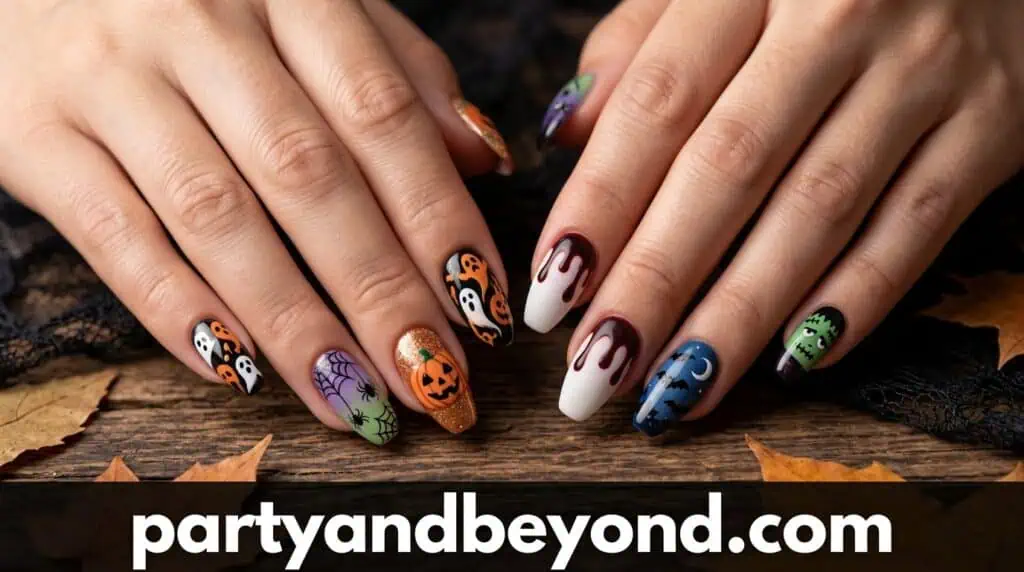
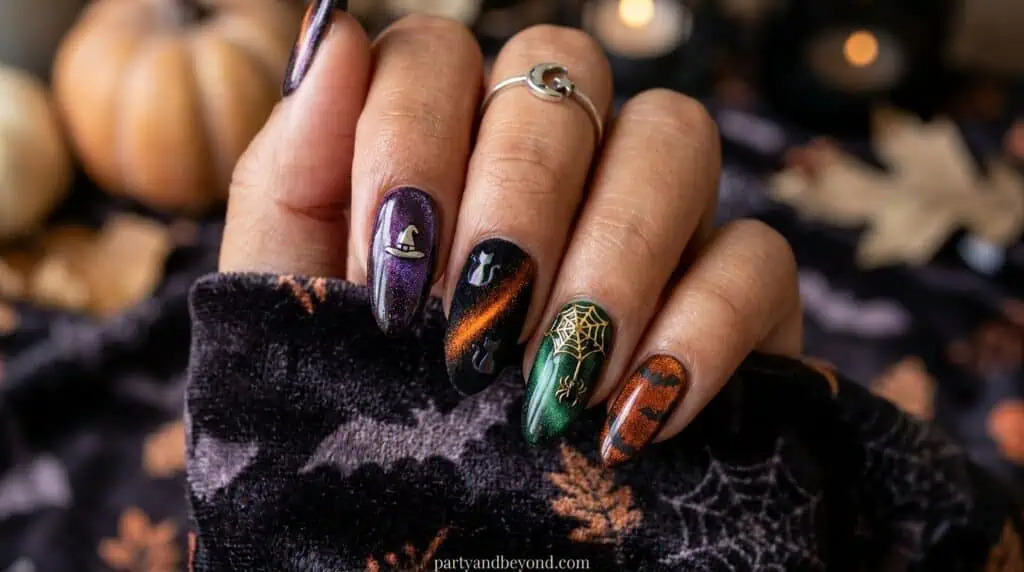
17.Mix-and-match spooky set
Give every nail its own icon — a ghost, a pumpkin, a black cat, a spider, a spooky eye. The trick to keeping it cohesive is a shared background and color story across all ten. Skill: Intermediate, the go-all-out option.
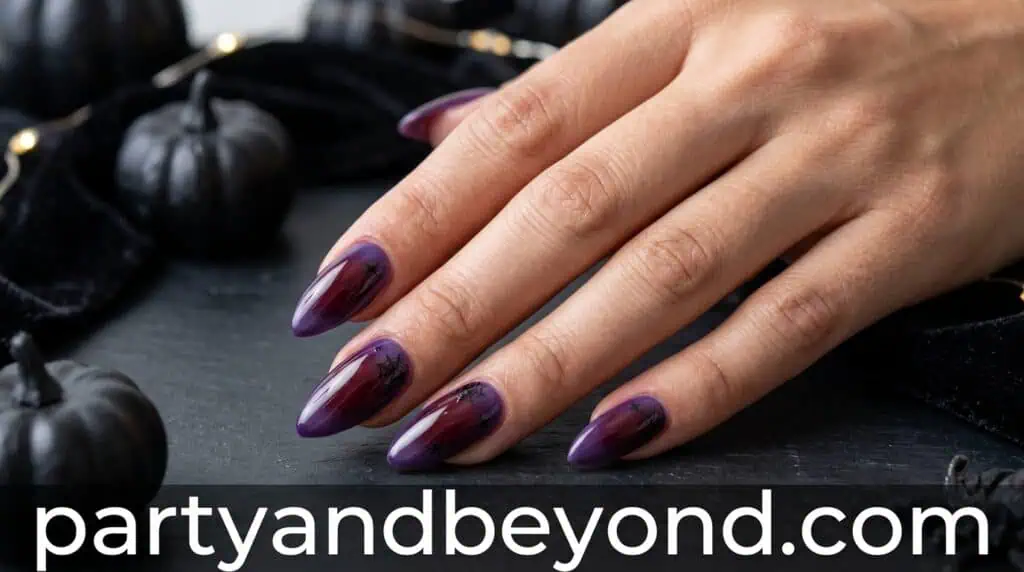
What are elegant Halloween nails that aren’t too spooky?
Elegant Halloween nails lean on moody color and finish over cartoon art, so they read chic and often work well past October 31. These six are low-effort, high-impact.
Paint coffin or almond nails solid black, then finish with a matte topcoat — that’s the entire look. The shape plus the matte finish is quietly dramatic and works at a wedding the next weekend. Skill: Beginner, no art, all attitude.
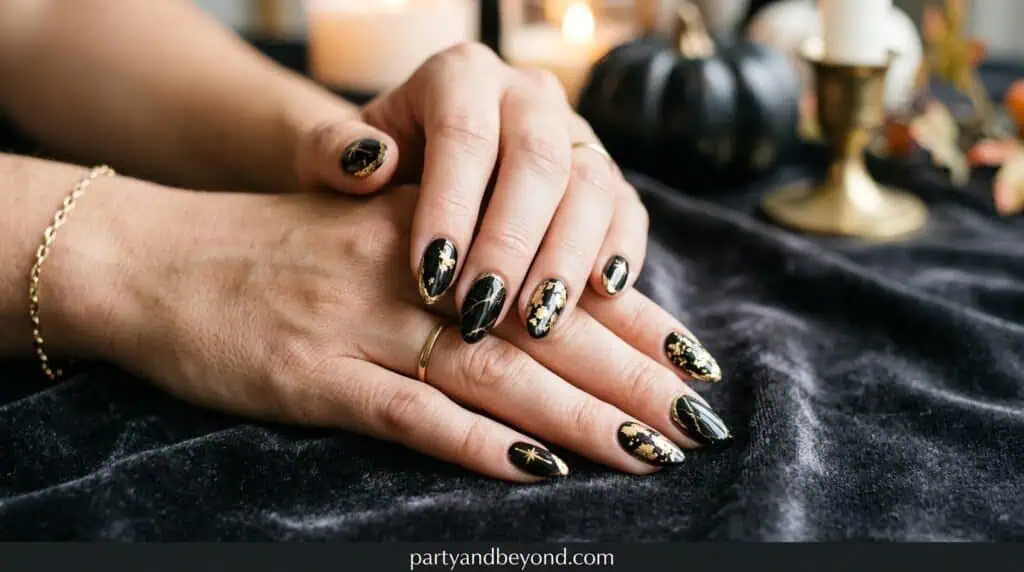
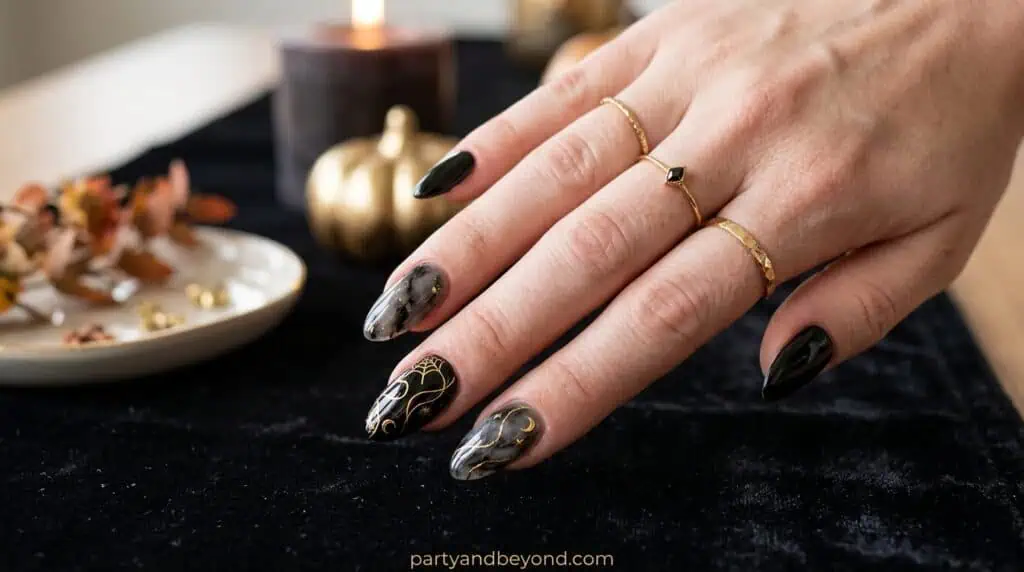
19.Black-and-gold foil or marble
Press bits of gold leaf into black polish while it’s tacky, or do a quick black-and-gold water marble. Timing is everything with foil — too wet and it sinks, too dry and it won’t stick. Skill: Intermediate, but it looks genuinely expensive.
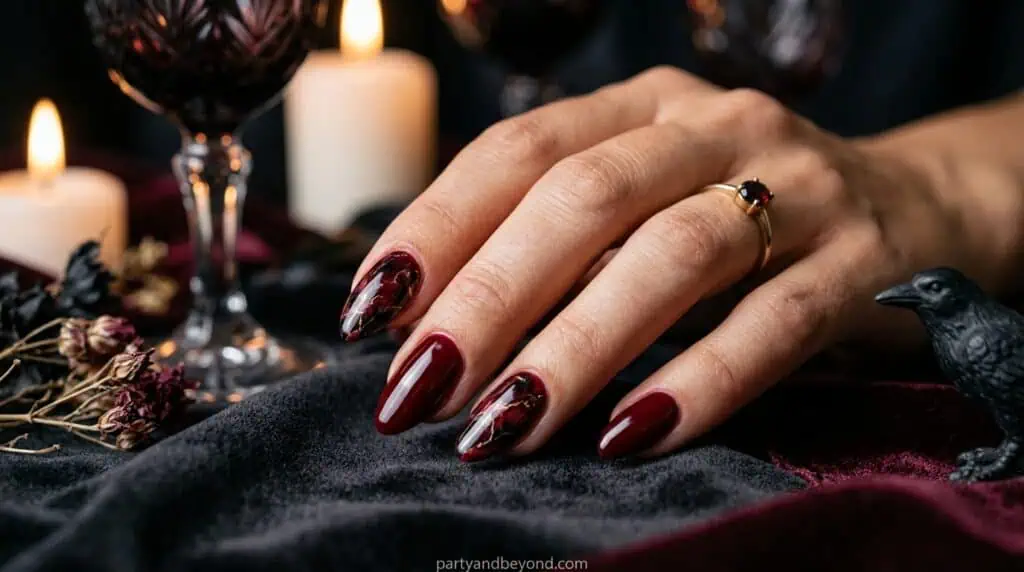
Sometimes one perfect shade is the whole look. A deep, glossy blood-red on every nail is timeless and sophisticated, and the easiest “Halloween” manicure that still reads grown-up at a dinner. Skill: Beginner — two coats and a shiny topcoat.
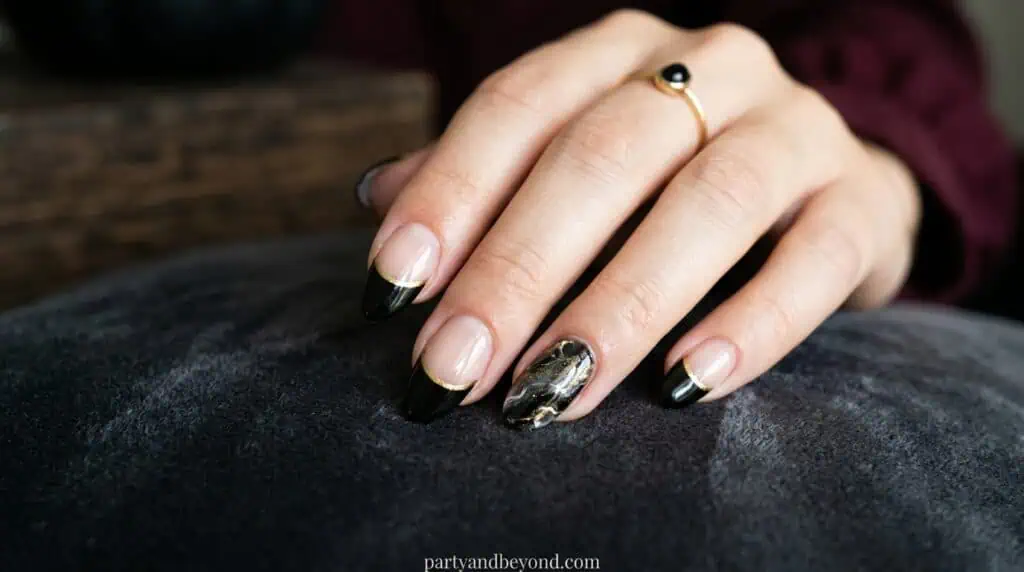
21.Black French + thin gold line
Do a black French tip, then trace a hairline of gold where the black meets the nude with a striping brush. The whisper-thin line is what elevates it from plain French to intentional. Skill: Intermediate, spooky-adjacent without a single bat.
A moody oxblood or dark plum on its own reads seasonal and chic, and it’s office-appropriate if your workplace is buttoned-up. One polish, no art, all mood. Skill: Beginner, festive without explaining a bat to your boss.
Sponge black, gray, and deep violet together for a foggy, marbled look like haunted mist on the nail. The smoky blur hides mistakes rather than showing them, which makes it secretly beginner-friendly. Skill: Intermediate, mysterious and forgiving.
What are cute Halloween nail ideas?
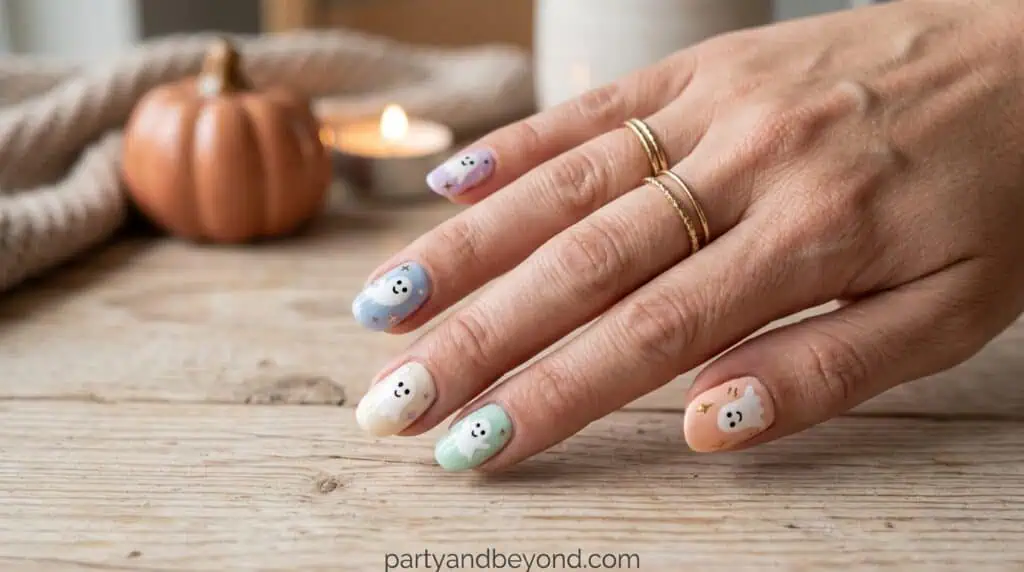
Cute Halloween nails swap the dark palette for soft colors and friendly faces, so they feel playful rather than scary. These three keep it sweet.
Swap the spooky palette for soft lavender or baby pink and add little white ghosts with happy faces. The soft-girl-meets-spooky combo is everywhere right now and friendly enough for anyone who finds traditional Halloween nails too dark. Skill: Beginner.
Paint candy corn, tiny lollipops, or little wrapped-candy shapes across your nails. It’s more “cozy fall party” than “haunted house,” which is exactly why some people love it. Skill: Intermediate, the sweetest, least scary option.
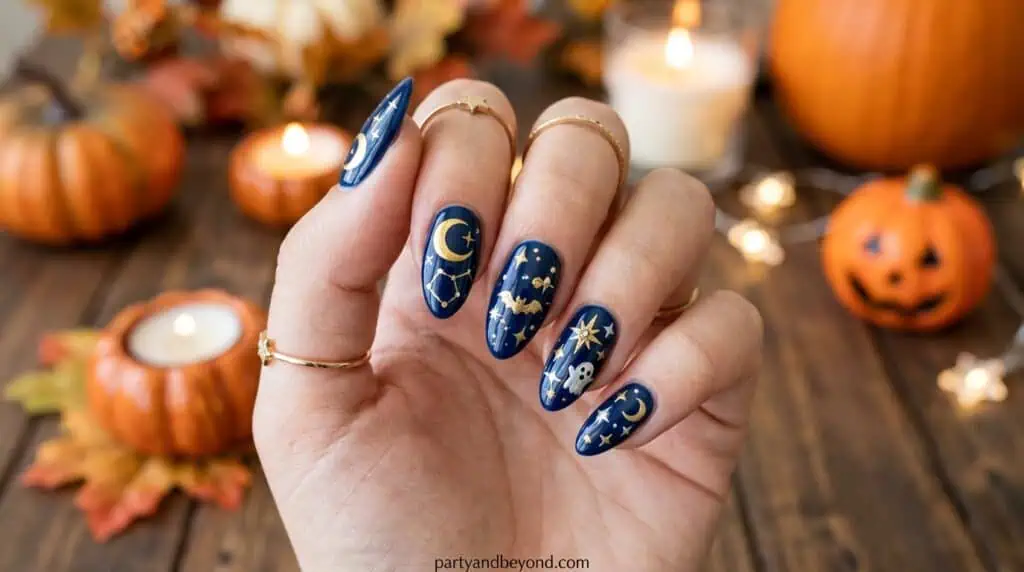
Dot tiny stars and a crescent moon over a dark or sheer base, or use little decals. Minimal, pretty, and barely “Halloween,” which makes it the move if you want something subtle you won’t tire of by November. Skill: Beginner, decals welcome.
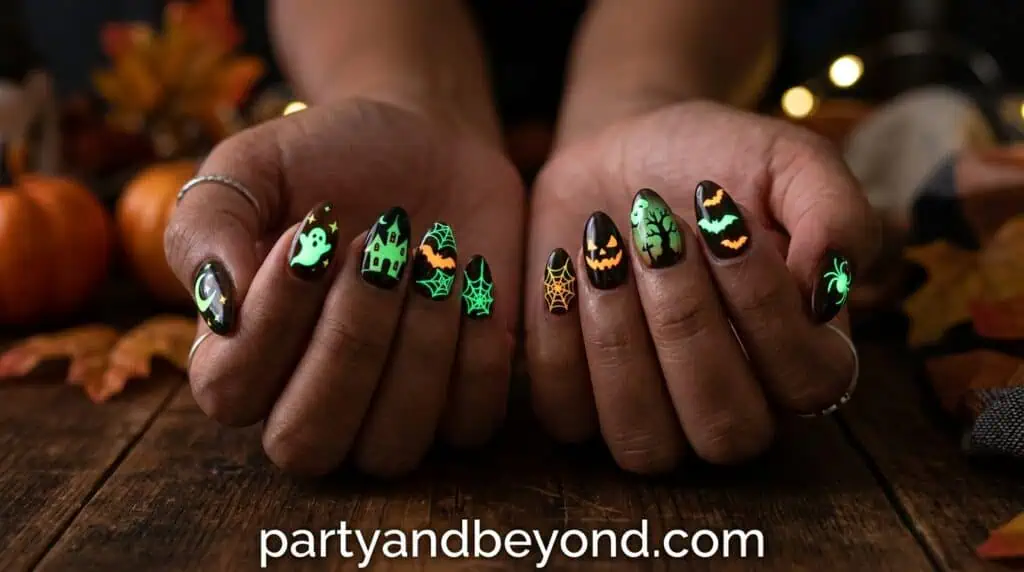
What Halloween nail trends are popular for 2026?
For 2026, the trends blend aesthetics — goth plus glam, minimal plus horror — through aura gradients, velvet finishes, dark chrome, and glow effects. These four are what’s actually blowing up.
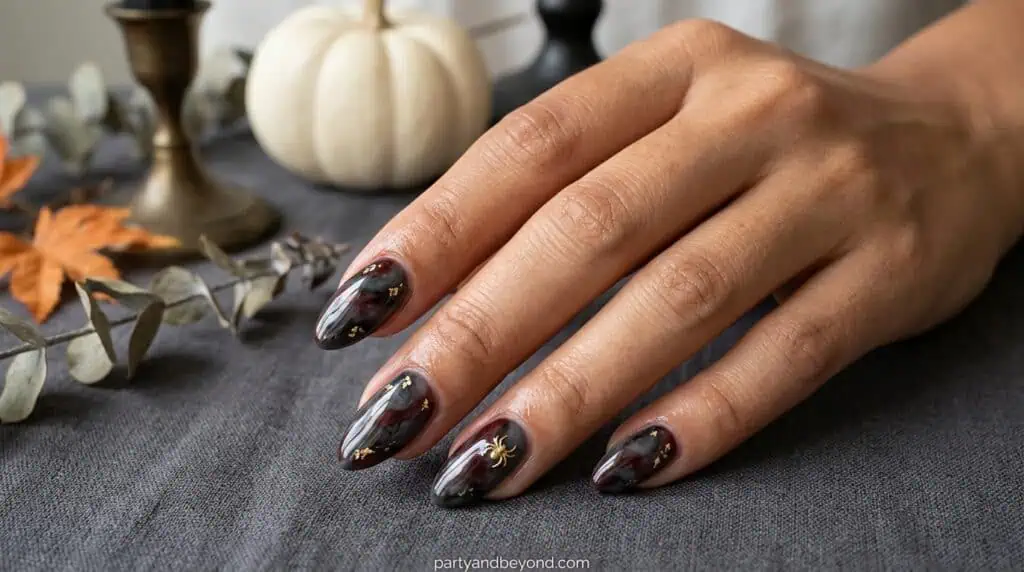
27.Aura nails (dark red or purple)
The aura trend — a soft glow of color bursting from the center of the nail — goes spooky in deep red or purple. Dab the color on with a sponge and blur the edges; the softer and hazier the edges, the more it glows. Skill: Intermediate, very 2026.
28.Cat-eye / velvet
Magnetic “cat-eye” gel in oxblood or black gives a velvety, shifting streak of light — you just hold a magnet over the wet gel for a few seconds. It looks far more advanced than it is. Skill: Beginner with the right magnetic polish, luxe and on-trend.
Chrome powder over black or copper gives a liquid-metal finish that catches every flicker of candlelight. It needs a fully cured base and a gentle buffing motion. Skill: Intermediate, one of the boldest looks this year and great in photos.
Add a glow-in-the-dark polish or topcoat over a ghost or web so it lights up at a dim party — charge it under a lamp first so it glows bright. It’s just an extra layer. Skill: Beginner, the party trick that earns a gasp when the lights drop.
How do you do Halloween nails without any art skills?
The no-skill route is press-ons or stickers, which give you full art in 15–20 minutes with zero painting.
Halloween press-on sets and nail stickers deliver full designs in 15–20 minutes with no painting ($8–$15). There’s no shame in the shortcut — they’ve gotten genuinely good, they last a week or two, and a clean press-on beats a rushed, smudged freehand every time. Skill: None — sometimes the smart move is just buying the look.
Pro tips after years of at-home manicures
Start with one accent nail. If you’re new, paint nine nails a solid color and put your design on one. It looks intentional and takes all the pressure off doing ten tiny paintings.
Two tools do almost everything. A dotting tool (or a bobby pin) and one thin striping brush handle most of these. You don’t need a 40-piece kit — buy more only once you hit the limits of these two.
Always base-coat, always top-coat. A base coat keeps dark and red polishes from staining your nails, and a top coat is the difference between art that lasts a day and art that lasts a week. These two layers do more for longevity than anything else.
Matte topcoat is a cheat code. A matte finish instantly makes black, plum, and spooky designs look high-end. It’s the cheapest, easiest upgrade in your whole kit.
Clean up with a brush and remover. Dip a small brush in polish remover and run it around your cuticles at the end. Tidy edges are the single thing that separates “did it at home” from “looks like home.”
The biggest mistake is trying intricate freehand art before you’re ready — a shaky skeleton hand looks worse than a clean single accent, so match the design to your real skill and lean on stamping or stickers for anything complicated. A close second is skipping the base and top coat: without a base, dark polish stains your nails; without a top coat, your art chips by the next morning.
The rest are quick traps: not letting each layer dry before adding the next so everything smears, going so busy that the design reads as clutter instead of art, and forgetting to clean up the edges — messy cuticle lines undo an otherwise great manicure.
🎉 Quick Summary
✅ Best for: finishing a costume or getting festive with no full costume
💰 Budget: $0–$15 DIY ($8–$15 press-ons, $40+ salon)
⏱ Time: 5–10 min for easy designs, up to an hour for a full set
🌟 Top pick: Single spiderweb accent — 5 minutes, beginner-proof
📌 Don’t skip: base coat, top coat, and a matte finish for spooky looks
Halloween nails FAQ
What are easy Halloween nail ideas for beginners?
The easiest beginner designs are a single spiderweb accent, polka-dot pumpkins, black-and-orange French tips, and a glossy-matte combo. Each needs only one tool or none at all and takes about five to ten minutes. Start with one accent nail and keep the rest solid for a look that’s intentional and forgiving.
How do you do Halloween nails at home?
Start with a base coat, paint your solid color, add a simple design with a dotting tool or thin brush, then seal with a top coat. Most at-home looks take 30–60 minutes total. Keep designs to one or two accent nails if you’re new, and clean up the edges with a brush dipped in remover.
What colors are best for Halloween nails?
Classic black and orange read instantly as Halloween, while deep red, plum, and oxblood feel chic and seasonal. For cute looks, pastels like lavender and baby pink work well, and gold or chrome adds drama. Sticking to two or three colors keeps any design looking intentional.
How do you paint a spiderweb on your nails?
Draw a few thin lines radiating from one corner of the nail with a striping brush, then connect them with small curved arcs to form the web. Five minutes per nail. A single web on an accent nail is the most forgiving version; use a thin brush and thin polish so the lines stay crisp.
How do you make a ghost on your nails?
Paint a small white shape with a rounded top and a wavy bottom edge, let it dry, then add two black dots for eyes. A small brush is all you need. Floating a few tiny ghosts on a sheer or ombre base looks eerie and pretty, while one bold ghost makes a cute accent.
What’s the easiest Halloween nail design?
The single easiest is a glossy-matte combo — paint all nails one dark color and add a matte topcoat to a few, with zero art skill required. A single spiderweb accent and black-and-orange French tips are close behind. All three take under ten minutes and look deliberate.
How do you do candy corn nails?
Paint or sponge three horizontal bands — white at the base, orange in the middle, yellow at the tip — onto an accent nail or two. Dabbing the colors with a small makeup sponge blends the gradient and hides streaks. Seal with a top coat so the layers stay smooth.
What Halloween nail trends are popular for 2026?
For 2026, aura nails in dark red or purple, cat-eye velvet finishes, dark chrome “molten” looks, and glow-in-the-dark accents are trending, along with soft-girl-meets-spooky pastels. Mix-and-match sets with a different icon per nail are also big. Many of these come from blending aesthetics — goth plus glam, minimal plus horror.
How long do DIY Halloween nails last?
Regular DIY polish with a base and top coat typically lasts three to seven days, while at-home gel or quality press-ons last about two weeks. Longevity depends most on those base and top coats and on letting each layer dry fully. Press-ons are the most durable no-skill option.
Do you need special tools for Halloween nail art?
No — a dotting tool (or a bobby pin) and one thin striping brush handle most designs, and many looks need only polish and a top coat. Stamping plates and stickers help for intricate art without skill. You can build up a small kit over time rather than buying everything at once.
What are good Halloween nails for short nails?
Short nails suit French tips, single accents, dots, and minimal designs like a small web or a crescent moon. Simple, small-scale art reads cleanly on a short nail, while busy full-nail designs can look crowded. Dark solid colors and a matte finish also look chic and intentional on short nails.
How do you do Halloween nails without any art skills?
Use press-on sets or nail stickers for full designs in 15–20 minutes with no painting, or stick to a single solid color in a seasonal shade like oxblood or matte black. A glossy-matte combo also looks intentional with zero art. There’s no shame in the shortcut — clean and simple always beats rushed and messy.
People also ask
Can you do Halloween nails with regular nail polish?
Yes — almost every design here works with regular polish, a base coat, and a top coat. Regular polish lasts three to seven days, slightly less than gel, but it’s far cheaper and easier to remove. Let each layer dry fully before adding the next so your art doesn’t smear.
What is the most popular Halloween nail design?
Spiderwebs, ghosts, and pumpkins remain the most popular year after year because they read instantly as Halloween. For 2026, minimal looks like a single web accent or floating ghosts are especially trendy, alongside moody solid shades like oxblood and matte black. Cute and minimal are outpacing heavily detailed art.
How do I make my Halloween nails last longer?
Always use a base coat and a top coat, let every layer dry fully, and reapply top coat every two or three days to reseal the tips. Avoid hot water and wear gloves for dishes. These habits stretch regular polish to a week and gel or press-ons to two weeks or more.
Are press-on nails good for Halloween?
Yes — press-ons are ideal for Halloween if you have no time or art skills, giving you full designs in 15–20 minutes for $8–$15. Quality sets last one to two weeks and look cleaner than rushed freehand. Buff your natural nail and use the included glue or tabs for the best hold.
Conclusion
Halloween nails are the easiest way to upgrade your whole look without needing a full costume or professional skills. From simple beginner designs like spiderweb accents and French tips to more advanced spooky art and 2026 trends like aura and chrome finishes, there’s something for every skill level and budget. The real magic is in the details — even a small, well-done design can completely pull a costume together.
Whether you go for DIY polish, press-ons, or salon-style finishes, Halloween nail ideas give you a creative way to join the celebration in your own style. The best approach is to start simple, match your skill level, and focus on clean, intentional designs. With the right colors, a few basic tools, and a little patience, your nails can become the standout part of your Halloween vibe.
Leah Meyer is a passionate event planner and creative writer behind Party & Beyond, where she helps hosts throw stunning celebrations on a real-world budget. From birthday parties and baby showers to backyard weddings and holiday gatherings, Leah personally tests every DIY idea she shares , proving that the wow factor lives in the details, not the price tag. When she's not planning the next party, you'll find her hunting for hidden treasures at dollar stores, inflating balloons (she owns three pumps!), or brainstorming with her dog, the official Chief Inspiration Officer of Party & Beyond.


")
")


")
")
