Disclosure: This post contains affiliate links. If you buy through them, we may earn a small commission at no extra cost to you. As an Amazon Associate, we earn from qualifying purchases.
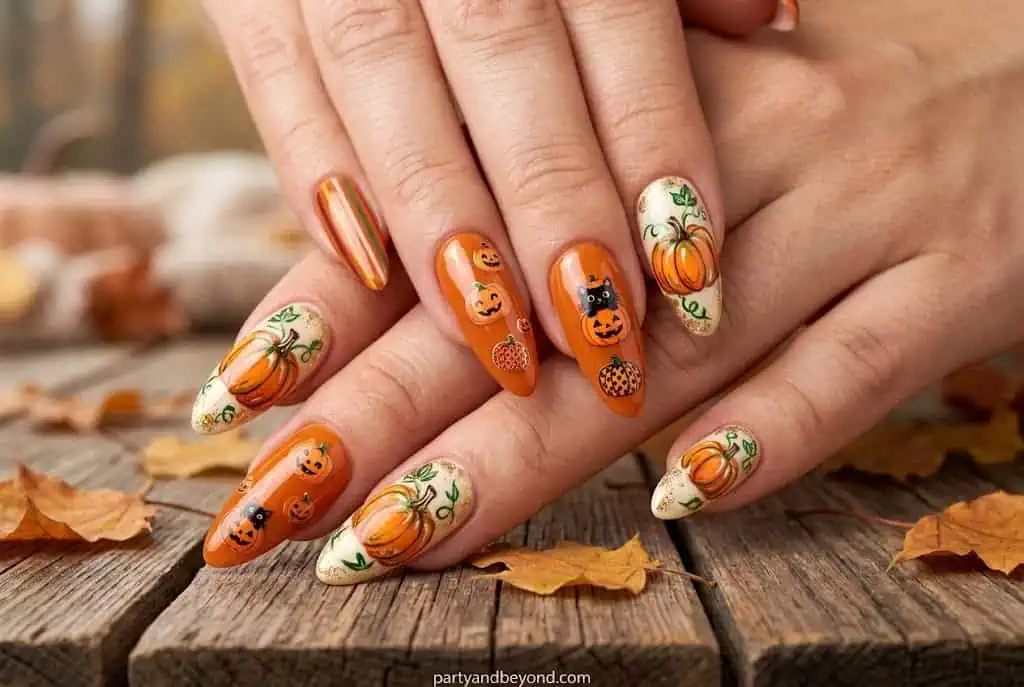
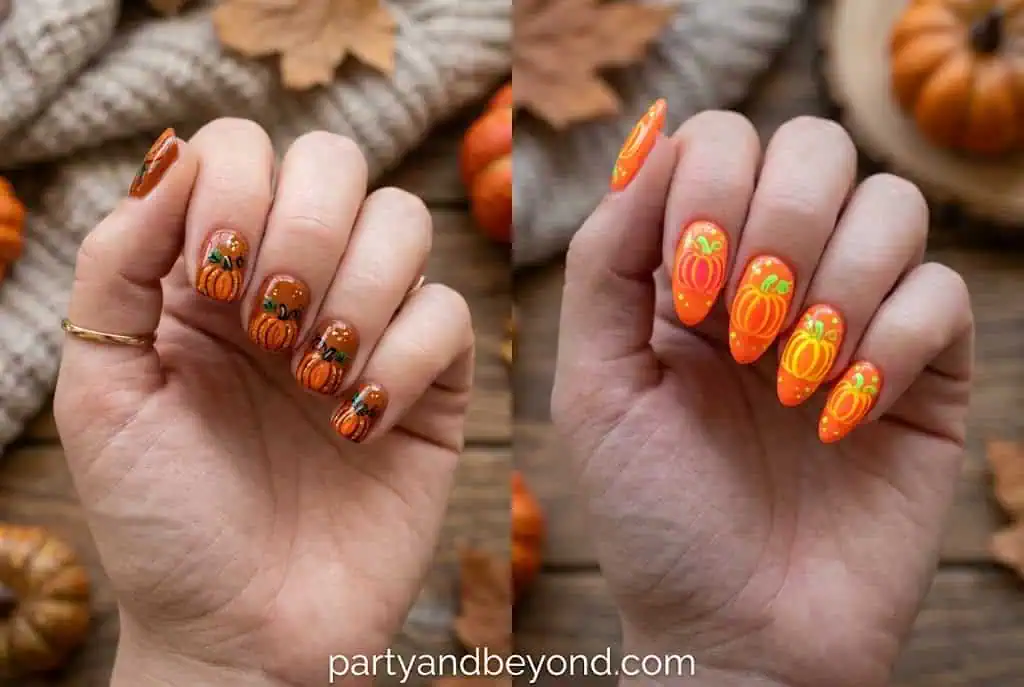
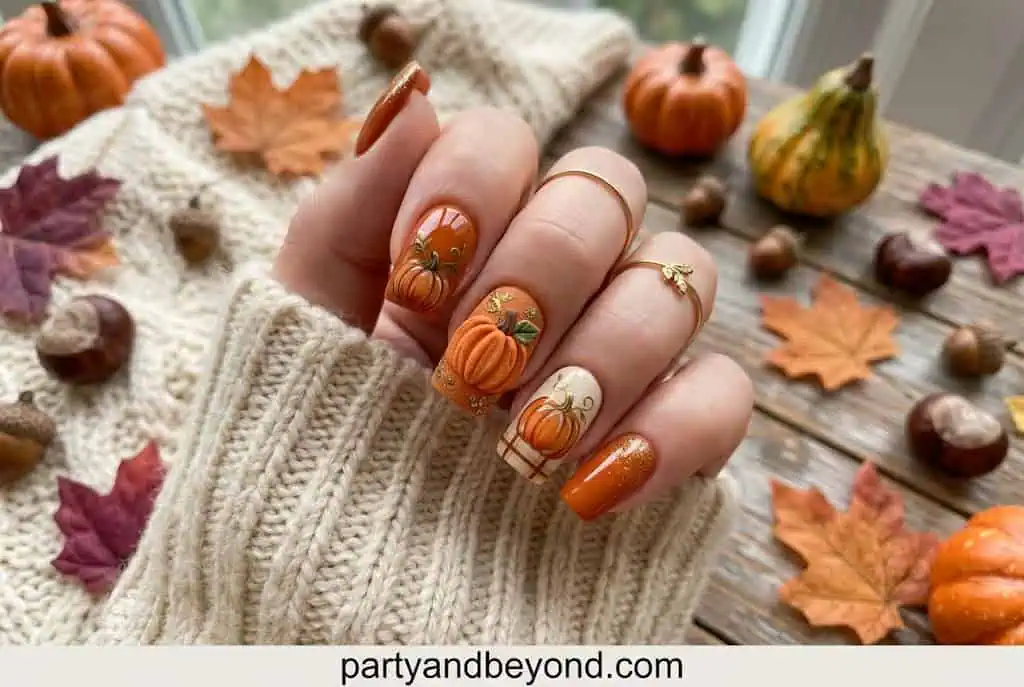
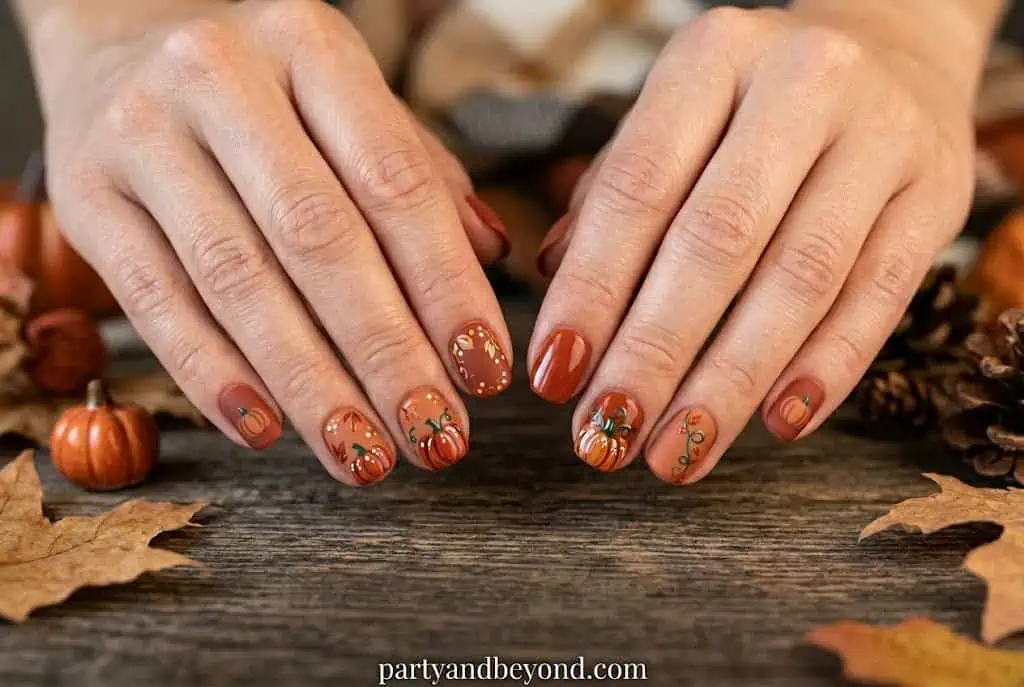
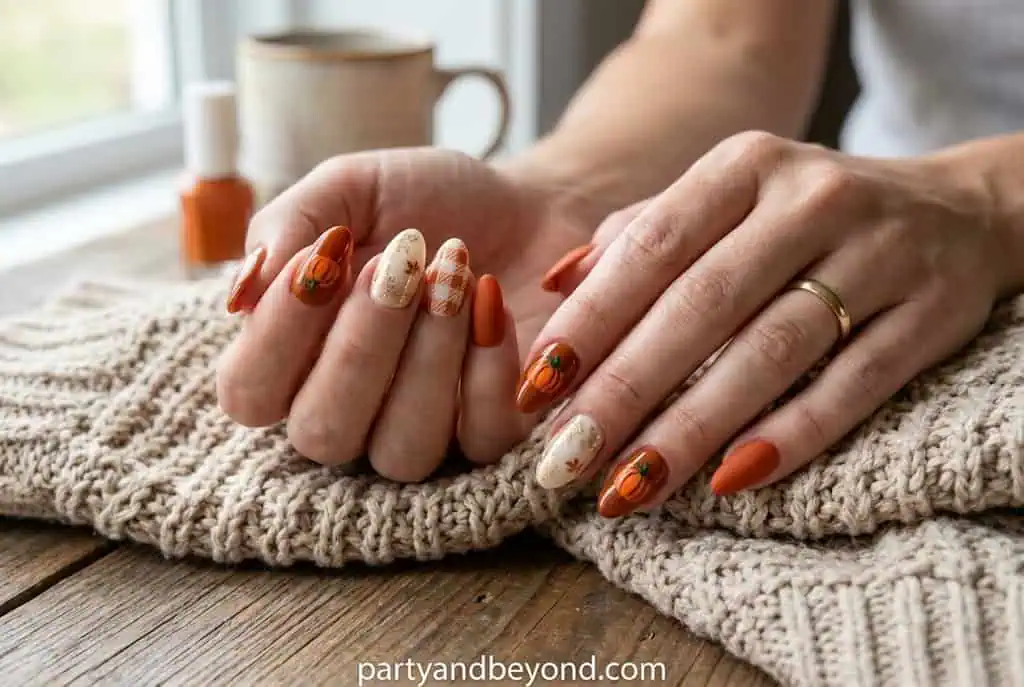
Last October I was at a Halloween party when someone walked in with the most incredible nails I’d seen all season — tiny textured pumpkins on a deep amber base, each with hand-painted ridges and a little curl of a stem. I stopped mid-conversation to stare. She’d done them herself. With builder gel she ordered from Amazon for $14. In about forty-five minutes, the night before.
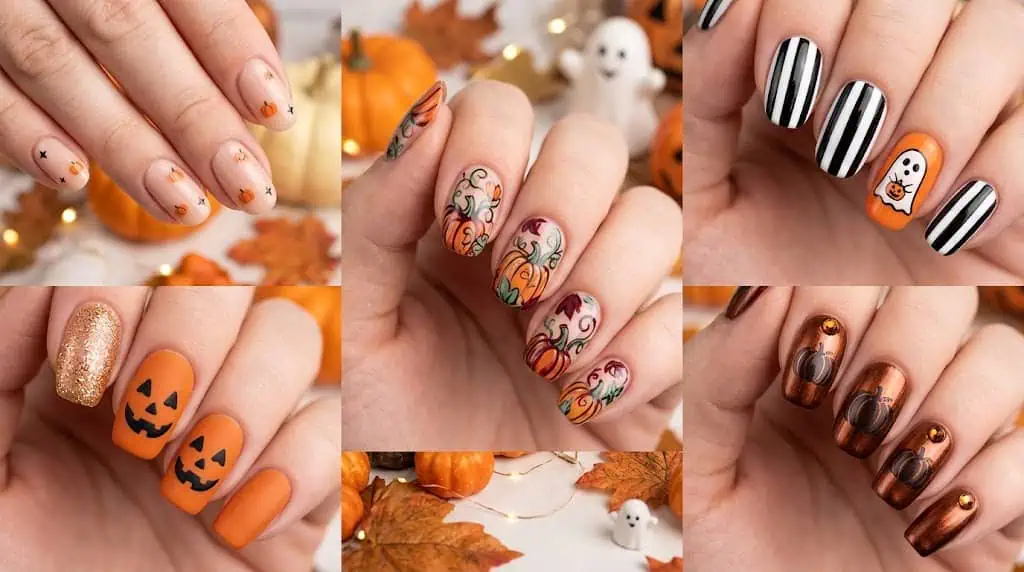
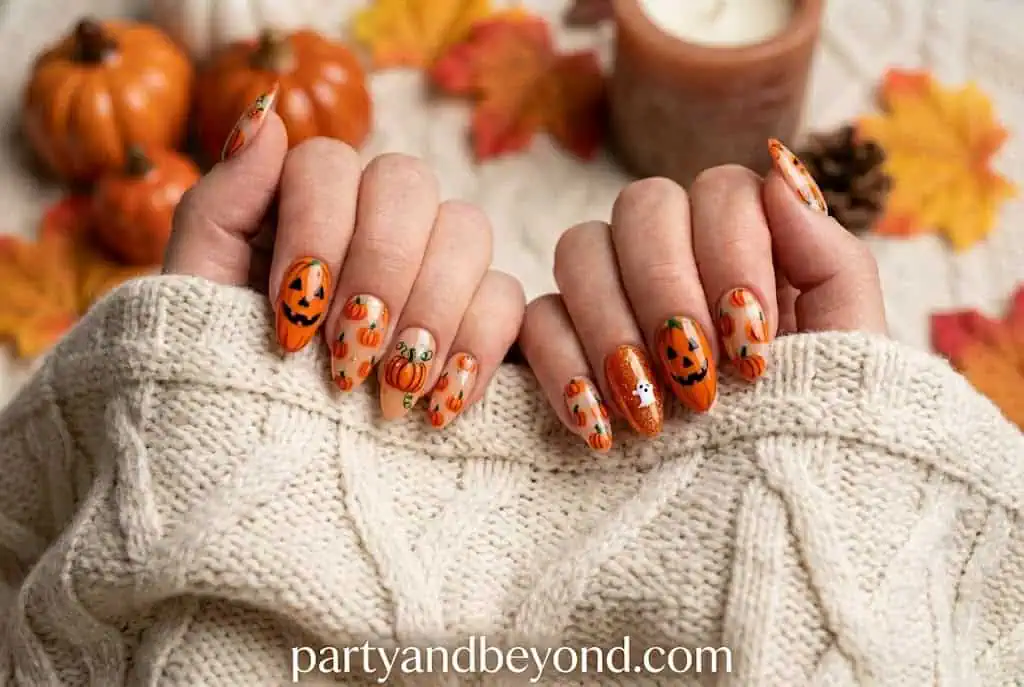
That was the moment I realized pumpkin nail ideas in 2026 have nothing to do with the orange-polish-and-a-Sharpie approach most of us grew up with. This is a full aesthetic category now — and it stretches from minimalist two-minute sticker sets to editorial 3D designs that look like they belong in a magazine.
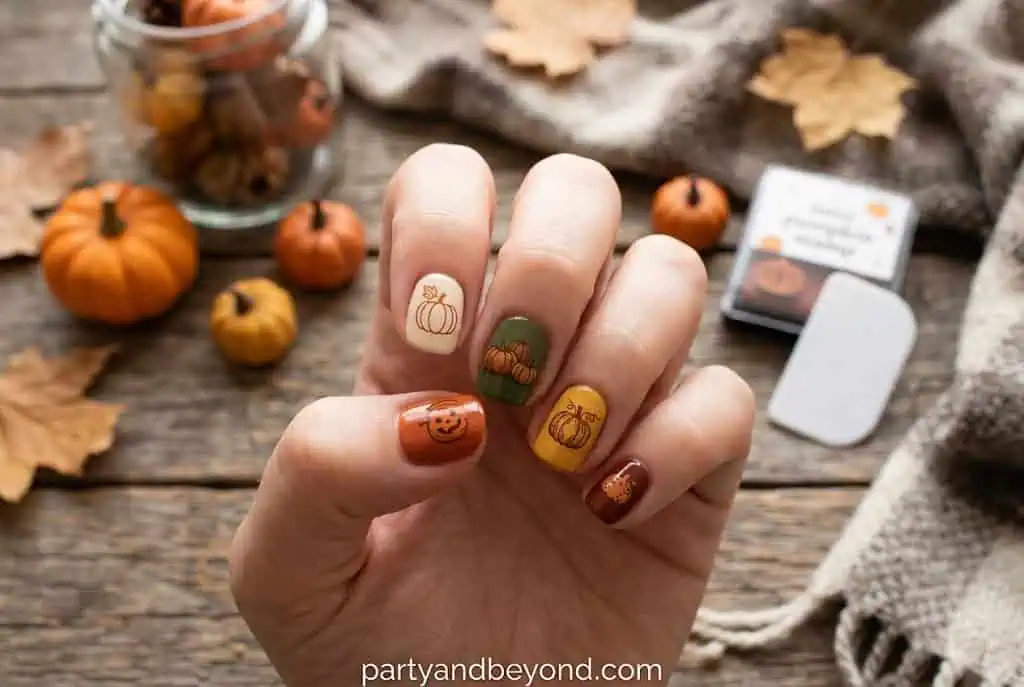
Here’s what actually works: pumpkin nails don’t require salon skills, a full nail art kit, or a large budget. You need three things — a direction (cute vs. spooky vs. chic), the right tools for your skill level, and a design that won’t chip on day two. After testing and attending more Halloween parties than I can count, this is the guide I wish I’d had. Thirty-nine ideas, organized by look, budget, and skill level — plus honest notes on what holds up and what just photographs well.
According to NRF 2025, 73% of Americans plan to celebrate Halloween, with total spending reaching a record $13.1 billion. With 51% of celebrators dressing in costume, the details — including nail art — have become part of the full Halloween look, not an afterthought.
What Are Pumpkin Nail Ideas — And What They Aren’t
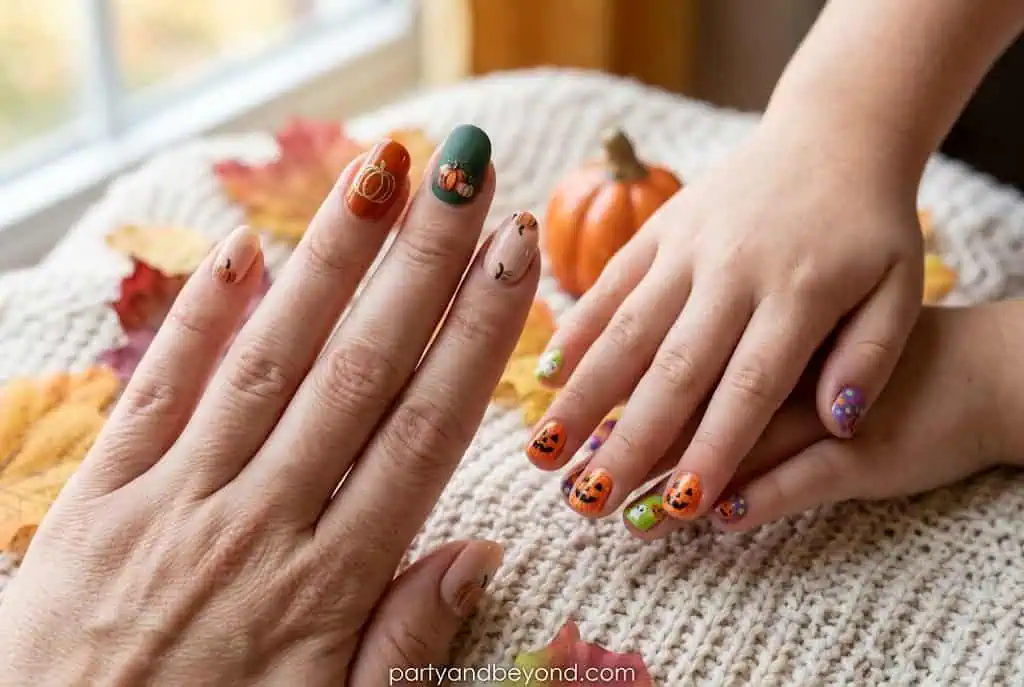
What they ARE:
Any nail design featuring a pumpkin motif, whether painted freehand, stamped, stickered, or sculpted
Fall-adjacent color palettes (burnt orange, amber, sage, rust, gold, black) used as the base or accent
Seasonal designs that work for both Halloween and general fall wear through late October
What they AREN’T:
Requiring freehand painting skills (stamping, stickers, and press-ons work just as well)
Limited to orange (black, sage, lavender, and copper pumpkins are all trending in 2026)
Only for long nails (every idea in this guide has been adapted for short, square, and almond shapes)
The trick is matching the design complexity to your time and tools — not to what you saw on someone else’s Instagram reel.
What Tools Do You Actually Need for Pumpkin Nail Art at Home?
Here’s what actually works for most of these designs:
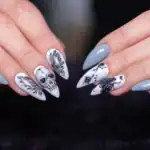
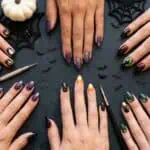
For beginners ($8–12 total):
Nail dotting tool (Dollar Tree, $1.25)
Thin nail liner pen (Amazon, $3–5)
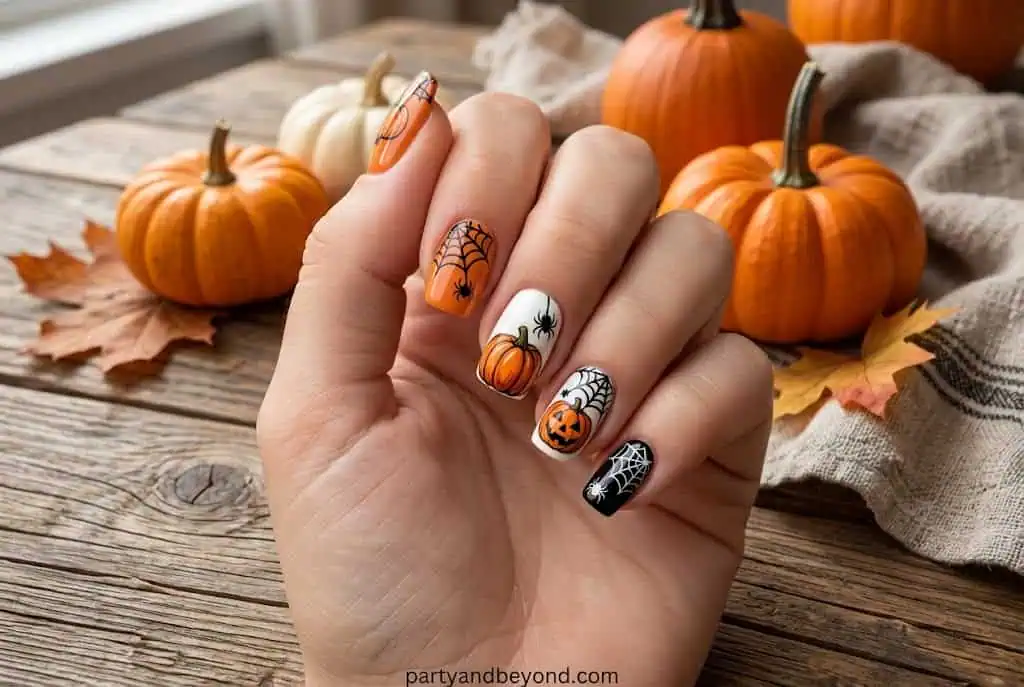
Orange, black, and white gel polish or regular polish
Topcoat
For intermediate designs ($15–25 total):
Nail stamping kit with Halloween plate (Amazon, $8–12)
Small flat nail brush
Gel UV lamp if using gel polishes
For advanced/3D designs ($20–40 total):
Builder gel or hard gel
Nail sculpting tools
Nail art brushes in varied sizes
The mistake most hosts make when planning Halloween looks is buying everything at once and then only using two items. Start with what matches your skill level, then add tools over time.
39 Pumpkin Nail Ideas for Halloween 2026
Classic Pumpkin Nail Designs
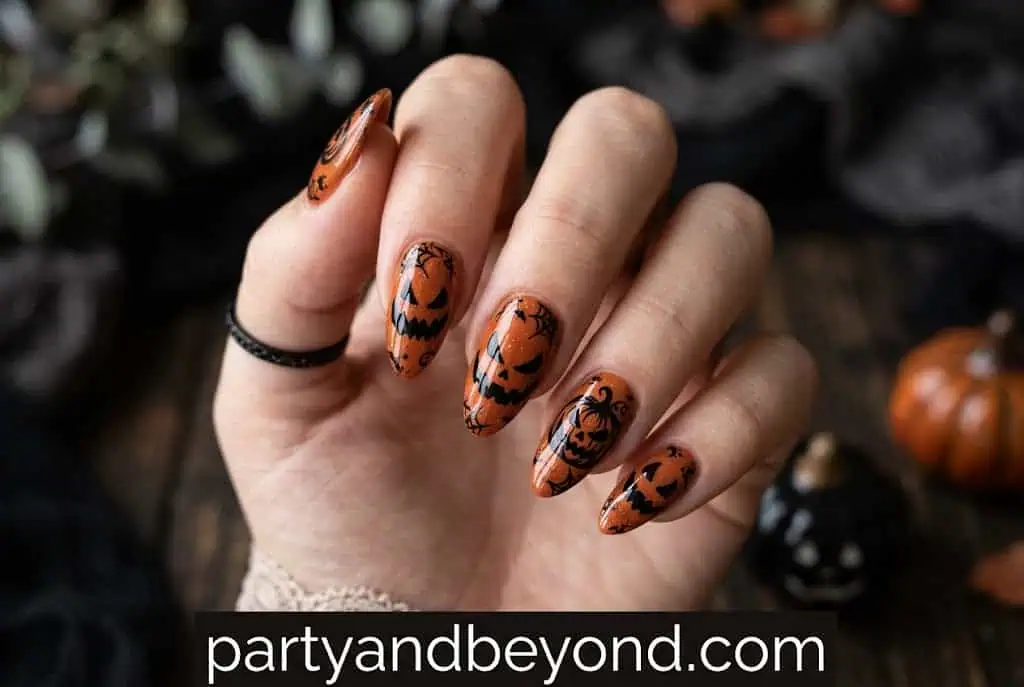
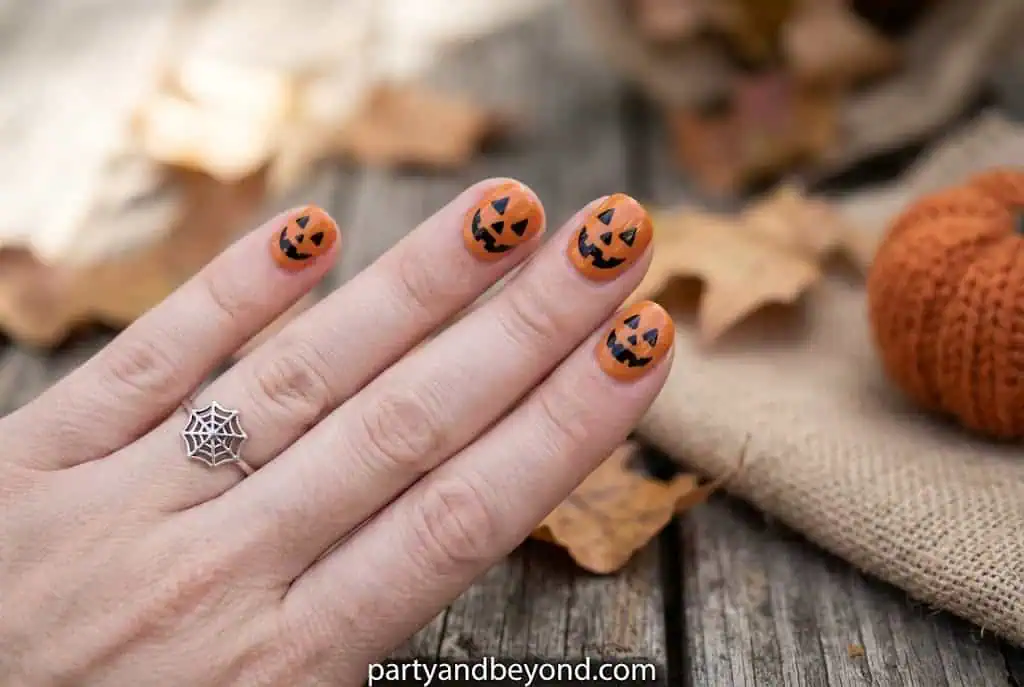
1. Classic Jack-o’-Lantern Face
Best for: Casual Halloween events, kids’ Halloween looks, beginners
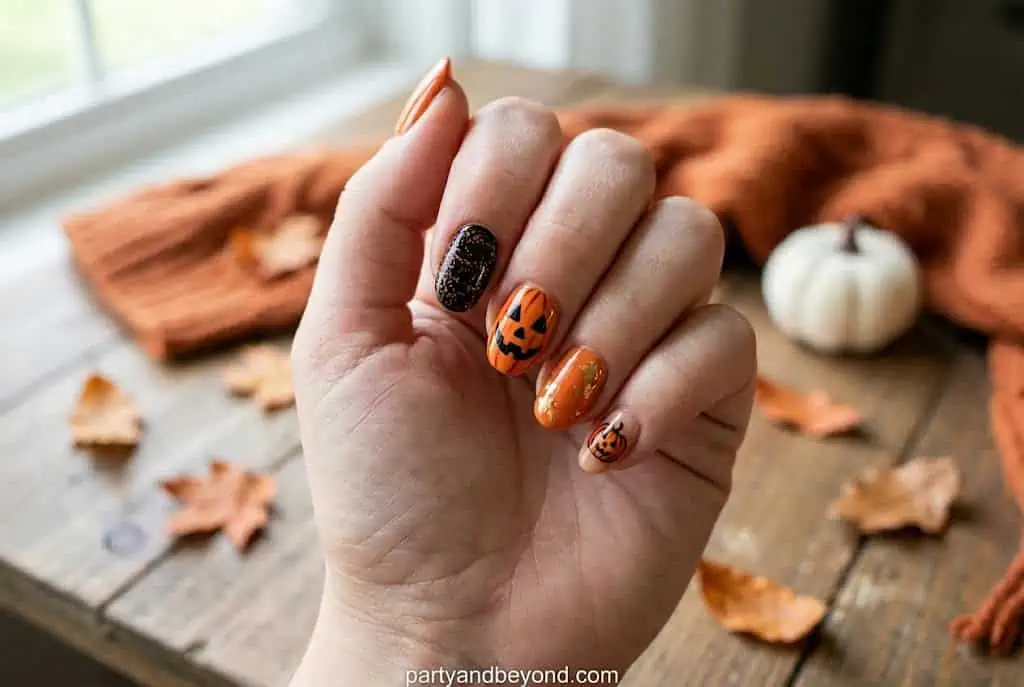
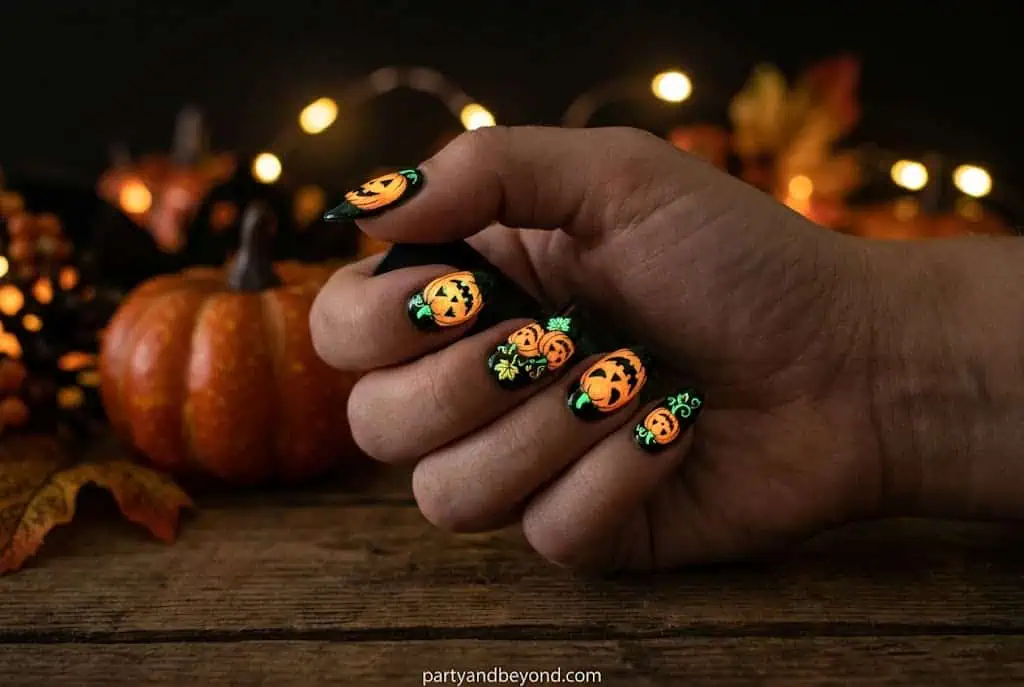
The most recognized pumpkin nail of all. Bright orange base, triangular eyes, a jagged smile, and black outlines. Done right, this looks crisp and intentional. Done wrong, it looks like a kindergarten art project. The key: keep the face centered on one accent nail only, not all ten fingers.
Colors: bright orange base, black liner
Tools: nail liner pen ($3–5 at Amazon or Target)
Cost: $5–8 total
Time: 20 minutes
Difficulty: Easy
💡 Pro Tip: Use a striping liner pen, not a brush — the line control is far better and forgives shaky hands. Practice the face on paper three times before touching your nail.
2. Striped Pumpkin Set
Best for: Cohesive, all-nail looks; beginners who want uniformity
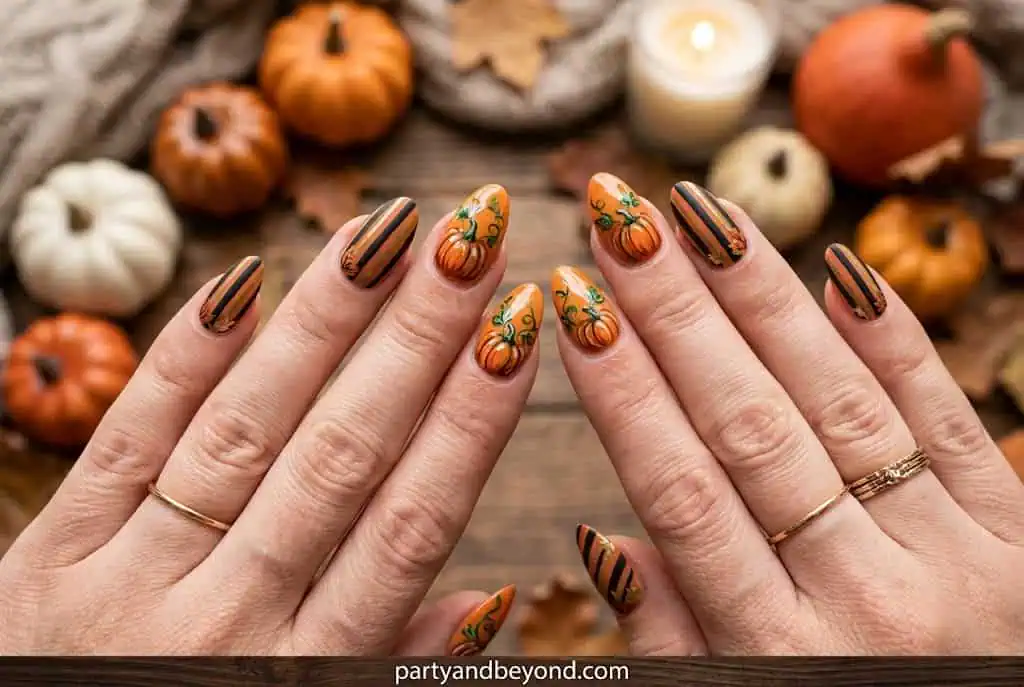
Instead of one pumpkin face, all nails go orange with thin black vertical stripes mimicking the ridges of a real pumpkin. Simple. Reads from across a room. Cohesive.
Colors: orange polish, black stripe
Tools: striping tape or Scotch tape
Cost: $5–8
Time: 20 minutes (including tape removal and dry time)
Difficulty: Easy
3. Pumpkin Patch Stamping
Best for: Beginners who want detail without freehand skills
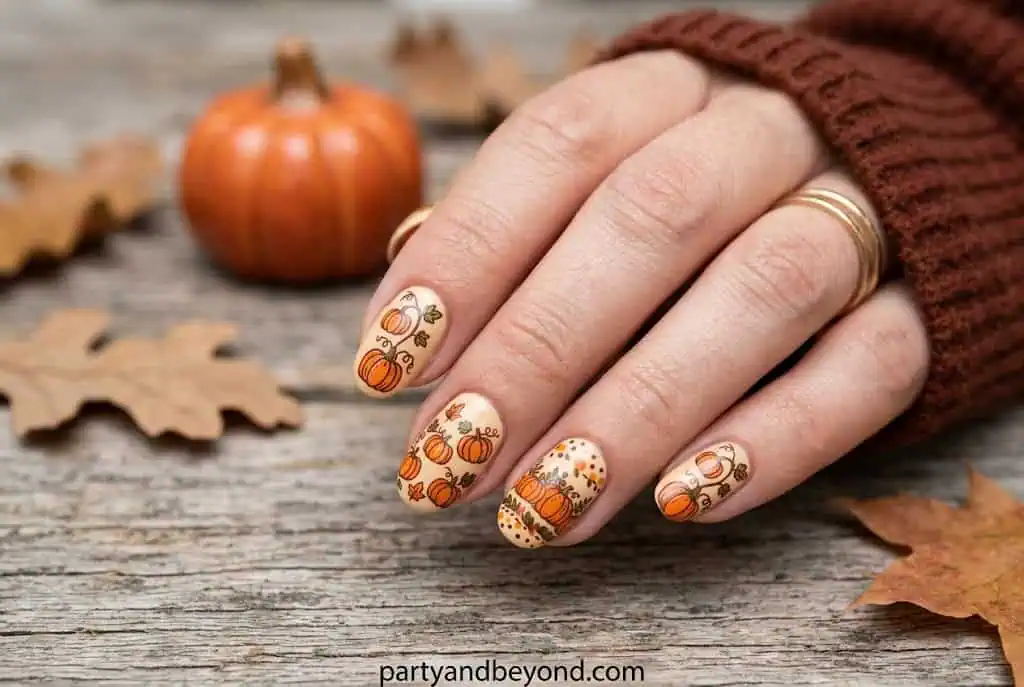
Rows of tiny pumpkins across a sage green or cream base, applied with a stamping plate. No artistic ability needed — you just press the plate, roll it onto your nail, and peel. The results consistently look professional.
Colors: sage green or beige base, orange and green stamp ink
Tools: nail stamping kit ($8–12 on Amazon
Cost: $10–15
Time: 20 minutes
Difficulty: Easy
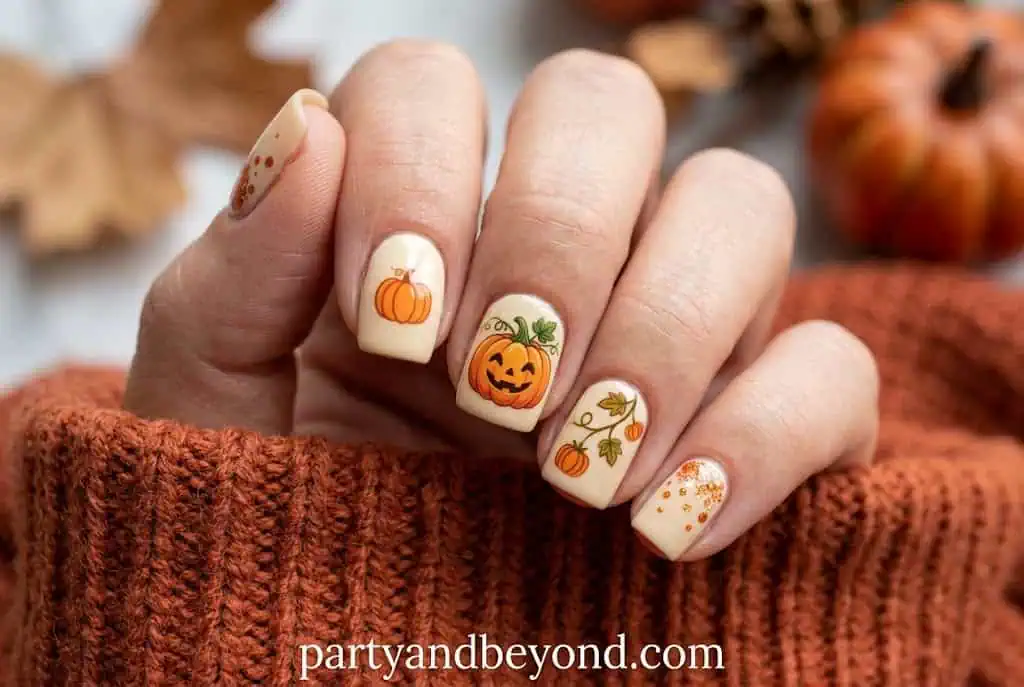
4. Pumpkin Sticker Nails
Best for: Absolute beginners, last-minute Halloween looks
Dollar Tree restocks nail sticker sheets in October each week — pumpkins, ghosts, spiderwebs. Stick them over a base coat and seal with topcoat. Total time: ten minutes. Total cost: $3–4.
Cost: $3–5
Time: 10 minutes
Difficulty: Beginner
“I learned this the hard way at my niece’s birthday — I’d planned a full painted nail look, ran out of time, grabbed Dollar Tree stickers, and honestly? They lasted four days and looked great. I stop overthinking nail art now.”
5. Press-On Pumpkin Set
Best for: Zero nail art skills, high visual impact
Pre-designed pumpkin press-on kits from Amazon and Sally Beauty run $8–15 and come ready to apply. Some include glitter, chrome accents, or 3D detail. Application takes ten minutes and results look salon-quality in photos.
Cost: $8–15
Time: 10 minutes
Difficulty: Beginner
Cute & Kawaii Pumpkin Nails
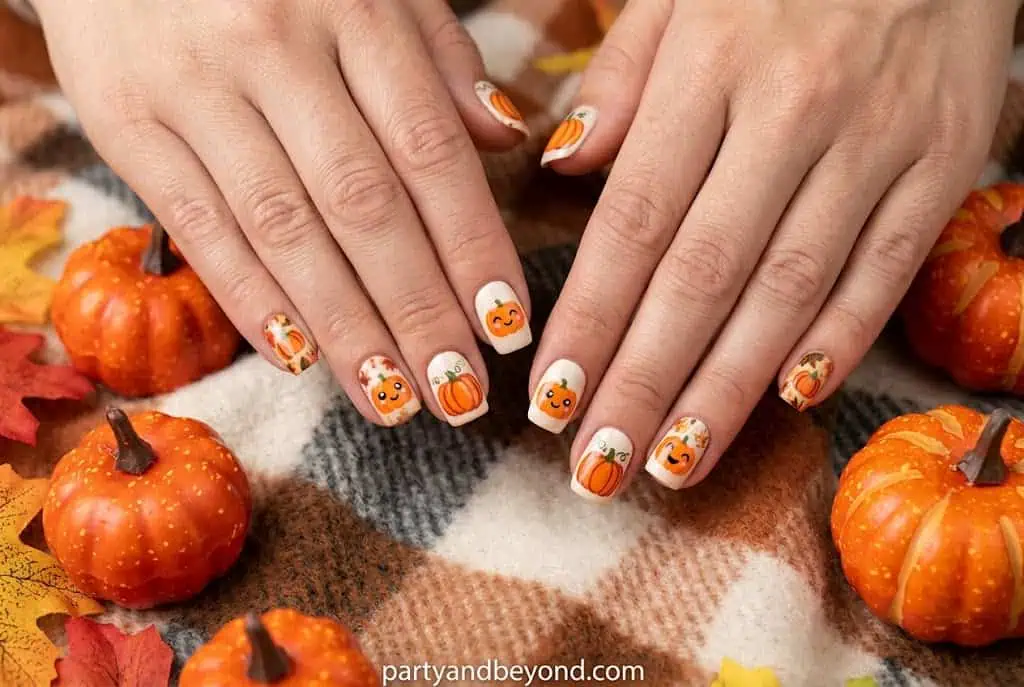
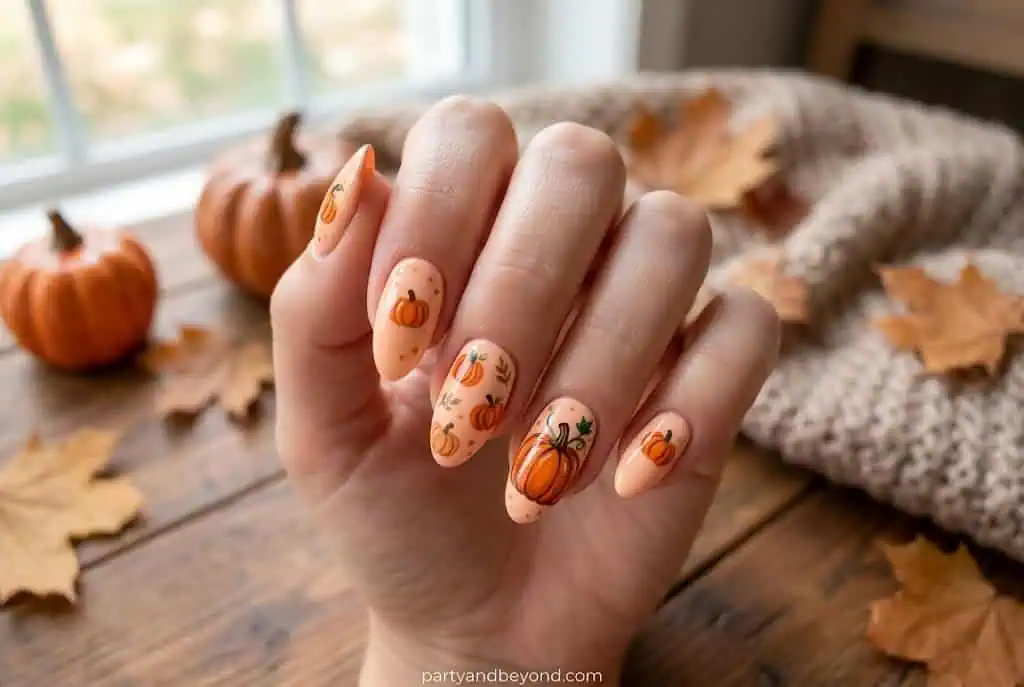
6. Kawaii Smiling Pumpkin
Best for: Kids, tween-adjacent Halloween looks, gentle spooky aesthetic
A tiny pumpkin with dot eyes and a soft curved smile on a pastel orange or peach base. No triangles, no jagged edges — just an adorable little gourd. My niece asked for this exact look before trick-or-treating last year. We used a dotting tool from Dollar Tree and two polishes. She showed every single person at school on Monday.
Colors: pastel orange, white, black dots
Tools: dotting tool ($1.25 at Dollar Tree)
Cost: $5–8
Time: 25 minutes
Difficulty: Medium
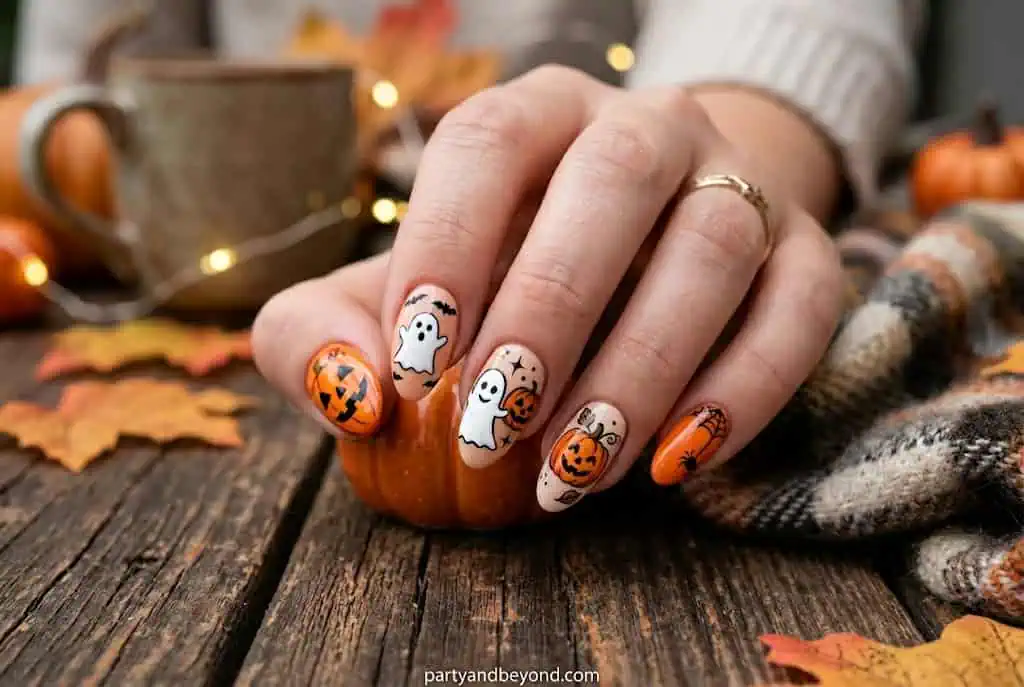
7. Ghost + Pumpkin Friends
Best for: Halloween parties, social media content, playful looks
Alternating tiny ghost and pumpkin designs on a light lavender or white base. Each nail gets one character. The whole set feels cohesive without matching.
Colors: white, orange, lavender base, black details
Tools: dotting tool, liner pen
Cost: $6–10
Time: 30 minutes
Difficulty: Medium
💡 Pro Tip: Make ghosts first — they’re just an oval body with two tiny arms and dot eyes. Pumpkins are three curved lines and a stem. Neither requires freehand confidence.
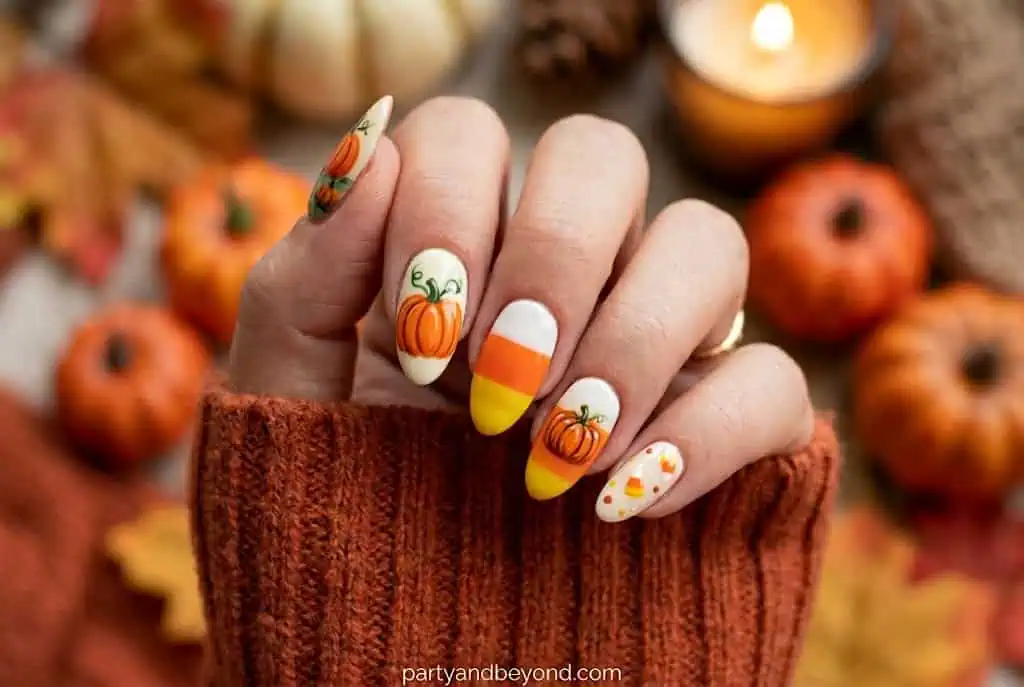
8. Candy Corn + Pumpkin Combo
Best for: Festive, fun sets; Halloween party hosts
Three-zone candy corn nails on some fingers, pumpkin accent on others. Yellow, orange, and white polish, cleanly separated with tape. The color palette ties the whole set together without needing any art.
Colors: yellow, orange, white
Cost: $8–12
Time: 20 minutes (plus tape removal and drying)
Difficulty: Easy
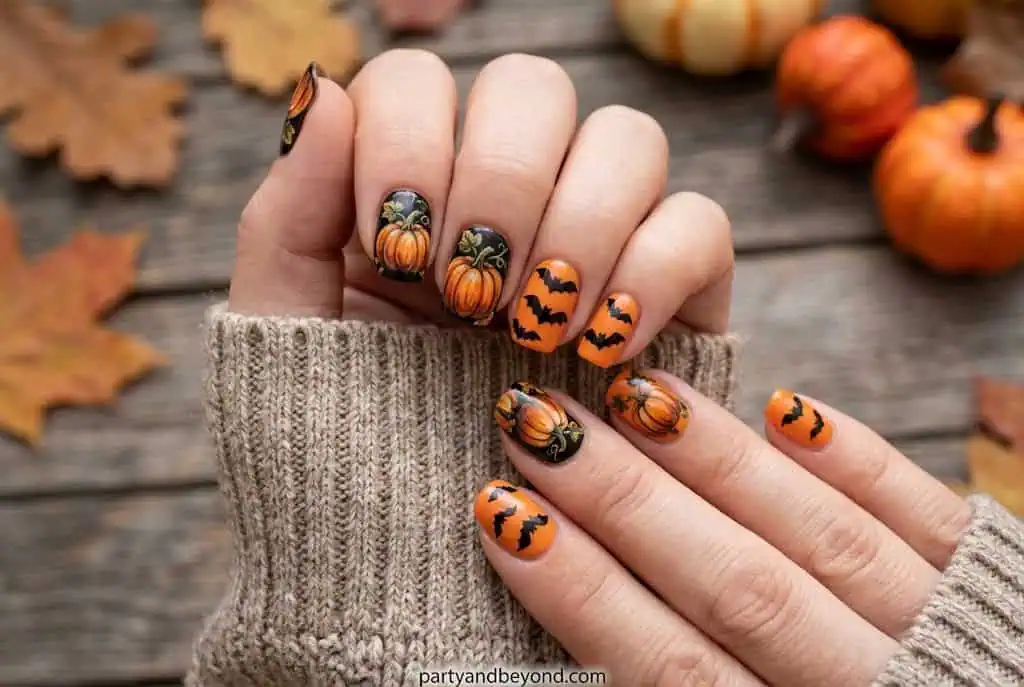
9. Pumpkin + Bat Duo
Best for: Classic Halloween pairing, easy variation
One accent nail gets a tiny bat silhouette, the rest get pumpkin motifs. Both can be stamped or stickered — no freehand required.
Cost: $6–10
Time: 20 minutes
Difficulty: Easy
Chic & Modern Pumpkin Nail Designs
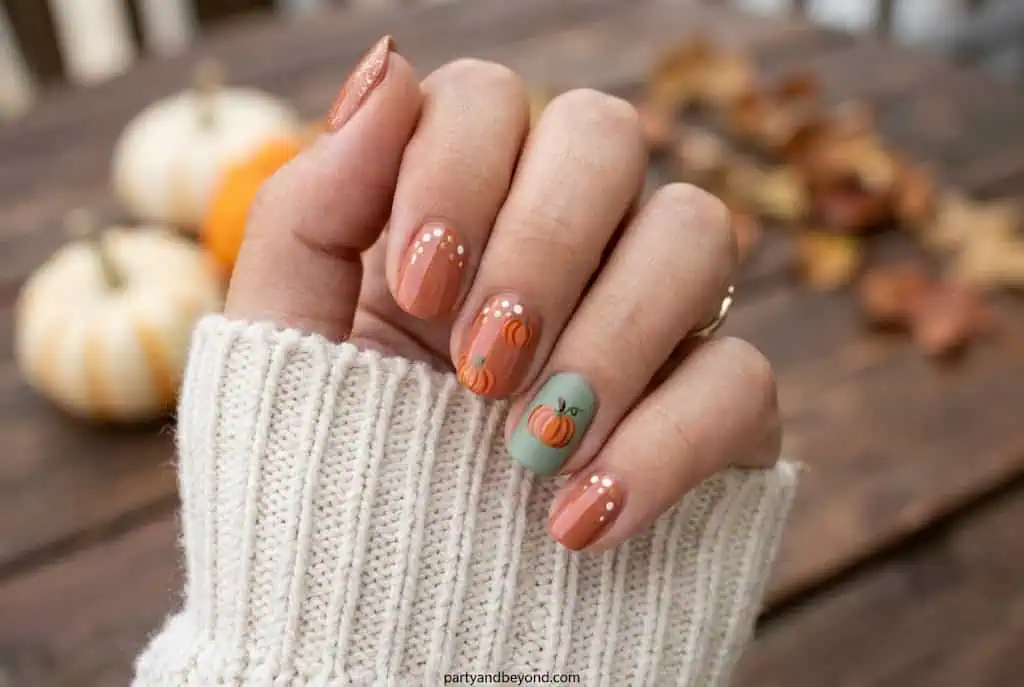
10. Sage Green Pumpkin Accent
Best for: Modern, aesthetic Halloween look; office-appropriate spooky
This is the 2026 pumpkin nail. Sage or olive green on four nails, one rust-orange pumpkin accent on the ring finger. Restrained. Unexpected. Completely on-trend.
According to Pinterest Trends 2024, earthy and muted Halloween palettes have seen consistent year-over-year growth in saves, with sage and terracotta replacing the traditional orange-black combination among millennials and Gen Z.
Colors: sage green, rust orange, brown stem
Cost: $8–12
Time: 20 minutes
Difficulty: Easy–Medium
11. Marble + Pumpkin Accent
Best for: Editorial, grown-up Halloween look
Neutral marble across four nails — cloud-white base with grey veining created using a thin brush — and one burnt orange pumpkin accent on the ring finger. Sophisticated and seasonal without feeling costume-adjacent.
Colors: white, grey, burnt orange
Cost: $10–15
Time: 30 minutes
Difficulty: Medium
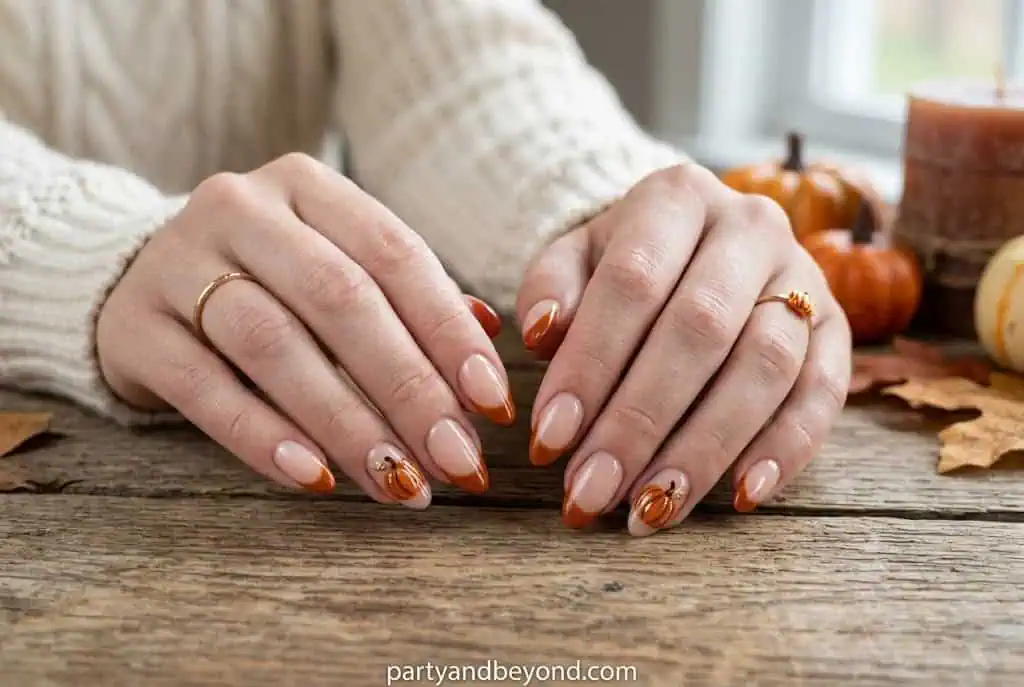
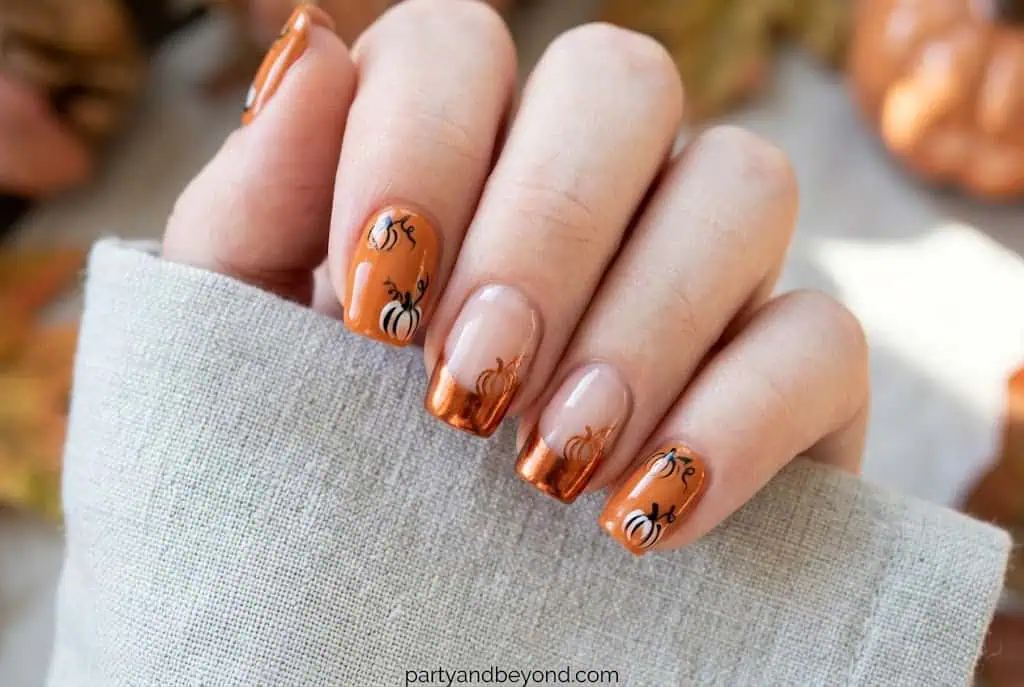
12. Pumpkin Spice French Tips
Best for: Office-safe Halloween, wearable through November
White French tips replaced with burnt orange or amber. One accent nail with a small pumpkin outline in black. Classic shape, seasonal color, one nod to the actual holiday.
Colors: nude or pink base, burnt orange tip, black accent
Cost: $6–10
Time: 20 minutes
Difficulty: Easy
💡 Pro Tip: Use French tip guides (peel-off sticker strips) instead of freehand. Costs $2 at any Dollar Tree and makes the edge line crisp on first try.
13. Negative Space Pumpkin
Best for: Minimalists, editorial nail look
Leave the nail mostly bare — natural or very sheer base — and draw only the outline of a pumpkin in black liner. The empty nail becomes part of the design. Takes ten minutes maximum.
Colors: bare/sheer base, black liner
Tools: nail liner pen
Cost: $3–5
Time: 10 minutes
Difficulty: Easy
14. Watercolor Pumpkin
Best for: Artistic, impressionistic Halloween look
Sheer layers of orange and amber polish blended slightly wet, with a faint pumpkin outline over the top. Dreamy, soft, more abstract than literal.
Colors: sheer orange, amber, white for mixing
Tools: small fan brush or sponge
Cost: $5–8
Time: 25 minutes
Difficulty: Medium
15. Floral Pumpkin
Best for: Cottagecore Halloween aesthetic, boho party lovers
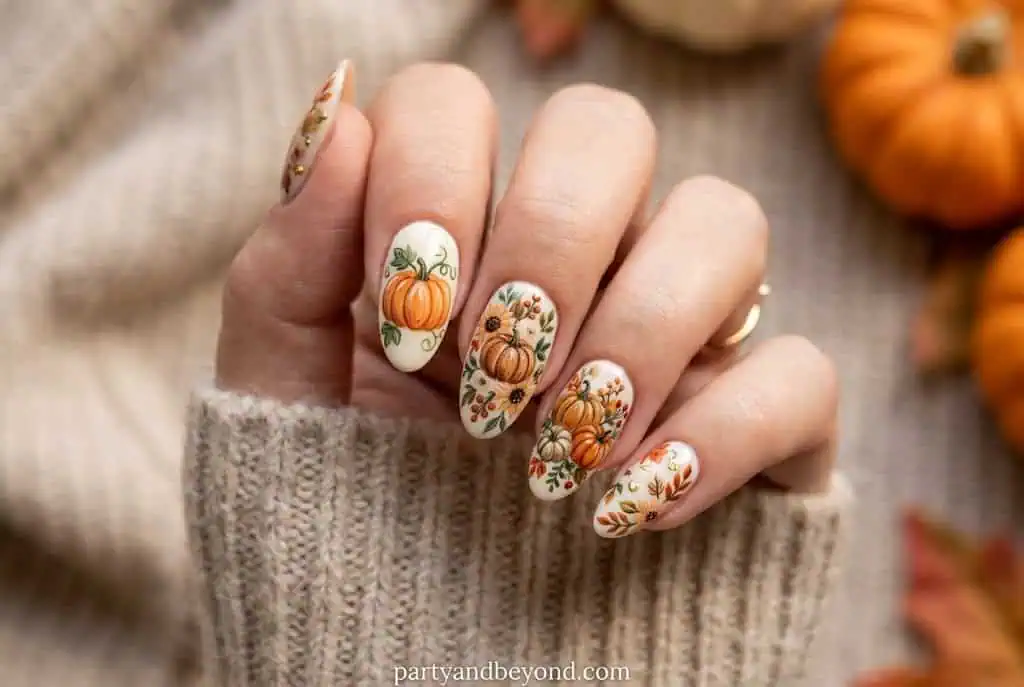
A pumpkin decorated with tiny painted flowers — rosebuds, daisies, small leaves — instead of a face. Cottagecore meets Halloween. This takes the longest but photographs the most dramatically.
Colors: orange base, pink, white, green floral details
Tools: thin nail brush
Cost: $8–12
Time: 40 minutes
Difficulty: Advanced
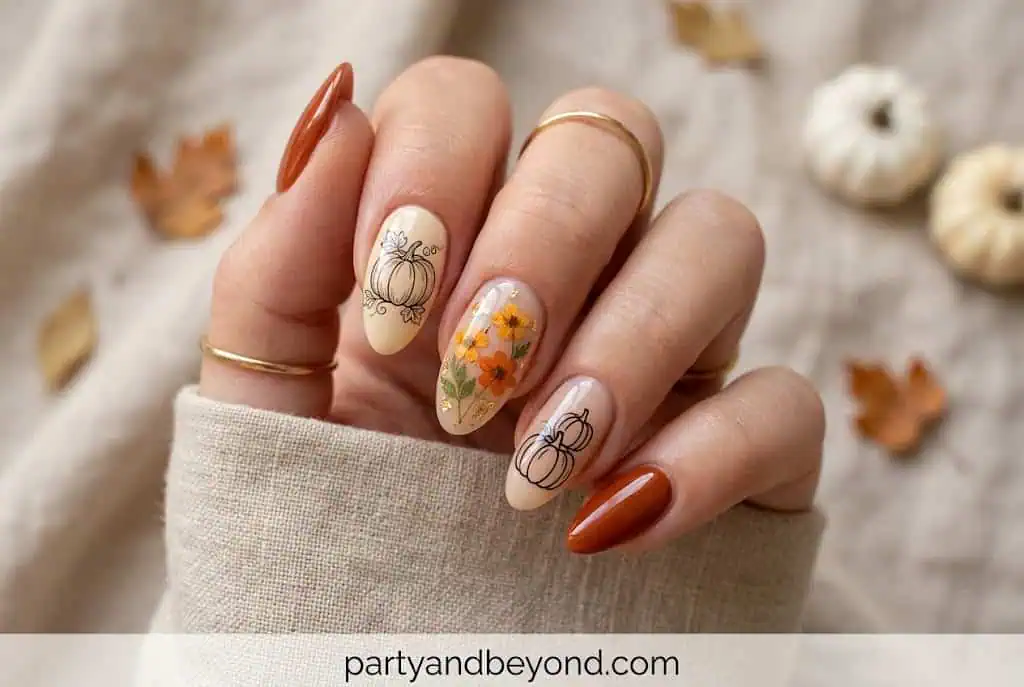
16. Pressed Flower + Pumpkin Line Art
Best for: Artsy, unique, one-of-a-kind look
Real dried flower petals (or dried kitchen herbs — rosemary, thyme, dried chamomile from the pantry) placed under gel topcoat, with a simple pumpkin outline drawn over or beside them. Every nail looks different.
Materials: dried florals, clear gel topcoat ($10–15 total)
Time: 35 minutes
Difficulty: Medium
Dark & Spooky Pumpkin Nails
17. Gothic Black Pumpkin Silhouette
Best for: Adults, chic Halloween party looks
All-black pumpkin shape on a white, nude, or blush base. Modern. Chic. Not childish at all. Stamp it for perfect results in under fifteen minutes.
“Here’s my honest take: this is the most underrated pumpkin nail design in the whole category. People overlook it because it sounds simple. Done right, it looks more intentional than anything orange could.”
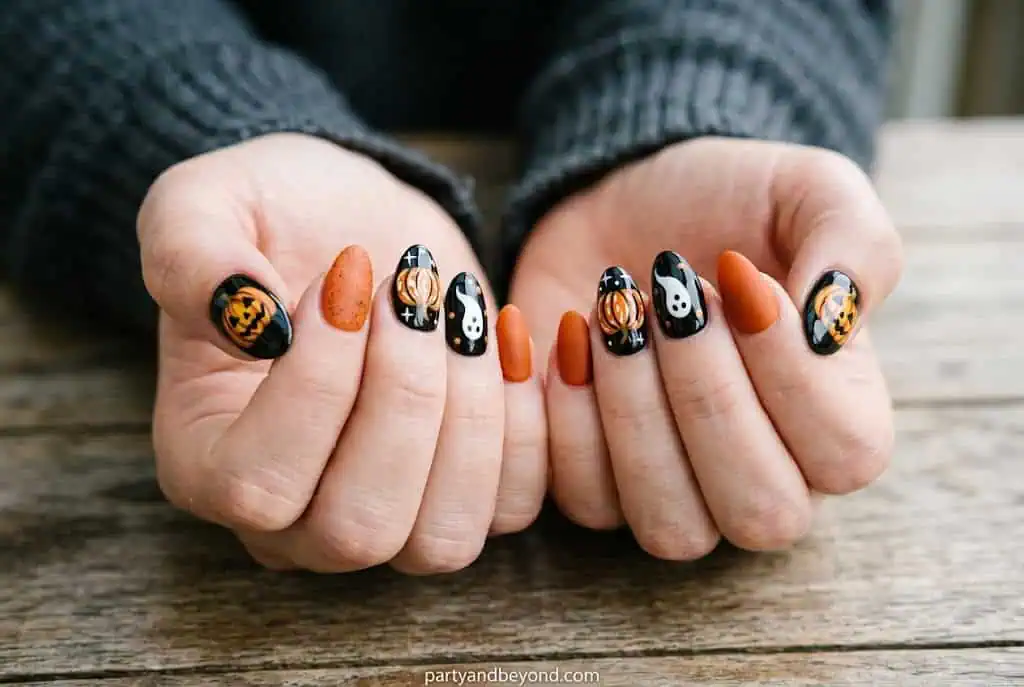
18. Black + Orange Spooky Set
Best for: Classic Halloween party, costume-aligned nails
Alternating matte black and gloss orange nails. One accent nail gets a white pumpkin outline. Two-tone, bold, pairs with almost any Halloween costume.
Colors: matte black, gloss orange, white liner
Cost: $8–12
Time: 20 minutes
Difficulty: Easy
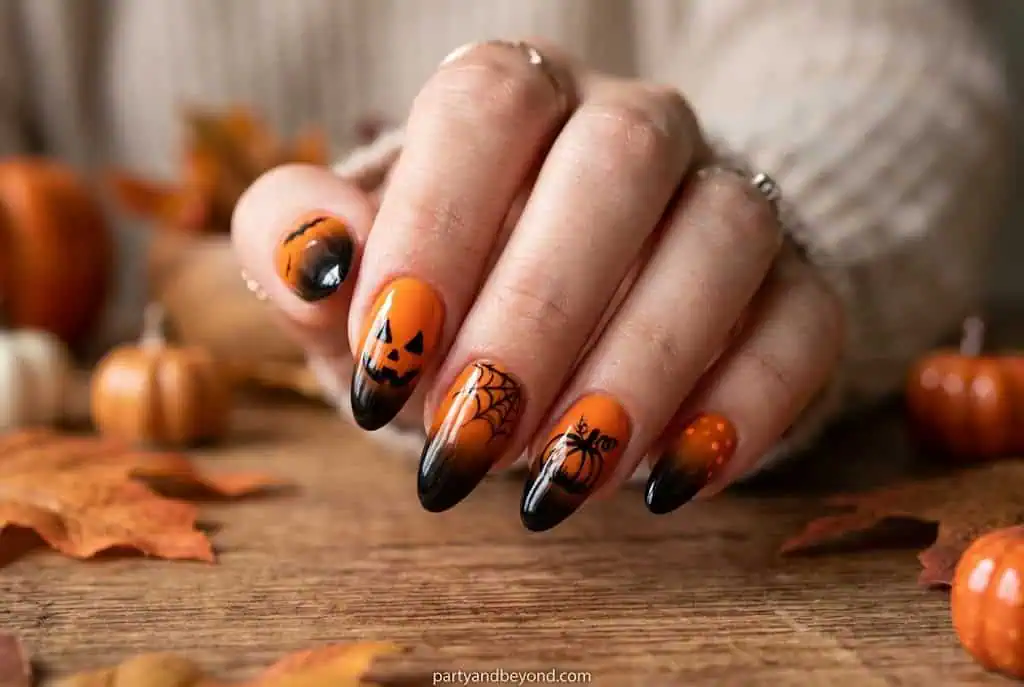
19. Ombré Orange-to-Black
Best for: Dark + festive hybrid look
Orange at the base fading to black at the tips via sponge gradient. One nail gets a small white or gold pumpkin silhouette. Drama without complexity.
Colors: orange, black, white or gold accent
Tools: makeup sponge for blending
Cost: $6–10
Time: 20 minutes
Difficulty: Easy–Medium
20. Spiderweb + Pumpkin Pairing
Best for: Traditional Halloween lovers
Black spiderweb on a white or red base on four nails, pumpkin on the ring finger accent. Classic Halloween motif pairing that never goes wrong.
Colors: white base, black web, orange pumpkin
Cost: $5–8
Time: 25 minutes
Difficulty: Medium
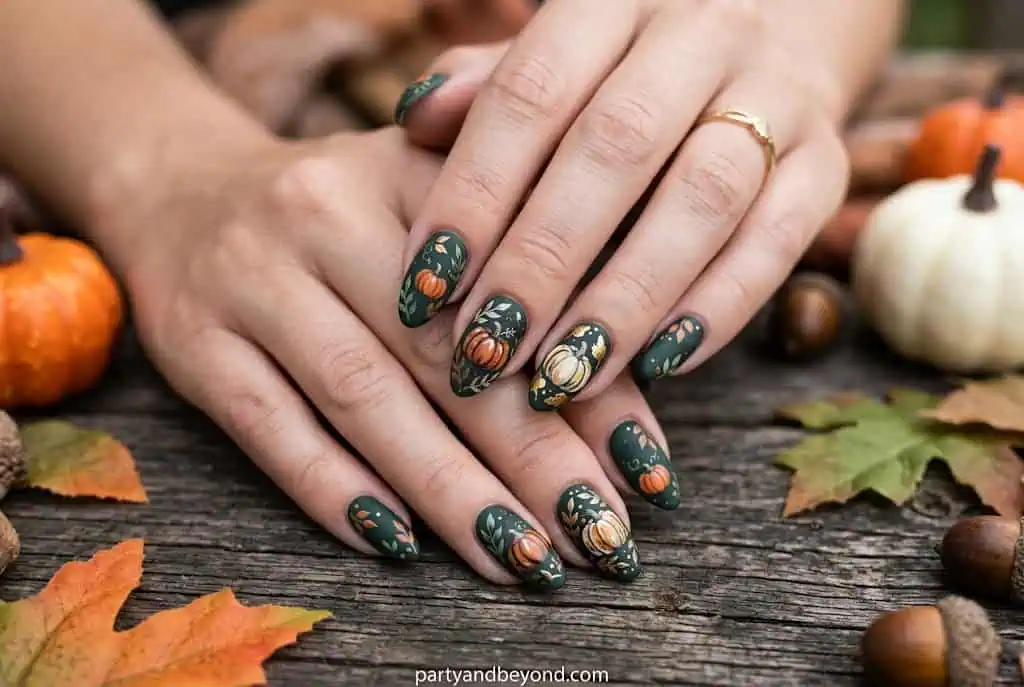
21. Dark Forest Pumpkin
Best for: Moody, witchy Halloween aesthetic
Deep burgundy or forest green base with a small orange pumpkin and bare tree branches drawn in black liner. Atmospheric, adult, cohesive.
Colors: burgundy or forest green, black, orange accent
Cost: $8–12
Time: 30 minutes
Difficulty: Medium
Glam & Special Finish Pumpkin Nails
22. Holographic Pumpkin Nails
Best for: Night out, Halloween parties, statement look
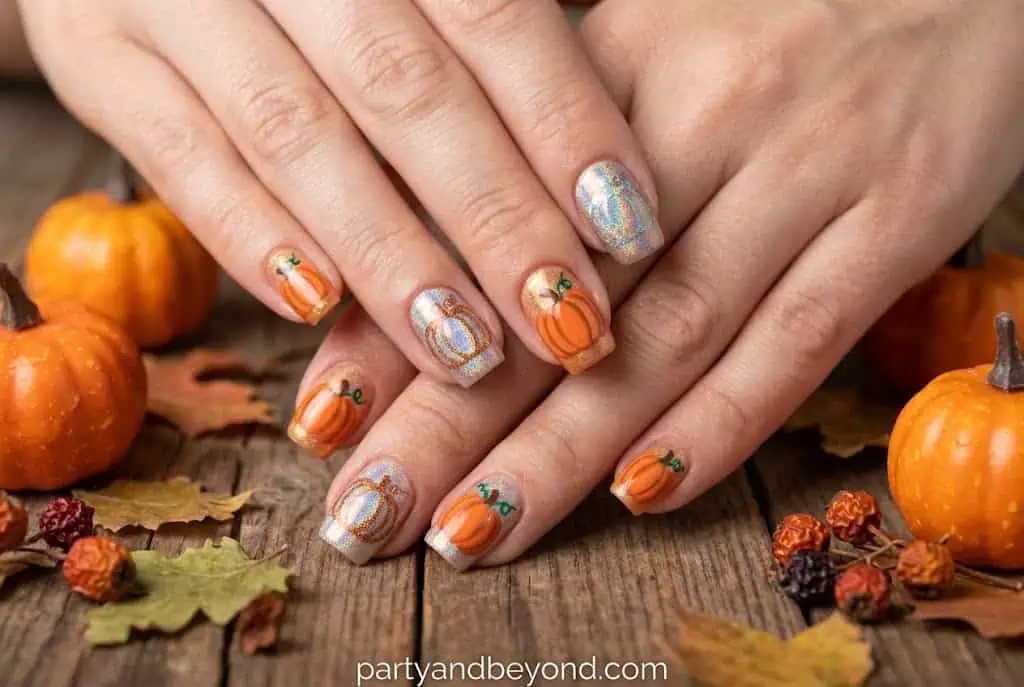
Chrome holographic powder buffed over a cured orange pumpkin shape. The nail shifts between gold, copper, and rose under different lighting. Looks like it cost $80 in a salon. Costs $18 in materials.
Materials: chrome powder + orange gel ($10–18)
Time: 30 minutes
Difficulty: Medium
💡 Pro Tip: Apply chrome powder only to the pumpkin shape you’ve painted, leaving the rest of the nail matte. The contrast is what makes it look editorial rather than messy.
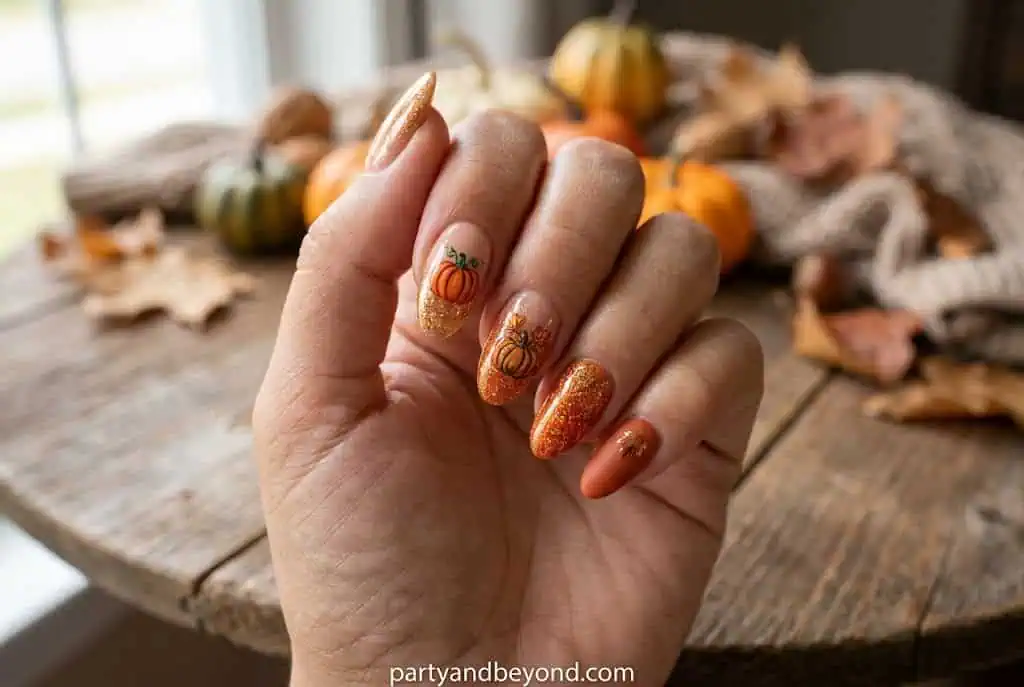
23. Glitter Ombre Pumpkin
Best for: Festive Halloween looks, works for daytime and evening
Deep amber fading into burnt orange, gold glitter at the tips. No freehand drawing needed — just gradient sponging and a glitter topcoat. Festive without being childish.
Colors: amber, burnt orange, gold glitter
Tools: sponge, glitter topcoat ($8–12 total)
Cost: $8–12
Time: 15 minutes
Difficulty: Easy
Let’s be honest — glitter nails shed onto everything you touch for 24 hours. Great for a one-day Halloween event. Annoying for a full week of wear. Set expectations accordingly.
24. Chrome Pumpkin Tips
Best for: Elegant fall looks, holiday parties beyond Halloween
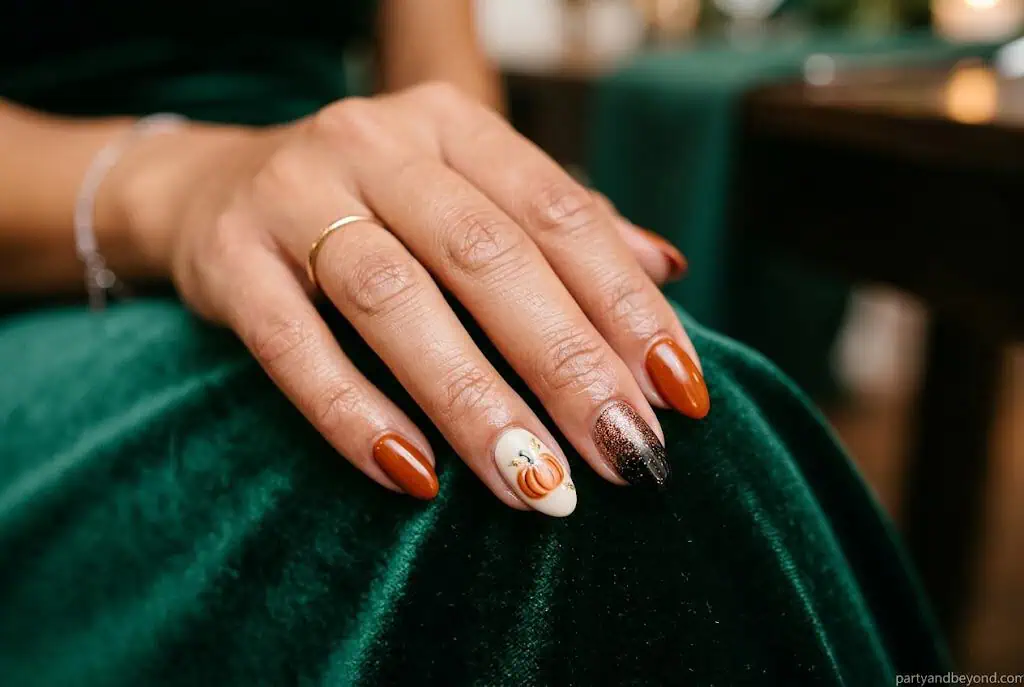
Rose gold or copper chrome on tips over a nude base, with a tiny pumpkin outline on the ring finger in black liner. Works for Halloween and carries through Thanksgiving season naturally.
Best for: Halloween parties with blacklight, glow-in-the-dark events
Electric orange neon base with UV-reactive pumpkin detail in white. Under normal light: vibrant orange. Under blacklight: the pumpkin glows. NRF 2025 data shows 32% of Americans throw or attend a Halloween party — if yours has blacklight, this is the nail look.
Best for: Statement nails, nail art enthusiasts, photoshoot looks
A raised pumpkin shape built with builder gel — textured ridges included, stem sculpted upward. Looks like a tiny real pumpkin sitting on your fingernail. Takes 45–60 minutes. Snags on things. Worth it for photos, impractical for daily wear — and I say this having watched someone spend twenty minutes untangling their 3D nail from a sweater at a party.
Materials: builder gel, nail tools $15–25
Time: 45–60 minutes
Difficulty: Advanced
Fall Aesthetic Pumpkin Nails (Non-Traditional Colors)
27. Pastel Pumpkin Set
Best for: Anti-traditional Halloween look, soft Halloween aesthetic
Dusty pink, peach, and lavender base nails with a soft pastel orange pumpkin accent. Looks like Halloween filtered through a Wes Anderson film. Unexpected, charming, widely shared on Pinterest in 2024.
Best for: Fall-leaning Halloween look, wearable into November
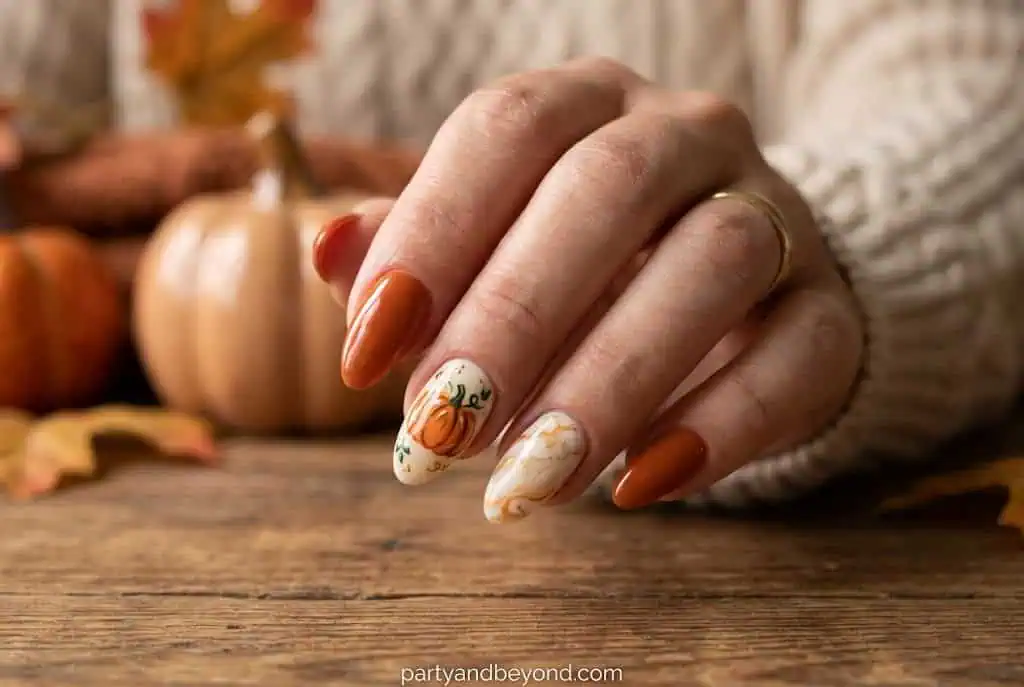
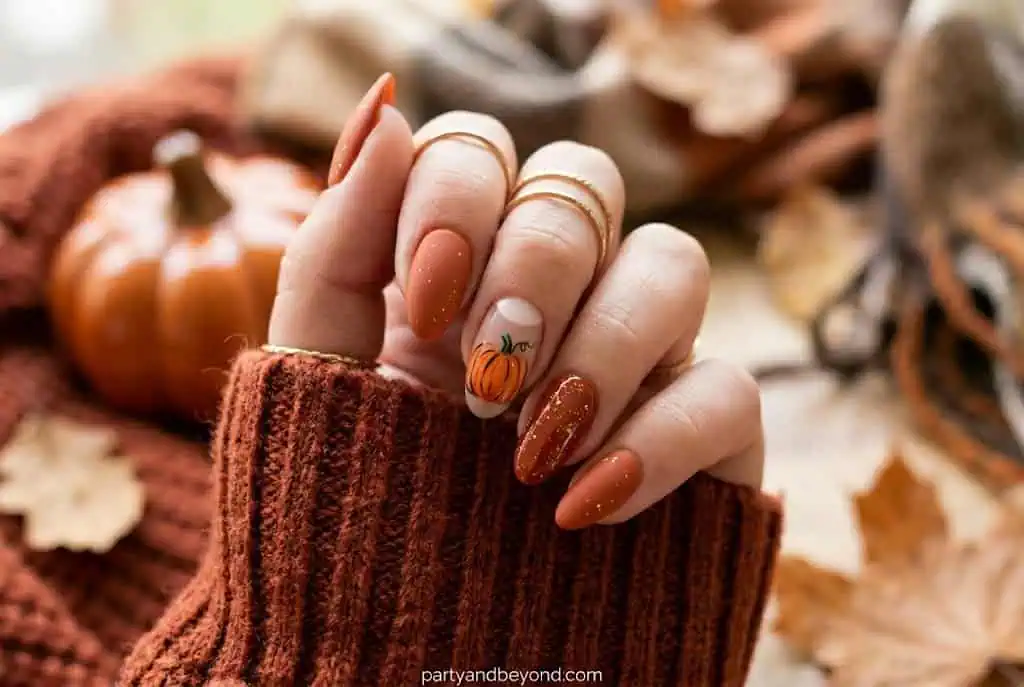
Deep rust, terracotta, and warm brown nails with one pumpkin accent in a slightly brighter rust. No black anywhere. Warm, cozy, earthy.
Colors: rust, terracotta, warm brown
Cost: $8–12
Time: 20 minutes
Difficulty: Easy
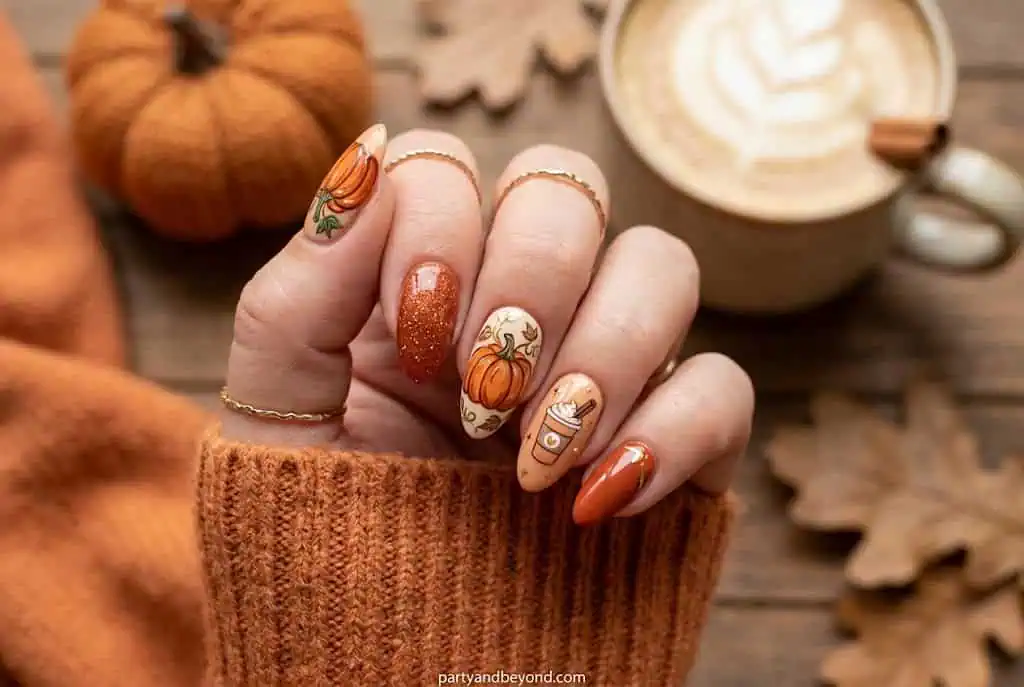
29. Pumpkin Spice Latte Nails
Best for: Fall coffee aesthetic, non-Halloween parties in October
Caramel and espresso base, one nail with a tiny latte art pumpkin foam design. Pairs effortlessly with any fall outfit regardless of Halloween adjacency.
Colors: caramel, espresso brown, cream
Cost: $6–10
Time: 20–25 minutes
Difficulty: Medium
30. Dusty Mauve + Pumpkin Combo
Best for: Sophisticated, grown-up fall aesthetic
Dusty mauve on most nails — that perfectly muted purple-pink — with one rust pumpkin accent. The contrast between the cool mauve and warm rust is the entire design.
Colors: dusty mauve, rust orange
Cost: $8–12
Time: 15 minutes
Difficulty: Easy
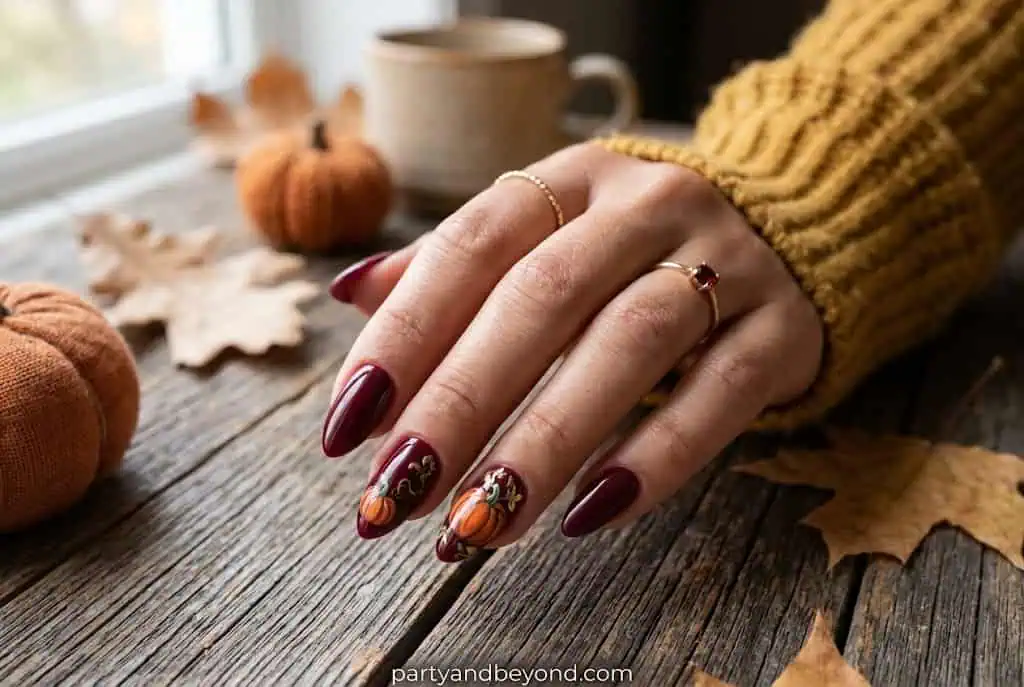
31. Burgundy Pumpkin Nails
Best for: Wine country Halloween, Thanksgiving-to-Halloween crossover
Deep burgundy base, one small burnt orange pumpkin in liner art. Rich, seasonal, completely wearable for adults throughout October and November.
Colors: deep burgundy, burnt orange
Cost: $6–10
Time: 15 minutes
Difficulty: Easy
Short Nail Pumpkin Designs
32. Jack-o’-Lantern for Short Nails
Best for: Short nail wearers who want the classic look
The full carved face, adapted for square or squoval short nails. The proportions work better than you’d expect — shorter nails actually frame the pumpkin face more cleanly than long ones.
Cost: $4–7
Time: 15 minutes
Difficulty: Easy
33. Mini Pumpkin Stamp for Short Nails
Best for: Beginners with short nails, clean cohesive look
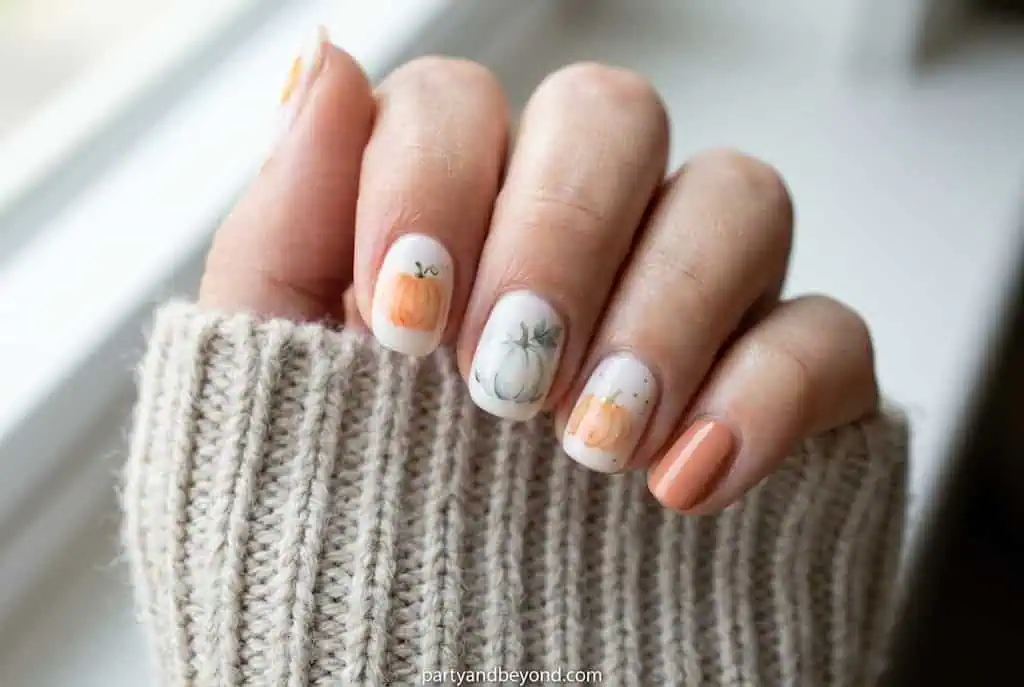
A single pumpkin sticker centered on a short square nail looks clean and intentional. Add a clear topcoat and it lasts three to four days.
Cost: $3–5
Time: 10 minutes
Difficulty: Beginner
Special Occasion Pumpkin Nails
35. Halloween Wedding Guest Pumpkin Nails
Best for: October weddings, elevated Halloween events
Deep copper chrome tips with a tiny black pumpkin outline on one accent nail. Formal enough for a ceremony, seasonal enough for the date.
Cost: $12–18
Time: 30 minutes
Difficulty: Medium
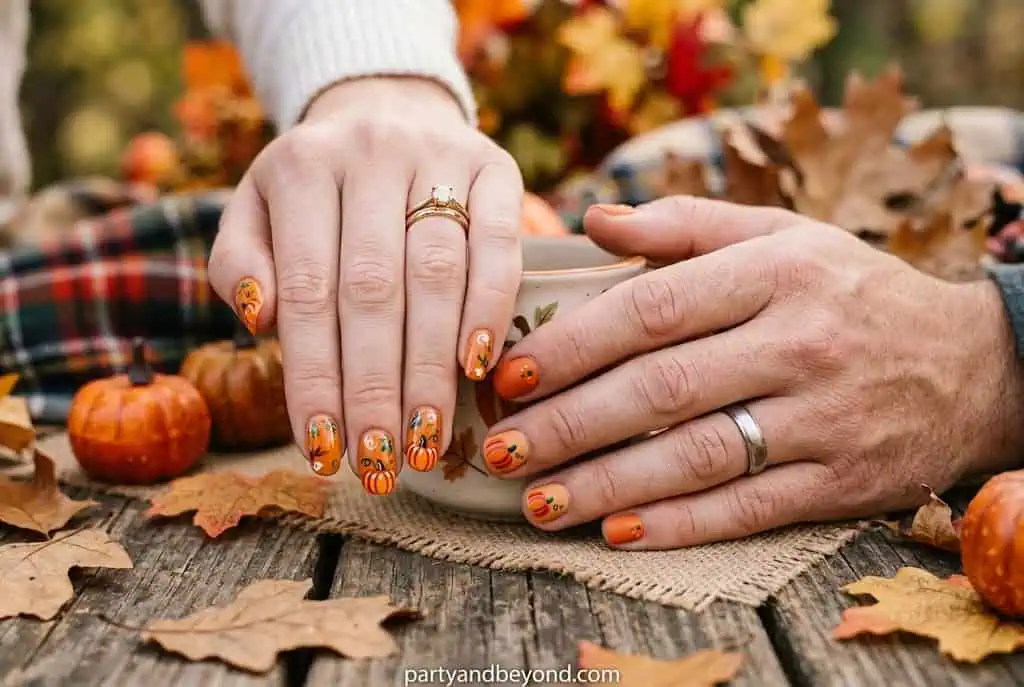
36. Couple’s Matching Pumpkin Nails
Best for: Couples going to Halloween events together
Partner A: orange base with black pumpkin face. Partner B: black base with orange pumpkin face. Same design, inverted palette. Coordinated without being identical.
Cost: $8–15 for both
Time: 20 minutes each
Difficulty: Easy
37. Pumpkin Nail Art for Kids
Best for: Children’s Halloween events, trick-or-treat
Bright orange with a kawaii face on the ring finger, yellow sticker stars on the rest. Apply with non-toxic, kid-safe water-based peel-off polish (available at Target, $5–8).
Cost: $5–8
Time: 10–15 minutes
Difficulty: Beginner
38. Glow-in-the-Dark Pumpkin Nails
Best for: Haunted houses, Halloween parties, outdoor trick-or-treating after dark
Glow-in-the-dark topcoat over any orange base. The pumpkin glows after exposure to light. Safe, impressive to kids, and costs $6–10 for the special topcoat.
Cost: $6–10
Time: 15 minutes (including charge time under lamp or sunlight)
Difficulty: Easy
39. Full Pumpkin Nail Set (Salon-Inspired at Home)
Best for: Special Halloween events, maximum visual impact
Every nail gets a different pumpkin treatment: orange base, black pumpkin, stamp accent, glitter tip, and sticker motif. A “mixed media” set that looks professionally curated. Takes about 60–75 minutes total.
Pumpkin Nail Design Comparison: Budget vs. Splurge
Design Style
Budget Option
Cost
Splurge Option
Cost
Time
Skill
Classic Pumpkin
Dollar Tree stickers
$3–4
Hand-painted jack-o’-lantern
$8–12
10–20 min
Easy
Glam Pumpkin
Glitter topcoat ombré
$8–12
Holographic chrome pumpkin
$15–20
15–30 min
Easy–Med
Dark/Chic Pumpkin
Black stamp on nude
$12–15
Marble + pumpkin accent
$15–20
15–30 min
Easy–Med
Cute/Kawaii
Kawaii sticker set
$3–5
Hand-painted kawaii pumpkin
$6–10
10–25 min
Easy–Med
Statement
Press-on set
$8–15
3D builder gel pumpkin
$20–30
10–60 min
Easy–Adv
Earthy/Fall
Rust ombré sponge
$6–10
Floral pumpkin freehand
$10–15
15–40 min
Easy–Adv
Short Nails
Mini sticker on nude
$3–5
Mini stamp chrome short
$12–18
10–30 min
Easy–Med
🎉 Quick Summary
✅ Best for: Halloween parties, trick-or-treating looks, October events, fall gatherings 💰 Budget range: $3–$25 depending on design complexity ⏱ Setup time: 10 minutes (stickers/press-ons) to 75 minutes (full mixed set) 🌟 Top pick for beginners: Pumpkin sticker nails or kawaii pumpkin with dotting tool 🌟 Top pick for impact: Holographic pumpkin tips or sage green pumpkin accent 📌 Don’t skip: A good topcoat — it doubles the life of any design, regardless of budget
People Also Ask
What is the easiest pumpkin nail idea for beginners? The easiest pumpkin nail idea for beginners is a Dollar Tree pumpkin nail sticker applied over a base coat, sealed with topcoat. This takes under ten minutes, costs $3–4, and lasts three to four days. No art skills needed.
What nail colors look best with pumpkin nail designs? Orange, burnt orange, amber, rust, and gold are the most natural pumpkin base colors. In 2026, sage green, dusty mauve, and burgundy are trending as alternative bases with a rust or orange pumpkin accent nail.
Can you do pumpkin nails without gel polish? Yes. Every design in this guide works with regular drugstore polish. Regular polish requires more topcoat layers for durability (apply two topcoat layers, wait 90 seconds between each) but the designs are identical.
How long do Halloween nail designs last? With two layers of topcoat and no gel lamp, regular polish pumpkin nails last four to six days. Gel polish with a UV lamp lasts ten to fourteen days. Press-ons last three to seven days depending on application.
Are pumpkin nails appropriate for the office? Yes — the sage green pumpkin accent, chrome pumpkin tips, and pumpkin spice French tip designs are all office-appropriate. Avoid neon and heavy glitter for professional environments.
Frequently Asked Questions
Q: How do you draw a pumpkin on your nails for beginners? A: Start with an orange base coat. Once dry, use a thin nail liner pen to draw three curved vertical lines to create the pumpkin sections. Add a small brown stem at the top. For a face, add two small triangles as eyes and a jagged rectangle as a mouth. Use a dotting tool for the eyes if freehand feels unsteady. Total time: 10–15 minutes.
Q: What nail colors go with pumpkin nail art? A: Traditional pumpkin nails use orange, black, and white. In 2026, the trending combinations are sage green + rust orange, burgundy + burnt orange, dusty mauve + terracotta, and nude + copper chrome. These pairs feel fresh without losing the seasonal reference.
Q: How long do pumpkin nail designs last? A: With regular polish and two topcoat layers, expect four to six days. With gel polish and a UV lamp, fourteen or more days. Press-on sets last three to seven days. Glitter designs tend to chip faster at the tips — add a fresh topcoat layer every two days to extend wear.
Q: Can you do pumpkin nails with regular polish instead of gel? A: Absolutely. Every design in this guide works with regular polish. The key differences: gel lasts longer, regular polish dries faster without a lamp, and regular polish is easier to remove. For regular polish durability, apply two topcoat layers with 90 seconds drying time between each.
Q: What tools do I need for Halloween nail art at home? A: For beginners: a nail liner pen ($3–5), dotting tool ($1–2), and topcoat. For intermediate: add a nail stamping kit with Halloween plates ($8–12) and a small flat brush. For advanced designs: a UV lamp, builder gel, and a set of nail art brushes ($15–25 total).
Q: Are there pumpkin nail ideas for short nails? A: Yes — the classic jack-o’-lantern, kawaii pumpkin, negative space pumpkin, and all sticker/press-on designs work beautifully on short, square, or squoval nails. Short nails can actually frame small detailed designs more cleanly than long nails.
Q: What are the trending pumpkin nail styles for 2026? A: According to Pinterest Trends 2024, the top growing pumpkin nail aesthetics include sage green with rust accent, holographic chrome pumpkin tips, cottagecore floral pumpkins, and gothic black silhouette designs. Traditional orange-black combinations remain popular but are now one of many directions rather than the only option.
Q: How do I make pumpkin nail art last longer? A: Apply a layer of topcoat every two days to refresh the seal. Avoid using your nails as tools (prying open cans, peeling stickers). Wear rubber gloves for dishes and cleaning. Apply cuticle oil daily to keep the nail bed healthy and prevent peeling.
Q: Can I do pumpkin nails without any nail art skills? A: Yes. Three options require zero freehand skills: nail stickers (Dollar Tree, $3–4), press-on sets with pumpkin designs (Amazon, $8–15), and stamping kits with Halloween plates (Amazon, $8–12). All three produce professional-looking results with no artistic ability required.
Q: What is the best nail shape for pumpkin nail art? A: Oval and almond shapes give the most canvas for detailed designs. Square and squoval shapes frame small motifs cleanly. Short square nails work particularly well with mini stamps and stickers. Stiletto nails can carry 3D designs dramatically but are impractical for daily wear.
Q: Do glitter pumpkin nails look as good in person as in photos? A: 9 times out of 10, glitter looks better in photos than in person — especially fine glitter, which tends to settle unevenly. Chunky glitter topcoats look more consistent in person. Also, expect glitter to transfer onto everything you touch for the first 24 hours. Seal with two topcoat layers immediately after application.
Q: How do I remove gel pumpkin nail art at home without damage? A: Soak a cotton ball in acetone, press against the nail, wrap in foil, and wait ten to fifteen minutes. The gel should slide off without scraping. Never peel gel off dry — it removes the top layer of the natural nail. For regular polish, any nail polish remover works; acetone-based removes it faster.
Conclusion
Pumpkin nails are the perfect way to celebrate the cozy charm of fall and the playful spirit of Halloween. Whether you love minimalist pumpkin accents, glittery autumn designs, spooky jack-o’-lantern art, or bold statement manicures, there’s a pumpkin nail look for every style and occasion. From casual fall outings to Halloween parties and Thanksgiving gatherings, these festive designs add a seasonal touch that never goes out of style.
The best part is that pumpkin nail art is incredibly versatile—you can keep it simple with tiny pumpkin details or go all out with vibrant colors, glitter, plaid patterns, ghosts, and other autumn-inspired elements. No matter which design you choose, pumpkin nails are a fun and creative way to showcase your love for the season.
Save your favorite ideas, book your next nail appointment, or grab your nail polish and try a DIY design at home. With these pumpkin nail ideas, your manicure will be ready to steal the spotlight all fall long.
Chloe Parker is the DIY decor and Halloween writer at Party & Beyond. Based in Denver, Colorado, she specializes in budget-friendly party decorations, family Halloween costumes, and creative crafts. With 10+ years of crafting experience, Chloe believes parties don't need to be perfect to be memorable , just made with love and a little hot glue.