Disclosure : This post contains affiliate links. If you buy through them, I may earn a small commission at no extra cost to you. All recommendations come from personal crafting experience and research.
My friend Emma doesn’t do subtle Halloween. Last October she showed up to her own party with pale, matte-white nails — until you looked closer and realized each one had a tiny red-veined eyeball painted dead center, staring back at you. Guests noticed before they noticed the decorations. By 10 p.m., nobody wanted to leave, and at least four people had photographed her hands without asking.
That’s exactly what makes Halloween Nail Designs 2026 so powerful — they’re not just beauty details, they’re instant conversation starters before anything else even begins.
After 10+ years of crafting, attending costume parties, and doing my own Halloween nails every single season, I can tell you that this category of Halloween Nail Designs 2026 has genuinely exploded in popularity. According to the National Retail Federation (NRF 2025), Halloween spending hit a record $13.1 billion, with 51% of Americans dressing in costume and per-person spending averaging $114.45. Nails aren’t just an afterthought anymore — they’ve become a core part of the full Halloween look.
This guide covers 33 horror nail design ideas across five categories: classic spooky, horror movie inspired, witch and supernatural, gore and creepy, and aesthetic dark. Every idea in these Halloween Nail Designs 2026 includes materials, cost, difficulty, and exactly how long it takes. Let’s get into it.
What Horror Halloween Nail Art Actually Is (And What It Isn’t)
Done right, Halloween nail art is:
Intentional — each nail tells part of a story
Specific — drips that look wet, webs that look geometric, eyes that look unsettling
Coordinated — colors that connect across all ten nails, even when individual designs vary
What it isn’t:
Slapping orange and black polish on and calling it Halloween
Stacking rhinestones until your nails snag on everything (trust me on this — I’ve lost two sets that way)
Copying a 12-step Instagram tutorial that requires a fine art degree
The trick is choosing a level of complexity that matches your actual skill and your actual timeline. A beginner with a $5 nail art pen and 30 minutes can still do something genuinely striking. That’s what this list is for.
Category 1: Classic Spooky Halloween Nail Designs
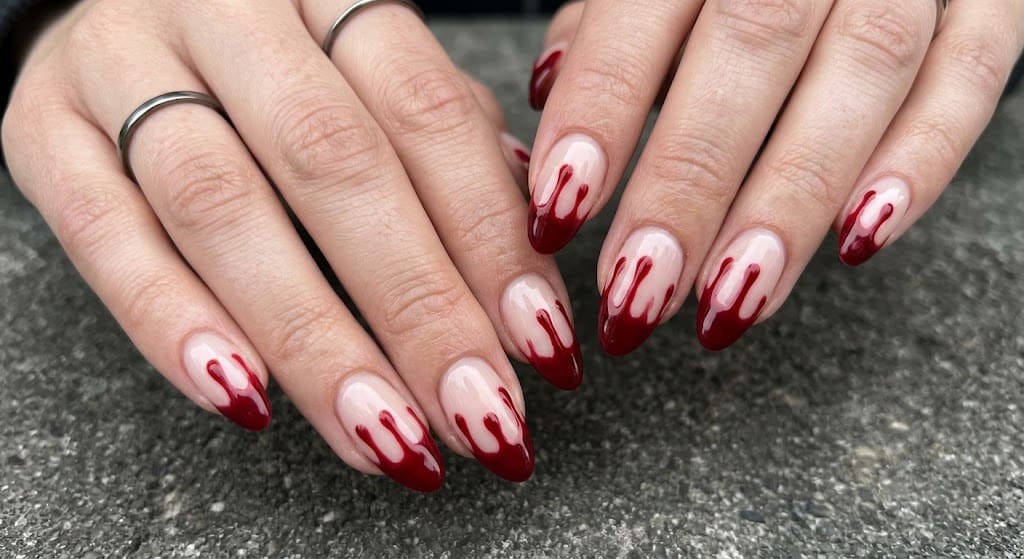
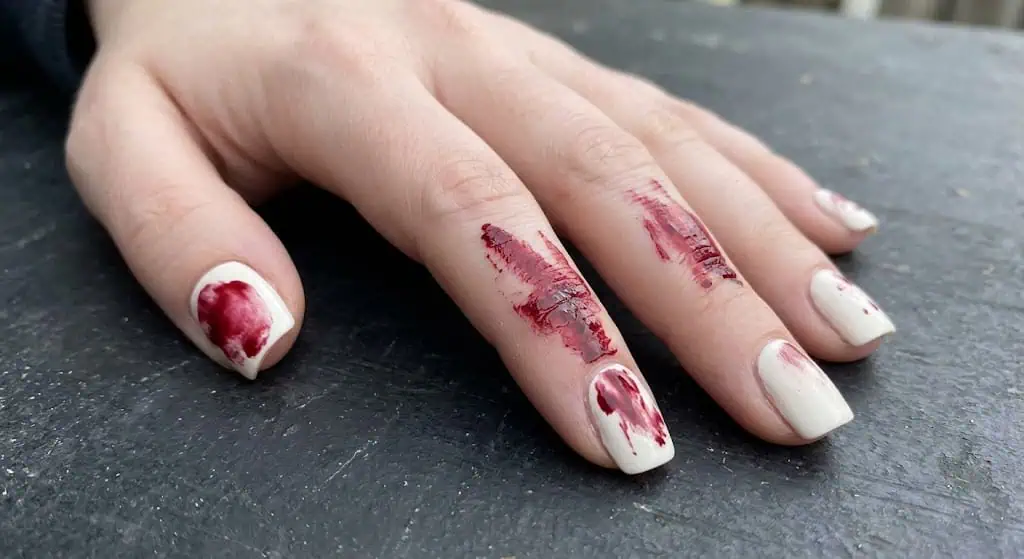
1. Dripping Blood Tips
Best for: Beginners | All nail lengths | Costume parties and events
A nude or white base with red drips bleeding down from the tip. Done right, it looks startlingly wet. Done wrong, it looks like you smeared red polish with a finger — so the technique matters.
The trick is thin, slow drips using a nail art pen or a toothpick loaded with red gel. Let one drip set before starting the next, or they’ll bleed together.
Base: Nude or white gel ($8)
Red nail art pen ($5)
Top coat ($6)
Total: ~$19
💡 Pro Tip: Do two thin drips per nail rather than one thick one. Thin drips read as fresh blood. Thick drips read as a blob. Thin wins every time.
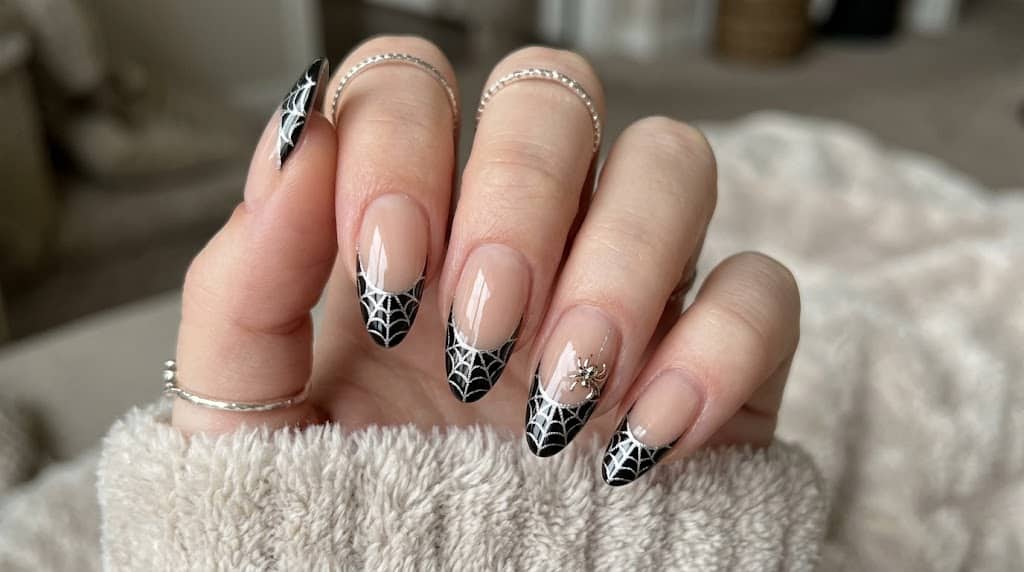
2. Spider Web French Tips
Best for: Easy classic | Short to medium nails | Work-appropriate Halloween
Black base with a crisp white web radiating from the corner of the tip. It’s one of the oldest Halloween nail looks — and it’s still one of the cleanest because geometry never goes out of style.
A nail art liner brush is the only tool you really need here. Draw one center point, then extend six spokes outward, then connect them with curved arcs. That’s it.
Black gel polish ($7)
White nail art liner ($4)
Top coat ($6)
Total: ~$17
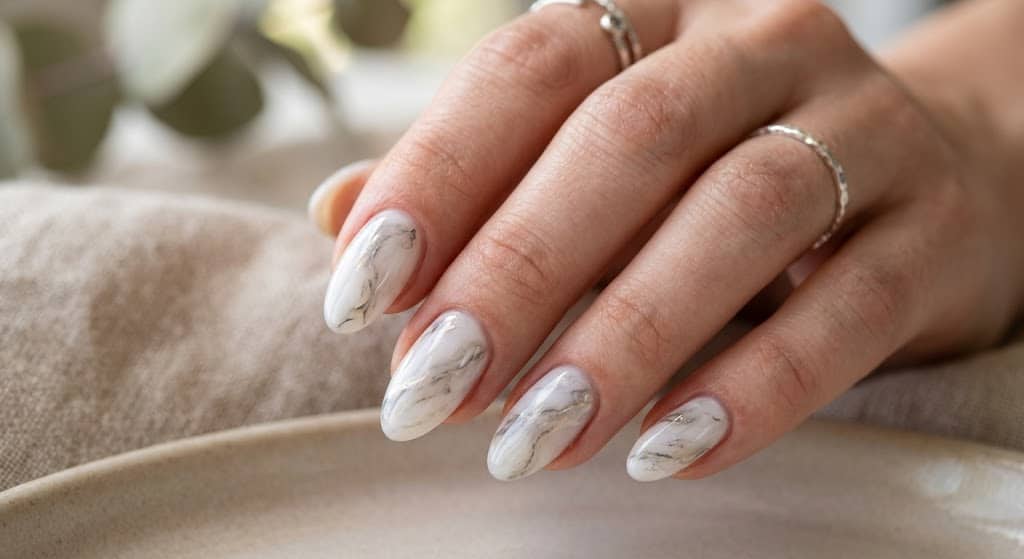
3. Ghostly White Marble
Best for: Medium effort | Elegant Halloween events | Longer nails
White and silver swirls on a sheer base — more ethereal than gory, but undeniably Halloween. This works especially well if you want something that reads as “Halloween” without screaming it at a work event or family dinner.
I tried this for the first time three seasons ago for a friend’s Halloween dinner party. I was nervous it looked “too pretty” to count. By the end of the night, two people asked where I’d had it done. I’d done it at my kitchen table.
Sheer base gel ($6)
White + grey gel ($9)
Thin detail brush ($4)
Total: ~$19
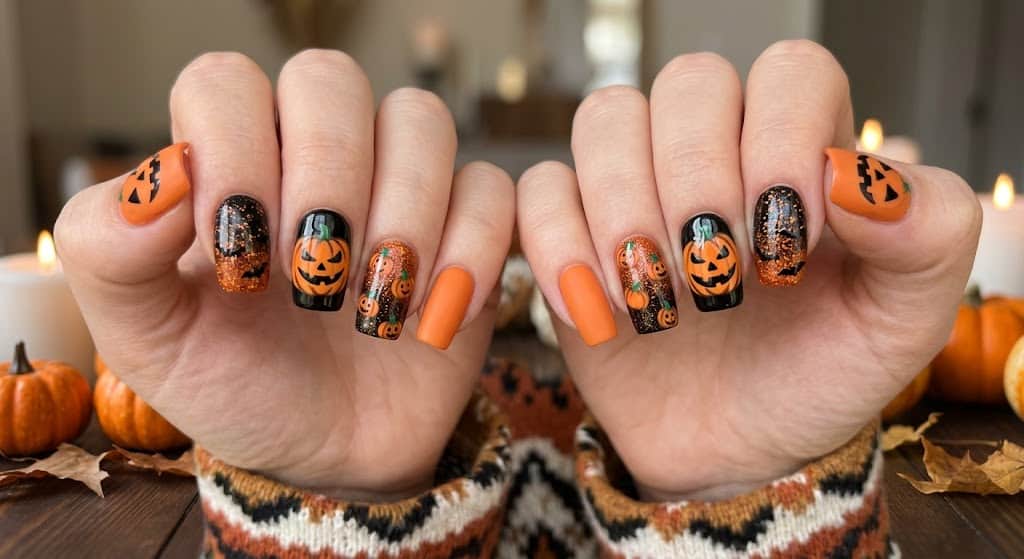
4. Jack-o-Lantern Pumpkin Nails
Best for: Beginners | Kids’ parties and family events | Short nails
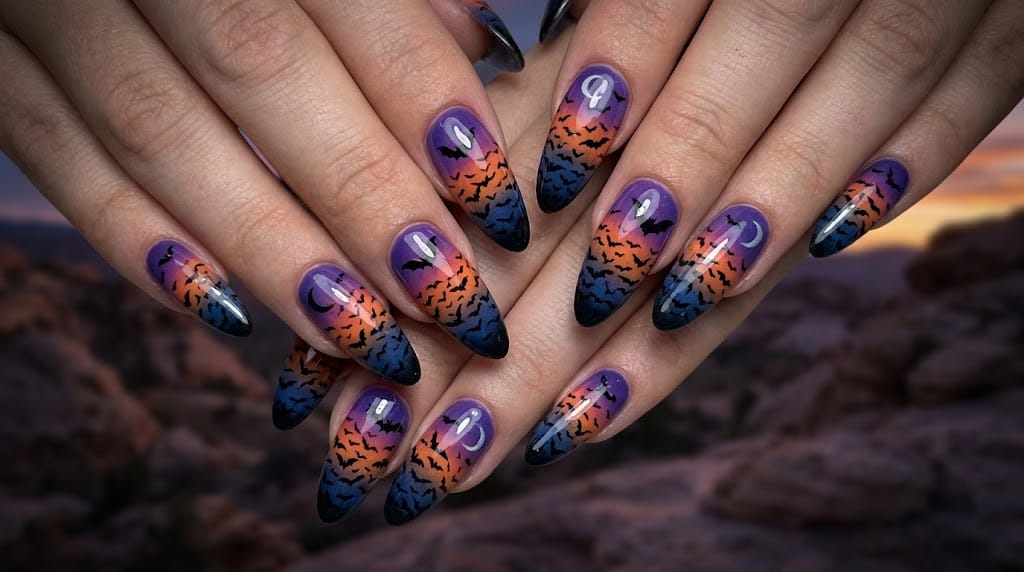
Best for: Medium effort | Statement nails | Costume parties
Purple-to-navy ombre sky across the nail with tiny black bat silhouettes in mid-flight. The ombre does the heavy lifting here — the bats are the easy part. A stamping plate makes this accessible for anyone.
💡 Pro Tip: Stamp the bats before applying your top coat. Top coat after stamping tends to blur edges on small details.
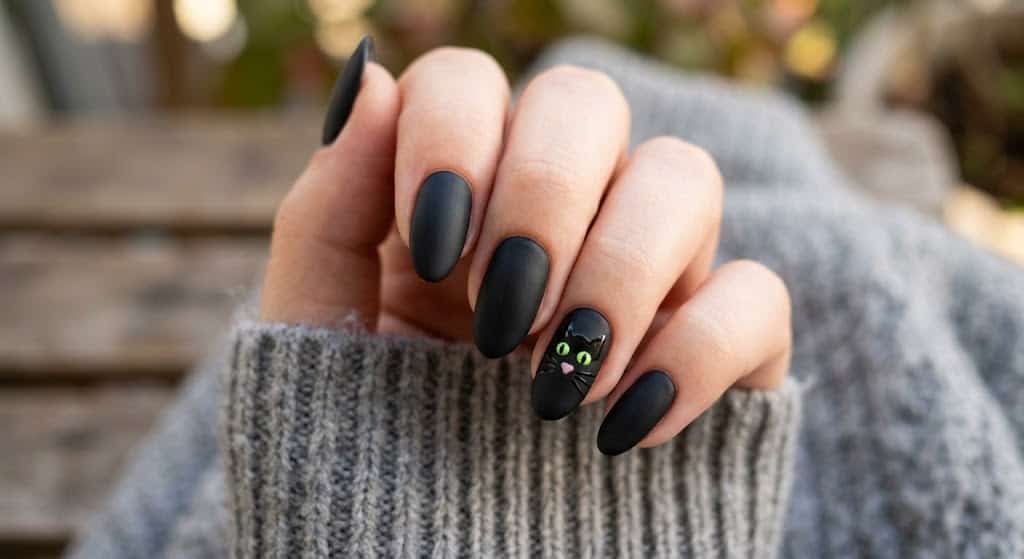
6. Black Cat with Green Eyes
Best for: Easy | All nail lengths | Accessible for beginners
Matte black base with a tiny cat face centered on one or two accent nails — green neon eyes made with a dotting tool, small pink triangle nose, and thin whisker lines.
9 times out of 10, this takes less than 25 minutes and photographs better than designs that took twice as long.
Matte black gel ($8)
Neon green art pen ($5)
Dotting tool ($3)
Total: ~$16
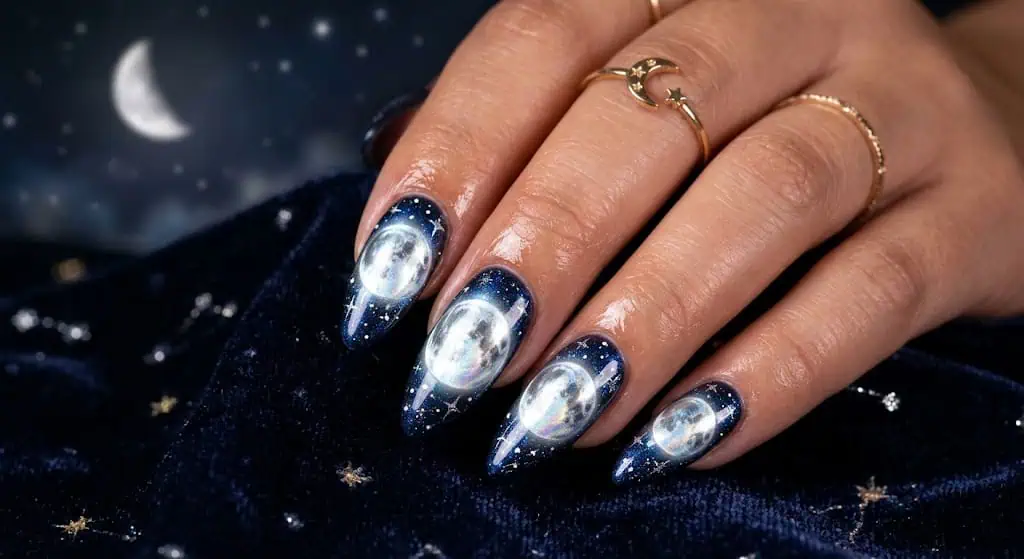
7. Full Moon Chrome Glow
Best for: Medium | Date nights and events | Medium to long nails
Deep navy base with a chrome powder moon and a soft glowing halo. Chrome powder applied over cured gel creates a mirror finish that genuinely looks lit from within — no special lighting needed.
Navy gel ($7)
Chrome powder ($6)
Silicone applicator brush ($4)
Total: ~$17
Category 2: What Are the Best Horror Movie Nail Designs for Halloween 2026?
Horror movie nail art is having a major moment — and after hosting and attending more Halloween events than I can count, I can confirm that a well-executed Ghostface set will get more reactions than a full costume.
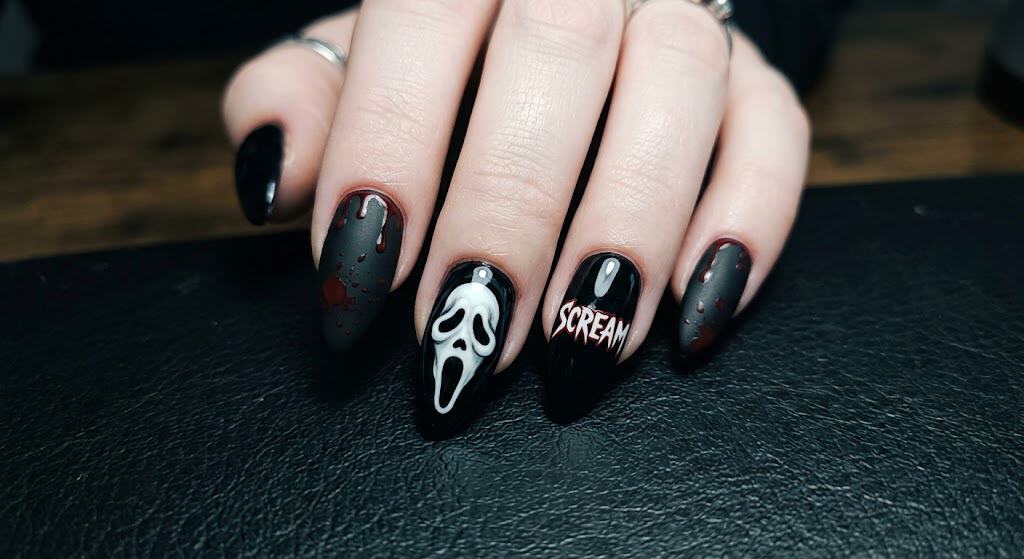
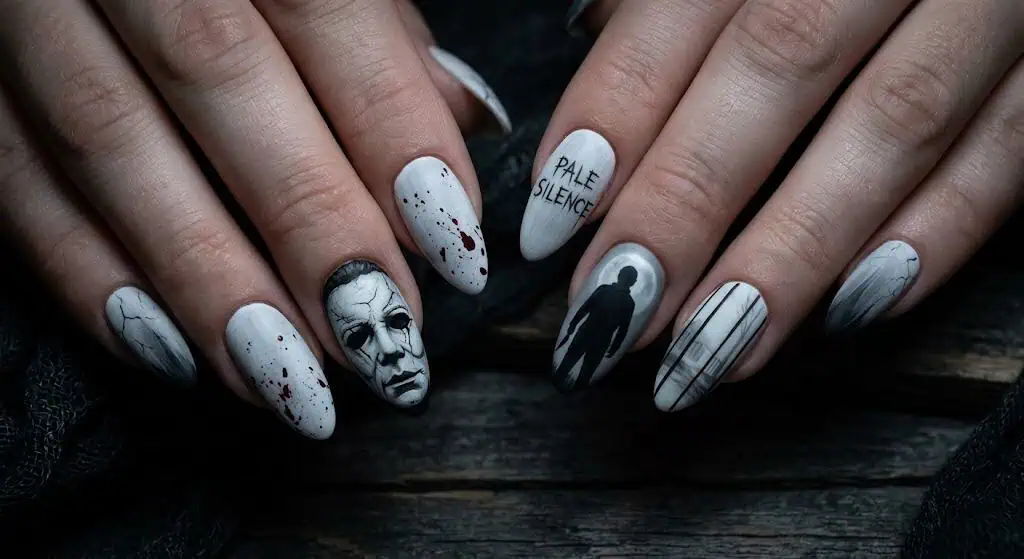
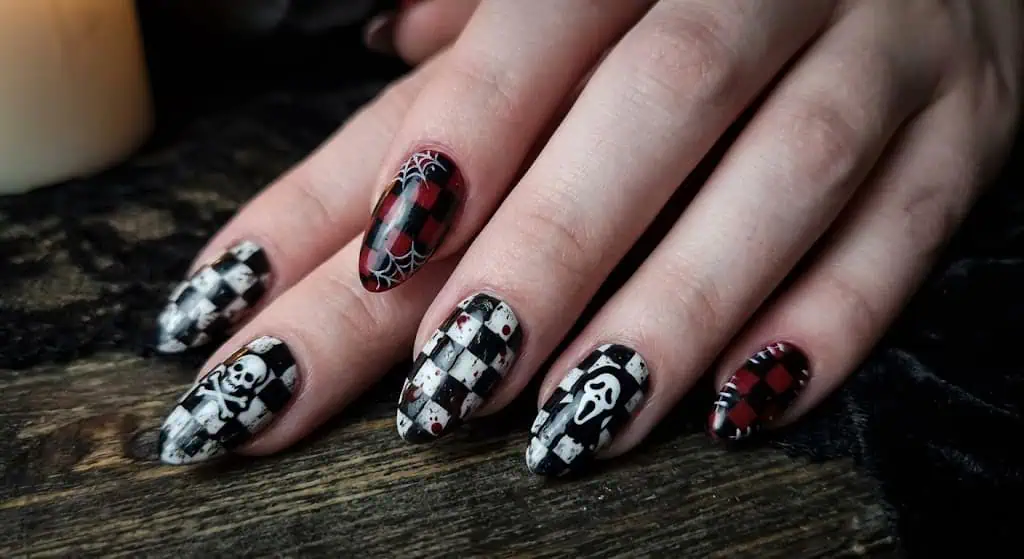
8. Ghostface Scream Mask
Best for: Advanced | Die-hard horror fans | Statement nail set
White elongated mask face on a true black base. High contrast, instantly recognizable, genuinely unsettling up close.
Here’s what actually works: paint the mask shape in white gel first, let it cure, then use a fine liner for the eye holes and twisted mouth detail. Don’t rush the liner work — this is the design where 20 extra minutes of patience makes the difference between “wow” and “what is that.”
Black + white gel ($12)
Fine liner brush ($4)
Total: ~$16
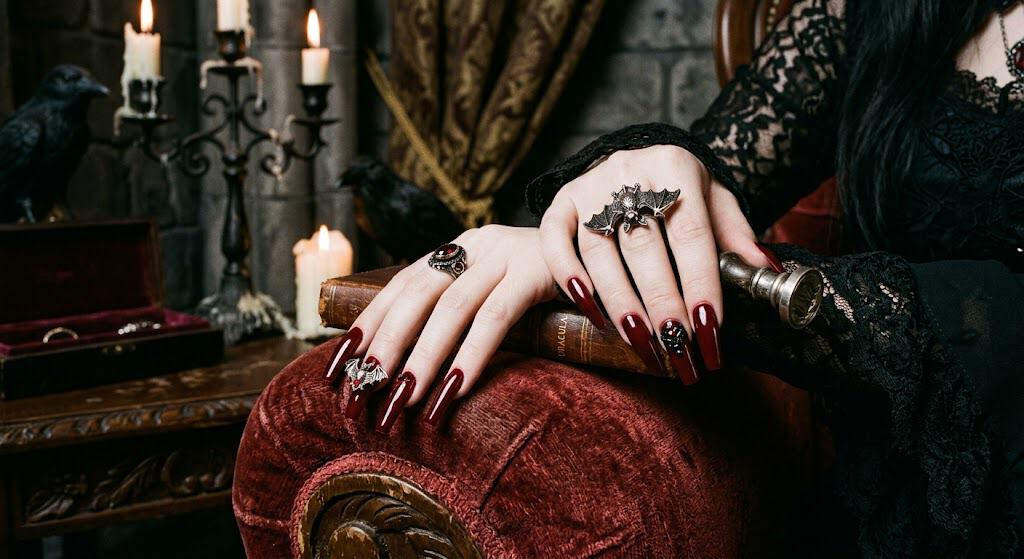
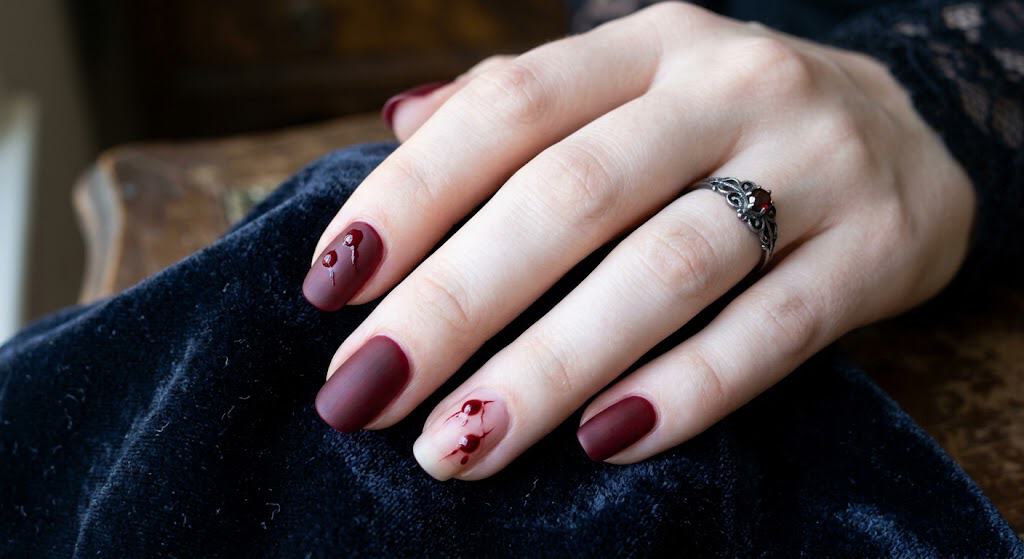
9. Dracula Gothic Red Coffin Nails
Best for: Medium | Coffin nail shape | Vampire costume pairings
Deep crimson and matte black on coffin-shaped nails, with a blood moon on the accent. The coffin shape photographs beautifully — it elongates fingers and makes even simple single-color work look editorial.
Coffin nail tips ($8)
Crimson gel ($7)
Matte top coat ($6)
Total: ~$21
10. Mummy Wrap Bandages
Best for: Easy | Short to medium nails | Family parties
Nude base with thin white strip “bandages” and a red eye peeking through on one accent nail. The easiest DIY approach: use thin tape strips for the bandage lines — paint, remove tape, done.
Nude + white gel ($12)
Red art pen ($5)
Tape strips ($1)
Total: ~$18
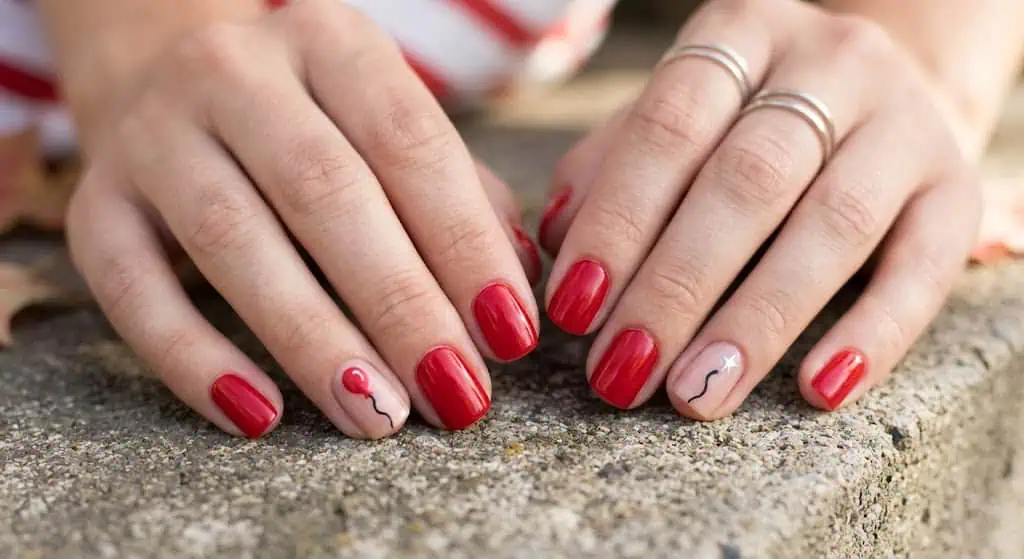
11. It — Red Balloon Detail
Best for: Medium | Horror fans | Statement accent nail
Pale white base, single red balloon with string on the accent nail. Simple design — but the cultural reference makes the wow factor punch well above its technical weight.
White gel ($6)
Red art pen ($5)
Black liner ($4)
Total: ~$15
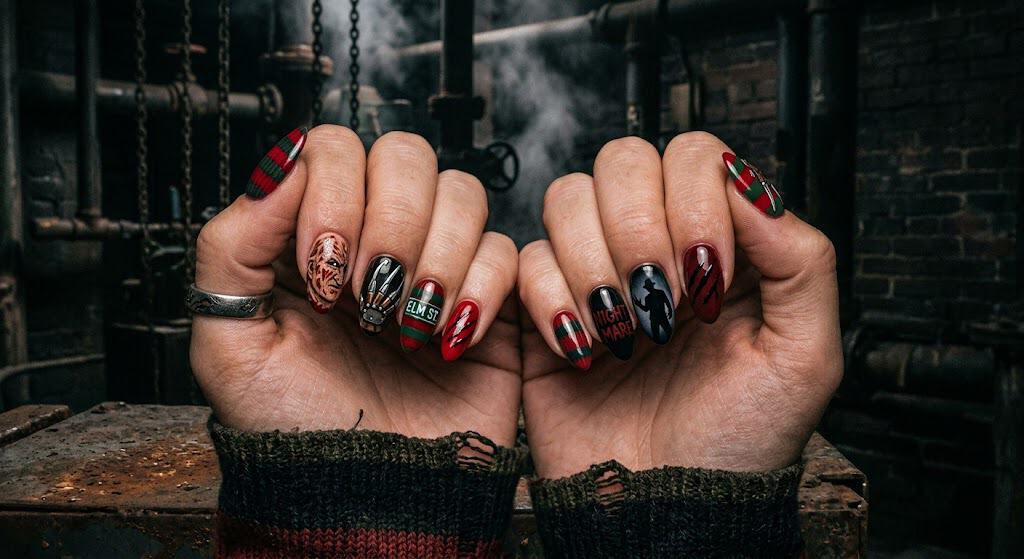
12. Freddy Krueger Stripe Nails
Best for: Medium | Horror-themed parties
Red and dark green vertical stripes with a sponged brown texture overlay that reads as burnt/scarred skin. The texture is created by dabbing a kitchen sponge over the base — no special tools.
The most unsettling design on this list — and one of the simplest conceptually. Pale, almost skin-tone flat nails in a matte finish, with one accent nail featuring the hand-painted mask face.
The restraint is the point. Done wrong, this just looks like you forgot to paint your nails. Done right, people stare at your hands and feel genuinely uneasy.
Pale nude matte gel ($7)
Black liner ($4) + white gel ($5)
Total: ~$16
14. Chucky Overalls Plaid
Best for: Medium | Horror-comedy fans | Costume pairings
Red and white plaid stripes on short round nails with one tiny painted face on the accent. The plaid pattern can be created using nail tape to block clean lines.
Red + white gel ($11)
Fine liner ($4)
Total: ~$15
💡 Pro Tip: Apply nail tape on top of your cured base coat, paint your stripe colors, then peel the tape off before the polish cures. This is the single best method for clean lines in striped nail art.
Category 3: Witch, Supernatural, and Dark Magic Nail Designs
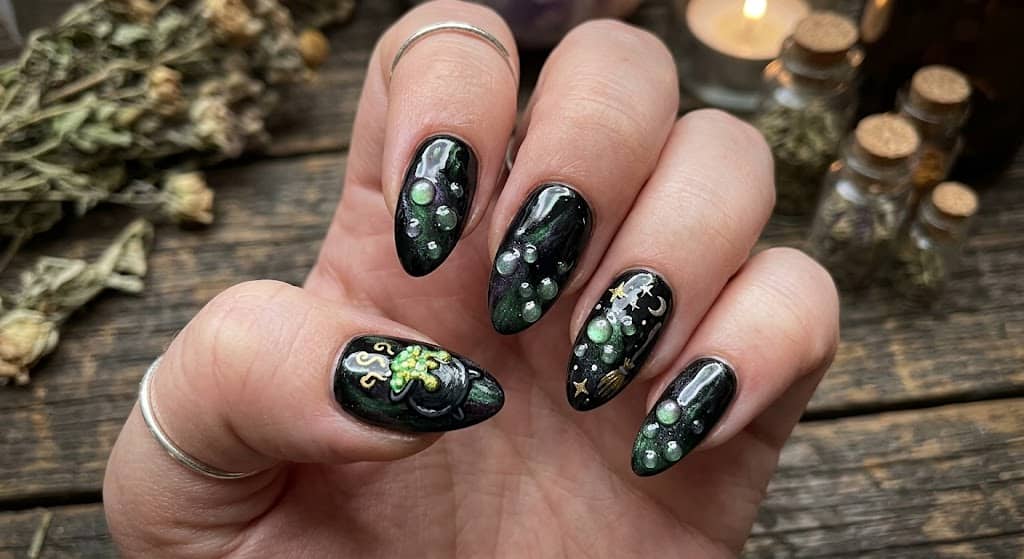
15. Bubbling Cauldron Nails
Best for: Easy | Beginners | Kids’ Halloween parties
Matte black base with neon green bubble clusters on the accent nail. The bubbles are just circles made with a dotting tool — apply in different sizes for a three-dimensional look.
Matte black gel ($7) + neon green gel ($5) + dotting tool ($3) — Total: ~$15
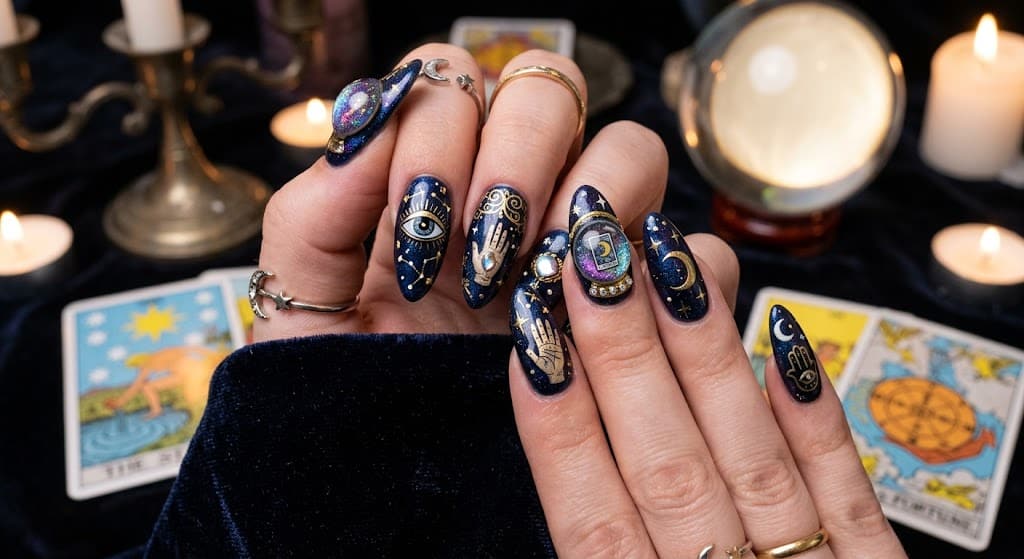
16. Ouija Board Nail Art
Best for: Advanced | Occult aesthetic lovers | Statement conversation nails
Aged parchment nude base with letters, numbers, YES/NO details, and a planchette hand-painted across multiple nails. This is the most technically demanding design on the list — budget 75 minutes and a very fine liner brush.
Nude/tan gel ($6) + brown art pen ($5) + fine liner ($4) — Total: ~$15
17. Crystal Ball Fortune Teller
Best for: Medium | Witchy costume pairings | Holographic effects
Deep purple base with a holographic glitter orb and mist-effect swirl. Chrome powder on a cured gel layer creates the “lit from within” orb effect.
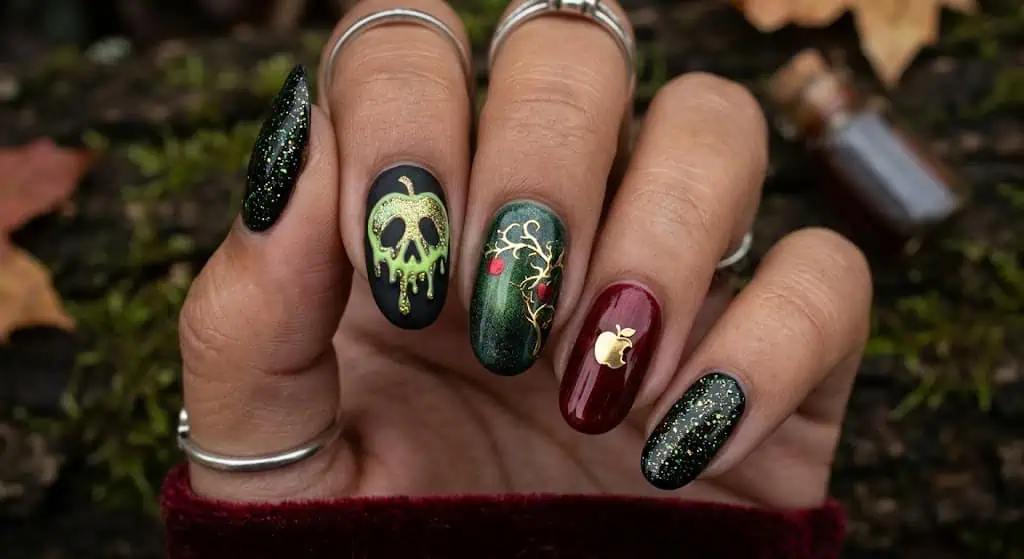
Best for: Medium | Halloween dinner parties | Villain costume pairings
Glossy deep red base with one nail featuring an apple, leaf, and dripping poison detail in pale green. Emma wore this to a Halloween dinner last fall — the first thing anyone noticed at the table.
Red gel ($7) + gold liner ($5) + green accent ($4) — Total: ~$16
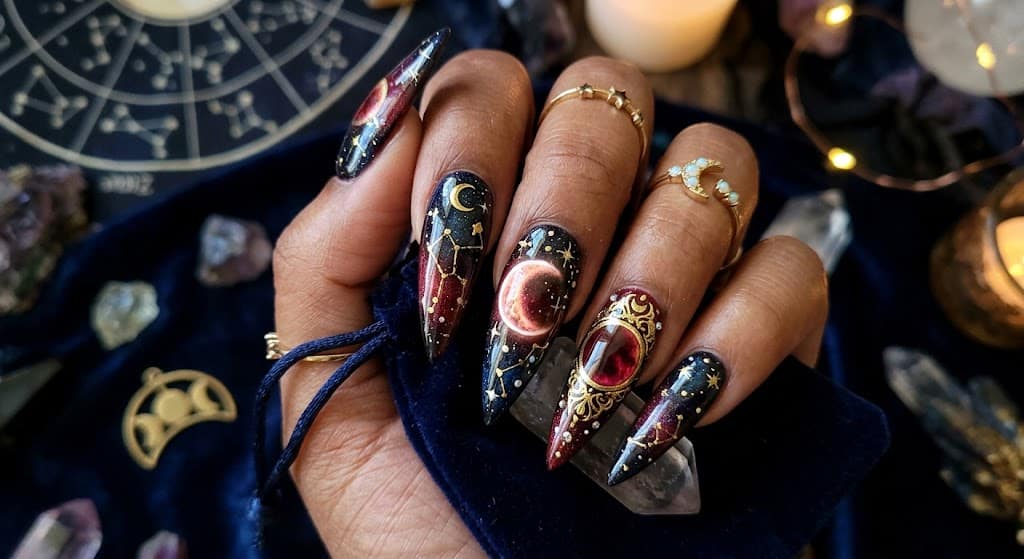
19. Celestial Blood Moon
Best for: Medium | Gothic aesthetic | Photography-forward looks
Black base with a burnt orange and red moon detailed with craters and star scatter in gold chrome.
Black + burnt orange gel ($12) + gold chrome ($6) — Total: ~$18
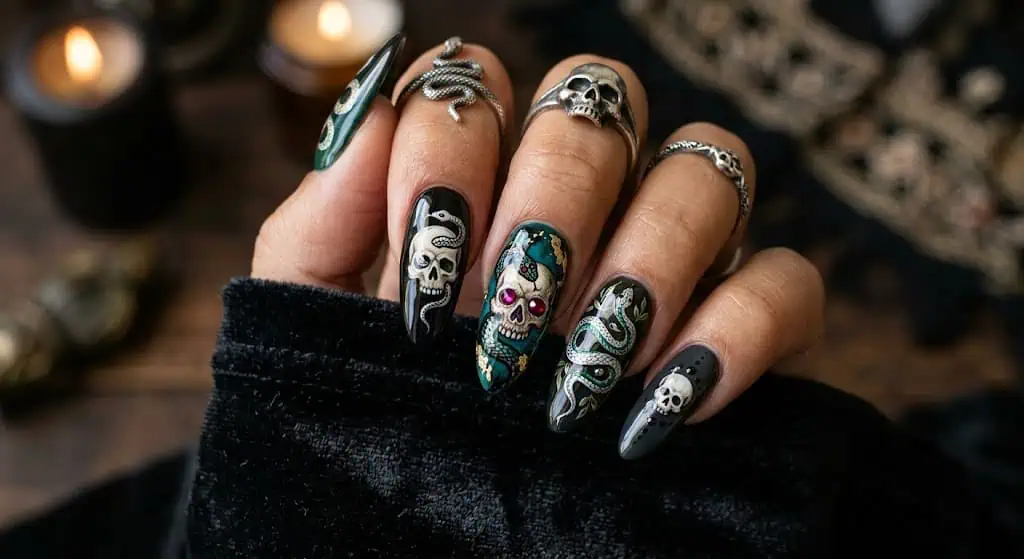
20. Snake & Skull
Best for: Advanced | Edgy Halloween looks | Longer nails
Dark olive or black base with a coiled snake body wrapping around a skull across the accent nails. Requires patience and a fine liner — this is a weekend nail project, not a 30-minute one.
Black + olive gel ($11) + white and gold liner ($5) — Total: ~$16
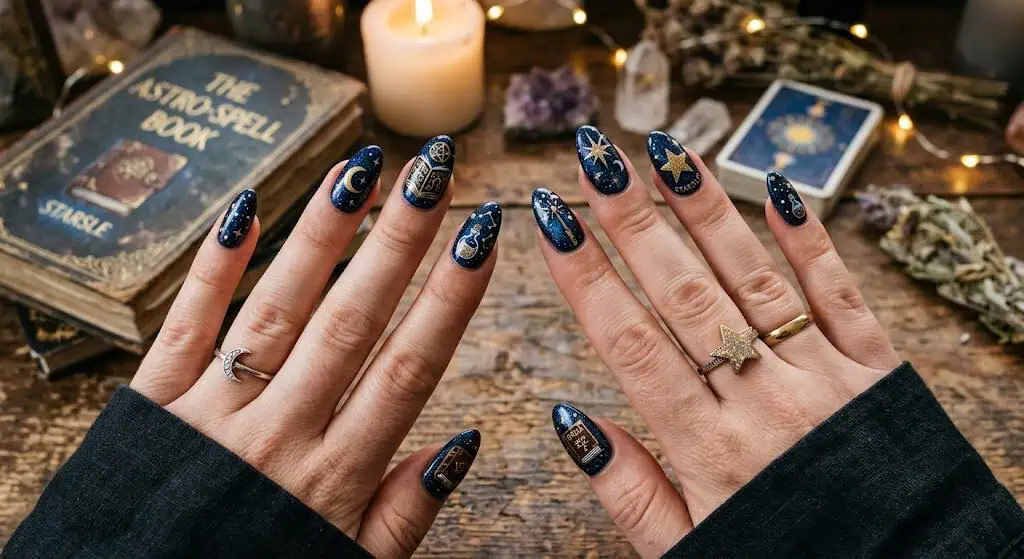
21. Spell Book & Stars
Best for: Medium | Bookish Halloween fans | Work-friendly
Deep burgundy base with a tiny golden spell book on the accent nail and scattered gold stars across the others.
Burgundy + gold gel ($12) + fine liner ($4) — Total: ~$16
Category 4: Gore and Creepy Halloween Nail Art
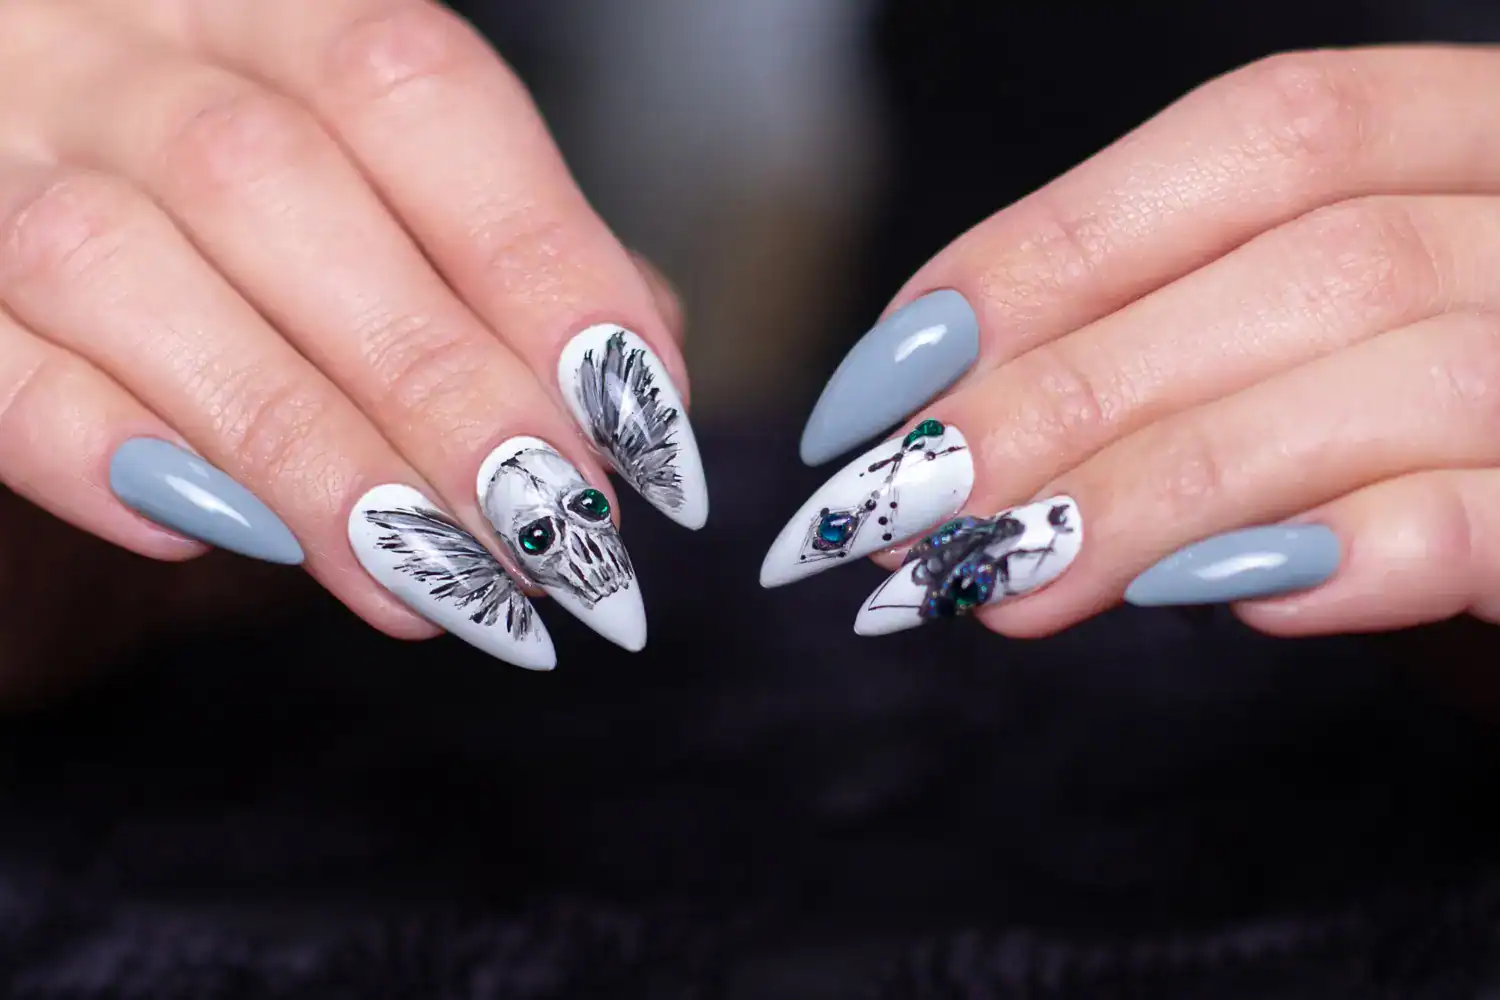
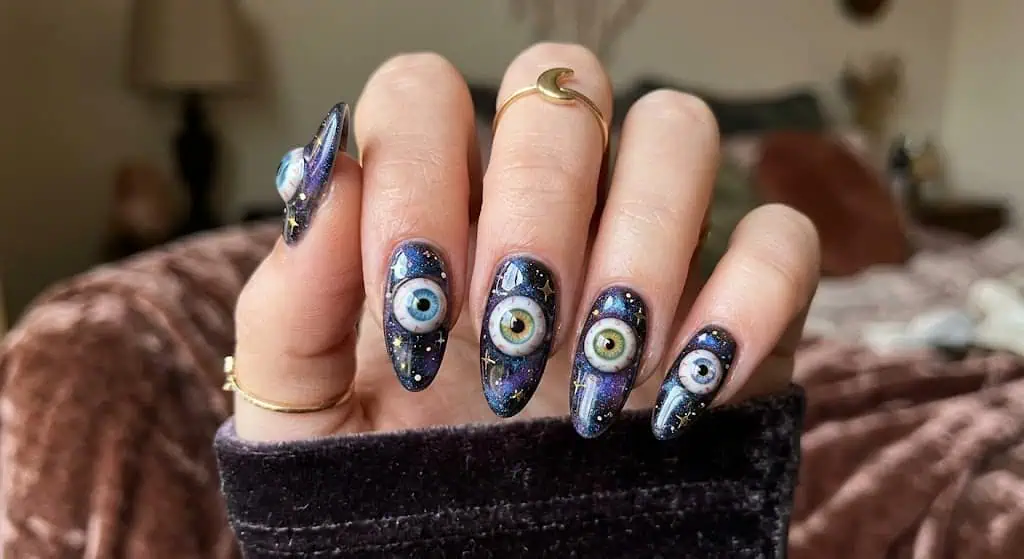
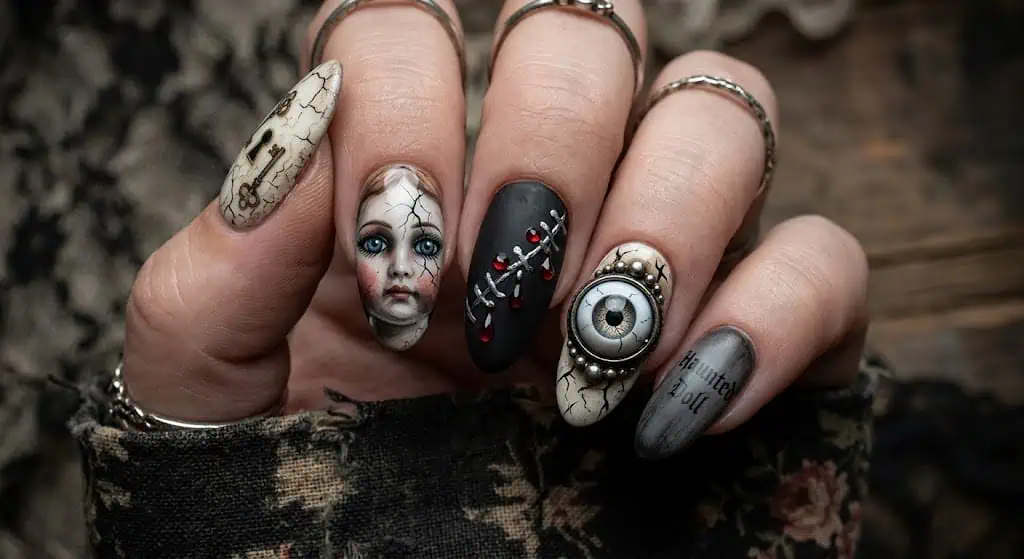
22. Floating Eyeball Nails
Best for: Advanced | Maximum horror impact | Emma’s go-to
Floating Eyeball Nails,White iris base with hand-painted red veins radiating outward, a black pupil, and a reflective highlight dot. This is the design Emma wore last October. Hyper-realistic. Genuinely unsettling.
The trick is the highlight dot — a tiny white dot placed at the 11 o’clock position of the pupil is what makes the eye look dimensional and alive. Without it, it’s just a circle. With it, it stares.
White + red + black gel ($14) + fine liner ($4) — Total: ~$18
💡 Pro Tip: Paint the pupil first, let it cure, then add veins outward. Veins over a wet pupil smear and look infected rather than realistic — which might actually be what you’re going for, honestly.
23. Bloody Handprint Smear
Best for: Easy | Shock value | Last-minute Halloween
Clear or nude base with a red smeared palm print — like someone grabbed your hand. Made by loading a fan brush with red gel and dragging it across the nail surface while wet.
Nude gel ($6) + red gel ($5) + fan brush ($3) — Total: ~$14
24. Frankenstein Stitches
Best for: Easy | Cartoonish horror | Kids and family-friendly
Lime green base with black X-stitch marks across the center. Probably the easiest design on this list — all you need is a black nail art pen and steady horizontal strokes.
Lime green gel ($7) + black liner ($4) — Total: ~$11
25. Vampire Bite Marks
Best for: Easy | Vampire costume pairings | Subtle horror
Nude gel ($6) + red gel ($5) + dotting tool ($3) — Total: ~$14
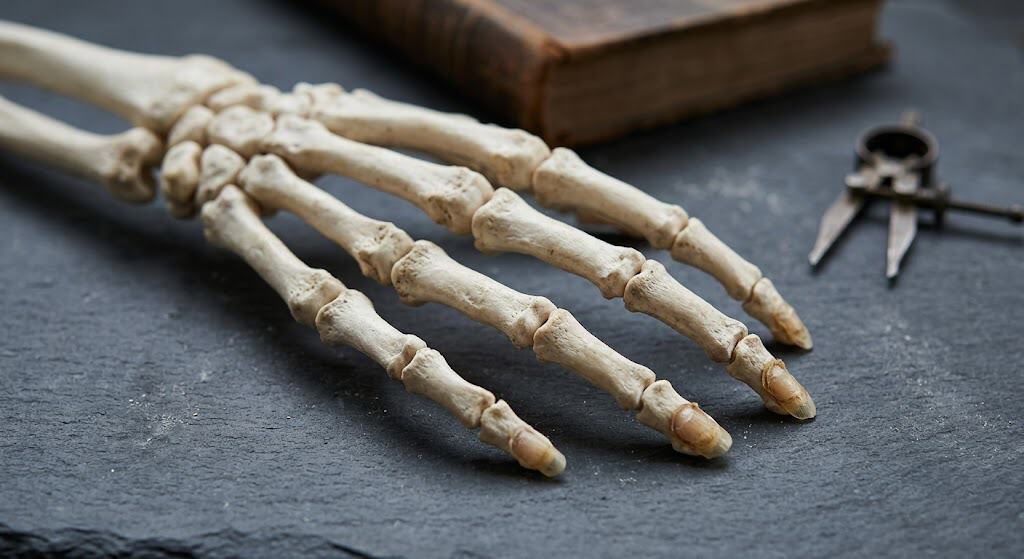
26. Skeleton Hand Bones
Best for: Medium | Full Halloween nail set | Pairs with any costume
Black base with white X-ray-style bone outlines on each nail — like looking at your own skeleton. Nail stamping plates make this achievable even without fine art skills.
Black gel ($7) + white liner ($4) + fine brush ($4) — Total: ~$15
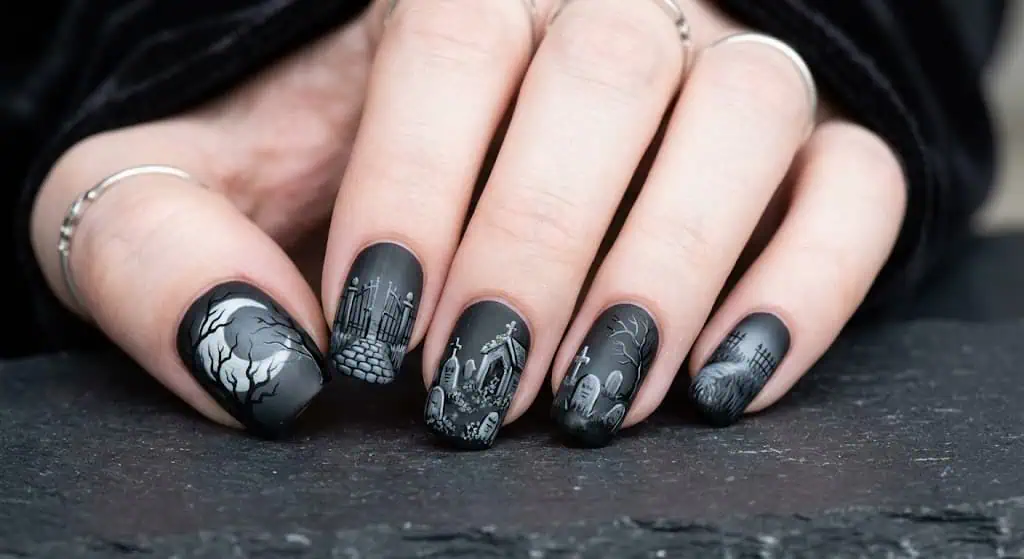
27. Graveyard Scene Mini Art
Best for: Advanced | Maximum detail | Statement set
Grey and black gradient sky with white RIP tombstones, bare leafless trees, and a crescent moon. This is the most ambitious design on the list — and the most rewarding. Budget 70 minutes.
The first time I attempted something like this (a haunted house scene on my accent nail, several Halloweens ago), it looked like a mud puddle. The second time, with better brushes and more patience, people stopped me at the party to look closer. It’s worth the practice.
Grey + black gel ($11) + white liner ($4) — Total: ~$15
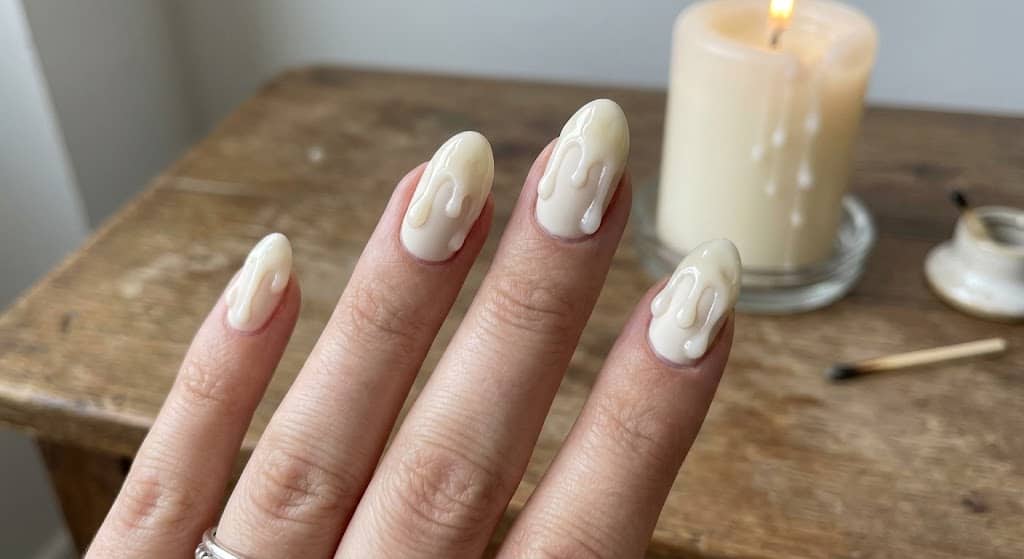
28. Melting Candle Wax Drip
Best for: Easy | Elegant horror | Date nights and parties
True black base with white “wax” drips running down from the tip — the inverse of the blood drip, and somehow more eerie because it’s quieter. Fan brush for wide drips; nail art pen for thin trails.
Black gel ($7) + white gel ($5) + fan brush ($3) — Total: ~$15
Category 5: Aesthetic Horror — Dark, Fashion-Forward Nail Designs
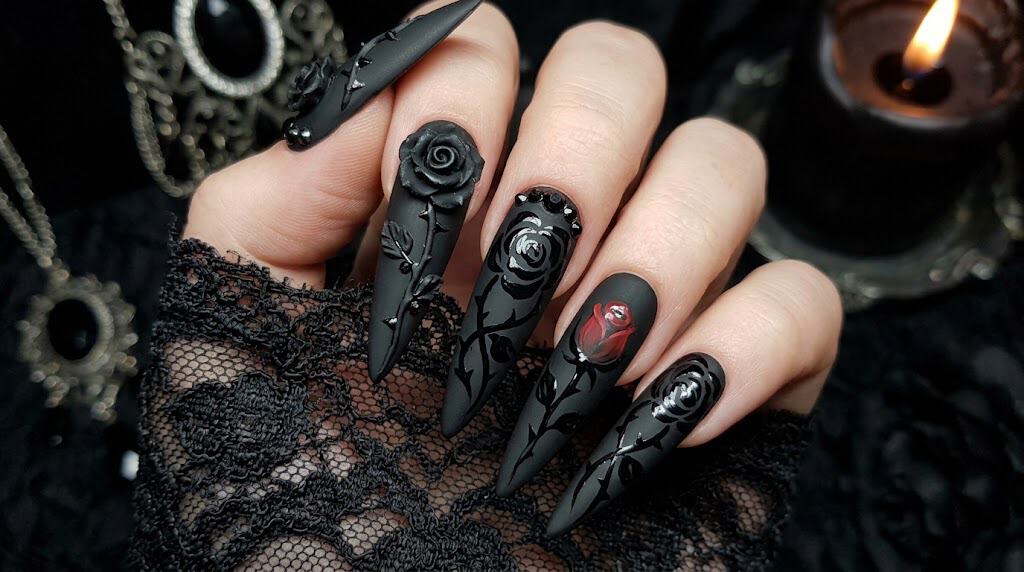
29. Gothic Black Rose
Best for: Medium | Dark romantic | Elegant Halloween
Matte black base with a deep crimson painted rose — this sits at the intersection of Halloween and high fashion. Done right, it looks collected. Done wrong, it looks like a clipart tattoo. The key is painting the rose in layers: dark red base, then lighter red highlights on the petal curves.
Matte black + red gel ($12) + fine liner ($4) — Total: ~$16
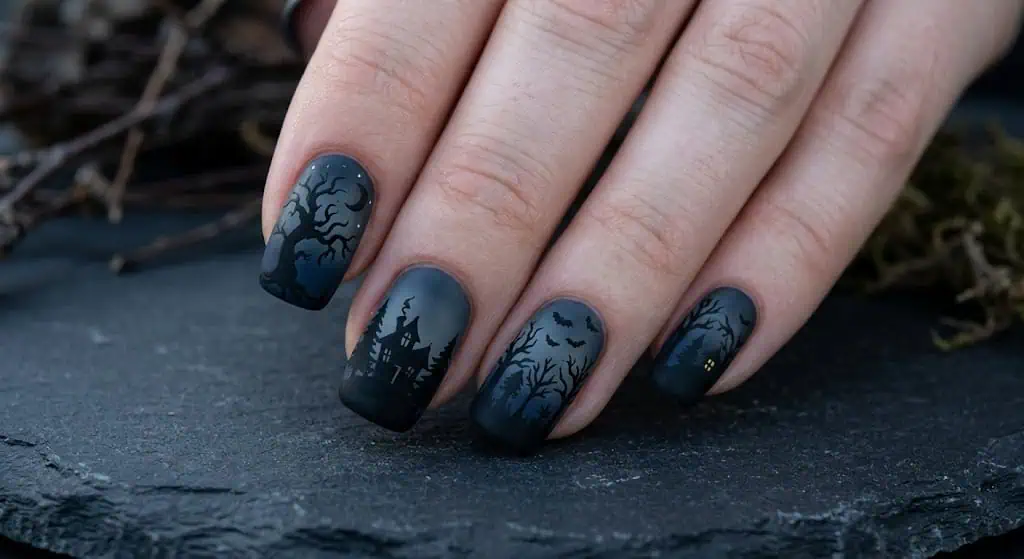
30. Haunted Forest Silhouette
Best for: Medium | Nature-inspired Halloween | Photography-forward
Orange + black gel ($11) + thin brush ($4) — Total: ~$15
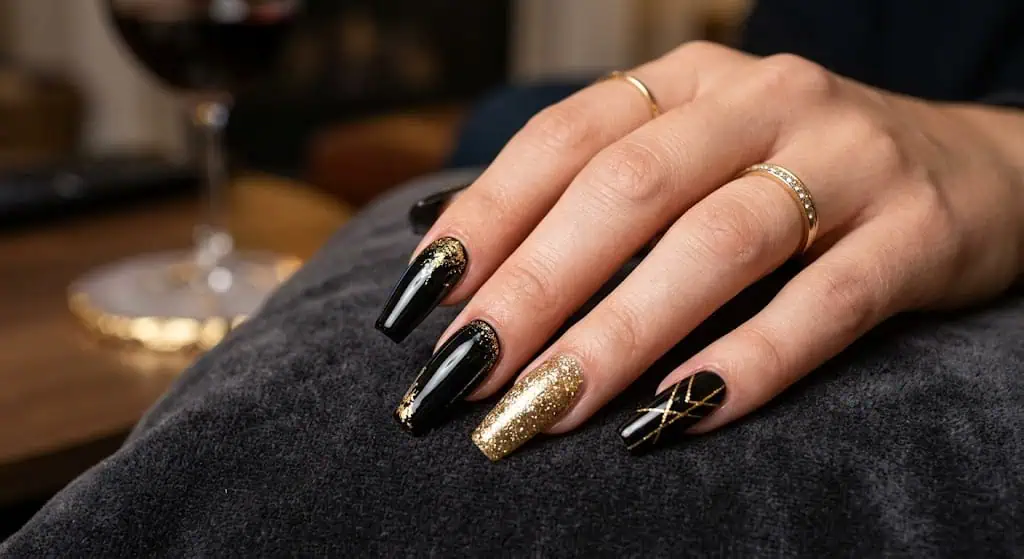
31. Coffin Nails — Midnight Black + Gold
Best for: Easy | Glamorous Halloween | Any costume
True matte black coffin-shaped nails with gold foil strips pressed along the side edges. Minimum effort, maximum editorial impact.
Let’s be honest — this is the “I have 20 minutes and still want to look like I tried” design, and there is absolutely nothing wrong with that.
Matte black gel ($7) + gold foil strips ($4) — Total: ~$11
32. Horror Checkerboard
Best for: Easy | Retro Halloween energy | Short to medium nails
Classic black-and-orange checkerboard using nail tape to block perfect squares. Retro, graphic, and immediately readable as Halloween from across the room.
Black + orange gel ($11) + nail tape ($3) — Total: ~$14
33. Haunted Doll Cracked Eyes
Best for: Medium | Creepy aesthetic | Doll costume pairings
Pale nude base with crackle top coat applied to create a porcelain-crack texture — one nail with a single red tear painted beneath a cracked eye. The crackle top coat does the work for you.
White + nude gel ($10) + red liner ($4) + crackle top coat ($6) — Total: ~$20
💡 Pro Tip: Apply crackle top coat in one stroke without going back over it. Every additional stroke reduces the crackle effect. One pass, let it do its thing.
What Nail Shapes Work Best for Halloween Nail Art?
Not all nail shapes serve horror art equally. Here’s the breakdown:
Nail Shape
Best Horror Designs
Why It Works
Coffin
Gothic rose, Dracula red, Midnight black + gold
Elongates fingers; any design reads as editorial
Stiletto
Blood drips, snake & skull, graveyard scene
Dramatic length adds visual impact
Almond
Crystal ball, celestial moon, marble
Elegant curves balance detailed art
Square
Checkerboard, Freddy stripes, mummy wrap
Clean edges suit geometric designs
Round
Bat swarm, pumpkin, black cat
Approachable shape; great for beginners
Short/Squoval
Dripping blood, Frankenstein, vampire bite
Detail work on small surface — less is more
The Most Common Mistakes in Halloween Nail Art
Here’s what actually goes wrong — and what experienced nail artists know:
The mistake most hosts make is skipping the top coat step between detail layers. If you paint detailed art directly over uncured gel, the liner pen drags the base color with it. Always cure each layer before adding the next.
Mistake 2: Rhinestone overload. I’ve seen Halloween sets where 3D embellishments are stacked on every nail — and by midnight, half of them have fallen off and caught in everything. Save embellishments for one or two accent nails maximum.
Mistake 3: Skipping the no-wipe top coat. A standard top coat requires wiping off the tacky layer — and wiping can smear fine detail work. A no-wipe gel top coat seals everything cleanly with no smearing risk.
Mistake 4: Trying advanced designs with beginner tools. A $3 toothpick is legitimately useful for drips. But a graveyard scene needs a proper liner brush. Match your tool investment to your design ambition.
🎉 Quick Summary
✅ Best for: Halloween parties, costume events, DIY nail art at home, seasonal nail looks 💰 Budget range: $11–$24 per design in materials ⏱ Setup time: 15–75 minutes depending on complexity 🌟 Top beginner pick: Dripping Blood Tips or Frankenstein Stitches 🌟 Top advanced pick: Graveyard Scene or Floating Eyeball 📌 Don’t skip: The no-wipe top coat — it protects every design 🛍 Dollar Tree hack: Toothpick + red polish = blood drips for under $2
People Also Ask
Q: Can beginners do horror nail art at home? Yes. At least 15 of the 33 designs on this list require nothing beyond a nail art pen, a dotting tool, and gel polish. Start with dripping blood tips, Frankenstein stitches, or the black cat design — all three take under 30 minutes and require no fine art skill.
Q: How much does a Halloween nail set cost at a salon? A custom Halloween nail set at a salon typically runs $65–$120+ depending on complexity and location. DIY equivalents on this list cost $11–$24 in materials — and your supplies are reusable across multiple sets.
Q: What nail colors are essential for Halloween nail art? The core five: true black, nude/white, red, burnt orange, and neon green. With those five shades and a black nail art liner pen, you can execute at least 20 of the designs on this list.
Q: How long do Halloween nail designs last? Properly sealed gel nail art with a no-wipe top coat lasts 2–3 weeks. The biggest factors are top coat quality, the seal around the nail edge, and avoiding prolonged water exposure in the first 24 hours after application.
Q: What’s trending in Halloween Nail Designs 2026 art for ? The dominant trends for 2026 are: maximalist horror movie sets (Ghostface, It), hyper-realistic eyeball art, matte black coffin nails with gold accents, and minimalist gore (single-detail vampire bites, blood moon). The aesthetic horror category — gothic rose, haunted forest, celestial blood moon — continues to grow as an alternative to traditional orange-and-black looks.
FAQ — Halloween Nail Designs 2026
Q: What are the most popular Halloween nail designs for 2026? A: The top trending designs for 2026 are Ghostface Scream masks, floating eyeball art, gothic coffin nails in matte black, spider web French tips, and celestial blood moon designs. According to NRF 2025 data, Halloween spending reached a record $13.1 billion, with beauty and costume spending both rising year over year — nail art is increasingly treated as part of the full Halloween look.
Q: How do you do spooky nail art at home without a salon? A: You need three core tools: a nail art pen (or fine liner brush), a dotting tool, and a no-wipe top coat. Start with a cured gel base color, apply your design details on top, cure each layer separately under a UV/LED lamp, and seal with top coat. For absolute beginners, the drip, stitches, and checkerboard designs require no artistic skill.
Q: What’s the easiest Halloween nail design for short nails? A: Dripping blood tips, Frankenstein stitches, vampire bite marks, and the horror checkerboard are all excellent for short nails. Simple designs actually look stronger on short nails because there’s no empty space for an unfinished look to read as incomplete.
Q: What nail polish colors do you need for Halloween? A: Five essentials: black, red, white/nude, orange, and neon green. Add a black nail art liner pen and a dotting tool. This $25–$30 starter kit covers at least two-thirds of the designs in this guide.
Q: Is horror nail art appropriate for work on Halloween? A: It depends on your workplace. Spider web French tips, ghost marble, celestial blood moon, gothic rose, and coffin nails in matte black all read as fashion-forward rather than costume-forward — these are safe for most professional settings. Save the eyeball art and bloody handprints for the after-work party.
Q: How do you get clean lines in nail art without a liner brush? A: Nail tape is your best friend for clean geometric lines — checkerboard, stripes, French tips. Apply tape over a cured base, paint the detail color, then peel the tape off before the second color cures. For freehand curves, a toothpick dipped in gel polish works surprisingly well for drips and dots.
Q: What’s the difference between gel nail art and regular polish nail art? A: Gel nail art cures under UV/LED light and lasts 2–3 weeks. Regular polish air-dries and typically lasts 5–7 days before chipping. For detailed Halloween art that you want to wear through the entire season, gel is worth the investment. A basic home gel lamp costs $15–$25.
Q: How do you remove Halloween gel nail art without damaging your nails? A: Soak cotton balls in acetone, press to each nail, and wrap fingertips in foil for 10–15 minutes. Don’t peel or scrape — let the acetone do the work. After removal, use cuticle oil to restore moisture. Aggressive peeling is what causes nail damage, not the gel itself.
Q: What nail stamping plates work best for Halloween Nail Designs 2026? A: Look for plates with spider webs, bats, skulls, moon phases, and tree silhouettes. Amazon nail stamping sets in the $8–$15 range typically include 5–10 plates and cover most of the classic spooky motifs. Always use gel stamping polish (slightly thicker formula) for cleaner transfers.
Q: How long does it take to do a fullHalloween Nail Designs 2026 set at home? A: Simple designs (blood drips, stitches, spider webs): 20–35 minutes. Medium complexity (bat swarm, skeleton bones, mummy wraps): 35–55 minutes. Advanced art (eyeballs, graveyard scene, Ghostface mask): 60–90 minutes. Factor in curing time between layers when planning your schedule.
Q: Can I do Halloween Nail Designs 2026 art on press-on nails? A: Yes — and it’s often easier because you can work on individual nails on a flat surface before applying them. Buy a pack of blank press-on nail tips, do your art off-hand, let everything cure and dry completely, then apply with nail glue. The design quality is identical and the process is more forgiving.
Q: What’s overrated in Halloween Nail Designs 2026 art? A: In my honest opinion: rhinestone overload. I’ve seen full Halloween sets covered in 3D gems, stars, and bats — and by midnight at every party, half of them have snagged in someone’s hair or fallen into the punch. One or two embellishments on an accent nail? Great. All ten nails encrusted? Regret.
Q: Are Halloween nail designs more expensive at a salon in 2026? A: Salon pricing for custom Halloween sets has risen with inflation — expect $75–$130+ for detailed art in 2026. Most of the 33 designs in this guide cost $11–$24 in materials at home. The time investment is 20–90 minutes. The materials are reusable.
Conclusion
Halloween is the perfect excuse to have fun with your manicure, and these Halloween nail designs for 2026 offer endless inspiration for every style and skill level. Whether you love cute pumpkins, spooky ghosts, elegant black-and-orange palettes, glitter accents, or bold statement nail art, there’s a design that can help you embrace the Halloween spirit in a creative and fashionable way.
The best Halloween nails combine seasonal charm with your personal style, allowing you to create a look that feels both festive and unique. From simple DIY manicures to salon-worthy masterpieces, these nail ideas can elevate your entire Halloween outfit and help you stand out at parties, events, and fall gatherings.
As you plan your spooky season look, save your favorite designs, experiment with new colors and techniques, and don’t be afraid to get creative. With these Halloween nail designs for 2026, you’ll be ready to show off a stylish, eye-catching manicure that captures all the magic, mystery, and excitement of Halloween.
Chloe Parker is the DIY decor and Halloween writer at Party & Beyond. Based in Denver, Colorado, she specializes in budget-friendly party decorations, family Halloween costumes, and creative crafts. With 10+ years of crafting experience, Chloe believes parties don't need to be perfect to be memorable , just made with love and a little hot glue.


")
")
")
")

")
